

Sugery updated 12.27.07...


Thread Starter
|
Senior Member
Joined: Mar 2007
Posts: 305
Likes: 0
From: Cali by the beach 831
Like the title says, surgery has begun. First, I plan to do some electrical upgrades to the fog lights and headlights. Here is how it is starting to shape up, I’ve already ran into a couple of problem nothing I can handle though, I just need to problem solve. It should take about a week or so depending on the complications. I will get to work on the car for a couple of hours a day, as I have a full time job, a convalescent Mother, and last but not least my four legged children. Well lets start.
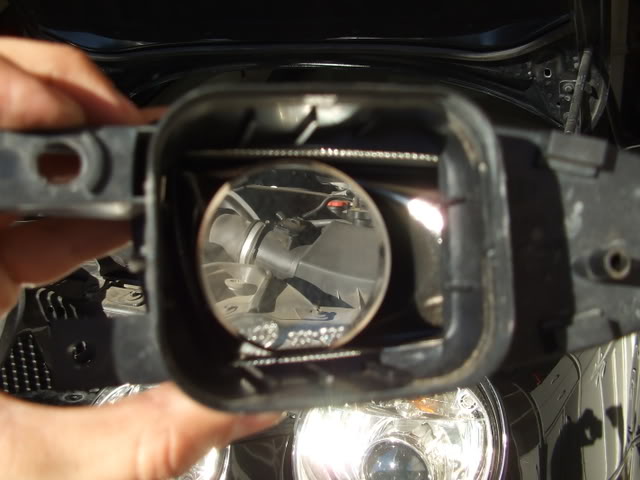
This is days one, I removed the grille and the fog lights. I plan to swap in real full size HID projectors into the OEM fogs. Here are the pics and as you can already see some of the problems that I have and or will need to address. I should add that these fog lights do not like being taking apart. In the time it would normaly take me to open two headlights, I could only manage to open one of these foglights.
Pic with foglight still in place but screws removed

Pic with foglight removed

Pic of OEM foglight vs a full size HID Bosch projector

Another shot of the OEM fogsvs. real full size projectors.

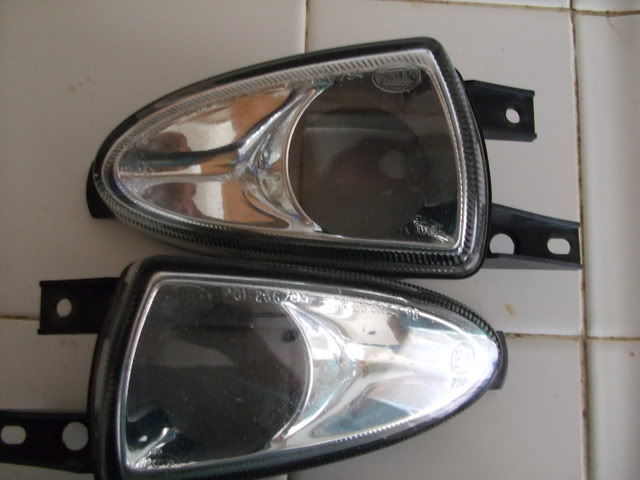
Pic of fogs side by side

Pic of the internals of theOEM miniprojector foglights
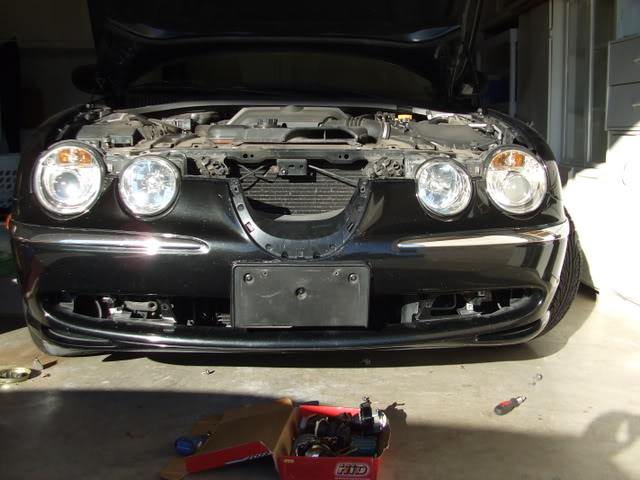
What the Jag looks like with no grille and no fogs
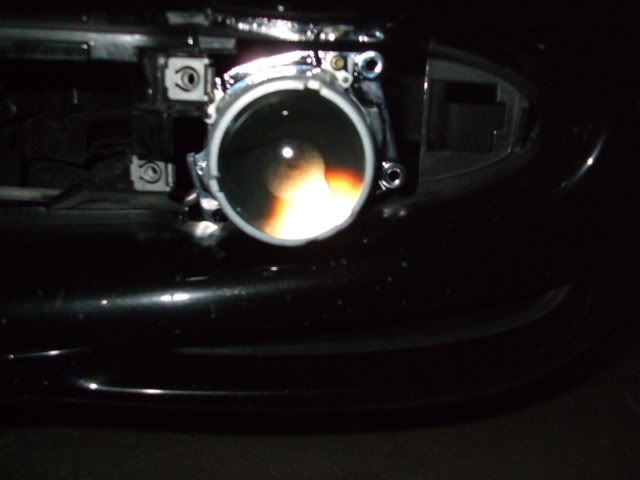
Pic of fogs right before going into the oven
Pics of the fogs in the oven preheated at 300, then 10 min in.

The outcome after fighting with them for about1/2 hour

One of the external pieces broke, nothing epoxy can't fix

Pic of the Bosch projector to be used with silver shroud still in place too small for full size projector, not allowing all the light to pass through

Side view, more evidencethat the shroud is too small for the full size projector

Pic of the mini projector lense vs a full size lense. Mini lense is crystal clear & has superior optics surprisingly.

Test fitting projector in OEM space, plenty of room here
More testing now with the OEM cover Bosch projector, as you can see I will not be able to retain the chrome shroud.

Bosch projector its self if too big for lense will need some type of adapter.

Bosch project with lense cover on vs OEM

OEM projector
More test fitting Bosch projector into OEM lense cover
More fitting with the Bosch projector

Projector being fitted into OEM encasing

Another shoot with the flash on this time

And more test fitting

Bosch project in place with lense cover on, you can see thepiece that broke off

Side of view of projector with lense cover on.

If you have made it this far? The easiest part is done. I plan to power the fogs using theJagsOEM hid system, including the DS2 bulbs. The hard part will be:1) I will need to figure out how keep the Bosch projector in place. 2) How to seal it so that it is water proof. 3) How to aim it.
This is days one, I removed the grille and the fog lights. I plan to swap in real full size HID projectors into the OEM fogs. Here are the pics and as you can already see some of the problems that I have and or will need to address. I should add that these fog lights do not like being taking apart. In the time it would normaly take me to open two headlights, I could only manage to open one of these foglights.
Pic with foglight still in place but screws removed
Pic with foglight removed
Pic of OEM foglight vs a full size HID Bosch projector
Another shot of the OEM fogsvs. real full size projectors.
Pic of fogs side by side
Pic of the internals of theOEM miniprojector foglights
What the Jag looks like with no grille and no fogs
Pic of fogs right before going into the oven
Pics of the fogs in the oven preheated at 300, then 10 min in.
The outcome after fighting with them for about1/2 hour
One of the external pieces broke, nothing epoxy can't fix
Pic of the Bosch projector to be used with silver shroud still in place too small for full size projector, not allowing all the light to pass through
Side view, more evidencethat the shroud is too small for the full size projector
Pic of the mini projector lense vs a full size lense. Mini lense is crystal clear & has superior optics surprisingly.
Test fitting projector in OEM space, plenty of room here
More testing now with the OEM cover Bosch projector, as you can see I will not be able to retain the chrome shroud.
Bosch projector its self if too big for lense will need some type of adapter.
Bosch project with lense cover on vs OEM
OEM projector
More test fitting Bosch projector into OEM lense cover
More fitting with the Bosch projector
Projector being fitted into OEM encasing
Another shoot with the flash on this time
And more test fitting
Bosch project in place with lense cover on, you can see thepiece that broke off
Side of view of projector with lense cover on.
If you have made it this far? The easiest part is done. I plan to power the fogs using theJagsOEM hid system, including the DS2 bulbs. The hard part will be:1) I will need to figure out how keep the Bosch projector in place. 2) How to seal it so that it is water proof. 3) How to aim it.

Thread Starter
|
Senior Member
Joined: Mar 2007
Posts: 305
Likes: 0
From: Cali by the beach 831
I told you guys that I wanted to do some electrical upgrades to the lighting system in the Jag, so I posted more pics. In these pics, I took the bumper off, removed the grille, and the headlights. I baked the headlights to see what type of upgrades I could do to the stock projectors. So far it’s pretty challenging due to the fact that the inner chrome housing is held by the internal motor that levels the headlights and thenthere is the screw, which allows you to manually adjust the headlights. I still need to figure out how I’m going to get around these without breaking the chrome housing? There is plenty of room in the housing forretrofitting just about any size projector in there, I just need to figure out how to open upthat darn chrome inner housing. While I was planning my strategy, I had time to pull off the door panels and upgrade the stock speakers to Infinity Kappa’s 682.7CF. Let me tell you what a difference they make. I may have to buy a pair for the rear doors. They fit perfectly without modding anything other than splicing into the wire harness to power the speakers.
What do you guys think of the Jaguar leaping cat logo? Nice touch huh…ask any question if y’all have any.
Poor kitty

One blind cat

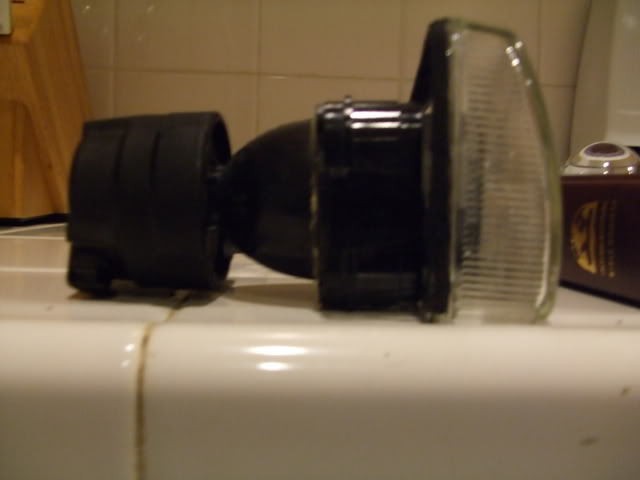
Close up of the headlight off the car

The backside of the headlight

Close up of the back side of the projector

Close up of front side of the projector

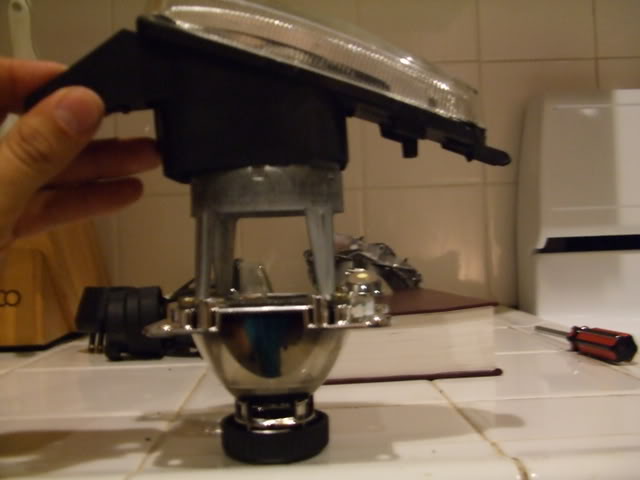
Headlight opened

Pic of the area pin/screw that keeps the chrome housing in place

This pics shows the two areas that keep the chrome housing area in place

Here are the speakers I chose to replace the stocks
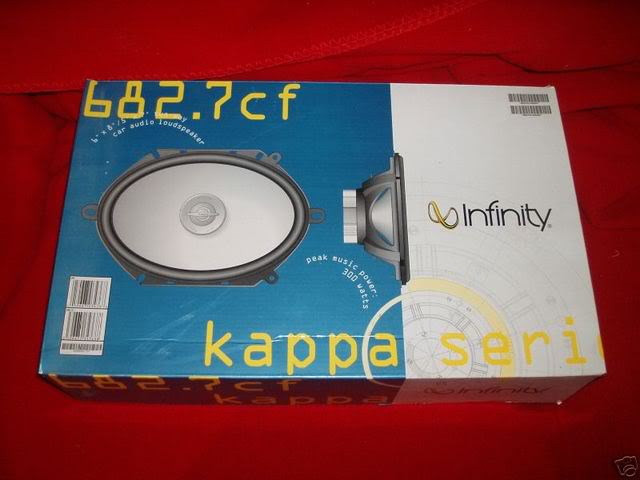
Another pic of the speakers
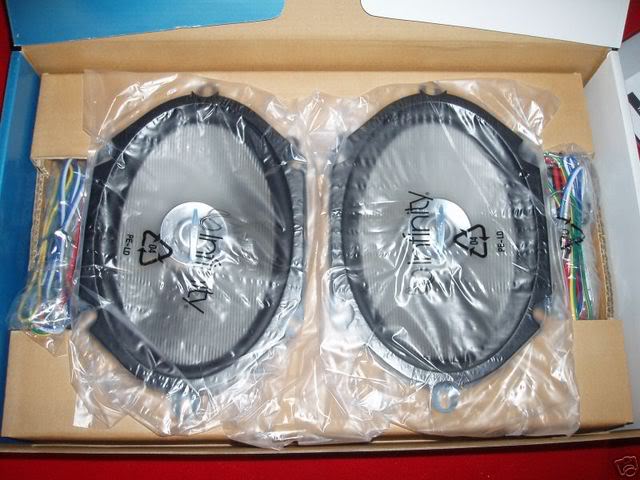
Stock Alpine's vs Infinity Kappas

Installed in door
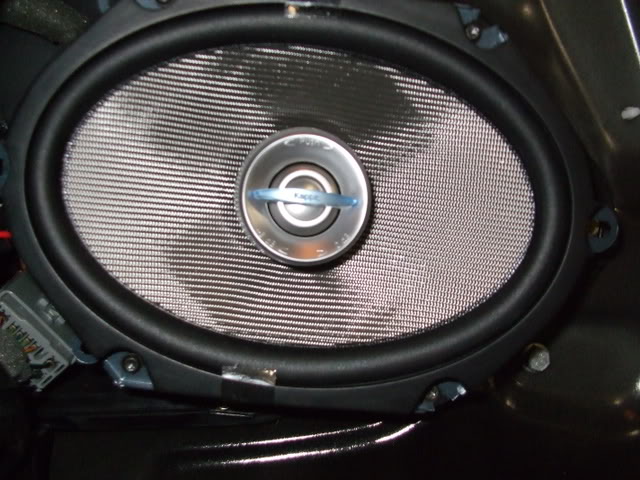
Another shot of speaker installed, perfect fit the tweeters are adjustable

Close up of Jaguar decals on head rest

Another shoot of decal on head rest

Last shoot of headrest

Free bee Jaguar decal in gold so I decided to place it on the ashtray lid

What do you guys think of the Jaguar leaping cat logo? Nice touch huh…ask any question if y’all have any.
Poor kitty
One blind cat
Close up of the headlight off the car
The backside of the headlight
Close up of the back side of the projector
Close up of front side of the projector
Headlight opened
Pic of the area pin/screw that keeps the chrome housing in place
This pics shows the two areas that keep the chrome housing area in place
Here are the speakers I chose to replace the stocks
Another pic of the speakers
Stock Alpine's vs Infinity Kappas
Installed in door
Another shot of speaker installed, perfect fit the tweeters are adjustable
Close up of Jaguar decals on head rest
Another shoot of decal on head rest
Last shoot of headrest
Free bee Jaguar decal in gold so I decided to place it on the ashtray lid

Joined: Nov 2007
Posts: 61
Likes: 0
Momo,
Thanks for this post! Did you replace both front & rear speakers or just the front? Also, howhard do you push your system? These speakers are rated for 2ohms so I want to make sure that you are not having any problems with them shorting out the factory amp as I thinks it is rated down to 4ohms? Lastly how much of an improvement are these speakers over and above the factory Alpines?
Thanks

Joined: Feb 2007
Posts: 133
Likes: 1
From:
Momo
I have theInfinity682.7cfSpeakers forthe front andInfinity 682.7cffor back withthe Ininity4 channel 475a Amp. Infinity said to used this Amp. I haven't installed the system as of yet. More then likely the Amp. will be the main problem. Can't wait to get it all installed. The speakers come with crossovers, Where did you put the crossovers? 4 wiresgo toeach speakers, what did you do with the extra 2 wires and what are they for? If not sure, any one else know?
Regards
Senior Member
Joined: Dec 2006
Posts: 782
Likes: 3
From:
FYI, The chrome reflector for the main headlight assembly snaps on at the points that you show. Plastic ***** snap into sockets on the reflector. They are connected to the self adjusters. the motor for the self leveling also just slips into a slot in the back of the reflectors. I was able to completely strip mine down to nothing. If you got the lenses off that's the hardest part.
Hope this helps.
HA, I just saw the date of the last post. I'm hoping you figured it out by now!!!
Hope this helps.
HA, I just saw the date of the last post. I'm hoping you figured it out by now!!!

Senior Member
Joined: Jun 2008
Posts: 818
Likes: 5
From: NA
badmojo. First time I am seeing this thread. You put your heart and soul into this havent you?? LOVE IT!! Anyways, where did you get those Jag logos for the headrest???
Trending Topics
Thread Starter
|
Senior Member
Joined: Mar 2007
Posts: 305
Likes: 0
From: Cali by the beach 831
ORIGINAL: harounq21
badmojo. First time I am seeing this thread. You put your heart and soul into this havent you?? LOVE IT!! Anyways, where did you get those Jag logos for the headrest???
badmojo. First time I am seeing this thread. You put your heart and soul into this havent you?? LOVE IT!! Anyways, where did you get those Jag logos for the headrest???

Thread
Thread Starter
Forum
Replies
Last Post
spdracer
New Member Area - Intro a MUST
8
Oct 1, 2015 01:43 AM
Currently Active Users Viewing This Thread: 1 (0 members and 1 guests)