

Another alloy wheel refurb!


Alloys refurbed[/b]
[/b]
Well, I finally got the alloys that I bought off Ebay and am just about to start the refurb on them.
The set of 4 were in fairly good condition with some light scuff marks here n there and some of the paint was beginning to bubble too. As you will see the tyres are in pretty good condition with a decent amount of tread left.
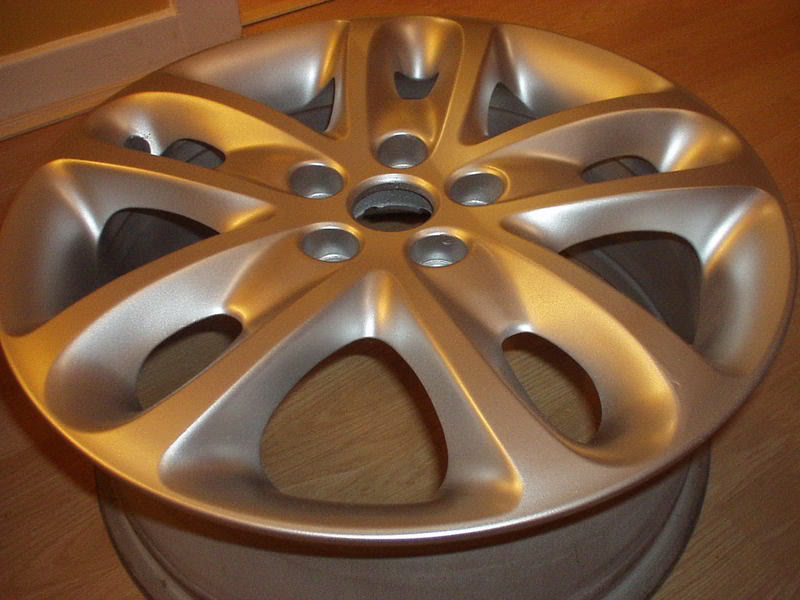
Inside of Wheel cleaned too

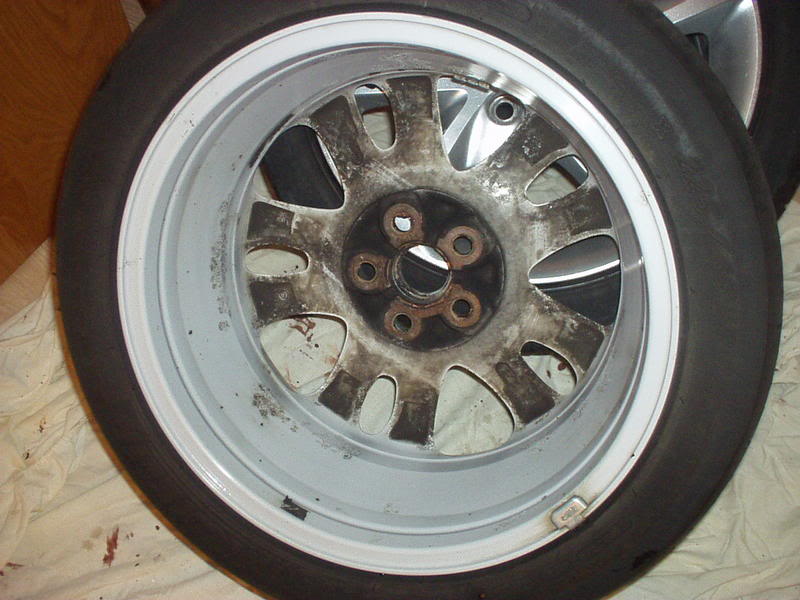
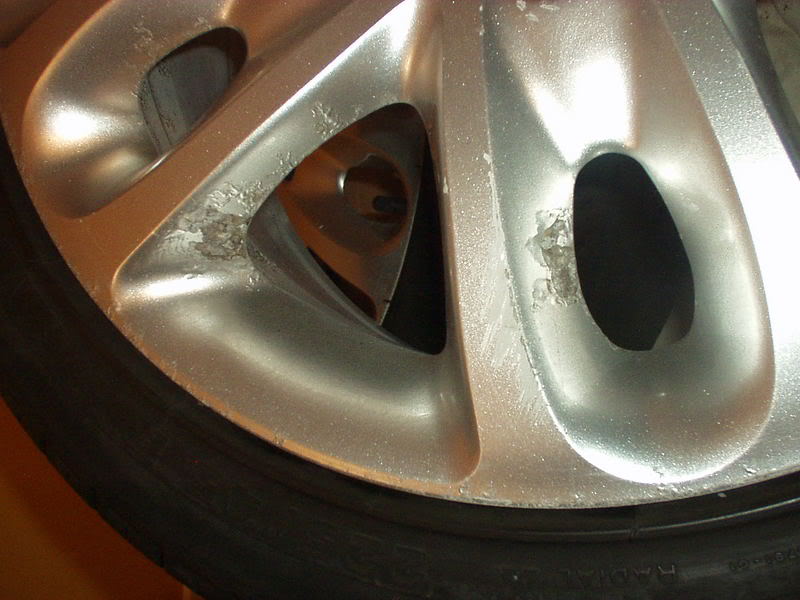
Wheel cleaned showing damage
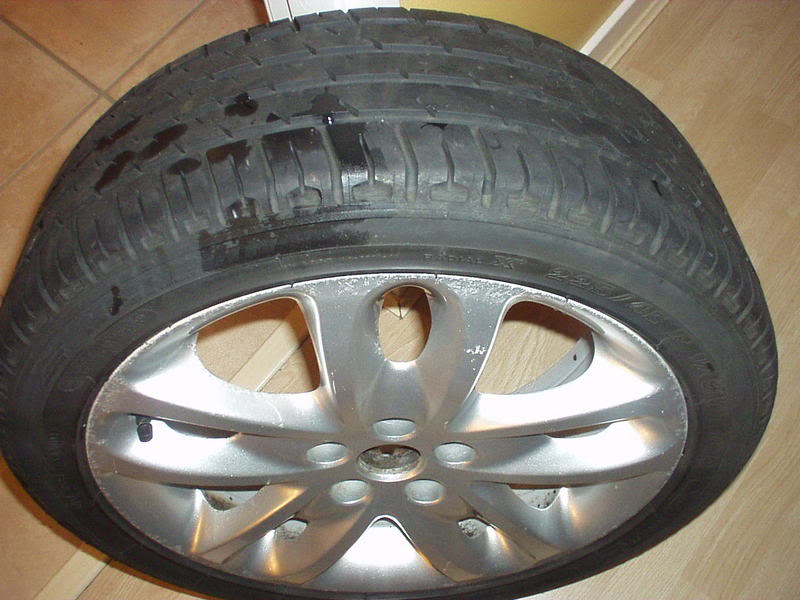
Wheel cleaned showing tread
These are the products I used[/b]
[/b]
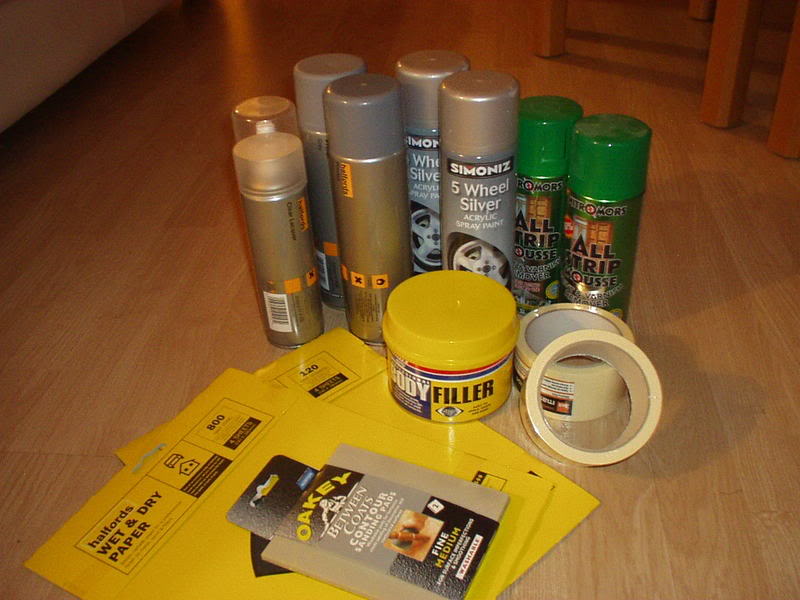
2 – Halfords grey primer
2 – Simoniz 5 Wheel Silver acrylic paint
2 – Halfords Clear lacquer
2 – Nitromors All Strip Mousse
2 – Rolls of masking tape
1 – Loctite professional body filler
1 – Halfords Wet n dry 120 grit coarse
1 – Halfords Wet n dry 800 grit fine
1 – Oakey Between coats contour sanding pads ( medium + fine )
Total cost £56.85 to do all 8 wheels[/b]
[/b]
I decided against taking the tyres off the rims mainly to save time. So, I spent quite some time using the masking tape and some bin liners to mask off the rim from the tyre ( quite effective it seems too )
Wheel masked ready for Nitromors
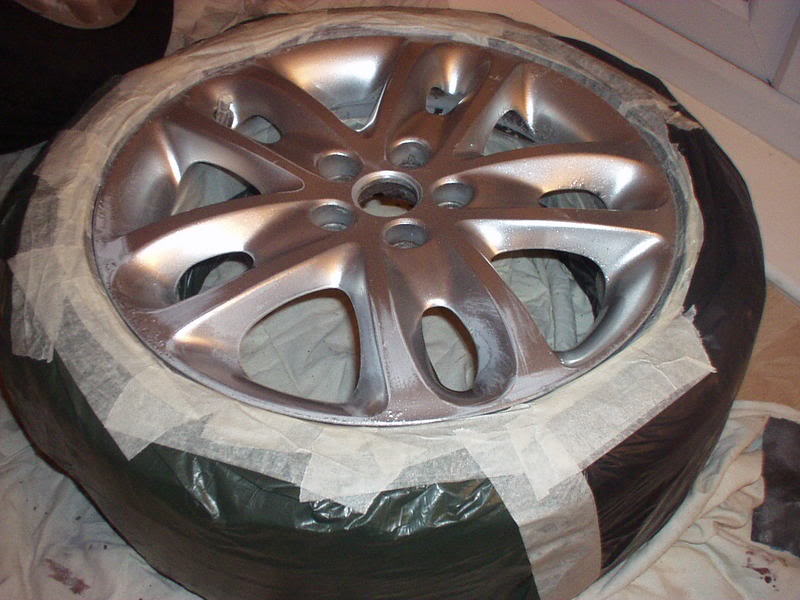
Then, the time saving technique. I applied the Nitromors mousse to the rims to remove the paint , lacquer as much as possible. The biggest problem with the rims seems to be the paint bubbling everywhere. So rather than sand, sand, sand I sprayed on and left overnight for it to do its job.
The nitromors worked well on the bubbling paint and stripped it right back, however, it was overkill really and I don’t know if I’d go down that route again!
Turns out I’m quite lucky really as the rims only had slight scuff marks and no REAL damage, so filler, it seems is not going to be needed. That can go back and save me around £10
After the nitromors did its job it was time to use the Wet n Dry 120 coarse grit. It took a while but seems well worth the effort. Then a quick going over with the Wet n Dry 800 fine grit, followed by fine contours sanding pad.
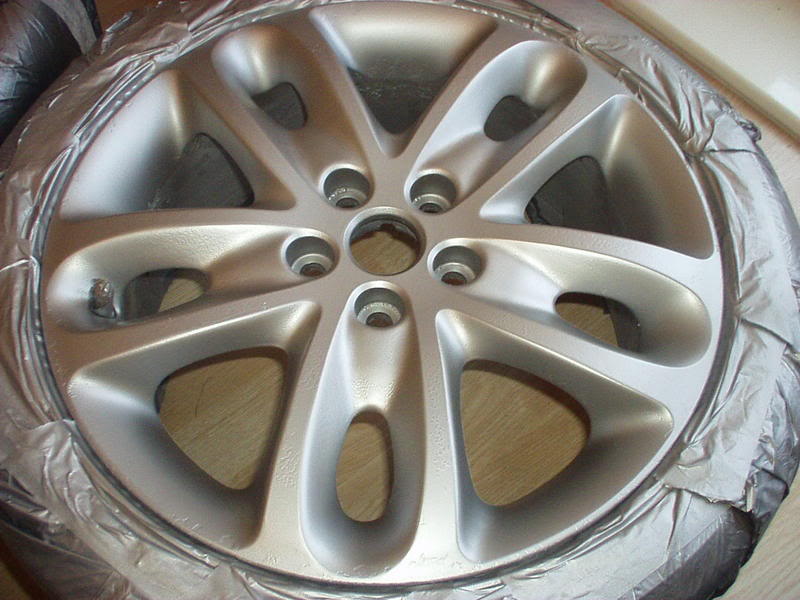
Masked them up all over again and applied 2 coats of primer, leaving around 30 mins between coats. It recommends 15 mins minimum so I just gave it a little longer to be sure.
2nd coat primer
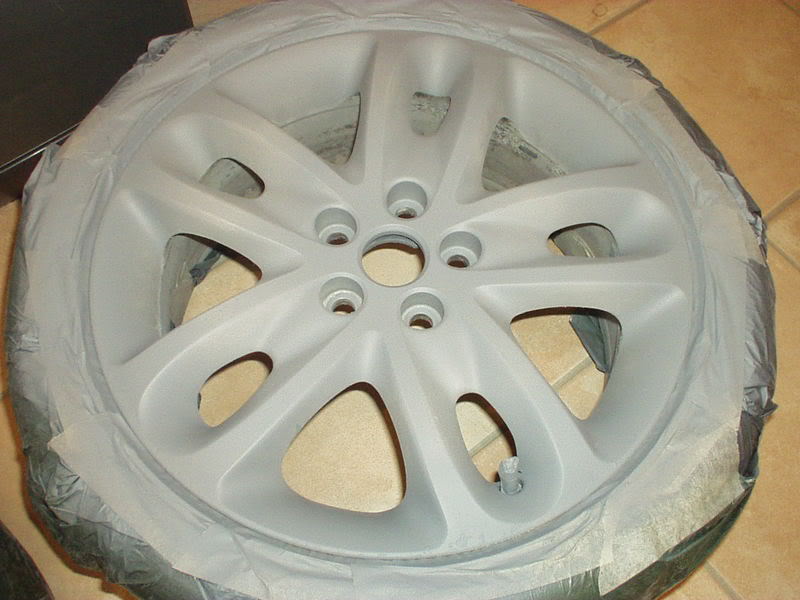
2nd coat primer detail

Its taken about a day and a half to get to this stage.
Hopefully over the next few days I'll have the time to apply the paint finish as well as the lacquer.
I've ordered some new dust valve caps to go with the "new" rims.
I'm thinking about new wheel studs and centre caps too? I'll sleep on that though!
Once these are done and on the car I'm going to take the other set off and do those as well.
I'm going to have a full size alloy spare instead of the space saver
 which will be going up for sale on Ebay, and possibly keep one of the others as another spare.
That'll leave me 2 refurbed alloys with decent tyres on to sell on Ebay. With a little luck I'll get most of my money back and it wont have cost me a penny!
More to follow -
Jim
Veteran Member


Joined: Mar 2007
Posts: 11,393
Likes: 649
From: Planetarium
That really makes difference !
I think you are world's # 1 carpenter .... Carpenter ???? Oh yes correcting wood refurbisher ,what ? wood ? what wood ?
Wheel refurbisher
As much as you're a super mod you'renaturallygifted at such DIY jobs
I think you are world's # 1 carpenter .... Carpenter ???? Oh yes correcting wood refurbisher ,what ? wood ? what wood ?
Wheel refurbisher
As much as you're a super mod you'renaturallygifted at such DIY jobs

Lol......not really Caddie, but thanks anyway buddy.
Lets just wait n see how they turn out first, still quite a bit to do.
Jim

Veteran Member
Joined: Oct 2006
Posts: 1,921
Likes: 65
From: UK
Nice to see how another member does it.
As you've said its a easier when there is no damage to the rims (unfortunately mine lost an argument with a kerb or two so the rims were damaged on a few of them).
I hadnt even heard of the mousse to strip back the paint when I did mine for the ones that werent kerbed.Seems like a real time saver.
Good luck with the painting and lacqueringstage which I found to be the trickiest part (temp,preciuos effort,dust,wind,humidity can all effect the result) and dont forget to sand the primer smooth and clean well before painting.
Guest
Posts: n/a
being on the topic of wheels....i have a 2002 xtype 2.5 awd 5mt....im at the time of needing new tires...anyone suggest tires???i want winter tires i guess cause we are aproching it....dnt need expenoisve tired...gunna swap in a few monthsn anyway...also...anyone have rims or n e thing alos...thanks
Thanks Buck.
I've just finished the 2nd coat of silver alloy paint and although they look pretty good I'm nowhere near 100% satisfied with them.
However, I'm gonna carry on and lacquer them and fit them onto the car as soon as possible. The reason for the rush is that one of the wheels on the car is slightly buckled and causing vibration thru the steering. I want to get this off the car ASAP as its the wifes daily driverThis will allow me to get the original set off, which, when done,will be perfect. I will be taking my time with these and have learned that the key is in the preparation ( no doubt about it )
The tryes will be comming off the rims this time too for sure
These babies will be sanded down to a smooooth finish from starting the process right thru to the end.
I reckon that once these replacements have been lacquered and fitted to the car though that they will look good, just not as good as I want them to be.
Then when I have refurbed the originals at my leisure and to my complet satisfaction, the replacements will be back off and redone to perfection.
Anyway
Heres a couple of pics of two of the wheels with their 2nd coat of silver alloy paint for you to judge.
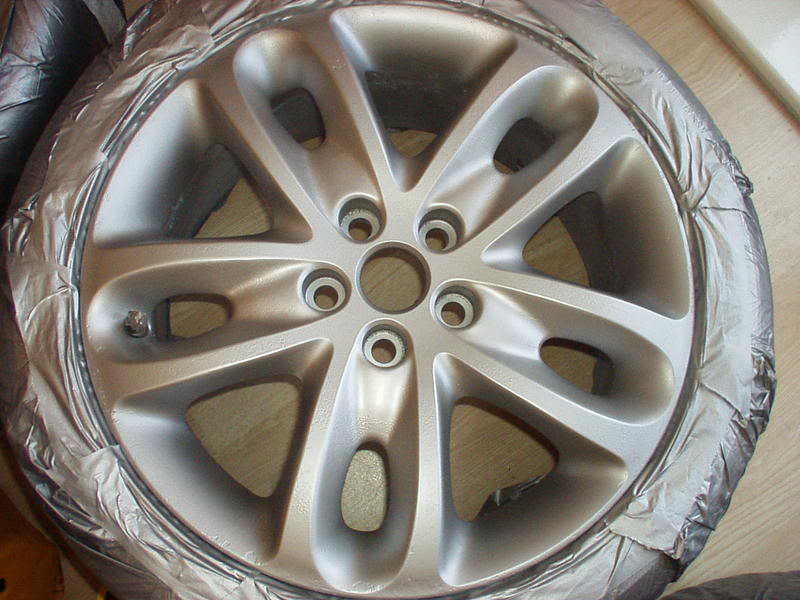
I suppose you really have to imagine them on the car c/w centre caps and wheels blackened to complete the picture though!
Jim
Trending Topics

Well guys, I've just finished the lacquer coat on the rims and they're about ready to fit onto the X.
I gotta say that I'm not at all happy with the way that they turned out, but, in my defence, its been a rush job while doing tooo many other things.
I'm gonna go ahead and fit them, they will look great from about 2 feet away, so they'll do for the time being.
It'll allow me to get the good rims off and really do a number on them 150% on these babies. Once completed, they'll go back on and the replacements will be revisited and done properly, however long it takes.
I'll take pictures when they're on the car if I get the chance.
Just dont be too hard on me boys[&:]
Its been a learning experience, thats the good thing about it
Jim


Well, got the wheels finished and on the car today
and the originals off the car and the tyres off the rims as wellGot them home and immediately cleaned them very thoroughly inside n out and them got the 120 grit coarse wet n dry to work, followed by the 800 grit fine and then the contours fins sanding pads to finish. I did 3 out the 4 which took around 3 hours or so and they are 100% smooth and look great ata this stage.
I wasn't too happy with the alloy silver used on the ones just done so tomorrow I am going for Wurth Silver wheel paint ( 3 coats)which is a much better match I think, to be followed by Wurth High Gloss clear lacquer (3 coats) These will be predeeeded by at least 2 coats of primer finished off with the fine contours sanding pads.
I cant wait as these are going to be stunning when finished
Jim
Veteran Member
Joined: Mar 2007
Posts: 11,393
Likes: 649
From: Planetarium
Dear mod , you're trully a super mod ! I didn't know you've a university for such ordeal jobs . University ? What was that ? Oh ok , faculty for such jobs
. University ? What was that ? Oh ok , faculty for such jobs

Caddie....I dont know if thats a compliment or an insult....lol
Either way......you kill me man, you really do.
Your a star
Jim
Veteran Member
Joined: Mar 2007
Posts: 11,393
Likes: 649
From: Planetarium
Dear mod, you can take it as a compliment . Whoever insults or says bad things about you gets a ............... by me .
LOL, I am a star ? Like what ? Northstar ,Hollywood Star , Watch star ? ( I have no idea about this lol )
LOL, I am a star ? Like what ? Northstar ,Hollywood Star , Watch star ? ( I have no idea about this lol )

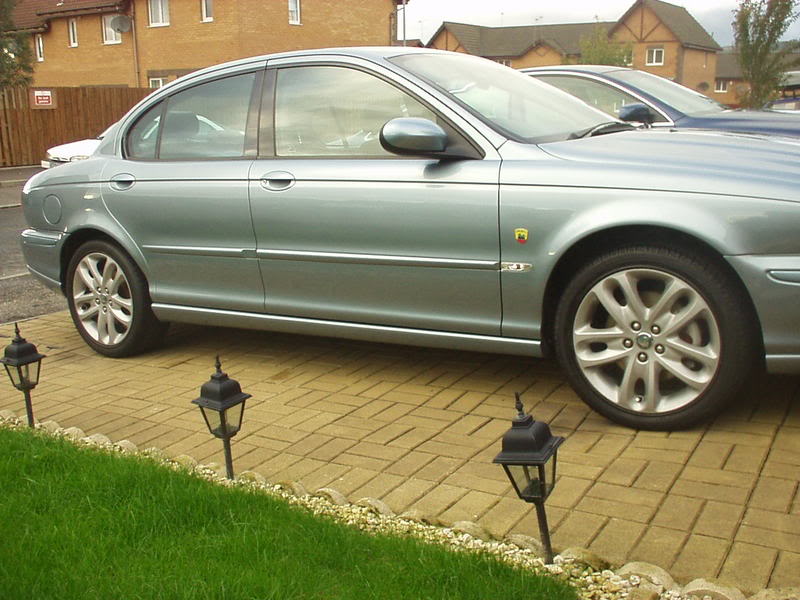
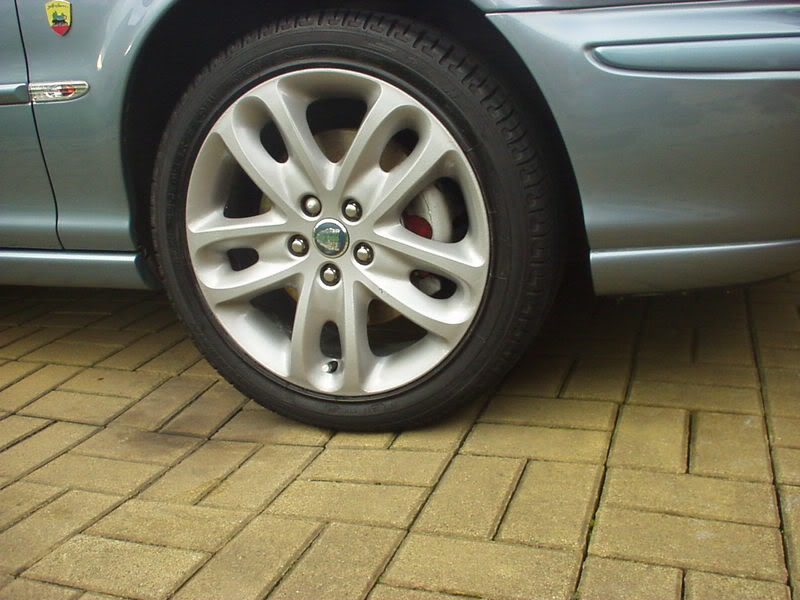
Here are some pics of the refurbished alloys on the X. I gave her a good clean today and she was lookin good so I thought I'd take em as I said I would
Jim


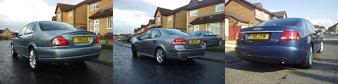
These are the ones I have on my A6 and what I am gonna fit onto the X when the original alloys have been refurbed, claipers repainted and lacquered, hubs painted and wheel wells cleaned.
I really wanted to fit Jaguar as that is what I have on there at the moment, but, they're all green leapers. I really want sumthin to match the colour of the car.

Jim

Ordered my Wurth silver alloy paint and High Gloss lacquer today, should be here tomorrow hopefully
along with their brand of primer.I sanded down the last of the original Sport alloys tonight and filled " the chasm" that had been taken out of it when the kerb attacked the car while the wife was driving[&:]
Soooo unbelievably smoooooth.............unlike my hands....lol
Cant wait[sm=happy046.gif][sm=happy046.gif]
I intend to prime n sand prime n sand followed by paint n sand paint n sand, and yes ( you guessed it ) lacquer n sand lacquer n sand. These babies will be perfect.
I am also gonna repaint the calipers and lacquer them too as well as the hub which is in a pretty horrible condition.
All being well I'd also like to clean the wheel wells as thoroughly as possible and then finish by adding the valve caps as per previous reply.
Jim

Nice one Biggie......I was wonderin who would be the first to spot it?
Only on for five minutes and she's done it already.......If it weren't a temp job I swear I would done time for her...lol
Anyways onto much much better news
All my paint, lacquer n primer arrived from Wurth earlier today so I managed to get back onto the original rims
Wait till you see these results..........I think, they are absolutely awesome, as good as new, literally.
I'm not the best at these sorta repairs I will admit, but if I had to give anyone any advice on doing this job it would be this.
Sand, sand, sand and sand again....preparation will determine how good the outcome is.
Buy Wurth products as they are an almost identical match for original, they may be more expensive,but certainly worth it at the end of the refurb
Checking on the web I found the primer was around £7 and the lacquer and the paint £10 each. I contacted Wurth UK direct and they supplied me them for £5 each
.....result!!!!2 coats of primer on each wheel 30 mins drying time between each coat, followed by 2 coats of paint 1 hour between each coat. 2nd coat will be left to harden overnight, then I will follow with 2-3 coats of lacquer.
I swear to god my mouth is almost watering at the results
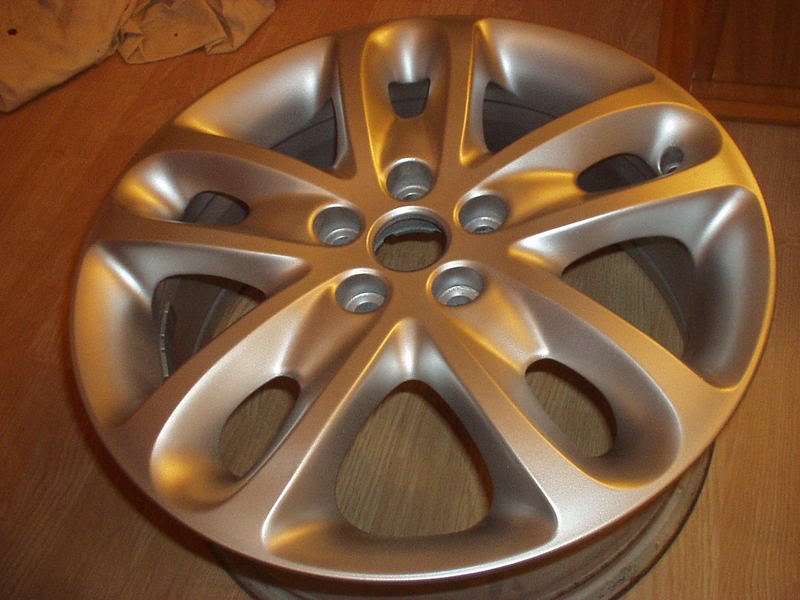
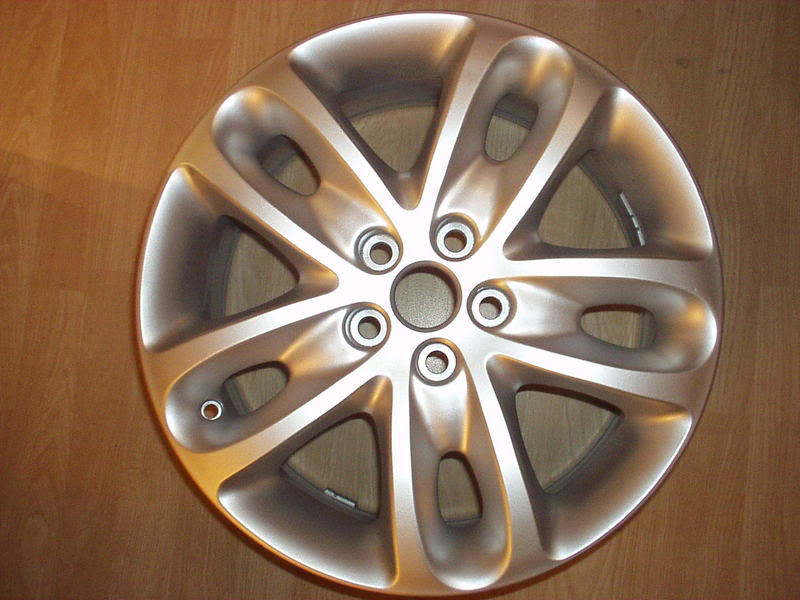
See below painted wheels still to be lacquered....150% improvement on previous refurb!
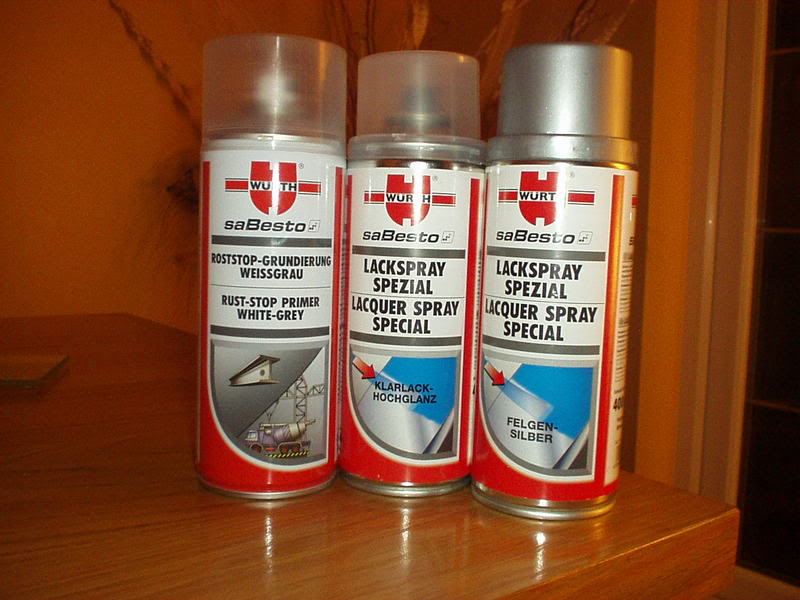
Products used!
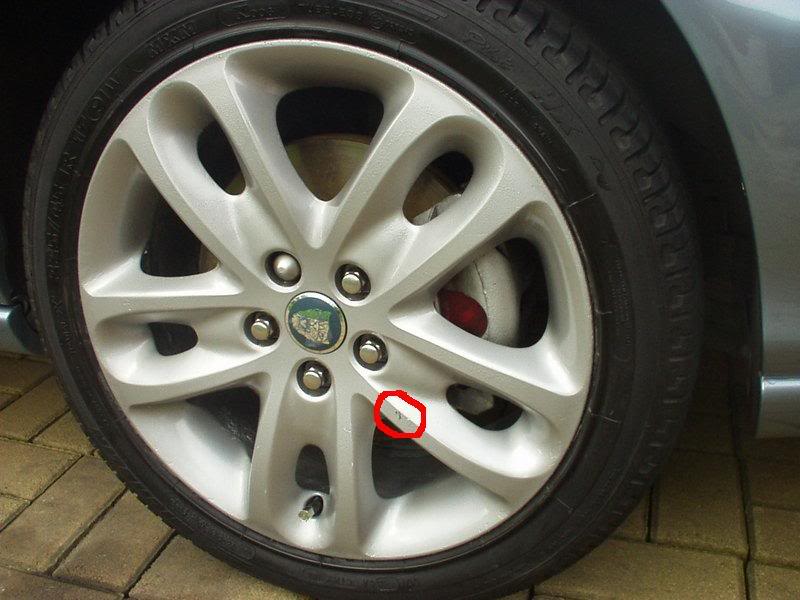
This is the worst wheel that had a major chunk sliced outta it by the kerb she hit!
Anyone wants Wurth products details listed below.
Highly recommended
Wurth UK Ltd
1 Centurion way
Erith
Kent
DA18 4AE
Tel 08705 987841
www.wurth.co.uk
Now, I cant wait to apply the lacquer and get the other rims off, calipers painted and wheel weels cleaned ( If I have time ) and these beauties back on the car
Jim