

Retrofit OEM Amplifier & Speaker Upgrade FAQ


This is a how-to-guide showing how to upgrade your standard sound system with the "Premium Sound" Amp.
Amp
The Jag/Alpine amp is an 8x40W special, connects into the D2B network, and powers a total of 10 speakers.

Amp connections
After a lot of searching, (and I mean a lot) I just couldn’t get my hands on the original connectors, so as an alternative I managed to find some 2.8mm spade connectors, which are still too big, but with a bit of laterial thinking I got it to work. Strip off the PVC insulation;

Tighten them up a little, and slip them over the pins "sideways" and they fit.
A little heatshrink around the spades will take care of the insulation.


The terminals on the amp aren’t marked, but with some investigation I figured it out here;

Then, just at the last minute, Jordan from xtypeparts.com found some connectors for me, brilliant.


As you can see, the wires are crimped down tight, so it's a matter of soldering the wires on.
I doubt others will be so lucky to find the connectors, so I wanted to show you the example with the 2.8mm spades anyhow.
Cabin Harness Connectors
You need to get you hands on a complete CA230 harness connector. I was lucky & got three from JagWorks in Sydney during my last trip to Australia. Most of the speaker wiring from the amp runs into this connector. If you don’t have this, you might as well run all new wire to the speakers….which is a pain in the...you know…

Speaker Wire
The speaker wire was actually quite a headache to find; luckily I came across roddas73 on eBay, who sells specialised, colour-coded wire, in small quantities, specifically for this type of application. Of course I wasn’t able to find the exact OEM colours, but I did get 17x different colours, so that’ll make it easier to wire up. The wire is a 1mm� thin-insulated special. I got 5m each of Black, Grey, White, Yellow, Orange, Purple, Blue, Pink, Green, Light Green, Brown, Grey/White Stripe, Purple/White Stripe & Blue/White Stripe, plus 10m each of Red/White Stripe, Orange/White Stripe and finally Red.
100m all up, delivered to Switzerland for �40.
Obviously for the power & earth connections I’ll be using a heavier gauge.

Speakers
Since Buck was so impressed the Focal speakers in his old X-Type, I decided to go for a set myself. Focal Access 165 A1, these are a 6.5” split system, with a separate crossover. You’ll need the crossover for the back doors, but not for the fronts.

Subwoofers
Despite them being hard to find in Europe, the many positive reviews in the US convinced me to go for the Kicker CVT. 4Ω units. I had thought about going for the 2Ω to get a bit more out of the amp, but it’s a bit risky…

These look like serious kit (hope they put out as good as they look).

Speaker adaptors
In order to mount the 6.5” speakers in the existing slots, you will need some spacers/adaptors. Most car-stereo installers make their own from MDF sheet. But I found these special ones from www.car-speaker-adapters.com HERE. Once I got them in my hands I was a little surprised, since they are an “open” design, which doesn’t make much sense in my experience. So I decided to seal them up with some magic tape. Besides that, these adaptors should make it dead-simple to fit the speakers.

Door handles
Depending on the year of your car, you may or may not have tweeters in the front doors as part of the standard system. Mine being 2005MY I did. So to match I wanted the same tweeters in the back doors. Again Jordan from xtypeparts.com came through & got me a pair of door inserts with the tweeter grills. These are easy enough to install in the door cards, bit of hot-glue does the trick.

Front door connections
This is where things can change depending on the model year of your car. There are connectors in the doorjambs which pass the wires through to the door. On the early models with standard sound, there are no factory tweeters in the front doors, therefore no wires to connect them. This means you have to add more pins/wires to the door connectors or pass the wires outside of the factory looms. Lucky for me the later models with the tweeters already have the connections there, & it’s only a matter of cutting & splicing into the retrofit loom. Unlucky for me I also decided to fit puddle-lights at the same time, so I’ve gotta add the additional wires anyhow…Bruce at b12jags.co.uk came through for me with some spare door connectors to rob the pins from.

Wiring diagram / schematic
The "retrofit loom" helps to use as much of the existing wiring in the car as possible. The cabin wiring harness (at CA230) is different for LHD and RHD cars.
The pinouts can be downloaded HERE
The layout of the RHD harness can be downloaded HERE
The layout of the LHD harness can be downloaded HERE
You will need to make this loom yourself, it's custom!
Making the loom
If you managed to find the OEM connectors, then it's a matter of soldering in the extension wires, repeat this 16 times...

As you go, write down the new colour for each pin.
When all 16 are done, stretch out all the wires and wrap with electrical tape;

You can see the branch off for the subwoofer cables closest to the plug.
Other end has the 8-wires which will go into the CA230, 2-wires for the left side tweeter, and the two long wires which are coiled up are for the right side tweeter, I'll run these along the firewall, under the carpet, over to the other side.
If you've already measure the lengths, then you can start on the piggy-back CA230 connector;

So now the connectors for the front door tweeters, to get the pins out, first gotta push down the white tabs in the middle of the connector;

Like this;

This pushes the white central part out;

Then you need to get in with a small jewelers screwdriver to push down the plastic retainer inside;

So, got the required pins out of both sides;

These will go in #1 & #15 of the black door connector.
Here is the finished front end of the harness, with the piggy back CA230.
You can also see the lead for the left-front tweeters in that shot, with the pins from the door connector on.

And here's a pic of the finished speaker harness. Click to enlarge.

Now, the next bit is important Power connections to the amp.
The wiring for the power, as per the wiring diagrams.
There are two earths on 2 & 8 (which are spliced together) and two power inputs on 3 & 9 (which are also spliced together).
The other wire on that plug is the D2B wakeup on 5, which all the devices running on the D2B network have.
Earths are easy enough, there is a common earth point behind the media rack, but the power is tricky.
The factory Premium Sound setup has it's own 30A fuse in the cabin fuse box, and a single + supply runs from the back of the fusebox to the boot of the car, to feed the amp.
Although the fuse (F20) is in place, the actual feed wire to the boot isn't.
Should be pin 8 of the CA208 connector (CA208-8), a thick, brown & red wire.
Well it's not there and it'll be a hell of a job to get that connector out of the fuse box, and get a pin in it (I assume it's the same as the others so far, specially crimped).
So I've decided to run a separate + lead directly from the main bus leading of the cabin fusebox and then put an inline 30A fuse in the boot next to the amp. Here is what the wiring looks like for now;

I've soldered the + leads directly onto the tabs of the fuse holder. And the feed wire is heavy, just in case anyone asks...
Short extensions onto the earths which will geet a ring connector. And i'll just scotchlok the D2B-wakeup onto the same from the CD-changer wiring.
That's the big nut at the top right of the pic with the rubber boot over it.

Make sure the battery is disconnected before you touch the nut! (BTW not my pic, forgot to take one)
Rear Door Speaker & Tweeter Install
So, door card off, it's basically the same as the front doors. Managed to break four of those stupid plastic pins on the left rear door. Only broke one on the right rear, it came off a lot easier, turns out that the lock must have been replaced in the past, the lining had been cut around the lock, and re-sealed with black gaffa tape. Good to know that's what the pros use!
With the door card off, we're looking at the original speaker;

So, get that out & fit in the speaker adaptor;

Back to the door card, here's what the inside of the door handle looks like.
It's held in place with lots of hot-glue, and a lot of melted plastic in slots.

Lots of patience with a stanley knife, and a blunt soldering iron, I managed to get the handle out;

Put the new handle in place (havent glued it in yet);

OK now for the tweeter, I decided to wrap some black electrical tape around it to hold it in place.

And then when I had the glue gun out to fix the handle, just a couple of dollups to fix the tweeter in place;

Now to fit the crossover, I basically just copied Bucks idea;

Got some slotted metal strip from the hardware store, cut & bent, then bolted in.
I didn't get any pics of the wiring, but it's very straight forward. The existing 2-wires from the original speaker go into the input of the crossover. A pair to the midbass, and the tweeter is pre-wired, and just long enough to get to the crossover in that position.
Re-seal the door lining with black gaffa tape (sorry, forgot to take a pic).
Bolt in the midbass speaker;

Finally, door card back on & give it a test. Everythings working!

Amp
The Jag/Alpine amp is an 8x40W special, connects into the D2B network, and powers a total of 10 speakers.
Amp connections
After a lot of searching, (and I mean a lot) I just couldn’t get my hands on the original connectors, so as an alternative I managed to find some 2.8mm spade connectors, which are still too big, but with a bit of laterial thinking I got it to work. Strip off the PVC insulation;
Tighten them up a little, and slip them over the pins "sideways" and they fit.
A little heatshrink around the spades will take care of the insulation.
The terminals on the amp aren’t marked, but with some investigation I figured it out here;
Then, just at the last minute, Jordan from xtypeparts.com found some connectors for me, brilliant.
As you can see, the wires are crimped down tight, so it's a matter of soldering the wires on.
I doubt others will be so lucky to find the connectors, so I wanted to show you the example with the 2.8mm spades anyhow.
Cabin Harness Connectors
You need to get you hands on a complete CA230 harness connector. I was lucky & got three from JagWorks in Sydney during my last trip to Australia. Most of the speaker wiring from the amp runs into this connector. If you don’t have this, you might as well run all new wire to the speakers….which is a pain in the...you know…
Speaker Wire
The speaker wire was actually quite a headache to find; luckily I came across roddas73 on eBay, who sells specialised, colour-coded wire, in small quantities, specifically for this type of application. Of course I wasn’t able to find the exact OEM colours, but I did get 17x different colours, so that’ll make it easier to wire up. The wire is a 1mm� thin-insulated special. I got 5m each of Black, Grey, White, Yellow, Orange, Purple, Blue, Pink, Green, Light Green, Brown, Grey/White Stripe, Purple/White Stripe & Blue/White Stripe, plus 10m each of Red/White Stripe, Orange/White Stripe and finally Red.
100m all up, delivered to Switzerland for �40.
Obviously for the power & earth connections I’ll be using a heavier gauge.
Speakers
Since Buck was so impressed the Focal speakers in his old X-Type, I decided to go for a set myself. Focal Access 165 A1, these are a 6.5” split system, with a separate crossover. You’ll need the crossover for the back doors, but not for the fronts.
Subwoofers
Despite them being hard to find in Europe, the many positive reviews in the US convinced me to go for the Kicker CVT. 4Ω units. I had thought about going for the 2Ω to get a bit more out of the amp, but it’s a bit risky…
These look like serious kit (hope they put out as good as they look).
Speaker adaptors
In order to mount the 6.5” speakers in the existing slots, you will need some spacers/adaptors. Most car-stereo installers make their own from MDF sheet. But I found these special ones from www.car-speaker-adapters.com HERE. Once I got them in my hands I was a little surprised, since they are an “open” design, which doesn’t make much sense in my experience. So I decided to seal them up with some magic tape. Besides that, these adaptors should make it dead-simple to fit the speakers.
Door handles
Depending on the year of your car, you may or may not have tweeters in the front doors as part of the standard system. Mine being 2005MY I did. So to match I wanted the same tweeters in the back doors. Again Jordan from xtypeparts.com came through & got me a pair of door inserts with the tweeter grills. These are easy enough to install in the door cards, bit of hot-glue does the trick.
Front door connections
This is where things can change depending on the model year of your car. There are connectors in the doorjambs which pass the wires through to the door. On the early models with standard sound, there are no factory tweeters in the front doors, therefore no wires to connect them. This means you have to add more pins/wires to the door connectors or pass the wires outside of the factory looms. Lucky for me the later models with the tweeters already have the connections there, & it’s only a matter of cutting & splicing into the retrofit loom. Unlucky for me I also decided to fit puddle-lights at the same time, so I’ve gotta add the additional wires anyhow…Bruce at b12jags.co.uk came through for me with some spare door connectors to rob the pins from.
Wiring diagram / schematic
The "retrofit loom" helps to use as much of the existing wiring in the car as possible. The cabin wiring harness (at CA230) is different for LHD and RHD cars.
The pinouts can be downloaded HERE
The layout of the RHD harness can be downloaded HERE
The layout of the LHD harness can be downloaded HERE
You will need to make this loom yourself, it's custom!
Making the loom
If you managed to find the OEM connectors, then it's a matter of soldering in the extension wires, repeat this 16 times...
As you go, write down the new colour for each pin.
When all 16 are done, stretch out all the wires and wrap with electrical tape;
You can see the branch off for the subwoofer cables closest to the plug.
Other end has the 8-wires which will go into the CA230, 2-wires for the left side tweeter, and the two long wires which are coiled up are for the right side tweeter, I'll run these along the firewall, under the carpet, over to the other side.
If you've already measure the lengths, then you can start on the piggy-back CA230 connector;
So now the connectors for the front door tweeters, to get the pins out, first gotta push down the white tabs in the middle of the connector;
Like this;
This pushes the white central part out;
Then you need to get in with a small jewelers screwdriver to push down the plastic retainer inside;
So, got the required pins out of both sides;
These will go in #1 & #15 of the black door connector.
Here is the finished front end of the harness, with the piggy back CA230.
You can also see the lead for the left-front tweeters in that shot, with the pins from the door connector on.
And here's a pic of the finished speaker harness. Click to enlarge.

Now, the next bit is important Power connections to the amp.
The wiring for the power, as per the wiring diagrams.
There are two earths on 2 & 8 (which are spliced together) and two power inputs on 3 & 9 (which are also spliced together).
The other wire on that plug is the D2B wakeup on 5, which all the devices running on the D2B network have.
Earths are easy enough, there is a common earth point behind the media rack, but the power is tricky.
The factory Premium Sound setup has it's own 30A fuse in the cabin fuse box, and a single + supply runs from the back of the fusebox to the boot of the car, to feed the amp.
Although the fuse (F20) is in place, the actual feed wire to the boot isn't.
Should be pin 8 of the CA208 connector (CA208-8), a thick, brown & red wire.
Well it's not there and it'll be a hell of a job to get that connector out of the fuse box, and get a pin in it (I assume it's the same as the others so far, specially crimped).
So I've decided to run a separate + lead directly from the main bus leading of the cabin fusebox and then put an inline 30A fuse in the boot next to the amp. Here is what the wiring looks like for now;
I've soldered the + leads directly onto the tabs of the fuse holder. And the feed wire is heavy, just in case anyone asks...
Short extensions onto the earths which will geet a ring connector. And i'll just scotchlok the D2B-wakeup onto the same from the CD-changer wiring.
That's the big nut at the top right of the pic with the rubber boot over it.
Make sure the battery is disconnected before you touch the nut! (BTW not my pic, forgot to take one)
Rear Door Speaker & Tweeter Install
So, door card off, it's basically the same as the front doors. Managed to break four of those stupid plastic pins on the left rear door. Only broke one on the right rear, it came off a lot easier, turns out that the lock must have been replaced in the past, the lining had been cut around the lock, and re-sealed with black gaffa tape. Good to know that's what the pros use!
With the door card off, we're looking at the original speaker;
So, get that out & fit in the speaker adaptor;
Back to the door card, here's what the inside of the door handle looks like.
It's held in place with lots of hot-glue, and a lot of melted plastic in slots.
Lots of patience with a stanley knife, and a blunt soldering iron, I managed to get the handle out;
Put the new handle in place (havent glued it in yet);
OK now for the tweeter, I decided to wrap some black electrical tape around it to hold it in place.
And then when I had the glue gun out to fix the handle, just a couple of dollups to fix the tweeter in place;
Now to fit the crossover, I basically just copied Bucks idea;
Got some slotted metal strip from the hardware store, cut & bent, then bolted in.
I didn't get any pics of the wiring, but it's very straight forward. The existing 2-wires from the original speaker go into the input of the crossover. A pair to the midbass, and the tweeter is pre-wired, and just long enough to get to the crossover in that position.
Re-seal the door lining with black gaffa tape (sorry, forgot to take a pic).
Bolt in the midbass speaker;
Finally, door card back on & give it a test. Everythings working!
Last edited by Cambo; Dec 28, 2011 at 08:58 AM. Reason: Updated links
Sub and Amp Install
Backseat and parcel shelf out
This is a job in itself, seat base out (breaking the plastic retaining clips on the way, FYI the P/N is C2S 31685)
Then the side squabs out (same plastic clips at the bottom) and the quick release clips on the top, push in the black tabs.
After that the plastic shrouds over the seat back locks. The center seatbelt out. Lift & tug & pull & swear, eventually you'll get everything out & we're looking at the bare & stripped out back;

Test fit of the subs, yes they fit...

You need to drill mounting holes for the subs, two ways to do this, make a template & drill from the bottom, or you need a short drill bit & right-angle bit holder, to come in from the top. I did the latter with very special tools...
An angled 1/4" bit holder, I got from SMBW-Tools on eBay.de

And these little things, short hex drill bits from Tight Fit Tools in the US.

Together they are incredibly short, and were the perfect size for drilling the mounting holes in the parcel shelf, with the speakers in place, from above. It was just brilliant, I had to share....

Gotta admit, I was a bit worried about how tough that angle-bit-holder was, so I didn't go full power, and after drilling the first 8 holes it got quite warm. So I let it cool down while I put in the bolts. Then did the next 8. TBH it did the 16 holes I needed, good enough.
Then its a case of putting in the new parcel shelf, & getting things back together.
I changed my parcel shelf over to the version that has the speaker grill for the subs;

Picture courtesy of xtypeparts.com. I had a look under the parcel shelf and the cutouts for the woofers are actually offset to the left like that. I guess it's because of the middle seatbelt. TBH I didn't actually measure it out, but it's pretty safe to assume that the position didn't change from the earlier models. Just be sure that you also get the two outer pieces from the parcel shelf, since the fabric changed in later years.
I used a bit of gaffer tape in a few strategic places to try & hold everything down (worried about rattles).
Mounting the Amp
So first & put the retrofit loom in place, and added the power supply loom to it.
Ran the loom down the left side, to the A-pillar junctions.

Mounting the amp was a complicated affair....
The earth point is on the side panel, & the amp sits over the top of it.
Also space is tight so you need to have the media rack in place, before bringing the amp in.
So first wiring, then rack, then bolt the amp in.

So now you should have the loom running down the left hand side of the car, to the A-pillar. Use a ring connector onto the positive bus of the fusebox.
Front Doors
OK so this was the fun part, getting those door connectors out & swapping the tweeter pins over. Actually it was easier than i expected... If you have an early model X-Type, you'll be adding the tweeters in the door handles the same as the rear doors. However you also need to add the pins to the connector on the door side. It'll still be the top connector, #1 & #15. So rubber boot out of the door jam, & feed a long stiff cable tie through the boot to pull the wires.

Then for the cabin side, with a bit of digging around, and removing the relays from the fuse panel, I was able to get the connector out in the open;

This is the top connector of the two, which the wires for the factor tweeter in it, #1 & #15. Open up the connector, swap over the wires, close it up & put it back together.
One important thing to note is that you must wrap up the "old" wires for the tweeters, since they will still be connected to the amp in the head unit. Also, mark the connector before you remove it, since it needs to go back in the original orientation.
BTW I also figured out why the speaker adaptors have open sides

Mount the new speaker.

Front Tweeters
I (we?) have always assumed that the OEM Jag/Alpine amp has built in crossovers for the front doors, to split the mid-bass & tweeters.
Well, it doesn't, there are four channels to the front, and they are all full-range.
Here is a pic of the factory fitted Alpine tweeter from the Premium Sound;

Here is a pic of the factory fitted Philips tweeter from the Standard Sound;

You can see they have a capacitor on the negative leg, which functions as a high-pass filter. So you need to add this capacitor, or take it from the old tweeters. BTW the ones in the Philips Tweeter are marked 33V 3.3�F
I took the Capacitors out of the old tweeters & soldered them inline onto the negative side of the Focal tweeters, nothing too complicated, just be sure to get the polarity right.

The mounting of the tweeters is the same as you see in the back door photos.
As a finishing touch, I put the Focal badges on the speaker grilles;

And that's about it
Yep, just put everything back together, changed over the D2B cable in the boot to have 3x modules, battery back on, and surprise surprise, everything's working. I can hardly believe it...
So what do you get with the Premium Sound? Well apart from more rumble in the boot, there are extra features in the touchscreen;
The DSP button appears in the Audio screen;

DSP is Digital Sound Processing, which focus' the sound in a specific area of the cabin.
I've read on this & several other forums that to get maximum output from the subs, you need to have it set on Front.

And finally in your tone control men�, there is an extra control for the Subwoofer level;

With the volume down low, you need to crank up the bass & the sub level, but if you want to crank it up, turn down the bass, that little Alpine amp really puts out!
I made a little video of the subs before putting the parcel shelf back in.
Kicker CVT65's in Jaguar X-Type - YouTube
So to summarise, it sounds AWESOME!!!!
Very pleased with the end result, the DSP is brilliant!!!
Backseat and parcel shelf out
This is a job in itself, seat base out (breaking the plastic retaining clips on the way, FYI the P/N is C2S 31685)
Then the side squabs out (same plastic clips at the bottom) and the quick release clips on the top, push in the black tabs.
After that the plastic shrouds over the seat back locks. The center seatbelt out. Lift & tug & pull & swear, eventually you'll get everything out & we're looking at the bare & stripped out back;
Test fit of the subs, yes they fit...
You need to drill mounting holes for the subs, two ways to do this, make a template & drill from the bottom, or you need a short drill bit & right-angle bit holder, to come in from the top. I did the latter with very special tools...
An angled 1/4" bit holder, I got from SMBW-Tools on eBay.de
And these little things, short hex drill bits from Tight Fit Tools in the US.
Together they are incredibly short, and were the perfect size for drilling the mounting holes in the parcel shelf, with the speakers in place, from above. It was just brilliant, I had to share....
Gotta admit, I was a bit worried about how tough that angle-bit-holder was, so I didn't go full power, and after drilling the first 8 holes it got quite warm. So I let it cool down while I put in the bolts. Then did the next 8. TBH it did the 16 holes I needed, good enough.
Then its a case of putting in the new parcel shelf, & getting things back together.
I changed my parcel shelf over to the version that has the speaker grill for the subs;
Picture courtesy of xtypeparts.com. I had a look under the parcel shelf and the cutouts for the woofers are actually offset to the left like that. I guess it's because of the middle seatbelt. TBH I didn't actually measure it out, but it's pretty safe to assume that the position didn't change from the earlier models. Just be sure that you also get the two outer pieces from the parcel shelf, since the fabric changed in later years.
I used a bit of gaffer tape in a few strategic places to try & hold everything down (worried about rattles).
Mounting the Amp
So first & put the retrofit loom in place, and added the power supply loom to it.
Ran the loom down the left side, to the A-pillar junctions.
Mounting the amp was a complicated affair....
The earth point is on the side panel, & the amp sits over the top of it.
Also space is tight so you need to have the media rack in place, before bringing the amp in.
So first wiring, then rack, then bolt the amp in.
So now you should have the loom running down the left hand side of the car, to the A-pillar. Use a ring connector onto the positive bus of the fusebox.
Front Doors
OK so this was the fun part, getting those door connectors out & swapping the tweeter pins over. Actually it was easier than i expected...
Then for the cabin side, with a bit of digging around, and removing the relays from the fuse panel, I was able to get the connector out in the open;
This is the top connector of the two, which the wires for the factor tweeter in it, #1 & #15. Open up the connector, swap over the wires, close it up & put it back together.
One important thing to note is that you must wrap up the "old" wires for the tweeters, since they will still be connected to the amp in the head unit. Also, mark the connector before you remove it, since it needs to go back in the original orientation.
BTW I also figured out why the speaker adaptors have open sides
Mount the new speaker.
Front Tweeters
I (we?) have always assumed that the OEM Jag/Alpine amp has built in crossovers for the front doors, to split the mid-bass & tweeters.
Well, it doesn't, there are four channels to the front, and they are all full-range.
Here is a pic of the factory fitted Alpine tweeter from the Premium Sound;
Here is a pic of the factory fitted Philips tweeter from the Standard Sound;
You can see they have a capacitor on the negative leg, which functions as a high-pass filter. So you need to add this capacitor, or take it from the old tweeters. BTW the ones in the Philips Tweeter are marked 33V 3.3�F
I took the Capacitors out of the old tweeters & soldered them inline onto the negative side of the Focal tweeters, nothing too complicated, just be sure to get the polarity right.
The mounting of the tweeters is the same as you see in the back door photos.
As a finishing touch, I put the Focal badges on the speaker grilles;
And that's about it
Yep, just put everything back together, changed over the D2B cable in the boot to have 3x modules, battery back on, and surprise surprise, everything's working. I can hardly believe it...
So what do you get with the Premium Sound? Well apart from more rumble in the boot, there are extra features in the touchscreen;
The DSP button appears in the Audio screen;
DSP is Digital Sound Processing, which focus' the sound in a specific area of the cabin.
I've read on this & several other forums that to get maximum output from the subs, you need to have it set on Front.
And finally in your tone control men�, there is an extra control for the Subwoofer level;
With the volume down low, you need to crank up the bass & the sub level, but if you want to crank it up, turn down the bass, that little Alpine amp really puts out!
I made a little video of the subs before putting the parcel shelf back in.
Kicker CVT65's in Jaguar X-Type - YouTube
So to summarise, it sounds AWESOME!!!!
Very pleased with the end result, the DSP is brilliant!!!
Last edited by Cambo; Dec 8, 2011 at 09:36 AM.

And the Alpine logos on the factory system are PURE CLASS?
I resisted the urge to plaster the car with the multiple Kicker and Focal stickers that came with the speakers....
Maybe i should get one of those big /////ALPINE stickers for the windscreen?

But the car is already black, so how can I show my carbon fiber hood???
Then i'd really be pimpin'
Trending Topics
Veteran Member


Joined: Oct 2008
Posts: 4,880
Likes: 1,431
From: Sunny Southport UK
I've a question, I'm not clear on using the x-overs that come with aftermarket speakers with this amp - I've a similar one used in my XJ - can I use x-overs or do I need to solder the caps from the old speakers for hi pass filtering?
In hindsight, I would have gone with capacitors in the rear doors, much easier than installing a separate crossover, and I think it might give a more balanced sound, comparable with the fronts. As it stands now the rears seem to be less loud than the fronts.
Veteran Member
Joined: Oct 2008
Posts: 4,880
Likes: 1,431
From: Sunny Southport UK
The front mid/tweeters have a channel each. This may be the reason the sound is lower in the rear? Because each rear channel is driving x2 speakers. This would also mean those 2 rear channels are running 2Ohm?
Considering this, maybe a FOCAL Co-Ax of the same range and size (6.5") would give a higher sound level if fitted in the rear, removing the mid/tweeter and X-over, and letting the channel run at 4Ohm.
Also, what is the sensitivity of the speakers you installed? I'm looking at the highest Co Ax for the rear doors on my car. I'll update when I've done this.
It's the same, rear stage has the tweeter & the midbass running on the same channel. Front stage has separate channels. I agree it's probably got a lot to do with 160W going into the front and only 80W going in the back.
The Focal crossover is passive, and fairly complicated too (lots of electronic components in it) so i wonder how much volume is lost as a result. Compared to a "pure" output with just a capacitor in place.
The kits are advertised as 4ohm. Maybe that's actually a pair of 2ohm drivers, which end up wired in series through the crossover? So it's not the case of the rears being too low, it's the front's too high?
I dunno...
Never checked the sensitivity, I bought the Focal's on recommendation of another forum member.

Senior Member
Joined: Nov 2006
Posts: 287
Likes: 32
From: USA
It's funny I had the same thought, but I've never seen a different part number for rears vs fronts, so I'm not sure they have different ratings. But then again, it makes sense they might be 2ohms since they're wired in parallel. Sooooooo, does that mean those two channels on the amp put out at 8ohms? Possible, but I really (really really) doubt it. So the short answer, there is no definite answer.
I had my heart set on some Alpine Type R speakers but since the Focals had been tested already for this particular aplication, I decided to get the same components as Cambo for the fronts. But since I don't want to go hunting down for new door handles with the tweeters (even though like Cambo I'm always striving for perfection), and not to have to worry about the above 2vs4 ohm, I'm getting the Focal coax 2-way speakers for the rear. If I was building my own system from scratch with a 100 watt RMS per channel output, yeah I would get components all around. But with the stock Jag amp putting out 40 watts (max?) per channel, highly doubt I'd notice much of a difference. At the end of the day, they're still Focals, they're still 1000x better than the stock or stock Alpine speakers.
I had my heart set on some Alpine Type R speakers but since the Focals had been tested already for this particular aplication, I decided to get the same components as Cambo for the fronts. But since I don't want to go hunting down for new door handles with the tweeters (even though like Cambo I'm always striving for perfection), and not to have to worry about the above 2vs4 ohm, I'm getting the Focal coax 2-way speakers for the rear. If I was building my own system from scratch with a 100 watt RMS per channel output, yeah I would get components all around. But with the stock Jag amp putting out 40 watts (max?) per channel, highly doubt I'd notice much of a difference. At the end of the day, they're still Focals, they're still 1000x better than the stock or stock Alpine speakers.
Cambo, one of the best writeups I've ever seen on an internet forum! Great job.
I have a few questions though. What are the benefits of simply replacing the tweeters and midbass units over just installing some two way components and a new amp all around? Besides cost, of course. It seems that there is a greater possibility of installing the wrong components here and possibly damaging the factory amp exists, or maybe I'm just being a pessimist?
BTW, I should probably clarify a little bit. I already have the premium sound but I have replaced the subwoofers with Elemental Design 6.5" units. They definitely don't thump like they should, I think I need more power to them but I also am lacking in the front sound range too. I'd like to improve the sound over the existing premium sound system without having to pay for a new amp and crossovers.
Last edited by chknhwk; Jan 21, 2012 at 06:29 AM. Reason: Clarification
Thanks mate.
Well it's a matter of personal preference really.
Sure you can go for a bigger aftermarket amp (100W per channel, Spielnicht?) and just replace the speakers, you'll get more volume.
But the OEM amp gives you the DSP function, which is a nice gimmick.
And you also get the integrated control over the subwoofer level, which you won't have if you go for an aftermarket amp.
Regarding the speakers, the MY2004 onwards already have the tweeters in the front door handles, since they are there, why not use them?
I wanted to go as close to original as possible, hence the messing around with fitting the tweeters in the rear door handles. TBH i think i'm not getting the most out of them, hence the previous comment about using capacitors instead of the Focal crossovers.
Hard for me to say what the difference between a 2-way and a split would be, in theory the split with the tweeter mounted in the door handle should project clearer sound toward the listener, compared to having the tweeter low down in the door, firing at your knee.
I did notice that the deep bass is cut from the door speakers with the amp fitted. Presumably because the bass should now come from the subs. This affects the tone at low volumes, it can sound a bit thin. Crank it up & it's a different story.
I already explained a bit of the background as to why I retrofitted OEM stuff here https://www.jaguarforums.com/forum/s...17/#post447879
Basically it was a snowball effect. If I had stopped & thought about it, I should have put in an aftermarket double-DIN with touchscreen, NAV, bluetooth phone, TV, etc, and be done with it. However, once started down the OEM road (in my case, with the ACM) then there was no turning back.
In the end though, I really like the look of the interior with the factory Nav, so it'll do. Seen lots of pics of the double-DIN jobs, this definitely looks better, at least.
Wow, that really looks nice! I don't have the touchscreen or nav or audio connectivity, I just have a single disc player with the cd changer in the trunk. I'll go load a picture in a bit if it's not snowing out yet. I've been battling with myself over going the full factory upgrade with all of the above versus going aftermarket with a double din touchscreen unit. Personally I think I'd rather have the best factory options with the best aftermarket sound I can get...
Here's a double-DIN install from the UK forum, thanks Prisoners for the pic.
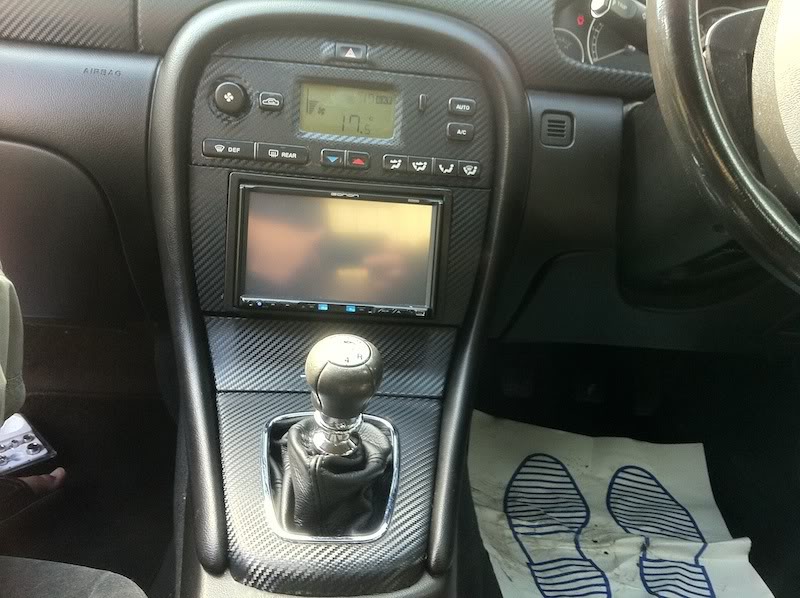
So that's the two options, OEM nav, or double-DIN.
Just my preference, but I like the look of the OEM nav better. The climate control panel at the top is a bit over the top (why so big?) and you'll have different colour backlighting on the LCD compared to the head unit. And since the screen is mounted down low, it would be harder to see when using the Nav. And you don't get the directions in the message center. And it won't keep track of where you are if there's no satellite signal.
It's really a question of value for money, especially if you're starting out with a car that doesn't have the OEM nav. You could easily throw $2000 maybe $2500 to retrofit the OEM Nav, Bluetooth, ACM & Premium Sound amp (don't consider the cost of the speakers, it's the same either way).
Prices are a guesstimate for North America.
Touchscreen $500
DVD Drive $400
Remote Climate Module $150
Nav Wiring $200
Phone Module $200
Bluetooth Module $150
Microphone $50
Phone wiring $100
Audio Connectivity Module $400
Premium Sound Amp $150
Speaker Wiring $200
D2B Cables $100
Parts only! And then you've got to hunt around for them. These might be a bit high, sure you could find bargains.
For that money you could get a wicked double-DIN, with much much more functionality, and a couple of big amps...?
Only thing is, do you like how it looks?
I DEFINITELY prefer the OEM look but I think I'm going with an aftermarket unit on this X. I have plans to pick up a later model sport with a manual eventually so I'll get one with all the options then.
BTW, I should probably clarify a little bit. I already have the premium sound but I have replaced the subwoofers with Elemental Design 6.5" units. They definitely don't thump like they should, I think I need more power to them but I also am lacking in the front sound range too. I'd like to improve the sound over the existing premium sound system without having to pay for a new amp and crossovers.
So i don't know about not thumping like they should...?
I don't think the subs were hooked up like in this write up, I dropped it off at a shop. I'll have to find out how they're done. I bought 4ohm dual voice coils so they could be wired up properly for the amp but like I said, I'm not sure how everything is done... At least I think they were 4ohm dvc, they might be 2ohm wired in series for 4 ohm total.