

Front wishbone _ Quick reply please


Thread Starter
|
Junior Member
Joined: Aug 2012
Posts: 29
Likes: 4
From: Rotherham
I have got the car in pieces changing the o/s ( UK ) drivers lower front wishbone. Does the long bolt slide out of the vertical bush without having to take anything else off, eg crossmember support etc. The space looks very tight above it ? I am ready to pop the bottom ball joint need to know soon. Thanks.

Joined: Aug 2011
Posts: 619
Likes: 210
From: Wilmington, DE
Space is very tight and both bolts must be removed entirely. I think you may have to lower the rear subframe bolt to get the rear bolt out far enough to remove the arm. It is a big 21MM and two small 13mm bolts holding the bracket. then just wedge a pry bar in there to force the sub frame down far enough to get the bolt out. It's a tricky job but just be patient and play it out in you mind first.
good luck
good luck

Senior Member
Joined: Nov 2006
Posts: 287
Likes: 32
From: USA
Mark, the JTIS states that you need to loosen the font and rear bolts of the subframe for the side you're working on. My question is, how do you know how far to loosen the bolts so you have enough room to wiggle the lower control arm out? Pardon my stupidity in asking this, but if you accidentally loosen the bolts all the way (again just the one side), what actually happens to the subframe? Will it still dangle since its held by the other side?
Space is very tight and both bolts must be removed entirely. I think you may have to lower the rear subframe bolt to get the rear bolt out far enough to remove the arm. It is a big 21MM and two small 13mm bolts holding the bracket. then just wedge a pry bar in there to force the sub frame down far enough to get the bolt out. It's a tricky job but just be patient and play it out in you mind first.
good luck
good luck
Last edited by spielnicht; Aug 31, 2012 at 08:39 PM.
Thread Starter
|
Junior Member
Joined: Aug 2012
Posts: 29
Likes: 4
From: Rotherham
Cheers lads. It is going to be next weekends job now. I did most of the hard work friday, loosened and removed, unseized the balljoint pinch bolt etc and both arm pivot bolts opened up and are free.
I have 2 more questions -
1. How long are the subframe bolts ? Loosening the rear one a good inch, i am hoping the threads are 2 inch long.
2. To gain access to the front subframe bolt, which piece of undertray or liner etc do i need to remove ? Or is there an access flap cut in the undertray / liner ?
Thanks.


Joined: Dec 2011
Posts: 120,439
Likes: 17,005
From: Durham, UK
Mark,
If you get the chance, some pics of this procedure would be a useful addition to the thread.
Graham
If you get the chance, some pics of this procedure would be a useful addition to the thread.
Graham
Trending Topics
Thread Starter
|
Junior Member
Joined: Aug 2012
Posts: 29
Likes: 4
From: Rotherham
Done it. Took me 4 hours. I will write a tutorial when i get chance.
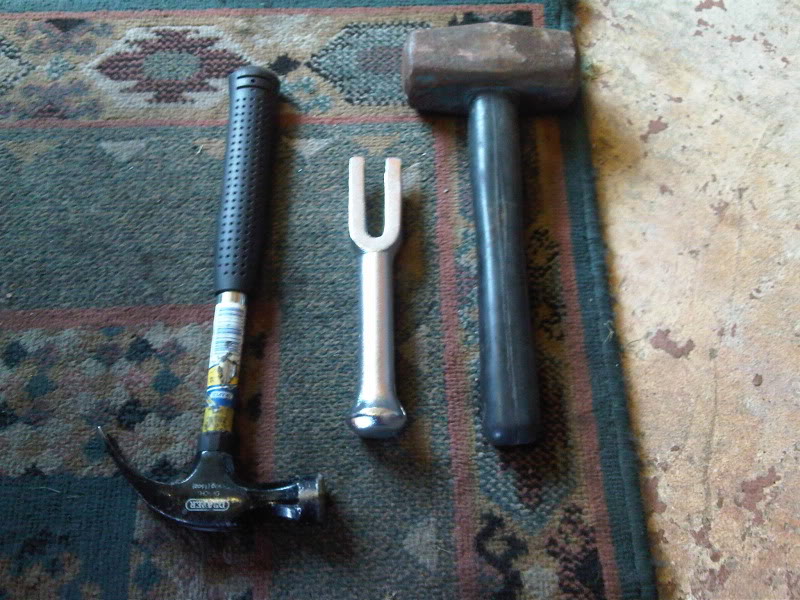
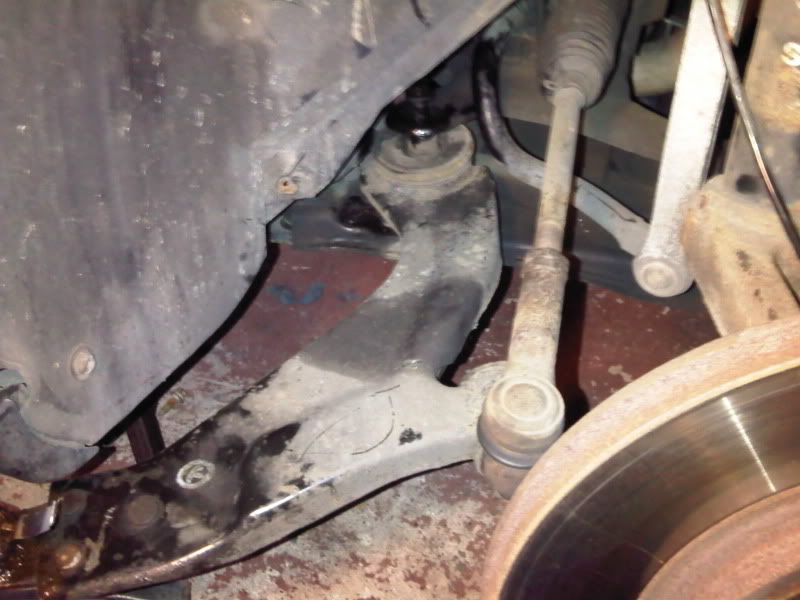
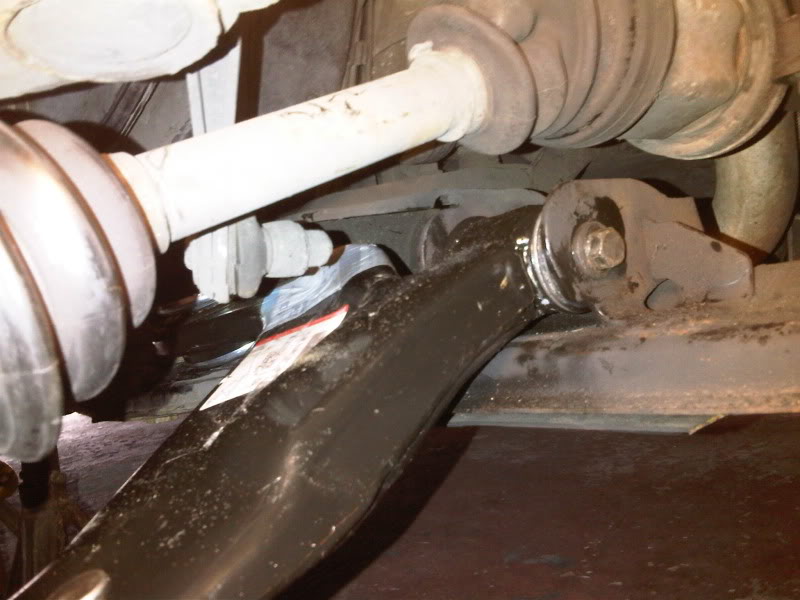
New Pinch bolt is essential before starting !!!
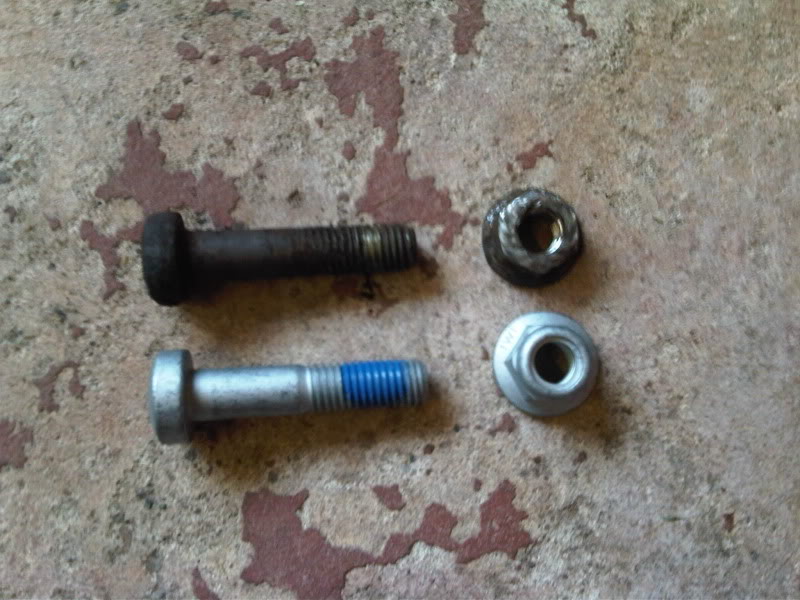
Front subframe bolt.
Wishbone rear bolt nut.
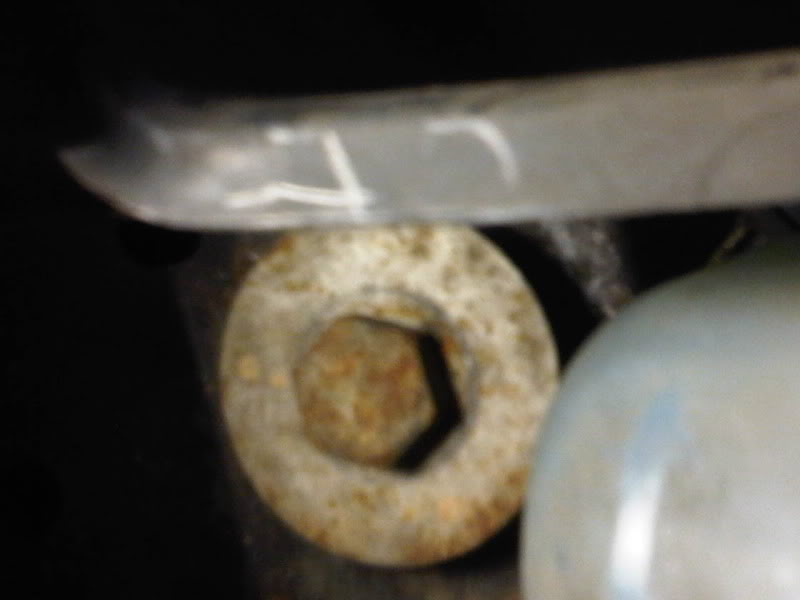
Rear subframe bolt and safety plate.
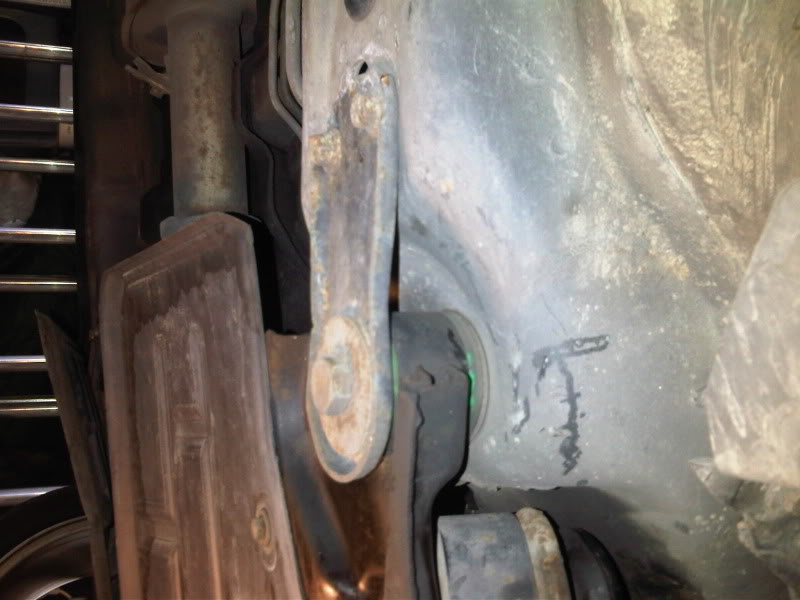
WD40 ran down inside of bush.
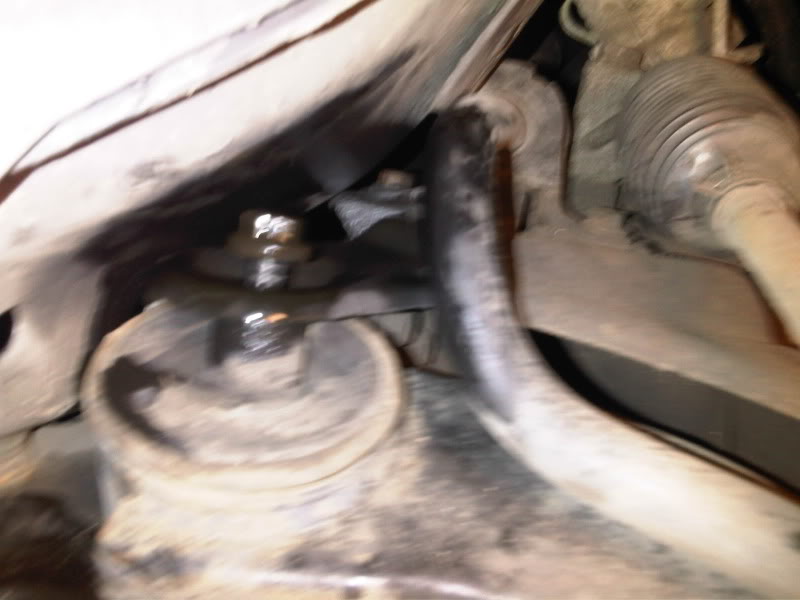
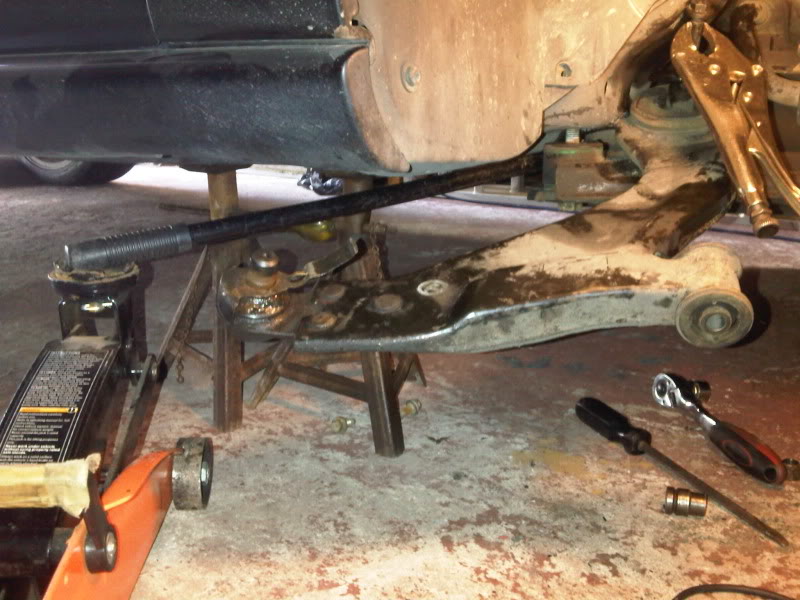
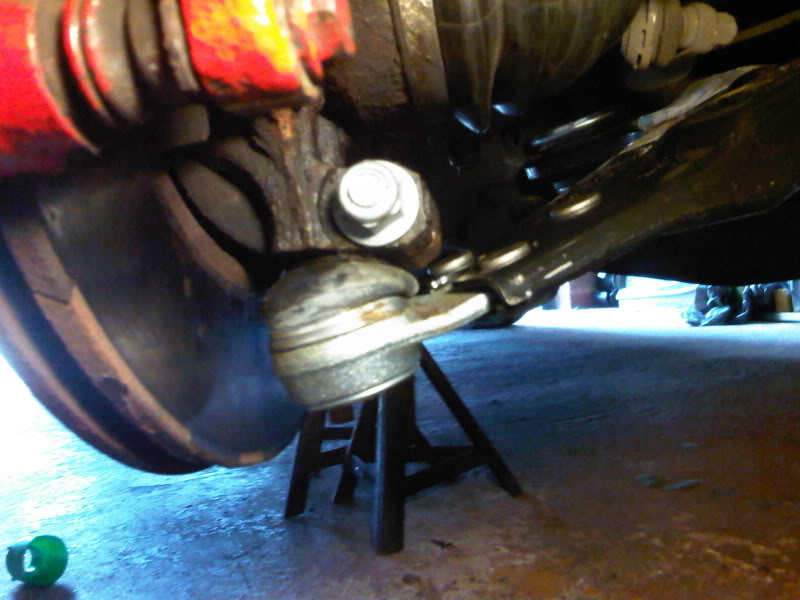
Remove rear safety plate bolts.
Undo bolt with long bar and 21mm socket.
Arm released from balljoint and front mounting. Swiveled around to help the long bolt out.
Improvisation. Me and my mate Jack. Lever subframe down or wedge jack handle in and use a socket extension to pump your jack up and do the levering for you.
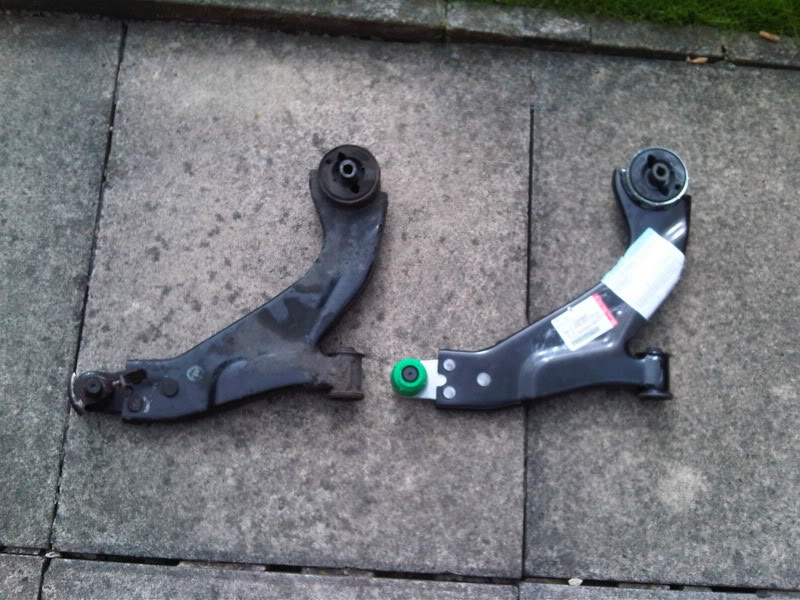
New for old. Match new part for pattern.
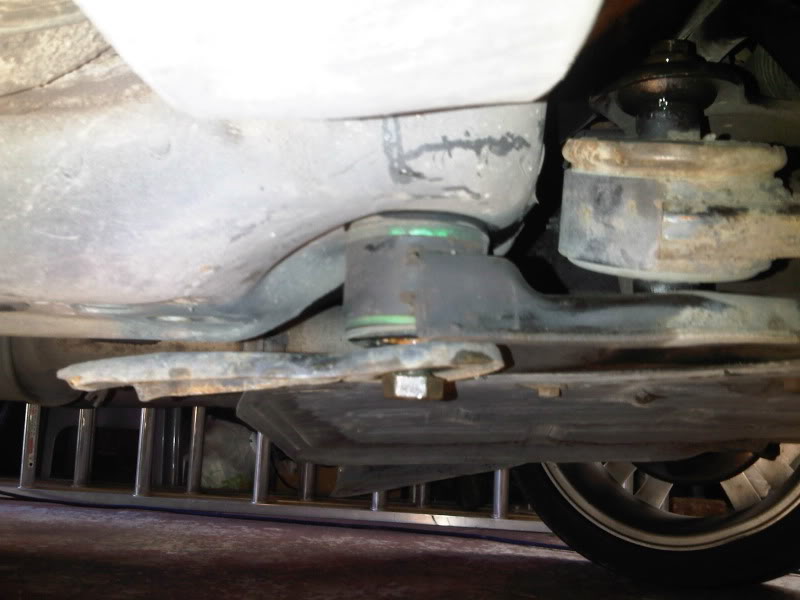
New arm rear mount back in
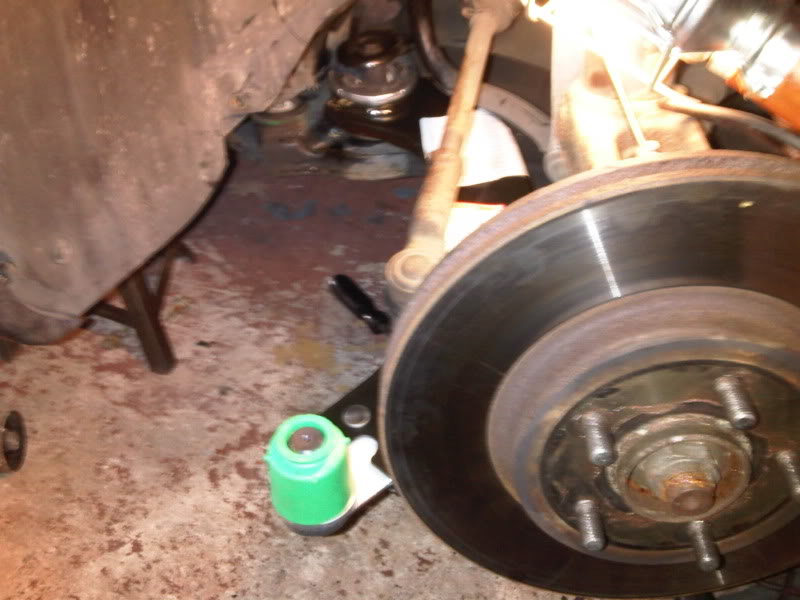
Front mounting bolt in.
Balljoint and pinch bolt fitted
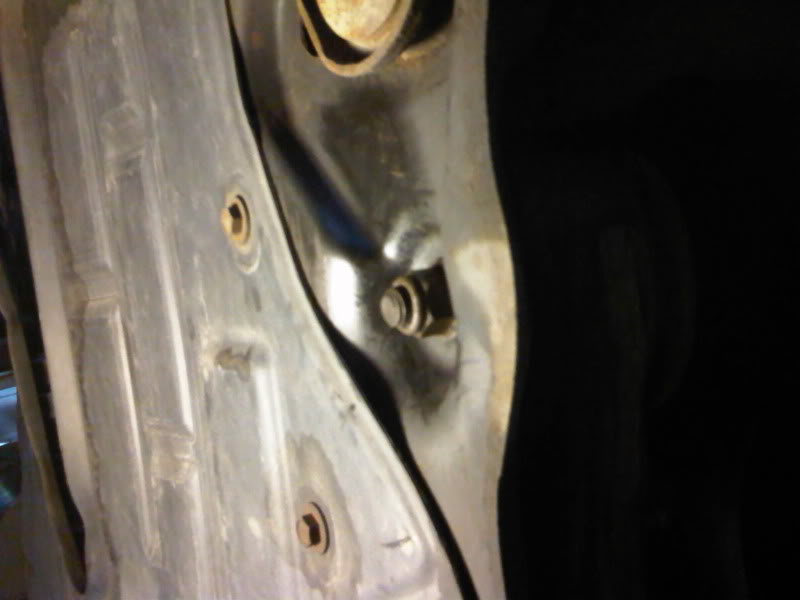
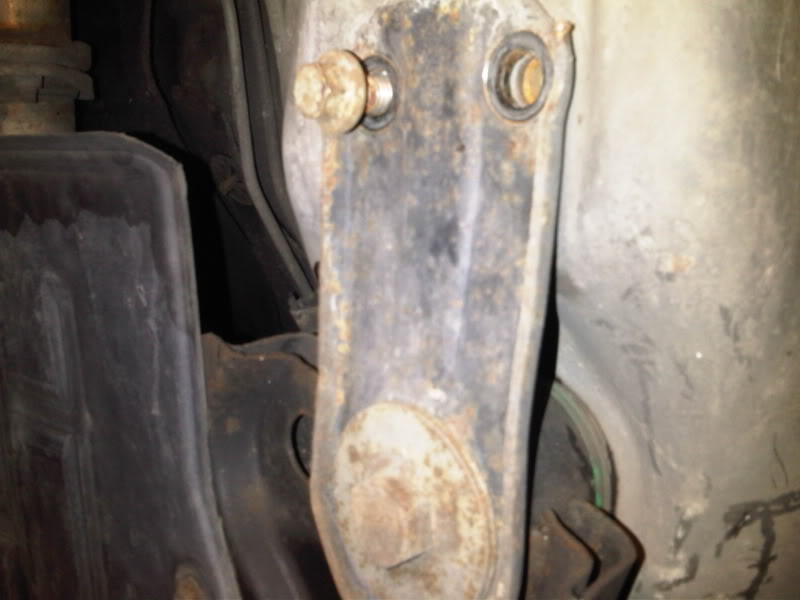
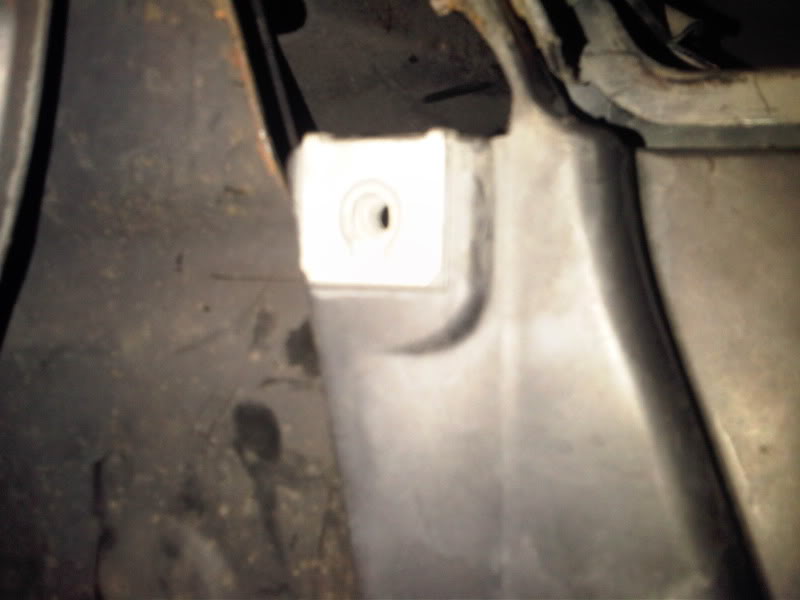
Front subframe bolt location.
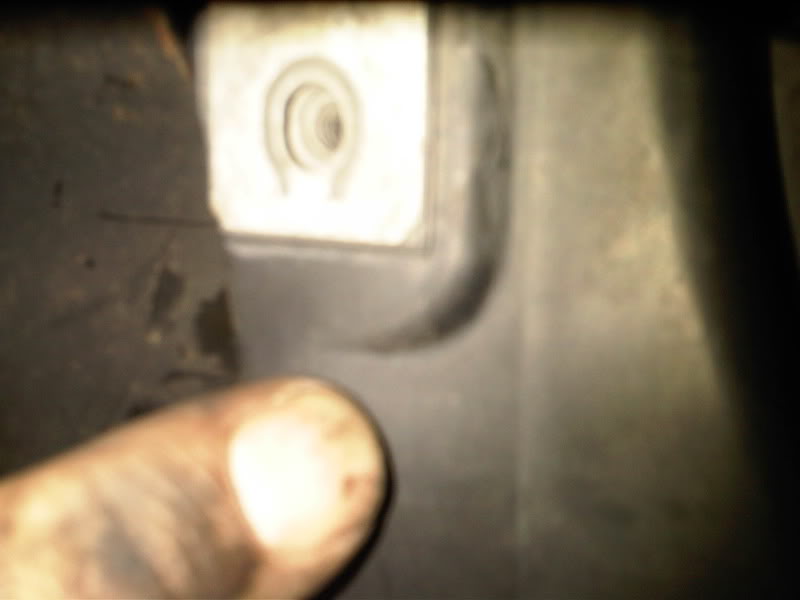
You could easily drill out a 1 inch hole in the undertray or cut a flap to save the tedious hours of freeing the rusted bolts off.
New Pinch bolt is essential before starting !!!
Front subframe bolt.
Wishbone rear bolt nut.
Rear subframe bolt and safety plate.
WD40 ran down inside of bush.
Remove rear safety plate bolts.
Undo bolt with long bar and 21mm socket.
Arm released from balljoint and front mounting. Swiveled around to help the long bolt out.
Improvisation. Me and my mate Jack. Lever subframe down or wedge jack handle in and use a socket extension to pump your jack up and do the levering for you.
New for old. Match new part for pattern.
New arm rear mount back in
Front mounting bolt in.
Balljoint and pinch bolt fitted
Front subframe bolt location.
You could easily drill out a 1 inch hole in the undertray or cut a flap to save the tedious hours of freeing the rusted bolts off.
Last edited by Yorkiemark; Sep 7, 2012 at 02:09 PM.
Joined: Aug 2011
Posts: 619
Likes: 210
From: Wilmington, DE
Way to go! One word of caution is to tighten the forward LCA bolt AFTER the car is sitting level on the ground. I don't know if you did or didn't but this thread may help someone else so the advice is here. That is a tricky job for even those of us that have done it before. Well done!
Joined: Dec 2011
Posts: 120,439
Likes: 17,005
From: Durham, UK
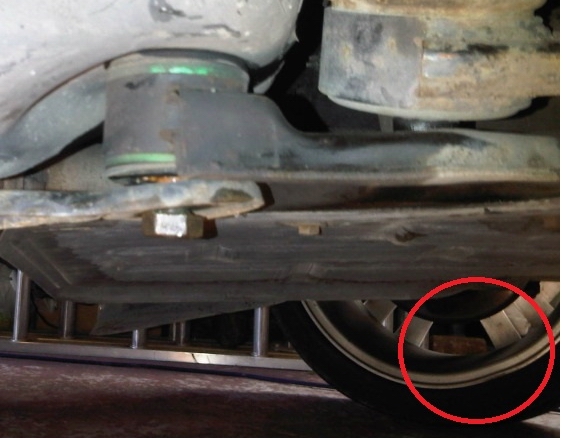
Good one Mark, 
That'll be the usual three and a half hours for freeing off bolts and thirty minutes for the actual change.
Is this a ding on the inside of the wheel rim or is it just discoloured?
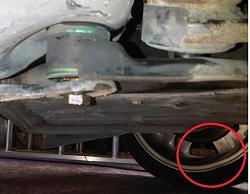
Graham
That'll be the usual three and a half hours for freeing off bolts and thirty minutes for the actual change.
Is this a ding on the inside of the wheel rim or is it just discoloured?
Graham


Thread
Thread Starter
Forum
Replies
Last Post
pnwrs2000
XJ6 & XJ12 Series I, II & III
62
Jan 15, 2018 07:20 PM
Currently Active Users Viewing This Thread: 1 (0 members and 1 guests)