

mesh upper grille insert


Thread Starter
|
Senior Member
Joined: Jul 2006
Posts: 475
Likes: 4
From: home
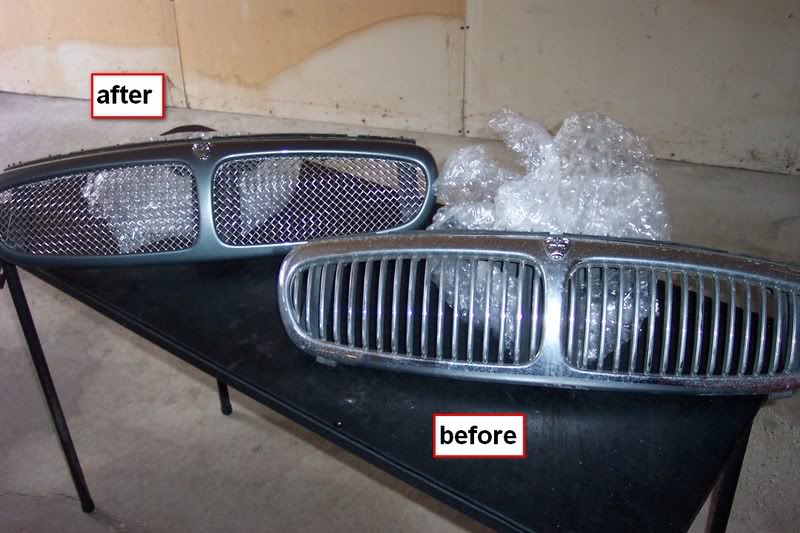
seems like i am becoming the king of the faqs, so here is another one. this will teach you how to install the grille, and go from before to after
step 1 - grab your favorite beer (british is the beer of choice for obvious reasons) and head to the garage. open beer, drink. repeat.
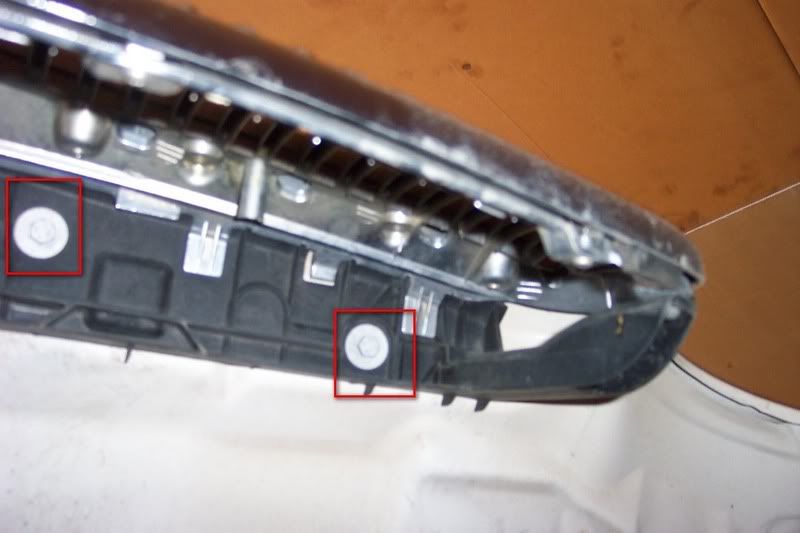
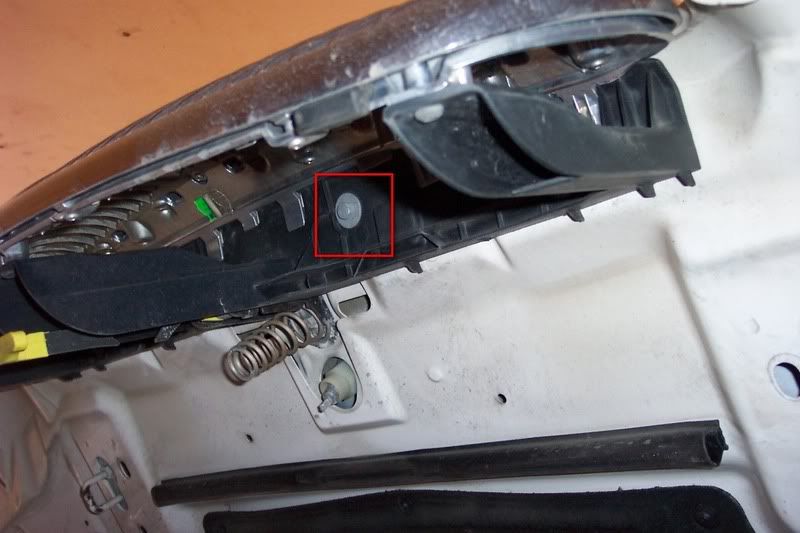
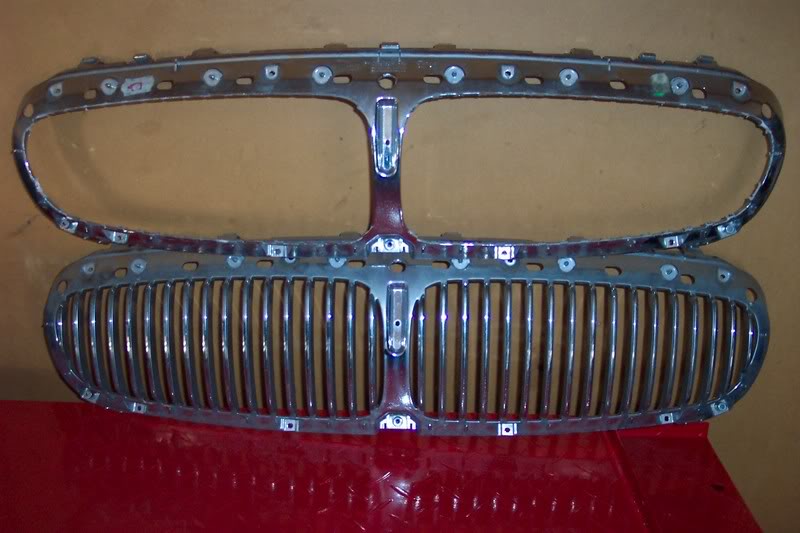
step 2 - remove the four 10mm bolts holding the grille assembly to the hood (bonnet for you british types)
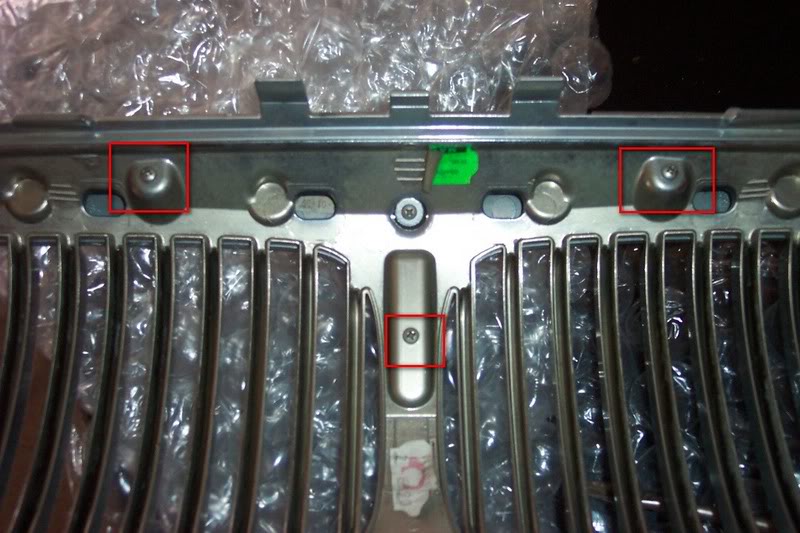
step 3 - remove the inner piece of the grille assembly from the other 2 pieces. there are three #25 torx screws that hold it in place, then the clips on the top of the grille have to be undone. these are just pressure clips and should be fairly obvious to unclip once you are looking at them
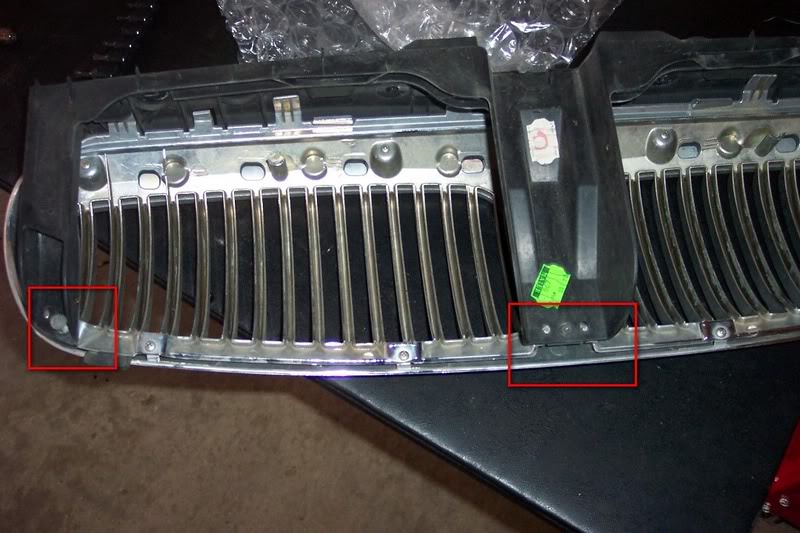
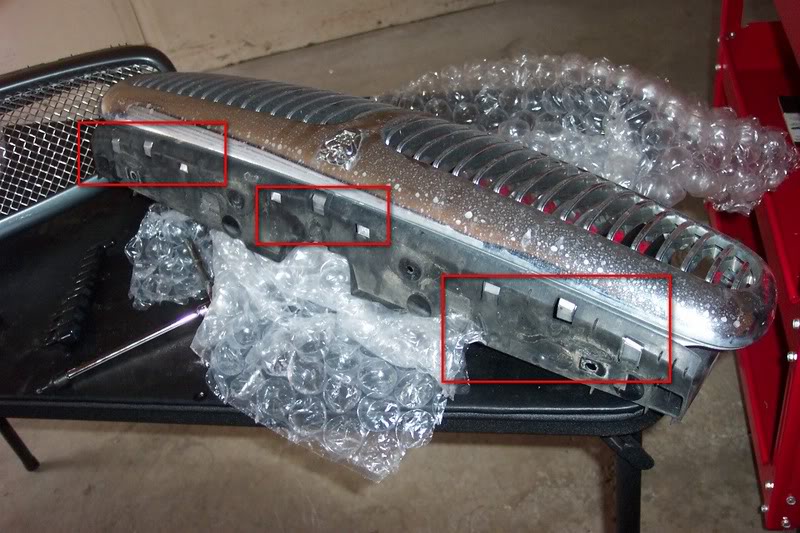
step 4 - remove middle vane insert from outer grille by removing the 9 phillips head screws (4along the top, 4along the bottom, 1 in the middle)holding it in place.remove the 2 rubber bits from either corner of the assembly.
*NOTE*
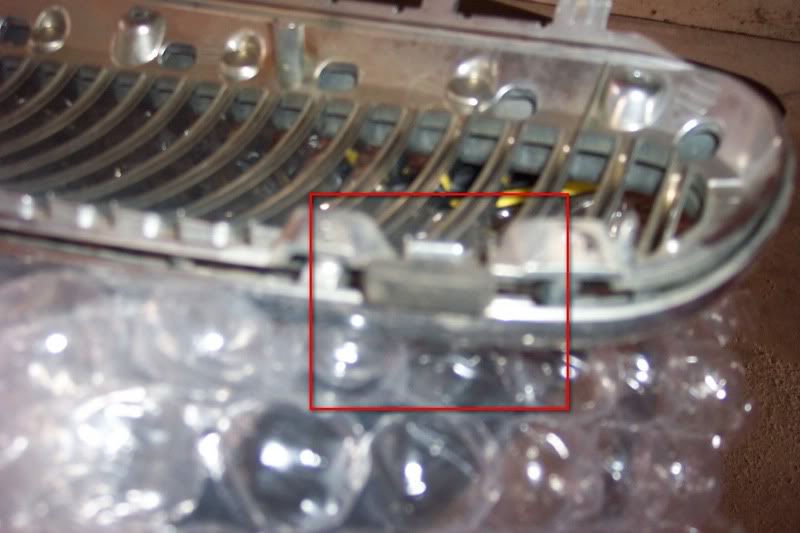
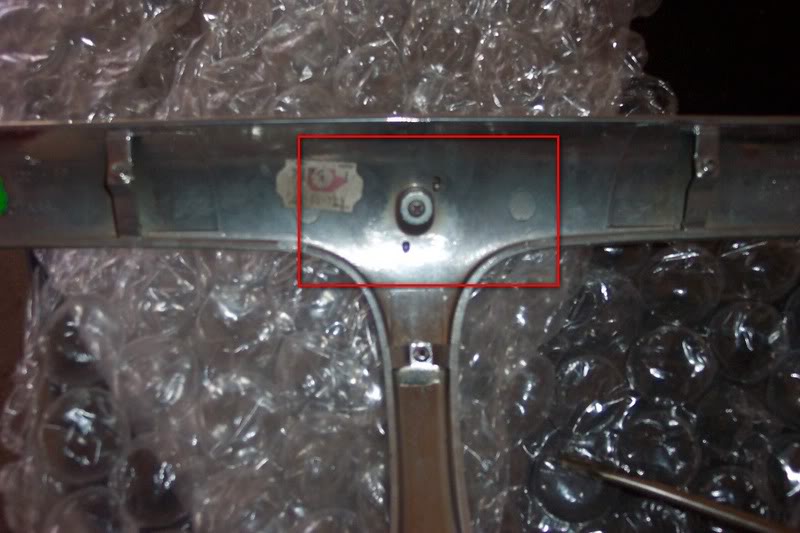
if you need to transfer the growler badge from an old grille to the new one, do it at this step. the badge is just held in place by a single phillips head screw, top middle of the rear of the assembly
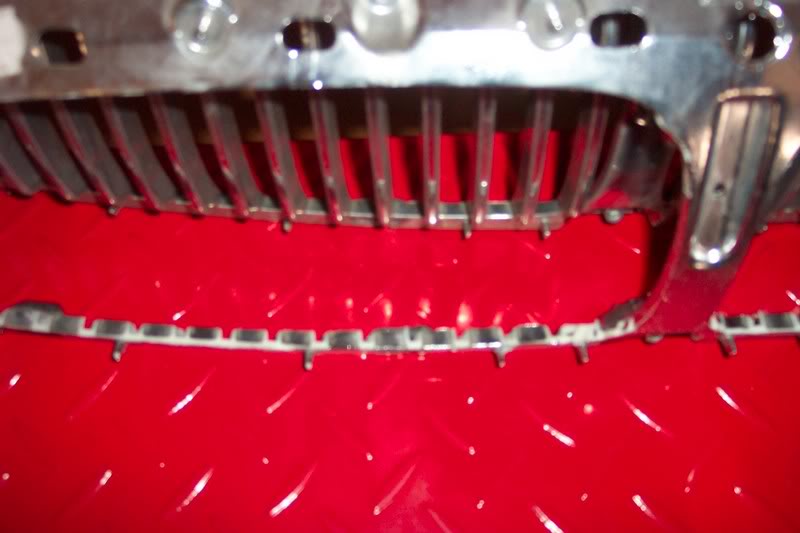
step 5 - now you have your grille assembly completely disassembled and you are ready for the scarry part. this step requires a dremmel (or some form of cutting tool for plastic). i say use a dremmel because it requires both cutting and some minor grinding/sanding. in a nutshell, you are going to remove the vanes from the middle part of the grille so it is hollow. i personally cut them with a grinding wheel on my dremmel, then used a sanding bit to grind down the plastic flush and even at the top and base of the vanes. here is a before and after shot.
step 6 - all that is left now is to reverse the process. there are 2 tricky parts here. first, you must align the mesh insert into place, then sandwich it between the outer grille part and thenewly cut ex-vane insert to hold it in place. the arden kit consists of 2 pieces, most aftermarket only have 1. once you have it in place, begin to add the phillips heads screws in some sort of an alternating pattern. for expamle, if the top left screw is #1 and top right is #4, bottom left is #5 and bottom right is #8, middle is #9, 2, 7, 5, 4, etc etc. the nexttricky part is getting the last bit of the grille assembly to snap into place (the bit that actually attaches to the hood) and then you just put in the 3 torx screws, reattach to the hood and you are done.
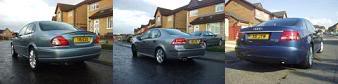
step 7 - take a step back, hit the beer again and admire your even more expensive looking car
step 1 - grab your favorite beer (british is the beer of choice for obvious reasons) and head to the garage. open beer, drink. repeat.
step 2 - remove the four 10mm bolts holding the grille assembly to the hood (bonnet for you british types)
step 3 - remove the inner piece of the grille assembly from the other 2 pieces. there are three #25 torx screws that hold it in place, then the clips on the top of the grille have to be undone. these are just pressure clips and should be fairly obvious to unclip once you are looking at them
step 4 - remove middle vane insert from outer grille by removing the 9 phillips head screws (4along the top, 4along the bottom, 1 in the middle)holding it in place.remove the 2 rubber bits from either corner of the assembly.
*NOTE*
if you need to transfer the growler badge from an old grille to the new one, do it at this step. the badge is just held in place by a single phillips head screw, top middle of the rear of the assembly
step 5 - now you have your grille assembly completely disassembled and you are ready for the scarry part. this step requires a dremmel (or some form of cutting tool for plastic). i say use a dremmel because it requires both cutting and some minor grinding/sanding. in a nutshell, you are going to remove the vanes from the middle part of the grille so it is hollow. i personally cut them with a grinding wheel on my dremmel, then used a sanding bit to grind down the plastic flush and even at the top and base of the vanes. here is a before and after shot.
step 6 - all that is left now is to reverse the process. there are 2 tricky parts here. first, you must align the mesh insert into place, then sandwich it between the outer grille part and thenewly cut ex-vane insert to hold it in place. the arden kit consists of 2 pieces, most aftermarket only have 1. once you have it in place, begin to add the phillips heads screws in some sort of an alternating pattern. for expamle, if the top left screw is #1 and top right is #4, bottom left is #5 and bottom right is #8, middle is #9, 2, 7, 5, 4, etc etc. the nexttricky part is getting the last bit of the grille assembly to snap into place (the bit that actually attaches to the hood) and then you just put in the 3 torx screws, reattach to the hood and you are done.
step 7 - take a step back, hit the beer again and admire your even more expensive looking car
Nice post Nineball.....great pics too.
Added to the FAQ section and LOCKED!
Chalk up anothr one for Nineball...........whos' keeping score?..lol
Jim


Junior Member
Joined: Sep 2010
Posts: 10
Likes: 0
From: UK
So what is the preferred Ale of choice for this endeavor? Is the replacement grill insert metal or plastic? Cheers and thanks for your step by step, I think my wife could even do this following your direction.
Senior Member
Joined: Jun 2009
Posts: 417
Likes: 50
From: Connecticut
Guinness if'n yer on the old side of the pond - Sam or even PBR on the new side - the important thing is to make it COLD.
Nice post. That makes it look like a very neat and easy job...
Which got me thinking... Hrrrm - When I got mine in April '09 I noticed that some Neanderthal had done the job by SAWING OFF the vertical fins rather than removing the entire inner piece containing the vertical fins as you show. It looks perfect from the outside, but the inside looks a little like raw ****. Since they prolly got the "insert" aftermarket kit from Mina or somewhere (it is stainless steel, not plastic) and I think that kit is just the wire mesh piece itself (and not the entire surround) I am wondering if sawing off the fins was intended to preserve the (already dubious) rigidity of the assembly by leaving the plasticky surround in addition to the rather flimsy external surround. I think I might have even seen other writeups here that included sawed-off fins...
And then I realize that you don't have inside pictures of your "After" grille. And then I realize that your After Grille is in the same pix as your Before Grille - including some overlappedness makin it look un-photoshopped... and it says "insert" rather than "assembly" Hrmmm...
So, is that an After, or is that another entirely different After grill to show the approximate actuality of the after before the before actually became another different after thats not actually shown - if you know what i mean.... Maybe its time for another PBR...

Junior Member
Joined: Dec 2011
Posts: 22
Likes: 5
From: Charleston, South Carolina
Excellent write up! Out of Fear, Uncertainly, and Doubt (FUD) I first bought a used grill assembly online (Xtypeparts maybe?) and did the fin-ectomy on it, saving the original just in case disaster struck. Bought the Mina mesh (one piece). Looks really nice. Catches the sunlight and is very showy. I swear the mesh insert has less surface area than the original fins/vanes and this allows more air to flow in. Something our warm running engine compartments and AC condensers both benefit from and need!
Last edited by TomTom; Dec 27, 2013 at 09:58 AM.
Trending Topics
Member
Joined: Dec 2013
Posts: 77
Likes: 8
From: WY
What brand of mesh insert for the upper grille did you use?
Senior Member


Joined: Nov 2011
Posts: 817
Likes: 258
From: Saint Robert, MO
Sorry, I purchased it a few years ago along with the lower mesh and mesh for my VDP. Since they were from different venders, I don't remember were I got them.


Thread
Thread Starter
Forum
Replies
Last Post
Camnelson324
S-Type / S type R Supercharged V8 ( X200 )
3
Sep 27, 2015 08:48 AM
Currently Active Users Viewing This Thread: 1 (0 members and 1 guests)