When you click on links to various merchants on this site and make a purchase, this can result in this site earning a commission. Affiliate programs and affiliations include, but are not limited to, the eBay Partner Network.
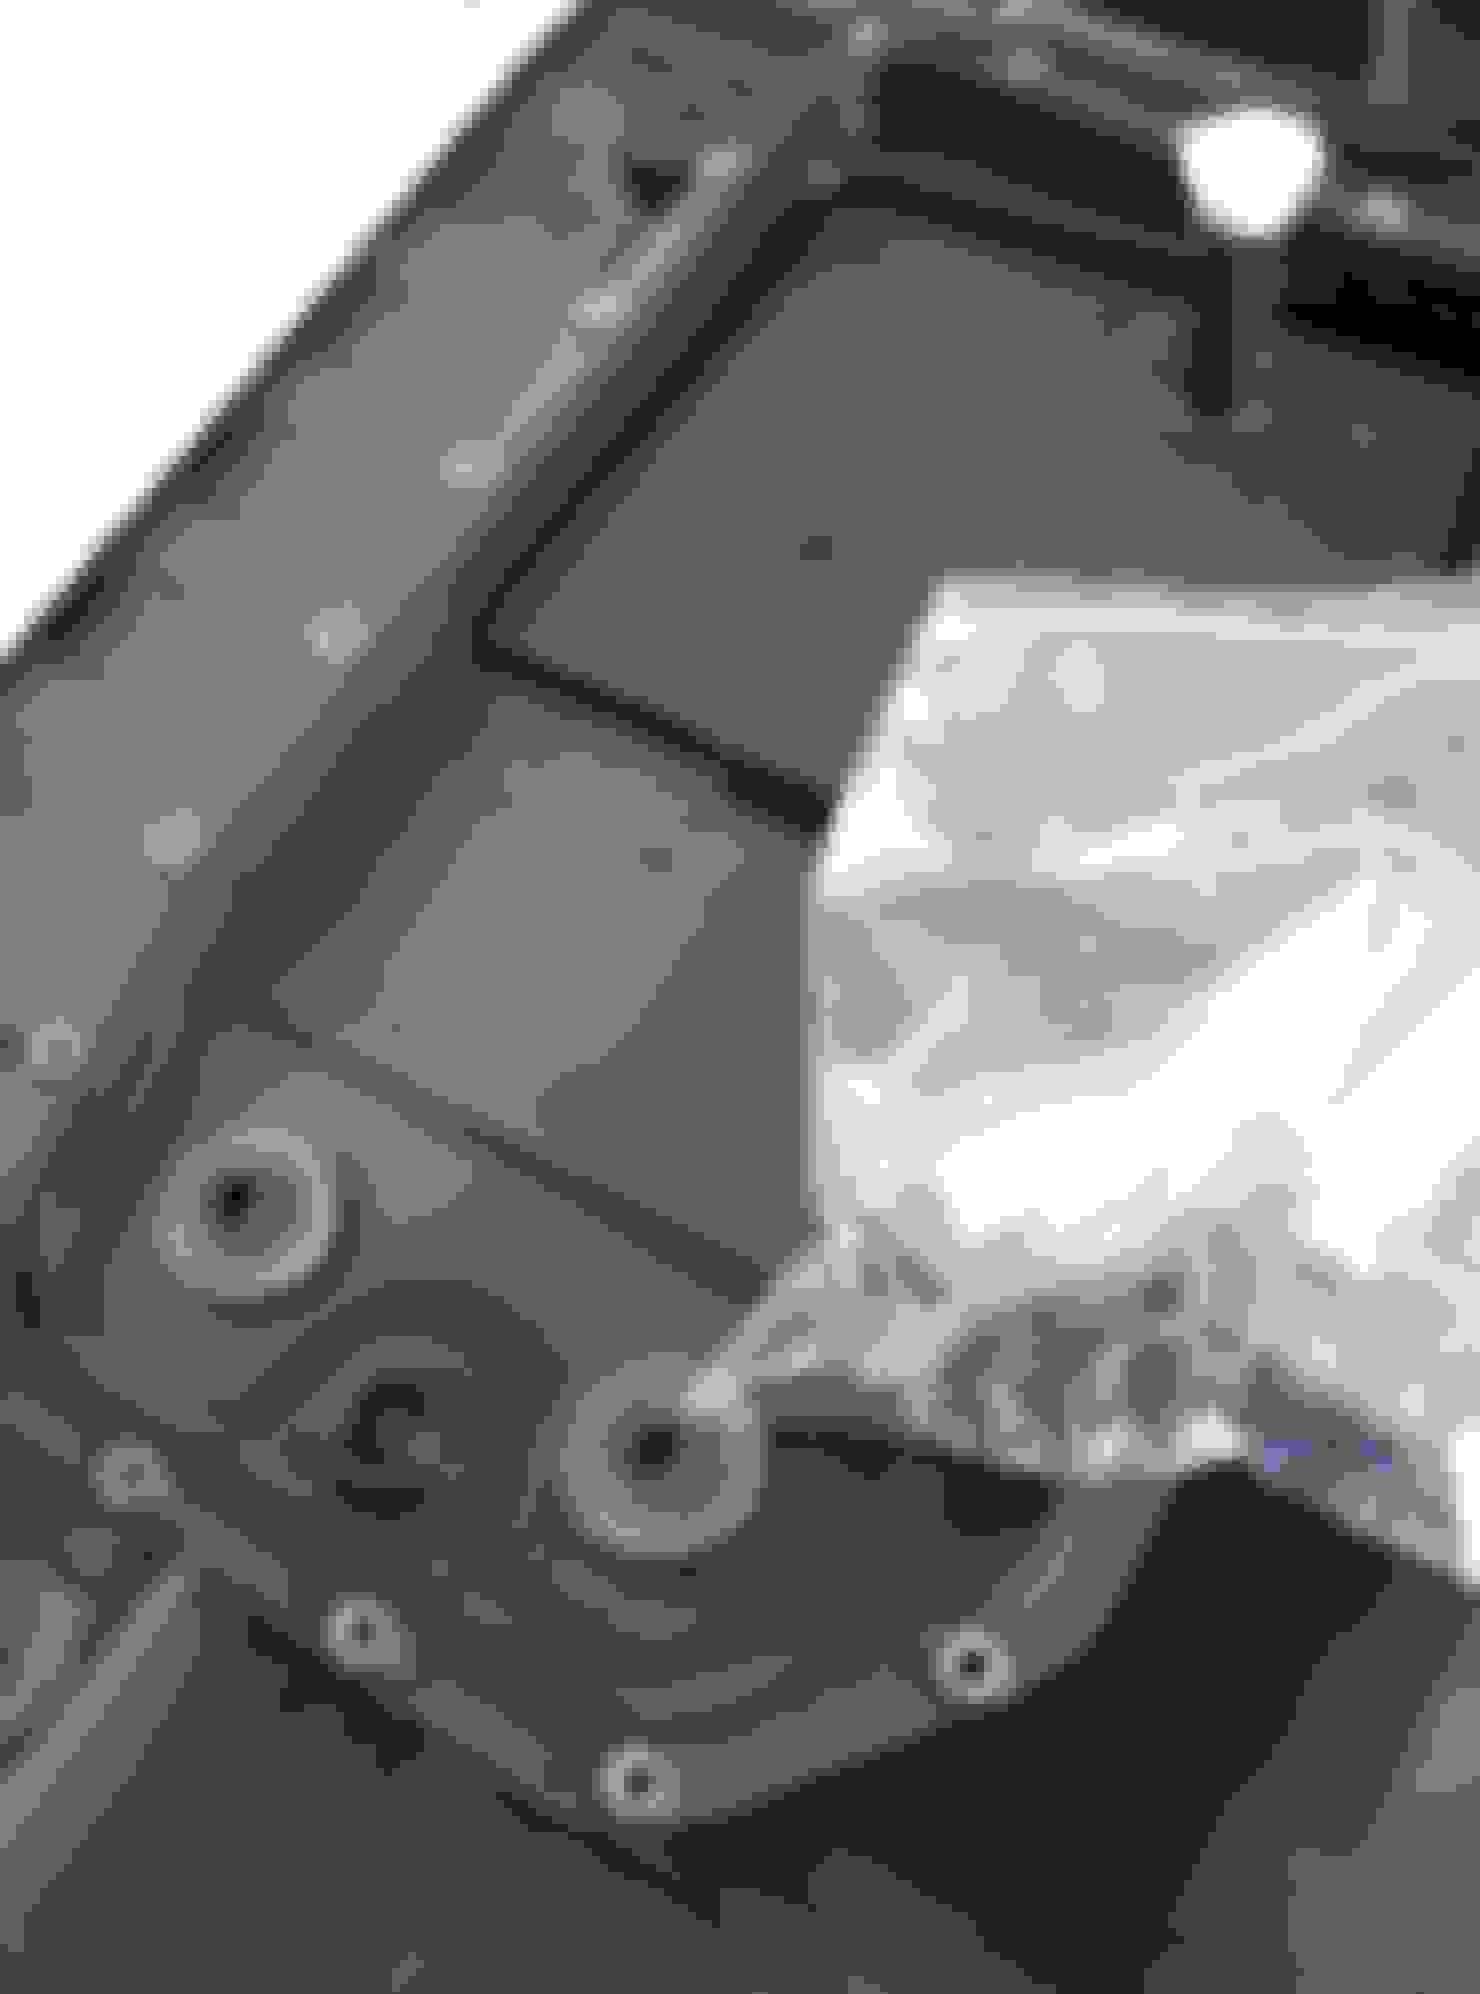
Jag joint dust covers suck, I have 3 bad ones. The tools The reason I keep a few wire coat hangers in the garage. Support the lower control arm, once you separate the upper no support here will leave things in a bind. Once separated, you need to remove the old cover. Use that length of wire coat hanger to temporarily tie off the knuckle to the spring. An old HS auto shop trick, take the loop end of a cotter pin Find the end of the wire clamp and wind the cotter pin onto the spring like a key on a key ring, this will allow easy removal of the spring clamp. It works on the hog ring type clamp on the pin end of this ball joint too. Clean off as much of the old grease as you can. As long as the joint moves freely with no binding but is not loose it should be good. see how I have the knuckle tied off, you don't want it flopping around. The new dust boots PN 19-1712 $10. The new dust boot needs to go over that flange. Grease up the joint as much as possible with a high quality waterproof grease. Me, and my negotiation team. Think like I'm mounting a small tire.. BOOM, it seals without the springs and has a 5 year warr. The 2 back ones will use black bellows type covers and are next.
I bought this aluminum valve body seal on the advice of a buddy who races his ZF equipped BMW regularly. The plastic on the right will deform under high loads, leading to slippage and heat.
The 8mm allen i cut down for the trans fill plug. The cut off section is what I use with an 8mm Gearwrench to remove the diff fill plug.
Simple but perfectly right for the job.
I found it easier to remove the trans mount to service the metatronic sleeve, if you do this support the trans and motor at their joining flange, this gets the jack out of the way of any trans work.
Last edited by Bigg Will; Mar 21, 2019 at 06:03 AM.
Checking for level before filling. Looks good, tip = a wet towel around the exhaust will keep you from getting burned as the exhaust heats up fast with the engine running for the fluid fill.
Oil pan ready for the re seal. Mid oil sump Staying away from silicone. The old vacuum pump seal. This thing made it seem my oil pan was leaking more than I thought.
Last edited by Bigg Will; Mar 28, 2019 at 01:33 AM.
Oil pan ready for the re seal. Mid oil sump Staying away from silicone. The old vacuum pump seal. This thing made it seem my oil pan was leaking more than I thought.
Thanks Will, the pic of the inside of the oil pan should clear up one debate once and for all - does extracting the old oil using a suction/vacuum pump on the oil extraction tube leave a lot more old oil in the sump than if you go with the old fashioned method of draining via the sump plug?
It is easy to see from that pic that the bottom edge of the sump plug drain hole is some 4 mm off the bottom of the pan, which as far as I can tell (from pics posted by davetibbs I think) is pretty much the same distance the bottom of the extraction tube sits off the bottom of the pan. If I am correct then it makes SFA difference which method you use as long as you are sure the vacuum pump has got every last bit it can get. Makes sense I s'pose!
It's good that you were able to get the seal for the vacuum pump. I've read a few posts on various forums where the whole pump has been replaced under warranty due to leaks. I figured it was because the seal wasn't available. Land Rover use a similar pump on the LR2 and it seems to start leaking around 60K miles. They don't make the seals available separately so you have to buy the stupid expensive pump. Fortunately Volvo use the same pump and offer a repair kit for about 10% of the price.
Got a part number for the rear boot(s) you changed out?
I actually looked under LR first for the vacuum pump seal, as LR parts are generally less than the same Jag part but the seal isn't listed separately for LR.
Got the boots here https://www.ebay.com/itm/6x-UNIVERSA...item33edbeace3
Some notes
The only Items left are;
The fuel pump, I have the filter portion and will order the pump portion soon. I was just ready to drive Higgins so it's coming.
Brake caliper rebuild, turns out I didn't need to rebuild the rear caliper, so I'll just hold on too the kits for now.
The service manual is wrong on the install positions of the O2 and fuel/air sensors so either remember what position they came out of, or go by the diagram in the Jag parts look up manual.
After replacing this seal, I found out that the other seal on the outside cover was leaking also. I just took it apart and went to a hydraulic hose and fitting store, he went through his bins until we he found what we felt was a good fit for both seals, he actually gave me 2 of each seal, yes Ill be taking the $17 Jag seal back.
I asked seafoam guys is their product safe for cleaning intake. And they said that it is not recommended, actually it would possibly cause catastrophic damage to supercharger. You have ***** for cleaning your intake!
I asked seafoam guys is their product safe for cleaning intake. And they said that it is not recommended, actually it would possibly cause catastrophic damage to supercharger. You have ***** for cleaning your intake!
Seafoam basically is the same product - liquid cleaning agent. This answer I got from seafoam guys:
I would not recommend doing this on a Supercharged engine. If the Sea Foam liquid takes up the clearance inside the supercharger it can cause catastrophic damage to the supercharger. Even Sea Foam Spray can do the same thing when sprayed into the throttle body. Unfortunately I do not know a way or any liquid or spray products to use to clean carbon on a supercharged engine.
Doesn't mean they are made of the same chemicals - one is safe, the other one is not.
They are not even the same company... so I don't understand how you can assume CRC is the same thing... !?
I think the concern from the Seafoam guy is that allowing a non compressible medium into what is essentially a compressor, could result in damage to the supercharger.
I think the concern from the Seafoam guy is that allowing a non compressible medium into what is essentially a compressor, could result in damage to the supercharger.