
My X300 Rebuild Project


Thread Starter
|
Veteran Member


Joined: Feb 2012
Posts: 1,096
Likes: 1,020
From: Manchester UK
When I joined the forum some time ago I was nearing completion of my X300 project. I did promise to post some details of the project and some pictures � but you know how it goes.
The car has been back on the road now for about two and half years so the moment for champagne and back slapping is lost. However, the nature of the rebuild may be of interest to others. To my knowledge my car is now unique (not sure if that�s good or bad) but I�d love to hear from anyone else who has done this.
I have documented the summary story in the attached PDF document for those interested, mostly with pictures as I don�t like writing. For those that want the executive summary, here it is.
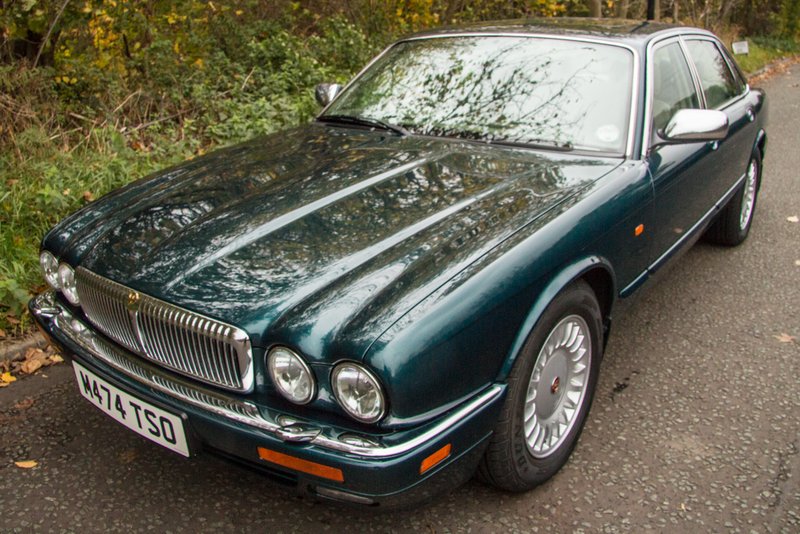
Before

After
The car has been back on the road now for about two and half years so the moment for champagne and back slapping is lost. However, the nature of the rebuild may be of interest to others. To my knowledge my car is now unique (not sure if that�s good or bad) but I�d love to hear from anyone else who has done this.
I have documented the summary story in the attached PDF document for those interested, mostly with pictures as I don�t like writing. For those that want the executive summary, here it is.
Before
After


Senior Member
Joined: Oct 2012
Posts: 190
Likes: 113
From: Seattle, WA & Vancouver, BC
I think one of the kewlest things in the course of life is to achieve an original act. You my friend have just done so and I take great pleasure in applauding your accomplishment! Good on ya Brendan! Well done!!
Veteran Member
Joined: Nov 2011
Posts: 1,535
Likes: 438
From: Melbourne, Australia
Trending Topics
Member
Joined: Jun 2014
Posts: 53
Likes: 9
From: British Columbia, Canada
Looks like a very thorough job ....your pictures are extremely informative; I've never seen such images and know I'll find them helpful in navigating the intricacies of my recently acquired Vanden Plas.
Do you have other images that you'd be willing to share, perhaps on Flickr or similar?
Do you have other images that you'd be willing to share, perhaps on Flickr or similar?
Senior Member
Joined: Mar 2014
Posts: 310
Likes: 62
From: boston
That's an unbelievable job that you did! I do minor stuff and I feel good about that. This is an order of magnitude away from anything I would ever try. Question, if I read correctly, you replaced all your rubber bushings with poly ones? Most people have said they are too hard on an XJ6. I ask because I have already put Bilsteins all around and found that I like the ride much better.

Thread Starter
|
Veteran Member
Joined: Feb 2012
Posts: 1,096
Likes: 1,020
From: Manchester UK
Thanks all for your very kind words.
To answer the question on cost, this is a very rough calculation based on a quick scan through receipts for big stuff. I'm sure there was probably other things so take as a guide only (GB Pounds and it doesn't include the donor car). Front and rear suspension numbers include brakes.
Shell Cost
Suspension Front
Suspension Rear
Used XJ8 Parts
Paint
Respray Labour
Door Waist Finishers
Wheels & Refurb
Exhaust & Cats
Full Alignment
Shot Blasting Services
Rustproofing Wax and Paint
Sundry Items
TOTAL
Time taken was about 3 years on and off.
On the question of Poly bushes. Only the wishbone arms at the front are Polybushed. They are harder than stock bushes but I don't find them harsh.
And yes, I do have lot's more pictures. I will work out a way of making them available as a reference. I'm not a fan of links to 3rd party hosting on forums as inevitably accounts on such sites fall in to disuse and the links are then worthless.
To answer the question on cost, this is a very rough calculation based on a quick scan through receipts for big stuff. I'm sure there was probably other things so take as a guide only (GB Pounds and it doesn't include the donor car). Front and rear suspension numbers include brakes.
Shell Cost
800
500
500
200
700
1000
350
600
750
150
200
300
1000
TOTAL
7050
Time taken was about 3 years on and off.
On the question of Poly bushes. Only the wishbone arms at the front are Polybushed. They are harder than stock bushes but I don't find them harsh.
And yes, I do have lot's more pictures. I will work out a way of making them available as a reference. I'm not a fan of links to 3rd party hosting on forums as inevitably accounts on such sites fall in to disuse and the links are then worthless.

Junior Member
Joined: Nov 2014
Posts: 3
Likes: 0
From: Geneva Florida 32732
Great job I have a 96 VDP that is Kingfisher blue it is almost the same as yours. If you have any pictures of the drive line that would help me as some one moved the support bearing before I got the car. I have been replacing bearing but the support bearing is a bit of a challenge. Any help would be much appreciated. Once again beautiful job on your car , inspirational to myself.

Senior Member
Joined: Oct 2014
Posts: 259
Likes: 41
From: Canada
Thanks all for your very kind words.
To answer the question on cost, this is a very rough calculation based on a quick scan through receipts for big stuff. I'm sure there was probably other things so take as a guide only (GB Pounds and it doesn't include the donor car). Front and rear suspension numbers include brakes.
Shell Cost
Suspension Front
Suspension Rear
Used XJ8 Parts
Paint
Respray Labour
Door Waist Finishers
Wheels & Refurb
Exhaust & Cats
Full Alignment
Shot Blasting Services
Rustproofing Wax and Paint
Sundry Items
TOTAL
Time taken was about 3 years on and off.
On the question of Poly bushes. Only the wishbone arms at the front are Polybushed. They are harder than stock bushes but I don't find them harsh.
And yes, I do have lot's more pictures. I will work out a way of making them available as a reference. I'm not a fan of links to 3rd party hosting on forums as inevitably accounts on such sites fall in to disuse and the links are then worthless.
To answer the question on cost, this is a very rough calculation based on a quick scan through receipts for big stuff. I'm sure there was probably other things so take as a guide only (GB Pounds and it doesn't include the donor car). Front and rear suspension numbers include brakes.
Shell Cost
800
500
500
200
700
1000
350
600
750
150
200
300
1000
TOTAL
7050
Time taken was about 3 years on and off.
On the question of Poly bushes. Only the wishbone arms at the front are Polybushed. They are harder than stock bushes but I don't find them harsh.
And yes, I do have lot's more pictures. I will work out a way of making them available as a reference. I'm not a fan of links to 3rd party hosting on forums as inevitably accounts on such sites fall in to disuse and the links are then worthless.
