
2000 xj8 Vanden Plas 4.0L Thermo Housing replacement


Thread Starter
|
Junior Member
Joined: Aug 2012
Posts: 17
Likes: 0
From: virginia beach
Needing help here. I have a leaking thermostat housing. It is leaking from a couple of spots namely the cap and a crack in the housing body.
I have purchased an after market aluminum housing. The kit includes the complete thermostat housing (aluminum) / thermostat, the outlet pipe and the Heater/AC bypass hose.
my issue is the torque specs for the mounting bolts to the top of the block and those for the thermostat cover.
Additionally, it appears, just from looking at the current housing that the rear two mounting bolts for the housing are partially under the forward lip/edge of the intake manifold.
I was wondering if anyone has undertaken this repair and/or upgrade before and how you managed those two rear bolts.
Any help would be greatly appreciated.
Senior Member
Joined: Jun 2014
Posts: 196
Likes: 31
From: Larkspur, CO
I've only replaced the thermostat cover on mine, since the tower/housing was already aluminium. I never could find torque specs for it - the plastic housing is 7 ft lbs so I used 12.5 ft lbs for the metal version and it has been just fine.
Not sure what the settings are for the tower. Do a search on the tower replacement - there are a number of discussions on it and how to get those bolts out/in.
Not sure what the settings are for the tower. Do a search on the tower replacement - there are a number of discussions on it and how to get those bolts out/in.

Senior Member
Joined: Jan 2012
Posts: 157
Likes: 8
From: Hull, England
I replaced the plastic tower with an alloy one on my V Reg XJ8. I have seen a photo record of the process somewhere on the internet, but can't remember where.
To get the 2 rear screws out, you have a choice. Either manufacture or modify an 8mm spanner so that the end is bent at 90 degrees and use that to remove the nuts. Can be done but not easy.
It would seem that the preferred method is to remove the 2 bolts you can get to at the front. Then using an old screwdriver as a chisel, chop round the rear two bolts. You should then be able to remove the majority of the plastic tower. Remove the 2 rear bolts with an 8mm spanner.
What I did next was to take one of the bolts to a local hardware supplier and I go 4 socket headed bolts in stainless of the same thread.
When you place the new alloy tower on the opening, you will see that the 2 front bolts will go in easily, but the rear ones are shrouded by the plastic inlet pipe moulding. What has to be doe is, take the new tower off and place it to one side.
Take a cloth and plug up the hole where the tower goes. Either use a rotary file in a drill or a round file, and relieve the front of the plastic moulding in the area of the 2 rear tower holes. The idea is to use a long round-headed Allen key to tighten the rear 2 bolts. Because it is round headed it can be used at an angle without slipping.
Once the plastic is relieved enough, place the gasket on, screw the front 2 bolts nearly all the way in. For the back two I put a bit of modelling clay in the socket head, put the Allen key into that, to hold it, lowered the bolt into the rear hole and tightened it up.
Repeat for the second bolt, then tighten them all. Not sure of the torque, but I used a 'T' handled Allen key and when tightened with that It didn't leak when tested. Even if it did leak a bit, you still have access to all the bolts to re-tighten.
As I said, somewhere on the web is a photographic record of this procedure, done the way I have described.
Try "Googling" XJ8 Thermostat tower replacement.
Bill W.
Last edited by JimC64; Oct 3, 2014 at 09:46 PM. Reason: PLEASE ADD LINE BREAKS!!

Veteran Member
Joined: Mar 2008
Posts: 5,390
Likes: 1,116
From: Ellijay
On the way to bend a wrench at the moment. Will post a picture shortly.
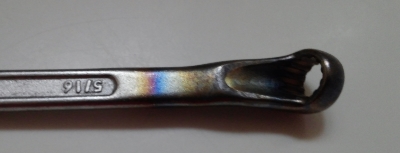
Started out with an offset decades old wrench that had never been used. Yes, it is a 5/16" but really the same size as the 8mm.
20141003_180652.jpg?t=1412288160
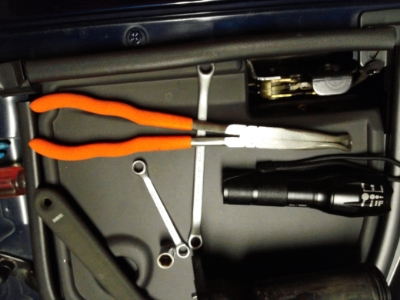
Heated it with a propane torch and hammered it flat.
20141003_180619.jpg?t=1412374458
Off to get the last two bolts out.
Started out with an offset decades old wrench that had never been used. Yes, it is a 5/16" but really the same size as the 8mm.
20141003_180652.jpg?t=1412288160
Heated it with a propane torch and hammered it flat.
20141003_180619.jpg?t=1412374458
Off to get the last two bolts out.
Last edited by test point; Oct 3, 2014 at 05:21 PM.
Thread Starter
|
Junior Member
Joined: Aug 2012
Posts: 17
Likes: 0
From: virginia beach
Badger2196, I think I read a post where you were doing the thermostat itself but, not the housing. I went through that one and I have searched the forum for any other threads and haven't been able to find anything. perhaps, I'm not wording the search correctly???
Heliwilly, your method sounds great my only concern is what is the danger of grinding to far into the plastic "inlet pipe molding"? I assume that we are talking about the same thing which I assumed is the intake manifold or crossover piping??? How thick is it? Obviously, if you've done it, it's thick enough to allow room for the head of the bolt lol but dremeling that out sounds tricky (not the process itself, just the threat of plunging toward the rear too much).
Test point, I'm interested in knowing how you fair and would greatly appreciate it if you could provide pics???
Lastly, my question would be how is it done at the dealer. Surely, they don't go to these lengths, if the bolt head doesn't clear that forward edge of the manifold/inlet pipe, then I assume they would remove it? That is something i certainly don't want to entertain. I have to do valve cover gaskets and check timing chain tensioners while I'm there so I thought I would attempt this.
Thread Starter
|
Junior Member
Joined: Aug 2012
Posts: 17
Likes: 0
From: virginia beach
I do appreciate everyone's input and will be taking notes lol.
I've done ball joints on this thing by grinding the old ones out. What a job that was, instead of buying complete control arms. I've done shock tower mount bushings which now squeal on both sides (I purchased after market bushings on ebay and I've read that I should have purchased certain color OEM bushings) anyone familiar with that one lol.
And, I now have a air bag light that dealer says is a $2000 fix and it will not pass inspection without a new sensor in steering column.
Thread Starter
|
Junior Member
Joined: Aug 2012
Posts: 17
Likes: 0
From: virginia beach
Test Point, what are using for the torque settings on those bolts to the thermo tower housing?
Heliwilly, I've googled my tail off and can't find the photos of this procedure or anything remotely written regarding it? Any ideas?
Heliwilly, I've googled my tail off and can't find the photos of this procedure or anything remotely written regarding it? Any ideas?
Trending Topics
Veteran Member
Joined: Mar 2008
Posts: 5,390
Likes: 1,116
From: Ellijay
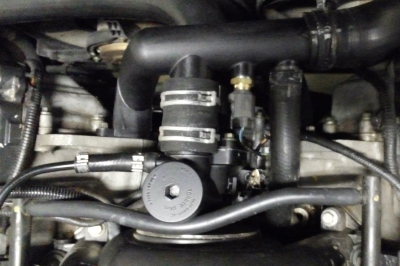
. . . and don't forget to paint the new housing black. A bright aluminum one looks really out of place in the center of an otherwise black engine.

I'll look up the torque requirements in the morning, through for the day. On the truck I take off the front tires and lower it to a comfortable height. Need to jack up the jaguar.
The top cap has 9Nm torque cast into the aluminum.
The dealer technician removes the intake manifold and charges 4 hours labor.
Thread Starter
|
Junior Member
Joined: Aug 2012
Posts: 17
Likes: 0
From: virginia beach
Test Point, so, were you able to fit the height of the box end wrench over the head of the bolts and between the intake? Just judging the gap with my fingers it feels like a very tight fit.
Veteran Member
Joined: Mar 2008
Posts: 5,390
Likes: 1,116
From: Ellijay
There is not much to take pictures of. You just have to remove stuff that is in the way.
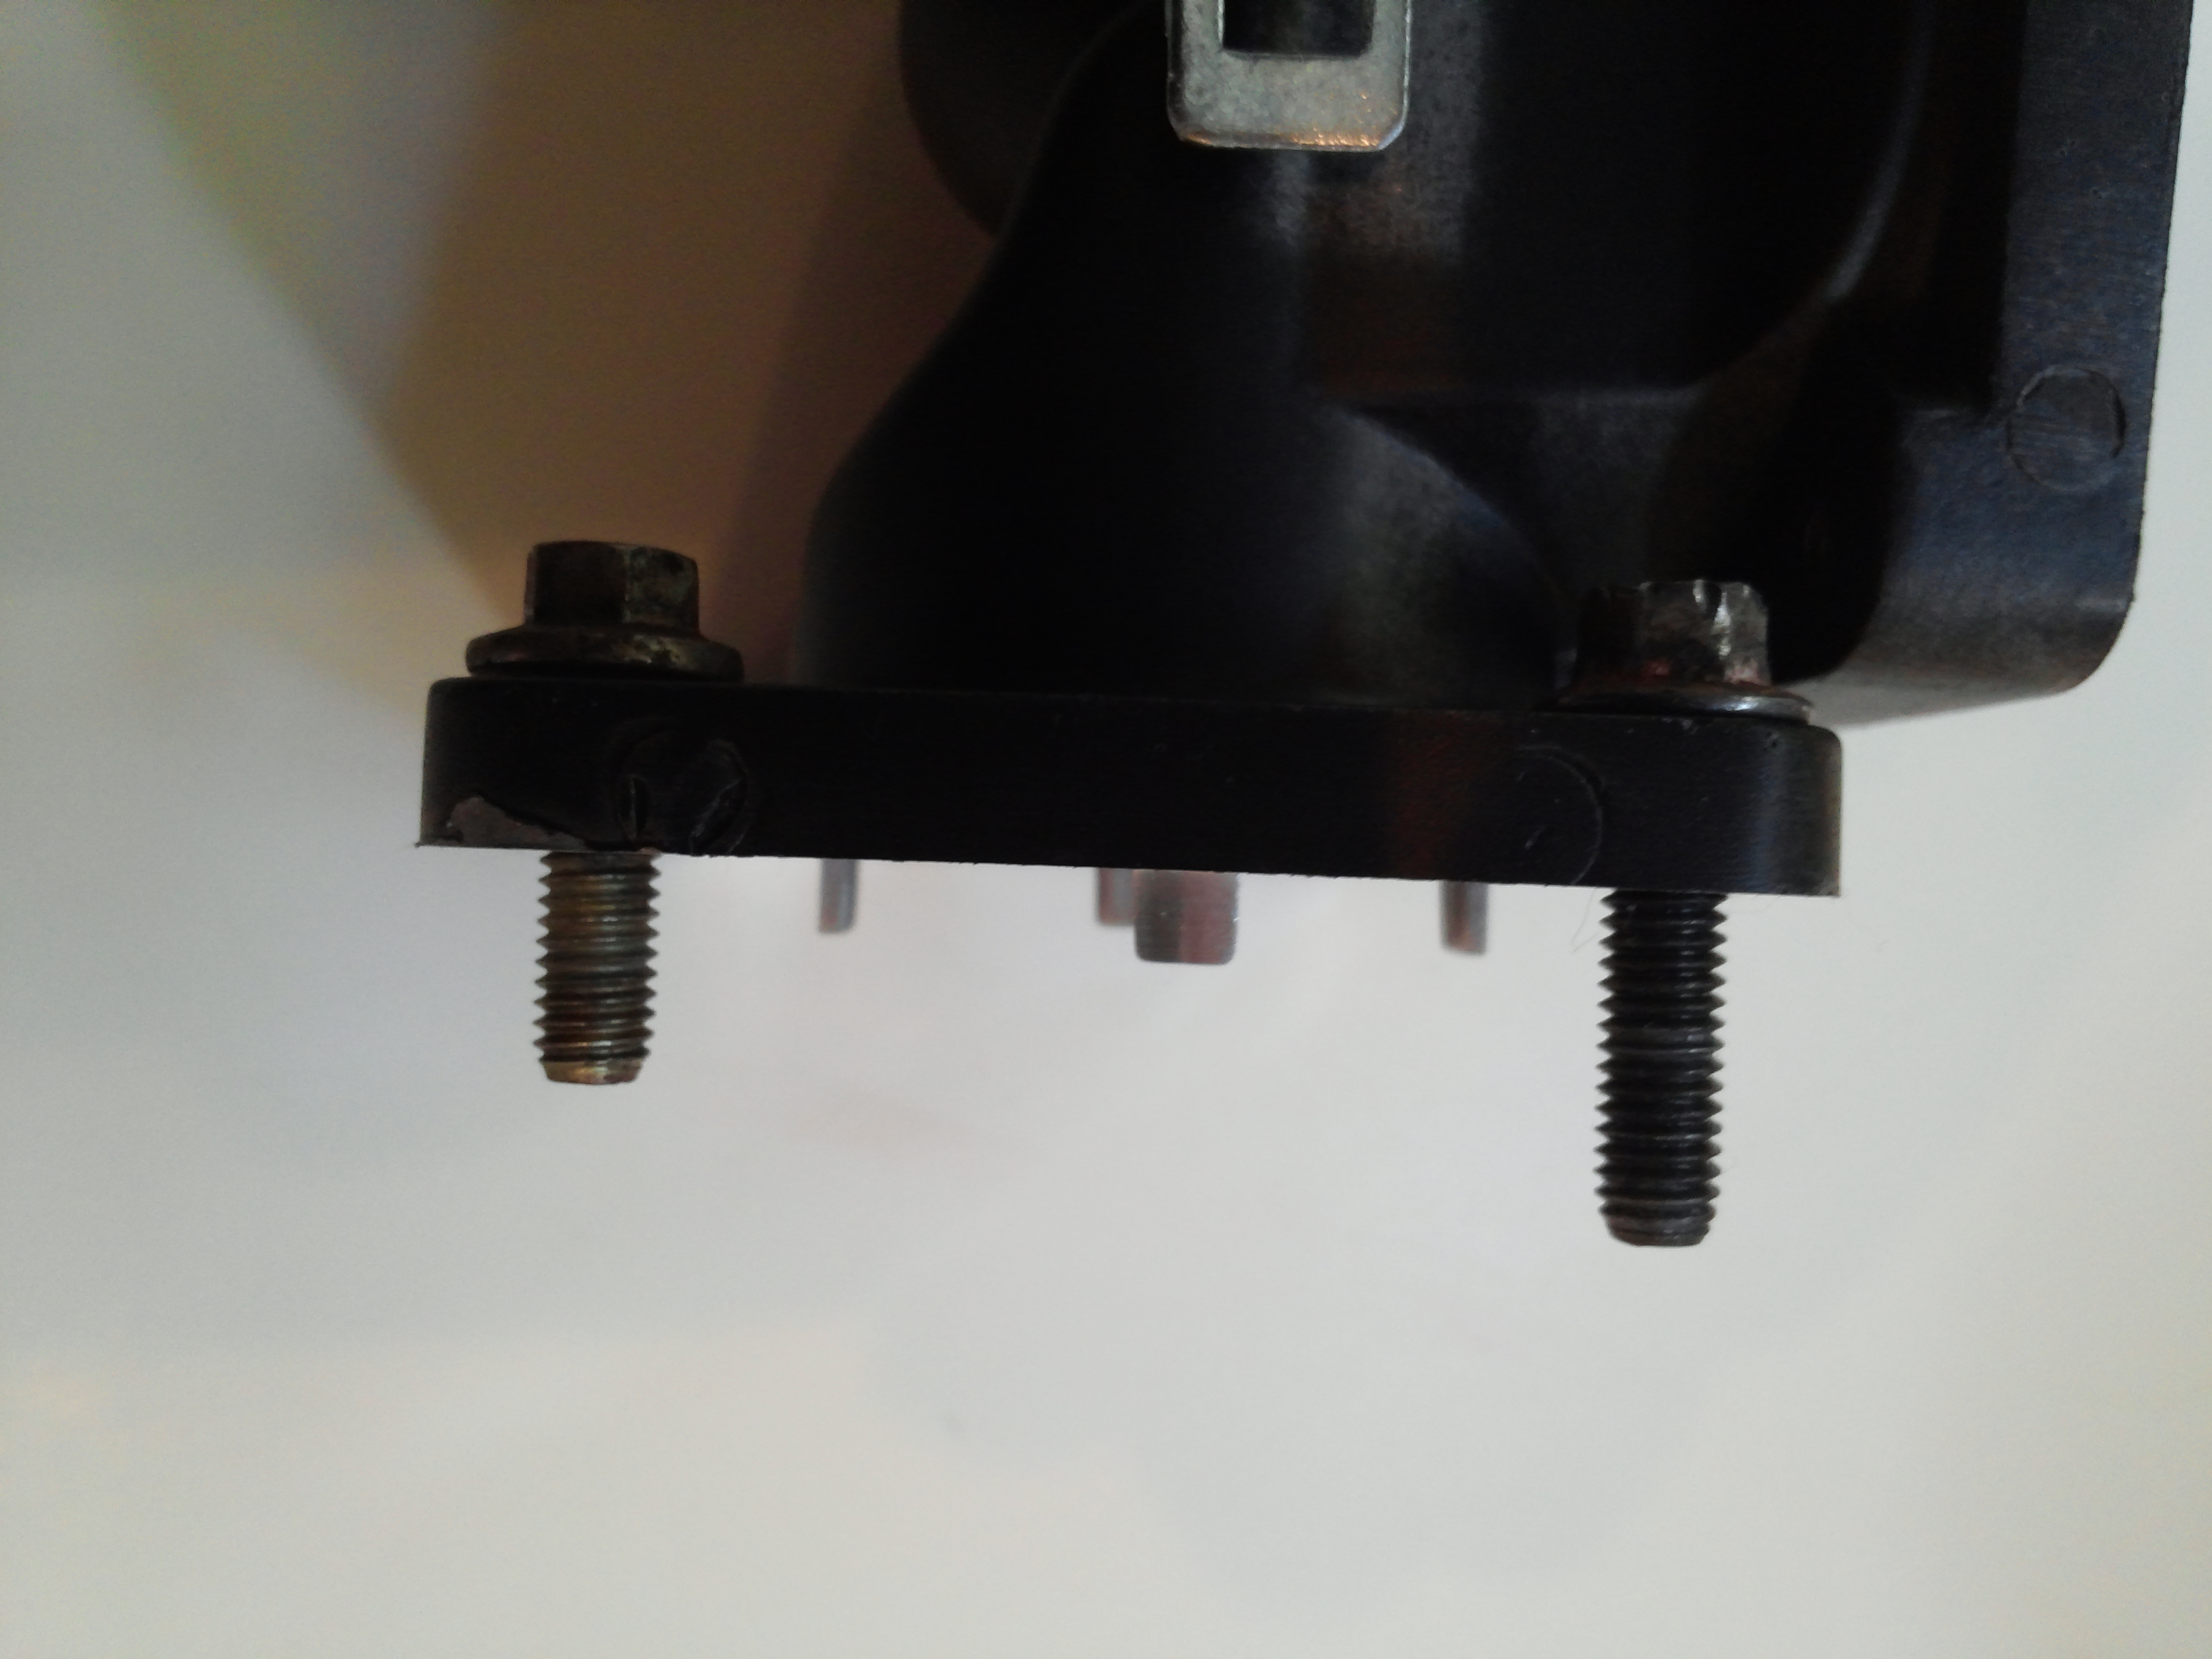
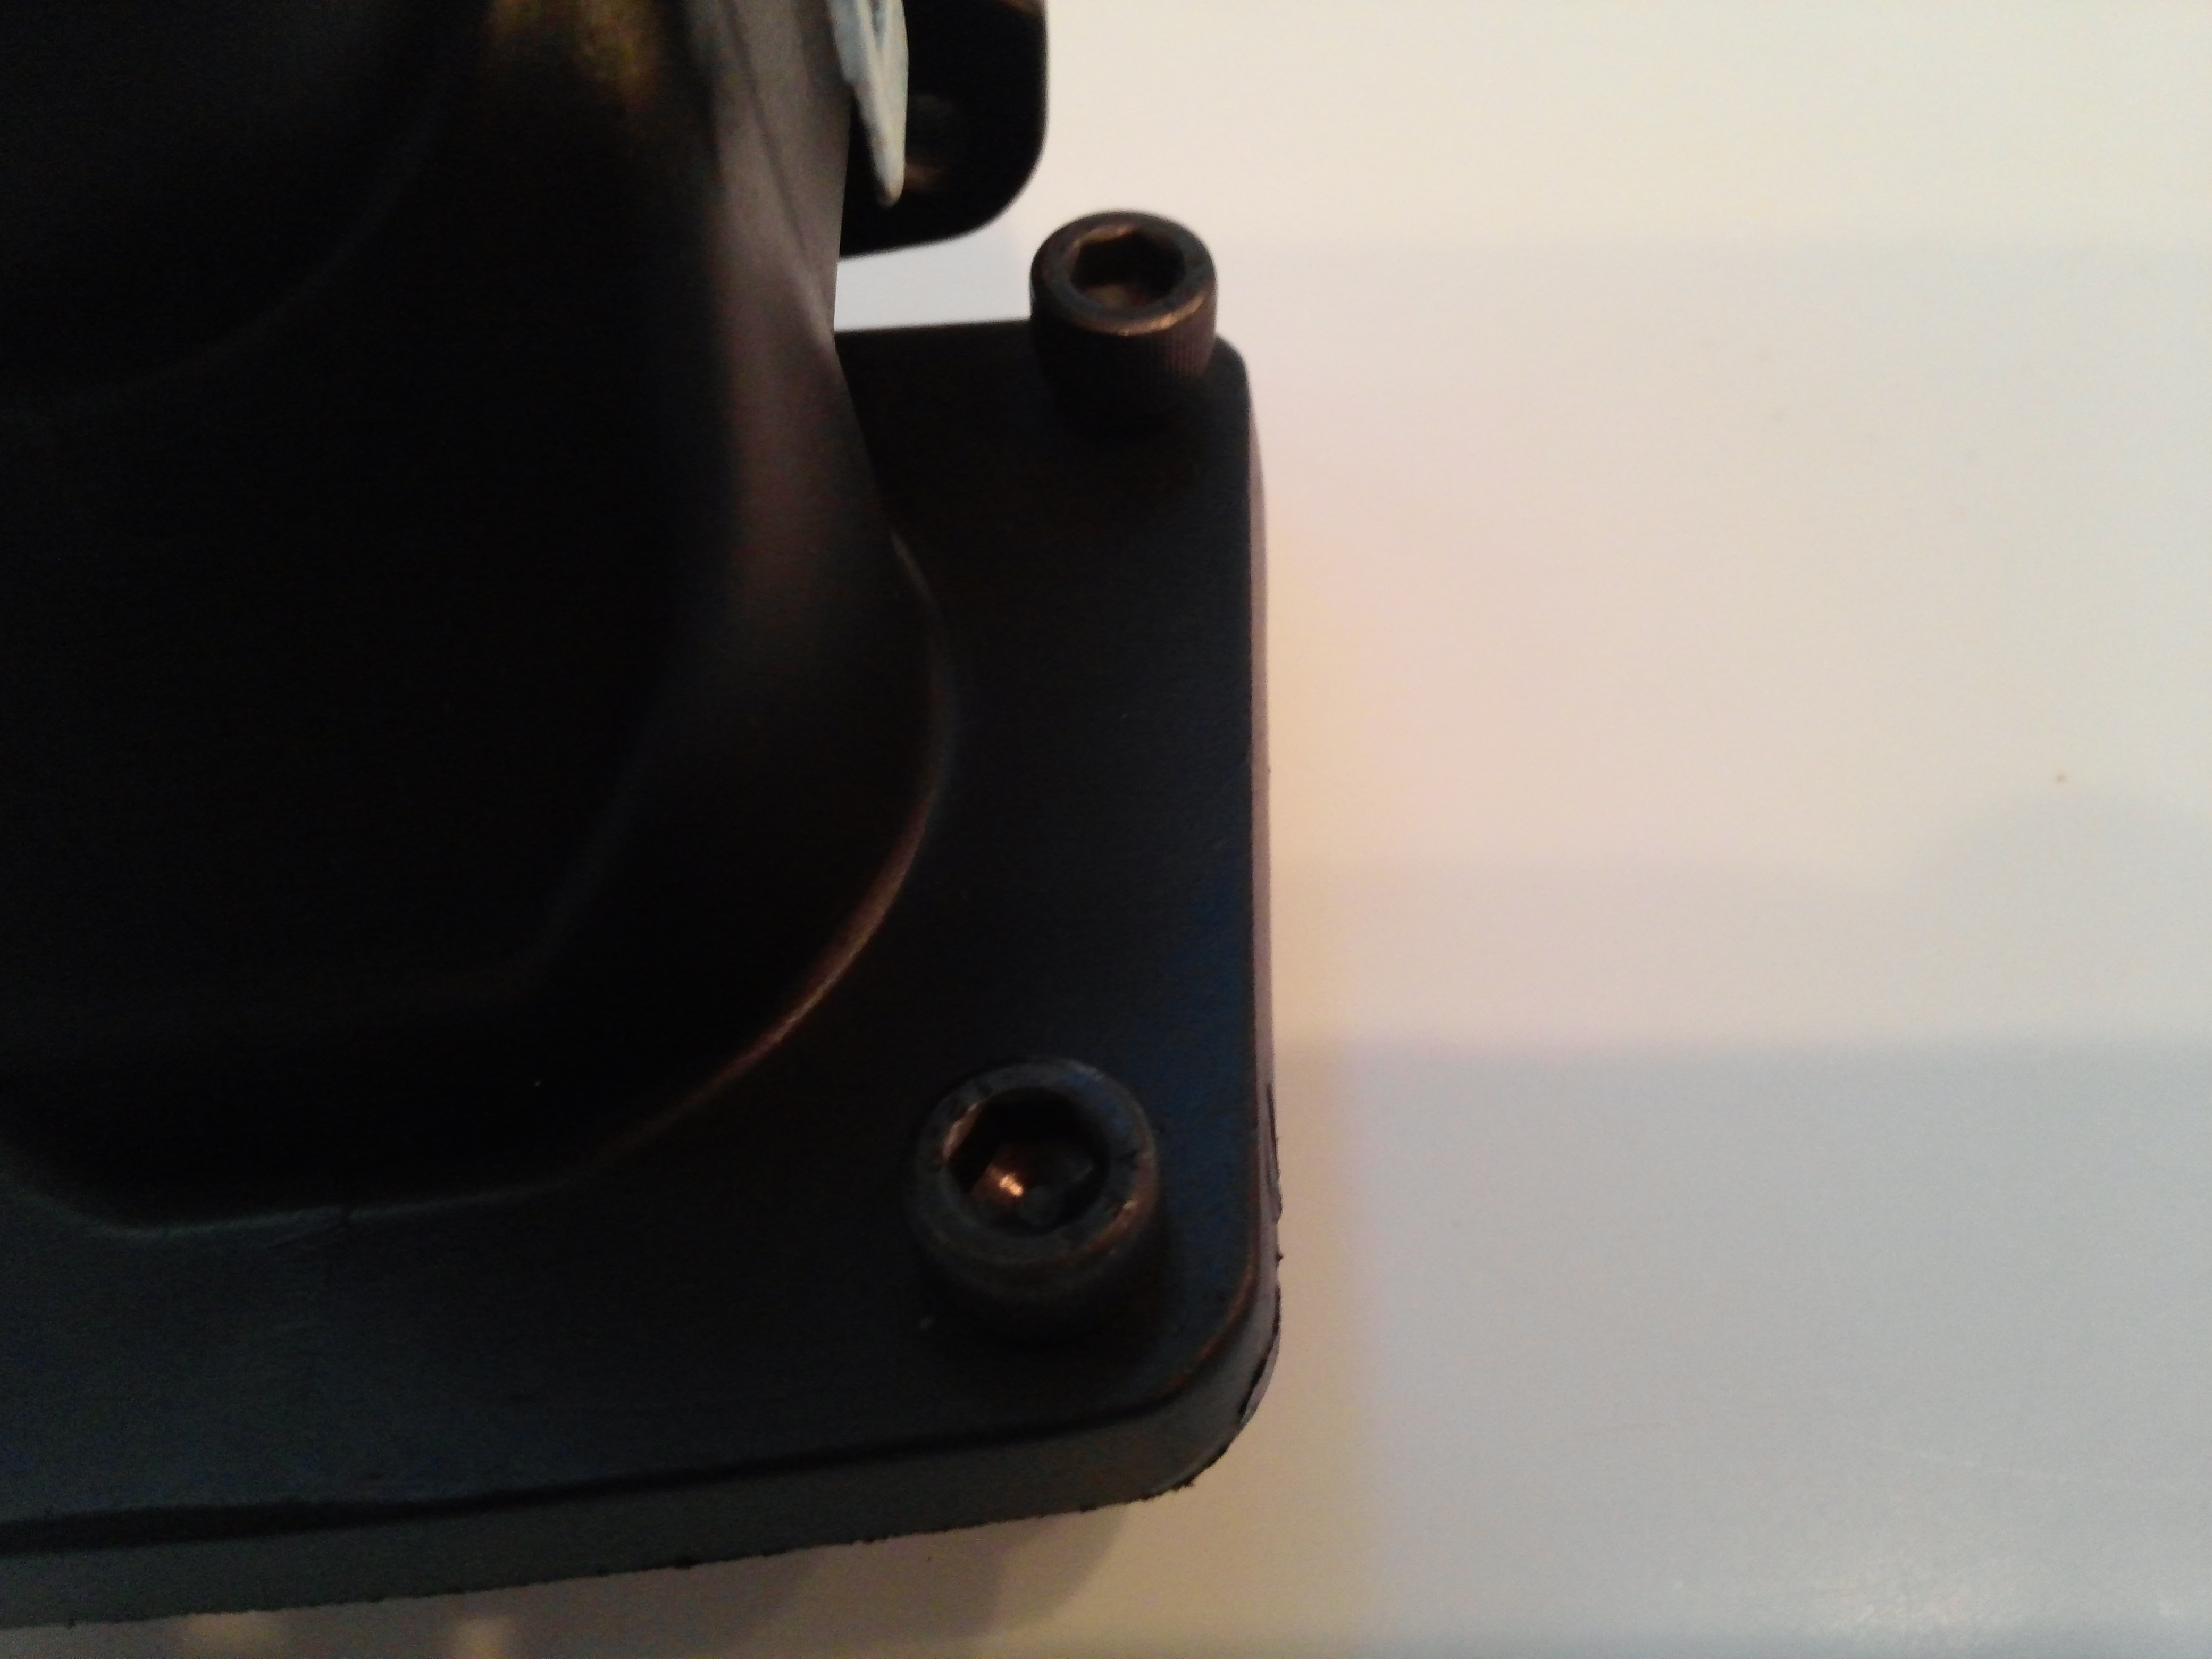
20141003_204440.jpg?t=1412383764
The easiest way to remove the electrical connectors on each side of the tower is to just cut the plastic rivets with a screwdriver and a tap of a hammer. The old housing is going into the trash anyway.
20141003_204458.jpg?t=1412297437
A pair of l o n g nose pliers is about the easiest way to work the rear bolts out. The first time I did this I used a Dremel to cut screwdriver slots in the bolt heads to put it back together but this time I think I am going to go for the Allen bolts.
I used the box end wrench to break them loose then an open end 8mm to move it then the long nose pliers.
Last edited by test point; Oct 3, 2014 at 08:06 PM.
Veteran Member
Joined: Mar 2008
Posts: 5,390
Likes: 1,116
From: Ellijay
Here is a great pictoral of removing the thermo housing.
JagRepair.com - Jaguar Repair Information Resource
JagRepair.com - Jaguar Repair Information Resource
Thread Starter
|
Junior Member
Joined: Aug 2012
Posts: 17
Likes: 0
From: virginia beach
Test point. I want to thank you for a couple of things. First, the current project. Question though if you use cap head bolts then you intend to dremel out the grooves in the intake to accommodate a T handled allen wrench with beveled head?
Secondly, I have had the valve covers changed by a mechanic a little over a year ago and I asked him to check the secondary timing chain tensioners and he indicated they were good but, it appears to me that they can not be adequately checked with pulling those things out to get a proper inspection for cracking etc would you agree? The thanks comes in, in that I've been reading some posts by you from 2012 concerning the valve cover gasket replacement and the dip stick tube lol.
Regarding the tensioners, particularly the primaries, if you replace the secondaries and the primaries are still made of that same material doesn't it follow that one should remove the timing chain front cover and do those also. I know a lot more is involved with cam locking tools etc. I'm not certain that I've heard as much about primary tensioner failure as the secondaries??
Thanks again to all. I'm looking at the Tower replacement from jagrepair Test Point and it's great. My only problem is I'm outside lol. 5 bedroom house I bought so all kids had their own bedrooms and I traded having a garage for a dagblum pool lol. Plenty of sheds just no garage 5 vehicles, every tool u could want and no garage. Somebody please tell me what I was thinking.
Veteran Member
Joined: Mar 2008
Posts: 5,390
Likes: 1,116
From: Ellijay
. . . it appears to me that they can not be adequately checked with pulling those things out to get a proper inspection for cracking etc would you agree?
. . . doesn't it follow that one should remove the timing chain front cover and do those also. I'm not certain that I've heard as much about primary tensioner failure as the secondaries??
. . . no garage 5 vehicles, every tool u could want and no garage. Somebody please tell me what I was thinking.
Last edited by test point; Oct 4, 2014 at 06:00 AM.

Veteran Member
Joined: Nov 2007
Posts: 4,502
Likes: 1,068
From: atlanta ga
By far, the easiest way to remove the rear bolts is to break away the old plastic riser with a pair of pliers, then just use a socket wrench to get them out. Then replace the bolts with socket head cap screws using a ball end wrench to tighten them.
Veteran Member


Joined: Apr 2013
Posts: 3,791
Likes: 1,070
From: Virginia beach va
I agree. You're going to throw away the old thermostat tower. Just break it off with waterpump pliers and the rear bolts are easy to remove. I spent a fortune on 8mm and 5/16 wrenches, nothing fits. I cut a slot in the back bolts which allowed a long thin bladed screwdriver to tighten it down sufficiently to squeeze the seal. Hasn't leaked, yet. Depending on which brand you bought, you might have to clean up the top of the tower: some of the brands are rough and don't seal well.
Be real careful of those thin plastic radiator hoses. They break really easily.checkered flag has them in stock: their mechanics routinely break them during oil changes. My car has had at least four in the last 18 months: the original, which I broke and replaced and two with different price tags after getting routine work done at the dealer. I routinely remove the one going to the radiator before doing any work. If you are also changing the water pump, the AC Delco doesn't leak.
You need to pull a cam cover to see which generation of tensioner you have. Easy job if you just do the secondaries: Did it in my driveway using the tie method. Lots of instructions and threads. robert DIY has a youtube on issues with removing the left cover's interfering dipstick. Lot of good gouge: most importantly, after checking cam timingwith a straight edge, turn the motor so that the least tension is on any of the cams, then tie the cam off. This keeps the camshaft from breaking when you torque it back down.

Senior Member
Joined: Sep 2013
Posts: 551
Likes: 49
From: Idaho
Use dremel to remove the old plastic housing. Cap screws to replace. Easy
Veteran Member
Joined: Mar 2008
Posts: 5,390
Likes: 1,116
From: Ellijay
Here is why many replace the tower rear bolts with the shorter bolts found on the thermostat housing:
I found the shorter size Allen slotted cap bolts at ACE hardware. Because of the significantly smaller head from the original 8mm bolts I added washers.

I found the shorter size Allen slotted cap bolts at ACE hardware. Because of the significantly smaller head from the original 8mm bolts I added washers.

Veteran Member
Joined: Mar 2008
Posts: 5,390
Likes: 1,116
From: Ellijay
I had used a pressure tester on the system and found only the plastic pipe leaking but ordered and installed the thermo housing because everything was going to be off. Sure enough the plastic was in pretty bad shape.
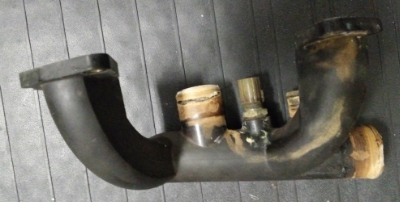
All better . . .
By the way . . . SNG Barrett has the housing kit without the thermostat on sale for $39.99 with free shipping.
Jaguar XJ8 XK8 uprated Aluminum Thermostat Housing Kit AJ82217 | eBay

All better . . .

By the way . . . SNG Barrett has the housing kit without the thermostat on sale for $39.99 with free shipping.
Jaguar XJ8 XK8 uprated Aluminum Thermostat Housing Kit AJ82217 | eBay