When you click on links to various merchants on this site and make a purchase, this can result in this site earning a commission. Affiliate programs and affiliations include, but are not limited to, the eBay Partner Network.
i am going to use this thread as a possible "how to" on a supercharger rebuild and repairing the coolant hoses underneath the supercharger. with tons of pictures for each step!
ill post as i go along....hopefully this will benefit present and future members!
ill post as my progress (day by day) goes on...and ill ask questions here...once we finish this task i will mark the post #s as i update. that way when someone new reads this thread can jump to posts:
Day 1 - Post #1
Last edited by Gopi Hira; Apr 1, 2016 at 12:48 AM.
Step 1:Remove Hood for easier access to the engine.
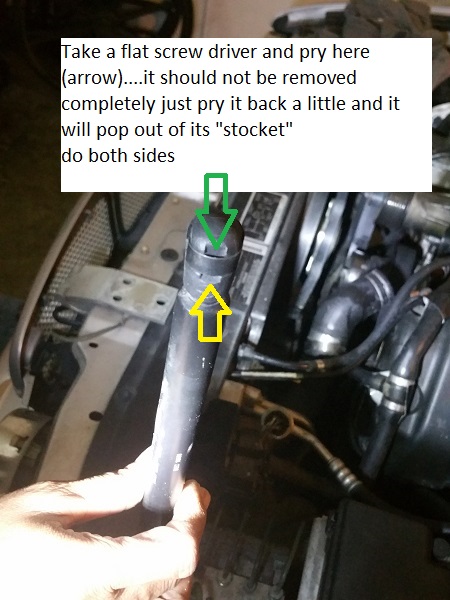
Remove the hood shocks like so:
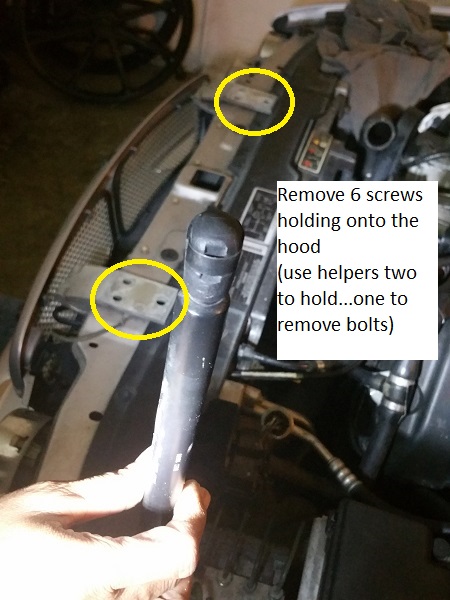
Then Remove Hood Bolts:
Step 2: Drain coolant from the radiator. (No pictures sorry; forgot to take some)
*1) since its supercharged remove the breather located next to the "V8" logo on supercharger (Large nut looking thing) (will post pictures of this later with the tool used; as soon as im done posting this)
*2) on the bottom of the radiator (driver side US car) you will see a bleed screw. mine was made out of plastic with a fin sticking out. DO NOT USE THE FIN TO TURN! it will most likely break...do this instead...take a pair of pliers that expand at the jaw..grab from the base of the plastic screw and turn from the base. (direction to turn is * imagine you sitting in the drivers seat* turn counter-clockwise) and drain all coolant
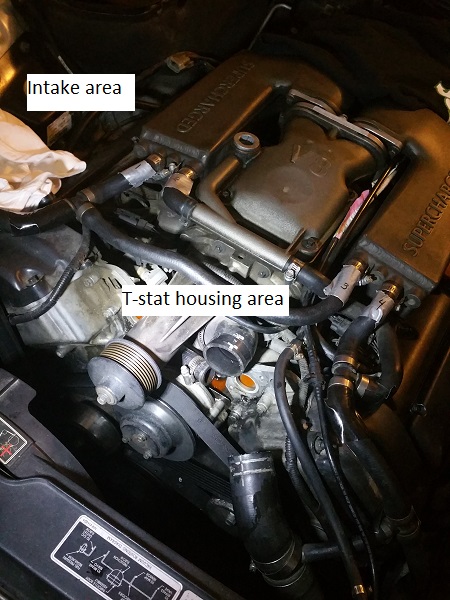
Step 3:Remove Intake Manifold
*1) remove filter and release levers that hold the box and filter
*2) Remove MAF sensor wire and Valve breather like so:
*3)
bottom screw mount broke on mine; i will fix that later.
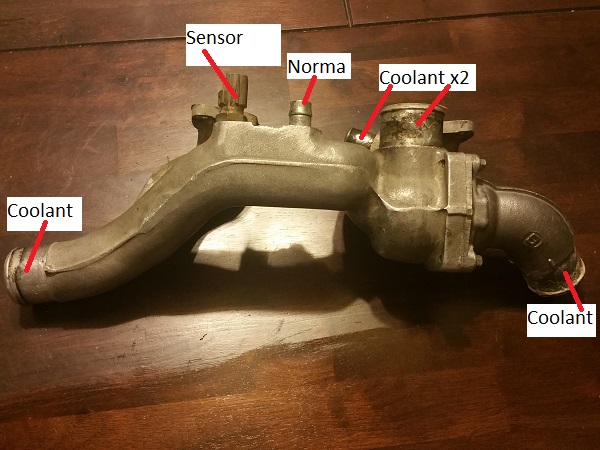
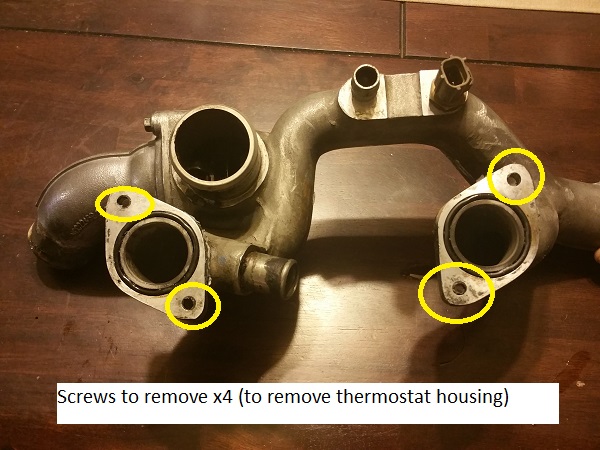
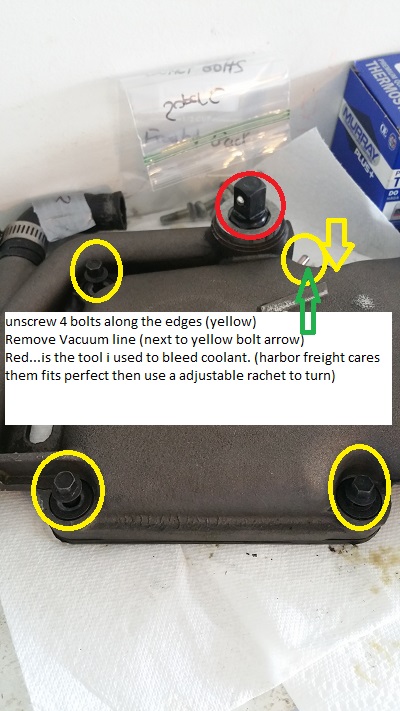
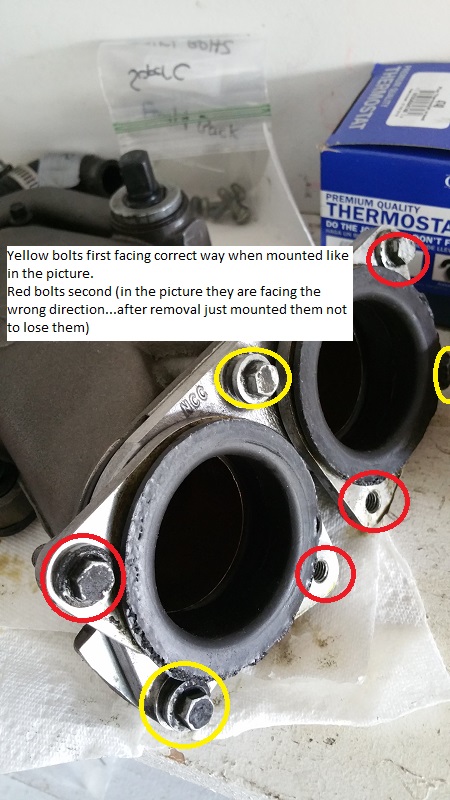
Step 4: Remove Thermostat Housing
*1)
the second smaller coolant connection is hard to see. so do not forget it!
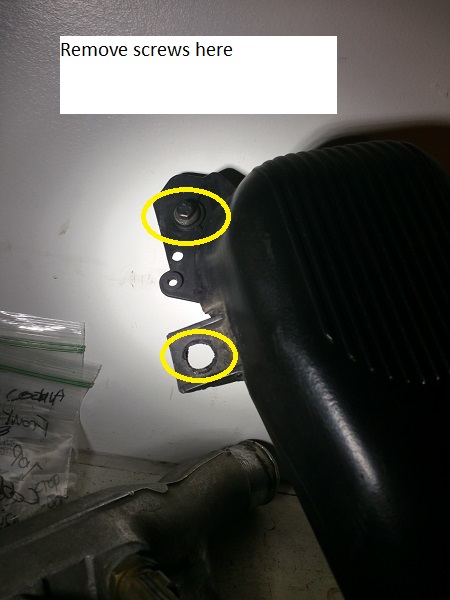
*2) remove these screws (Pictured from behind)
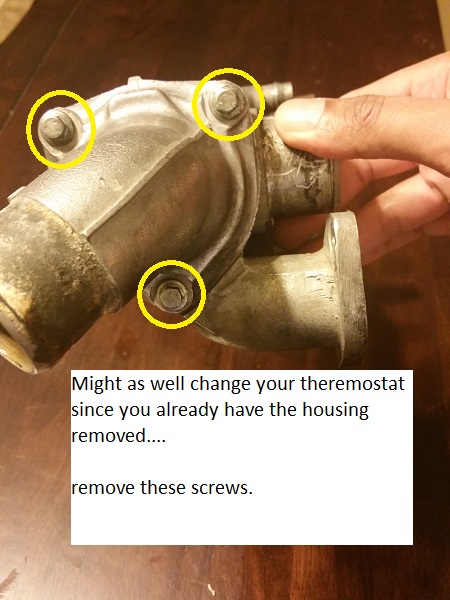
*3) optional since you have the housing removed; replace your thermostat like so:
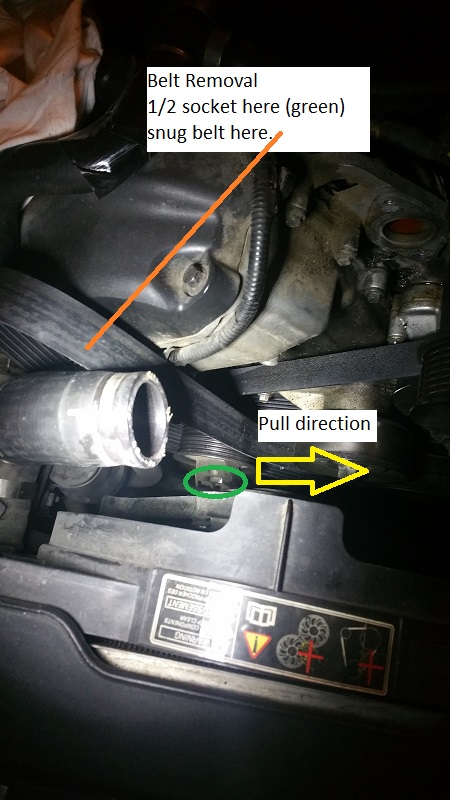
Step 5: Remove Belt
*1) use a 1/2 expandable ratchet; insert the ratchet head into a slot onto the belt tensioner. pull the ratchet towards the driver side. this will loosen the belt slightly. remove it just from the just the top supercharger pulley and set it aside towards the coolant pipe on the passenger. the coolant pipe will hold the belt in place while still connected on the bottom half while freeing the top.
End of Day 1:
Last edited by Gopi Hira; Apr 1, 2016 at 01:09 AM.
Do a search of the multiple threads on removing the supercharger. there is excellent advise on slotting the rear bolt hole of the supercharger for easier re-assembly. I highly recommend this.
+1 rocklandjag...especially do a search for "leak under supercharger" or similar. But it still doesn't hurt to have a little more info...searches don't always bring up the older threads.
I removed my hood by taking out the grill and unbolting it under the radiator support and a piece of 2x4 on the S/C. Reason being, so I didn't have to fight holding up the hood to put the bolts back in. Plus I had it ready to come off when my friend showed and he only needed to help pull it off. I did loosen one side of the hood side hinge to allow bringing out the hinges from the inset. When it came to for reinstall, same 2x4, set it down on it and slid it back in with minimal adjustment.
Those screws hold your valve cover on and retain the wire loom running under your cooler. That is a nut on top of a bolt to hold the loom. The bolts for the cooler are underside of it in the valley.
If you didn't get the connector, you push in on those tabs at 3 and 9 and pull or wiggle it apart. The 12 and 6 ones are decoys...lol
Last edited by Highhorse; Apr 3, 2016 at 04:03 PM.
First step i took was to remove the supercharger outlet..
*1)Removed the 4 coolant hoses on top (two for each cooler).
*2)Removed the center supercharger outlet... pictures.
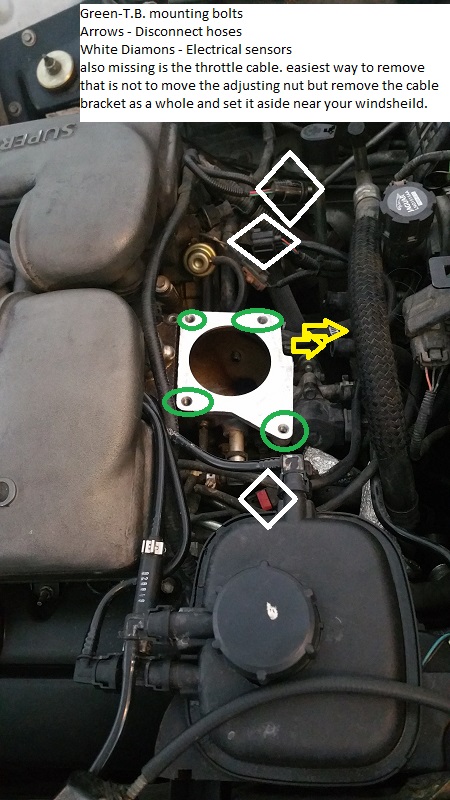
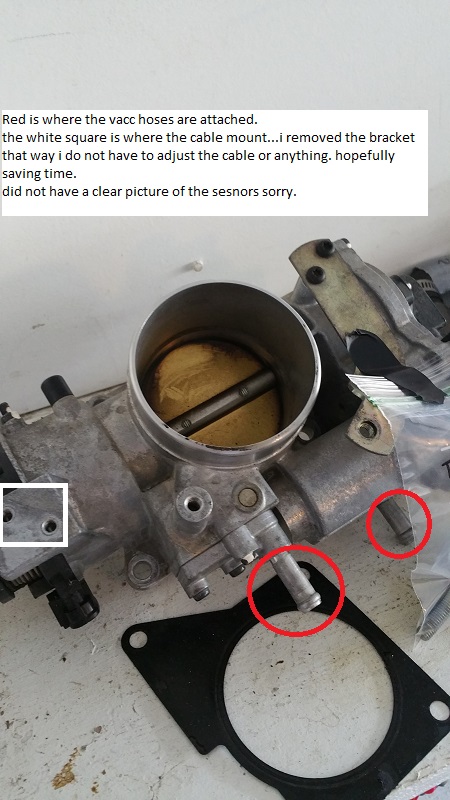
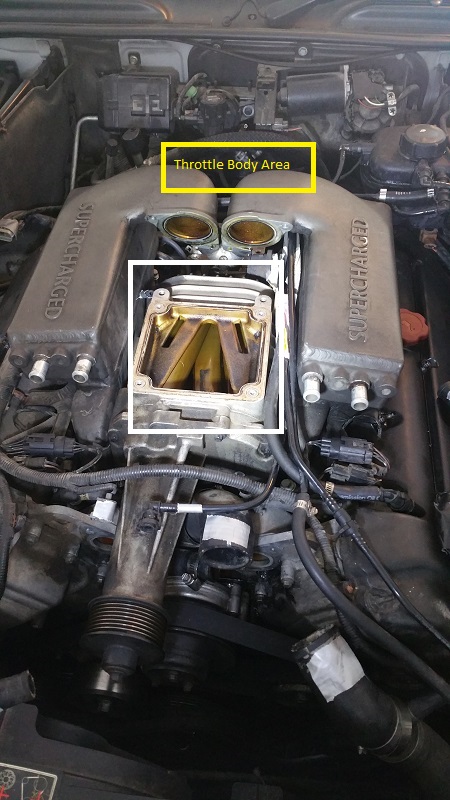
Second was to remove the Throttle body
*1)Battery should be disconnected;checked
*2) Removed electrical connections (both sides)
*3) Removed two coolant? hoses on the rear of the throttle body
*4) Removed petal cable...easiest way...do not move the adjuster..simply remove the bracket with a T30 screw (two of them) and once there is slack...remove the cable end from the throttle body..and position it out of the way.
*5)Removed 4 bolts that mount the throttle body. a slim black gasket should fall out as well.
End of day Two:
i have done more; but not sure if i am proceeding correctly...below will explain!
while i was in middle of my tear down once i removed the center outlet...there was this oily residue, its not coolant i believe. here is a picture...three combined to show you...
Oily residue...is it supercharger oil? and is it normal to look like this on the inside...oil everywhere including the coolers?
That's pretty normal. You can thank the part load breather on the bank 2 valve cover for transferring oil into the intake of your supercharger. I took out my part load breather and put a catch can in it's place to remedy that situation.
That's pretty normal. You can thank the part load breather on the bank 2 valve cover for transferring oil into the intake of your supercharger. I took out my part load breather and put a catch can in it's place to remedy that situation.
good to know...will do the same once i get her up and running! appreciate it
*BUMP* on message #12 please....how do i remove the coolers? or should i remove the EGR valve first? also are the coolers attached with the supercharger body or is it a separate unit..thank you...will continue on Thursday!
Pull the EGR out, you'll need all the extra room you can get. After that, pull the throttle body elbow off along with the 'V' like thing that connects the back of the intercoolers. (Can't remember the name at the moment). Then you can get the intercoolers off with a T30 Torx.
*1) disconnected EGR electrical connector from drivers side (US).
*2) removed hoses attached to EGR
*3) Removed bolts from Exhaust (pipe that leads to the EGR valve)
*4) removed EGR bolts that attach to the Elbow.
*5) unable to remove egr from engine bay although disconnected ...wires and hoses kept getting tangled.
I'll try to explain- It's the same connector as the part load breather, full load breather and thin cooling lines. If you press the top and bottom (as you are looking at it now) the sides (left and right as you are looking at it now) will release. I usually have to pry the left and right a little to get it to release as well.