When you click on links to various merchants on this site and make a purchase, this can result in this site earning a commission. Affiliate programs and affiliations include, but are not limited to, the eBay Partner Network.
Any tips on removing the interior pillar plastic trim between the front & rear passenger doors. I have to replace a seat belt component(in pic). I have a quality trim removal kit on hand etc.
I plan on doing the driver's door cable tomorrow so why I'm in the removing interior panel mode I may as well tackle this.
Thanks in advance !
Super simple...
Remove the seatbelt from the pillar first. Under that plastic cover is a bolt you can remove.
Once that's done, you're going to need to pull the trim piece itself. It's held by a pair of clips a bit below where the seatbelt is. You kinda "squeeze" it inward from the sides, and tug it right out. It takes a bit of force because the clips are spring-metal.
If I remember correctly there's also a couple tree-style trim holders at the very bottom. Depending on what you're doing, you might be able to leave those in place. You can tilt the entire piece from the top, popping the two clips in the center as described above, and leave the bottom clips installed (assuming you don't need to remove the entire thing). If you need to remove the entire thing, you'll probably need some new tree-style clips for the bottom to get it all tightened back up on re-assembly. Ripping them out usually ruins them.
The center clips are just little metal V-shaped clips, so they should have no problems with removal or re-installation.
The plastic surround for the seat belt hole is very fragile. If you're not careful during this operation you'll crack it. That piece of plastic that slides up and down inside is usually pretty brittle at this point too (you can see it's already broken in your photo). Be careful for that too.
Oh, and if you decide to un-bolt the piece underneath that holds the seatbelt to the pillar, be aware that there are washers -behind- the metal piece you're removing, and they'll fall upon removal of the bolts. Make sure you put something under it against the pillar to catch the washers or you'll be fishing for them in the nooks and crannies exposed below...
Last edited by xjrmageddon; Nov 29, 2017 at 05:55 PM.
Hopefully this will be of help but I doubt you�ll like what I�m going to say haha. I spent two hours in a junkyard attempting to get a seatbelt rewind mechanism and that trim piece decided to be difficult. It had been removed on the other side of the car so I knew where the clips were but for the life of me I could not coerce those stubborn thingy I come loose, I tried screwdrivers, knives, I even attempted to use a chrome trim piece to free them, with no avail. Out of rage, between swearing, I grabbed that thing on both sides and gave a huge pull and it came of (sending me tumbling through a particularly uncomfortable half-disassembled interior), however it was no worse for wear, clips and even the plastic sliding thing that goes with the seatbelt adjuster all remained intact. So from personal experience they seem to be able to take a little bit of a tug if you can�t find a more elegant way to free it from the pillar.
Removing is not hard just need to be patient. I've destroyed one or two before in a fit of rage like mentioned.
As noted, remove seat belt anchor on top (17mm) and gently pry out. they slider and top parts of belt are waiting to crumble on you as everyone I've messed with was brittle.Lower seat and get as far out of way and take your time.
Yeah my slider's already broken hence why I am going in.
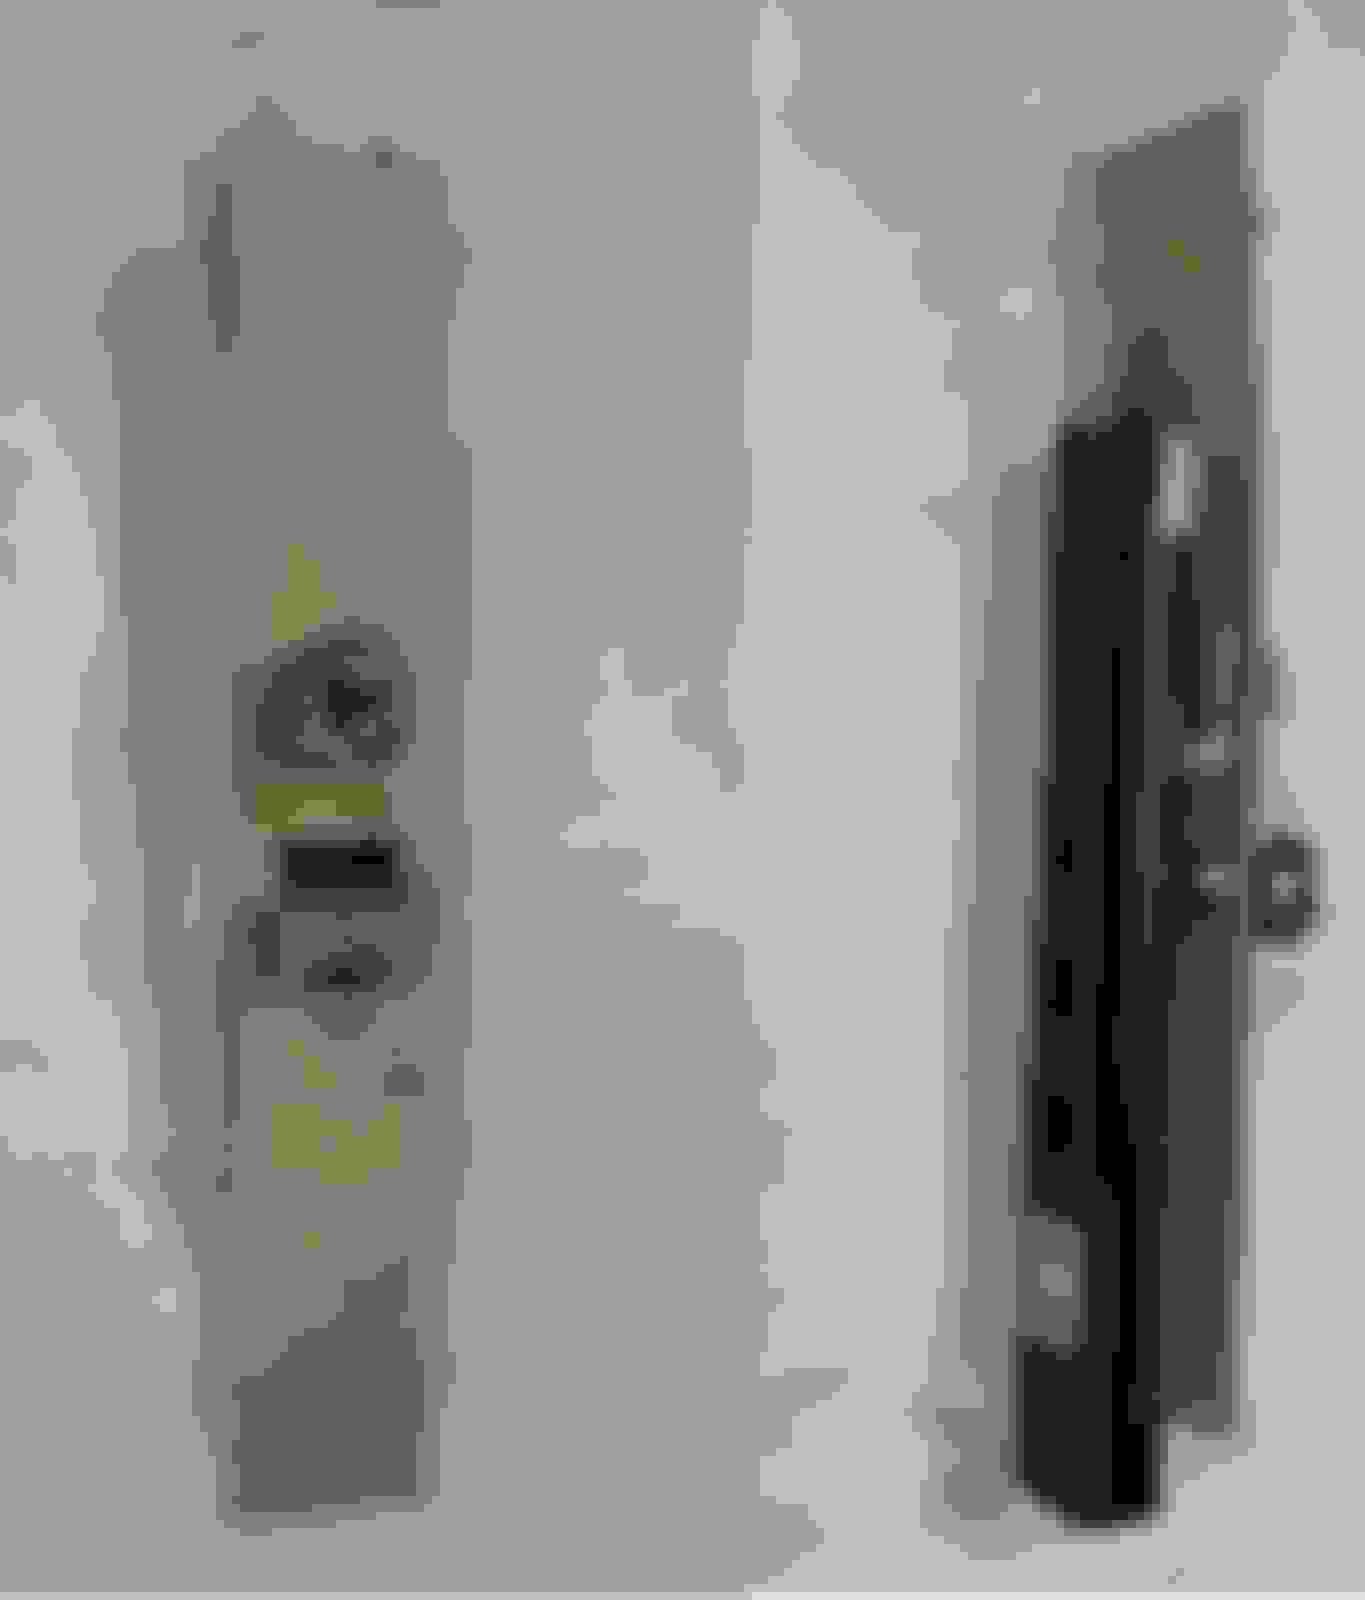
Ok the broken piece in my 1st pic slides into a track on the pillar trim. But here's the problem this replacement piece in my pic below will not fit into the allotted space unless it's turned sideways which can't be done while it's in the pillar track. How does the rectangle piece detach & reconnect as there no way of installing the piece without doing it. May I add all this is being done w/ brittle plastic lol ?!
Jaguar the art of over engineering .
Edit :
Too late another slider trim piece bites the dust.This car's working it's way to the classifieds day by day lol.
I tried to install the trim over the slider then run it in pillar track, no dice yet another plastic casualty. Just about to give up on making this car 100% right lol. I've dealt w/ same era Lexus,Infiniti,Benz & so forth never seen as many over engineered non-essential parts.
Here's how the trim is installed on a track on the pillar.
It goes here, but even when removing the slider mechanism off the door chassis to slide into the slot sideways, then there is zero clearence to screw the torx bolts back into re-mount it.
Now I have to hunt down another SDZ slider trim piece not even sure where the latest one came from lol.
Also when I look @ the driver's side I see a hairline crack forming in the same spot as these 2 broken ones, oh the joy.
I think I'm going to make a copy w/ a 3-D printer in some form of more pliable polymer & see what happens.
Edit :
And see here's one used piece put together, now how would you go about re-installing as there is no clearance to put in the torx to the chassis & how would it slide into the pillar track?! If that rectangle piece doesn't remove, I'm not sure this piece isn't a "one use & done" type deal.
Ordered the complete piece off E-Bay even though I can't see anyway it can slide into the pillar track & be screwed back into the chassis as a whole.
Last edited by King Charles; Jun 5, 2018 at 09:12 PM.
Pretty please to be able to wrap up an old thread with a solution!!
I've just finished tackling the same situation. Unfortunately @King Charles you'll kick yourself (if you haven't since realised) once you see the below pictures:
As you can see, on the underside of the black plastic handle which was causing the issues, there is a white plastic spring clip. When pressed in this allows the handle to be removed.
I figured what your pics shows the hard way. Luckily it was on the tan interior of my LS swap car I was changing out for the black on parts car.