When you click on links to various merchants on this site and make a purchase, this can result in this site earning a commission. Affiliate programs and affiliations include, but are not limited to, the eBay Partner Network.
Got my stay today and couldn't wait to install it so I gave it a quick try. Thanks David - nicely packaged and instructions too!
One issue - the hinges collide with the plastic insert behind my bumper, so I can't get the full opening angle. Are you guys missing that insert or is there something unusual about my hinges? I'm thinking I need to take it that insert off and do some cutting.
Trying to think where there is a plastic insert and coming up blank. Can you post a photo? What series is your XJ6? My 79 and 87 didn't present any problems.
there is a black plastic cover-finisher behind the chromed top of the bumper.
it has rwo raised over-covers held in place by plastic pins. This is where the european headlamp wipers would be mounted. American cars have these covers because the headlamp wipers are not used here.
but neither the long plastic cover nor the two plastic over-covers interfere with the sheetmetal of the hood. The hinges are behind the sheetmetal, so I don't see how they would make contact with the plastic parts at the bumper.
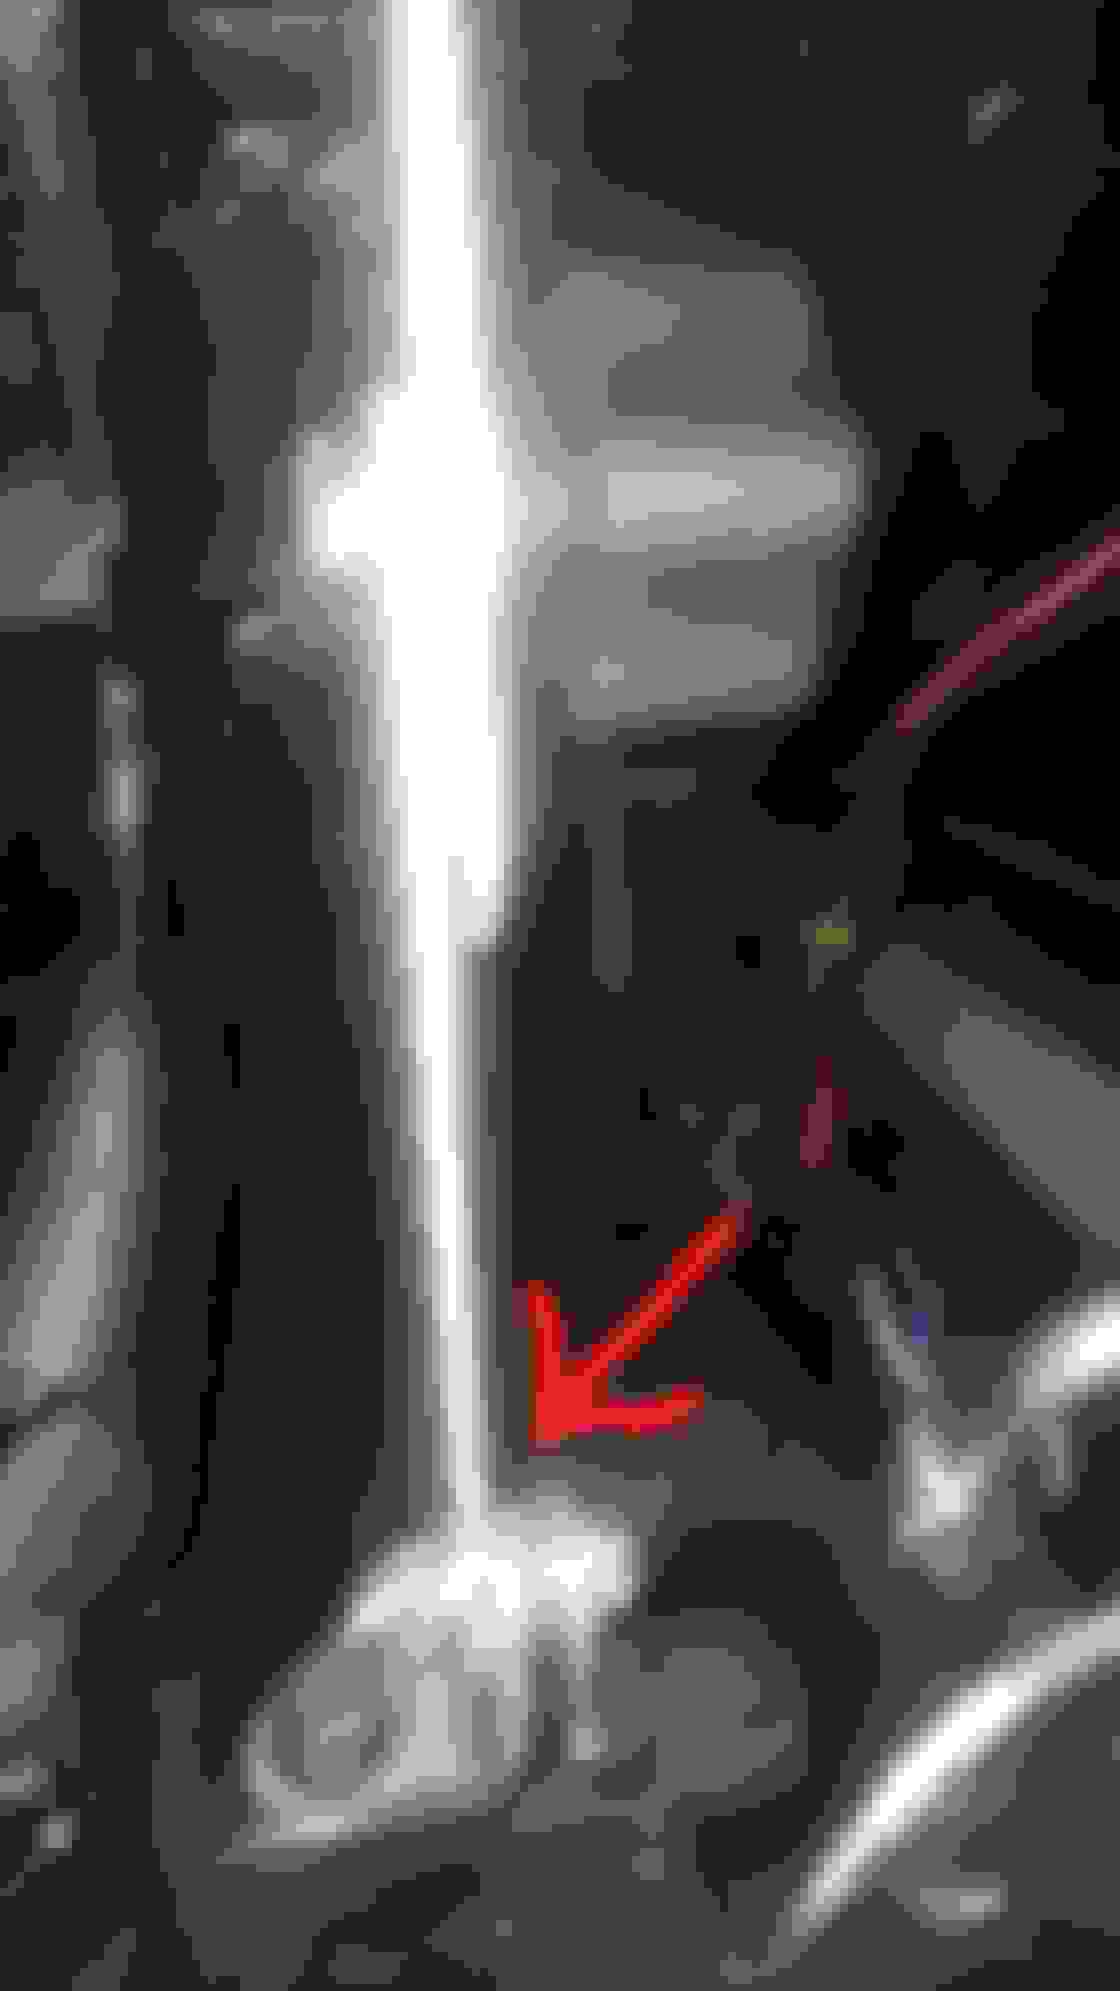
Djprofili, on mine with the hood open at the maximum with the new stay, my hood clears that plastic part by an inch (see photo below). As it swings up it is always about an inch away. My hood has been off more than once so maybe mine is aligned higher. Fully opened From above looking down Hood closed
All in International Price for New and Improved XJ6 Bonnet Stay $62.00 including shipping.
The factory hood stay design holds the hood open at 34" measured at the corner of the hood. This new design holds the hood open at 50" a 47% increase. ... Rgds David
It arrived Monday the 17th, David, I apologize for not telling you sooner,
Marvelously fast service.
(';')
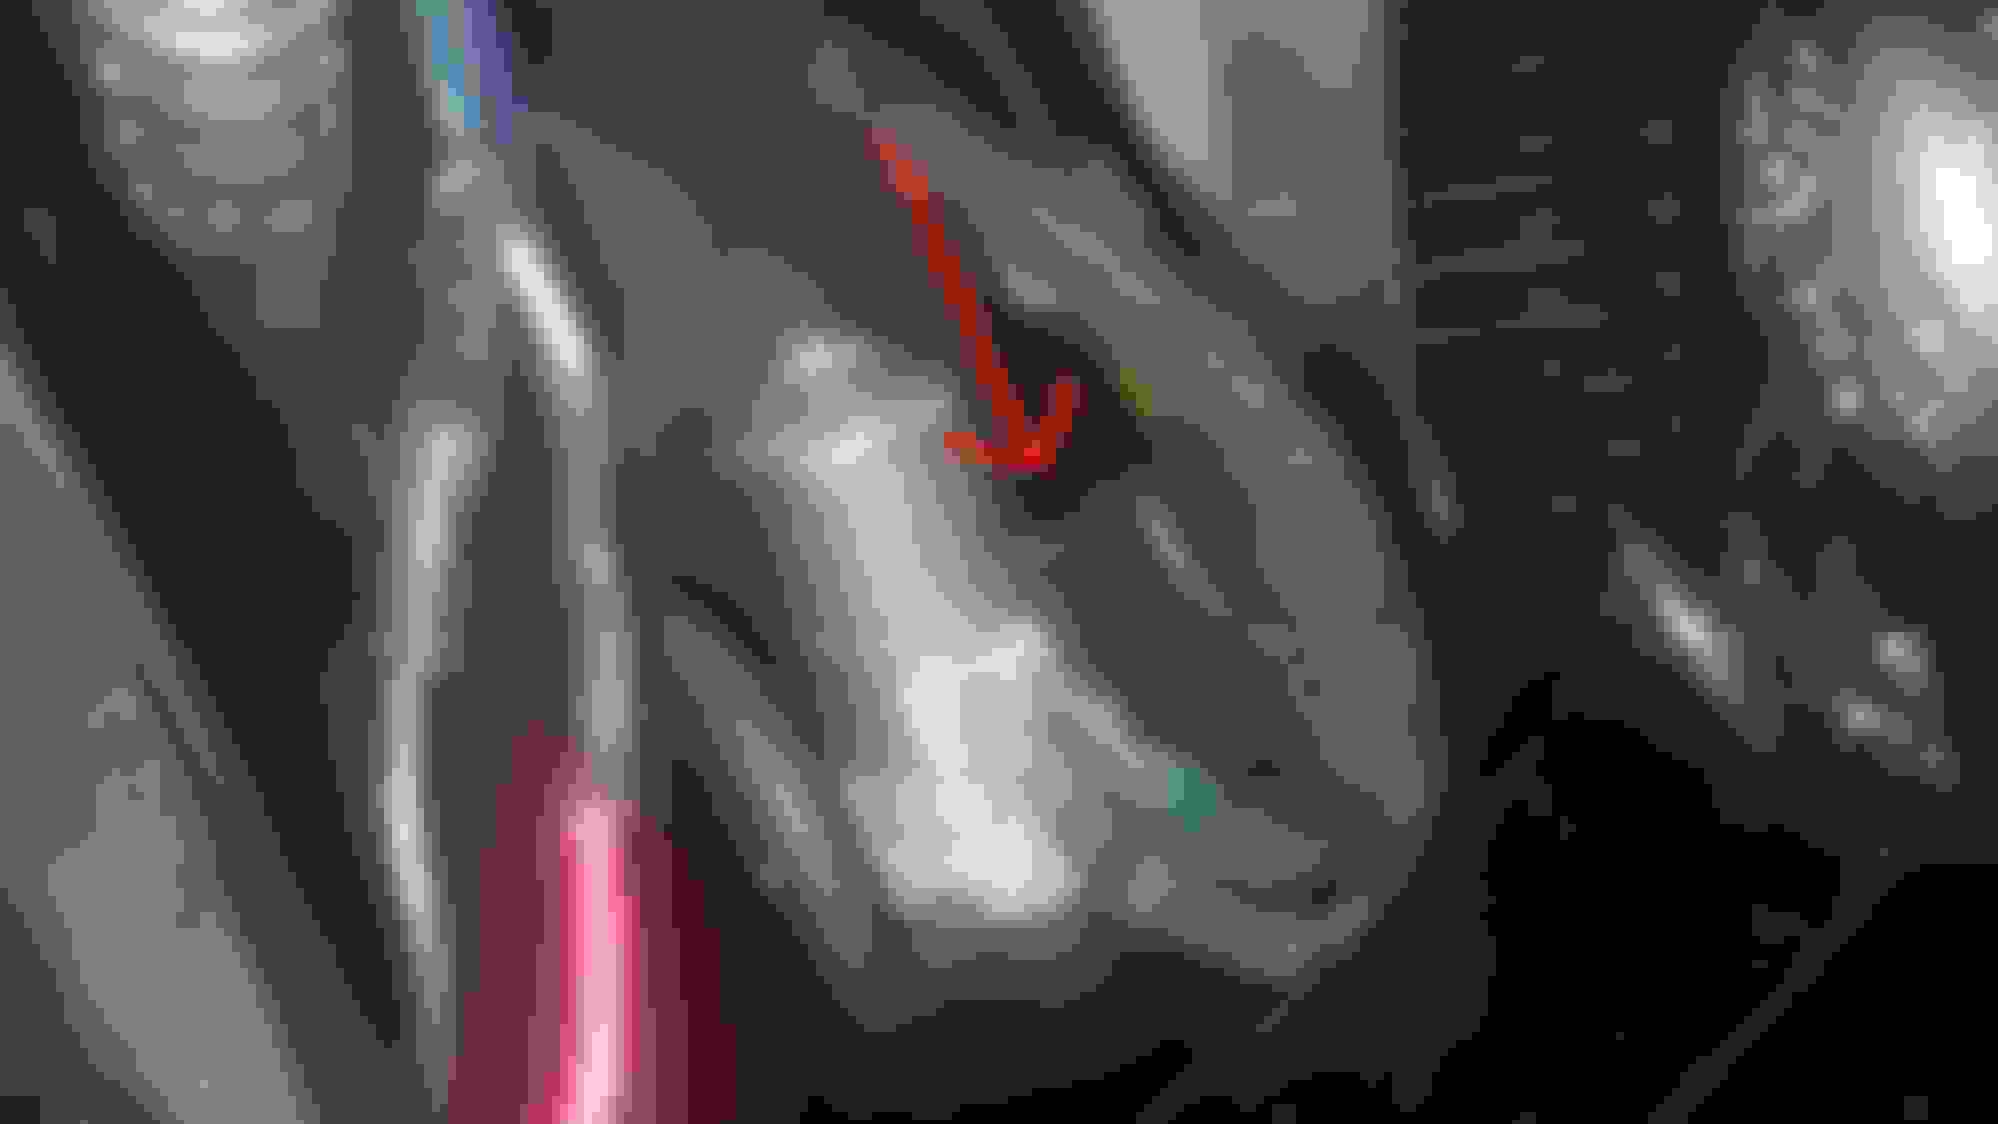
1. My bumper is not even side to side, as I checked after Phil's comments. On left side I needed a 5/16 x 1/4" notch in Plastic to accommodate hinge. Right side had 1/8'' clearance.
2. Inside was an unused angle fitting on the hinge that was bent inboard, I had to straighten to 90 degrees to miss stay.
3. Went from 35" to 50"+
Rgds
David
Cut notch in plastic for hinge arm Straightened to 90 degrees
I collapsed my bumper shocks and pushed my bumpers in about 3 inches. I have the OEM bonnet stay disconnected at this time and I can get the hood to open to 51 inches before the hinge touches the bumper. Based on the measurements of the "New and Improved Bonnet stay", when installed on my car, it is stated by Jeff that it will open to 50 inches.
This means that when installed I will still have an inch of clearance between the hood hinge and the bumper Collapsed bumper
David, in my car those brackets are also bent but I have no interference with them. In fact I don't know what those brackets are for.
I've always thought they were some kind of hanger for the factory to move them in the assembly line.
Did mine with the new stay and it works very well. It did take some fiddling with the configuration. In mine it didn't line up like in the instructuctions, but shifiting the brackets from on side to another did the trick and now it works as advertised.
I did same today on my installation: I have changed the forward link attach location on the to inboard of the forward bonnet bracket on the Assembly Drawing.
See attached PDF
Jeff and David - Great Job! Both of you. Packaging was outstanding; machinery outstanding. But... NOTHING takes 15 minutes with my Jaguar! All of it my fault of course. My driver's side inner headlight assembly had not been installed yet, so I had good access to see if anything was interfering with my new latch install. When the hood was off, I had installed an aftermarket windshield washer pump in the same place as the old one was. So the knob on the new latch interferes with the new washer pump. I had to remove it and reinstall it in another place next to the washer bottle. Then... the slotted bar and the solid bar were interfering with each other like a pair of scissors, so I had to add a 3/8" fiber spacer at the forward end. Then... because the two angle rear pieces on mine didn't touch each other they required 3 washer spacers between them. Then... I installed the inner head lamp assembly and the ground wire was too short with the longer hood opening, and had to be elongated. Am I happy with the install? YOU BETCHA! And yes, the black filler plastic behind the Euro front bumper I have was already notched, so at least I didn't have to do that. Maybe the PO did it before I bought it. I'm kinda thinking that once everything is all back together permanently, that I might see if it makes sense to take a round file and make a 1/2 round notch in the slotted piece for the Knob's bolt to drop into - to help keep it from slipping accidently??? Any ideas about that?
I guess if you have to lengthen the headlight ground wire to reach, the new stay is definitely doing the job. Yes, a nylon washer goes between the two pieces otherwise they are like a pair of scissors. Bill, your photos are brilliant; looks like the new hood stay glows with radiant energy.
. Then... because the two angle rear pieces on mine didn't touch each other they required 3 washer spacers between them. Then..
Bill
Thanks, nice write up on installation and work-arounds. The angle fittings have different length legs, with the longer leg attaching to Radiator frame, there should be a small gap (1/2 a washer). I was concerned with manufacturing tolerances, so left small gap to insure they fit. Also holes for radiator frame bolts are a few thousands bigger to allow wiggle room. I have been burned before with Jaguar tolerances.
Again thanks for the detail and pictures.
Rgds
David
Based on feed back from the installations, I have updated drawing and instruction sheets. You can download them for your files from the marketplace listing.
David - I saw in the excellent writeup that there were two longer legs and two shorter legs, and yes, indeed there are. I did install the two longer legs to the radiator support and still had all that gap in there on my car. No biggy, the spacer washers work just fine. I'm getting used to work arounds. Again, GREAT JOB!!
"Workarounds."
As a woman doing a man's job in a man's world, I don't even think about it when I have to modify accepted procedures or printed directions to get a job done. It's just part of what I do.
(';')