Gas tanks are designed with vapor head space. It clearly appears this is the extra room everyone is talking about, since the gauge is calibrated for it. The panel is probably a baffle.
The pump isn't getting shut off from a splash, the sensor is a vapor sensor. You are just fueling slowly enough to allow vapor to escape and not trigger the sensor. All you are doing is inhaling fumes and potentially sending liquid gasoline into your vapor system, which it isn't designed for.
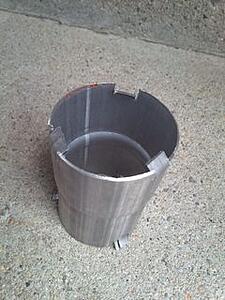
Just finished replacing both fuel sending units. Old ones rusty of course but what failed them was an external to the rheostat green wire that rusted off in both cases. I had made the nifty tool out of exhaut pipe but found it awkward and went back to whacking the ring with a wooden dowel. Spun it right off. Oh well!
Right tank took the full 11.5 gallons and gauge went right to the full mark. All good.
Behind the left tail light I found a taped off wire connector with 7 wires ending in it. All wire colors that go to the back of the car including to the rear cigar lighter!
(RO, GW, P, GR, SR, GP, B)
And both sides had another taped off pair of wires RU and B (Red/Blue and Black) which according to my wire diagrams are, again, used in the rear cigar lighter and the antenna!
Anyone know what that might be about?
The vapor head space is a great answer. As I have tried to adjust the sensor arm(s) to read full... guess all the modern vapor stuff is "winning"... I sure will not stand there to
try to dribble in another gallon or two just to have my fuel gauge read Full... Empty is the only important part of the gauge... that is accurate.. with two gallons or slightly less in
the tank, my needle is on the E.
I Replaced both my sending units with ones from Amazon. They are Eurospare. I foolishly did not check "full" calibration before installing. Well, I too could only get a little more than "3/4" read when filling tank till full.Recently, I have had rust build up in the pre- crossover switch filters I encourage you all to install. In order to inspect each tank, I removed the sending units. I checked each, and at 100% full position, they both only read 3/4 on the gauge. When I short the sending wires the gauge reads full. I pulled apart the sending unit, and it appears the arm that sweeps the resistor coil is not capable of sweeping to the end, hence no 100% full. I see no adjustment on the fuel gauge for signal. What a bummer.
Just bend float arm wire down 1/2" and try again. At 1/4 tank, I switch tanks or head to a gas station. I replaced both R & L senders at the same time, one read correct the other 3/4+ when full. Like others, at exactly 1/2 on gauge I metered in full tank and noted gals, subtracted from full tank "book capacity" to see how many gals to empty. Did the same thing at 1/4 tank mark. Made a cheat-sheet for each tank and put it in arm rest box, so did not have a a senior moment and think I could make it to the next town where the gas was cheaper. Rgds David
Thanks for the tip David. There are some clever ideas here on the forum for adjusting the arm that involve using a hook and string through the fill hole or the installation hole etc to try to "calibrate" the arm position to the dash gauge. But... as I was saying in my cautionary post. The arm with the float, when placed at the %100 full position against the stop will read only a tad over 3/4 full on the dash gauge. Bending the float arm does not affect where the sweep arm finally rotates to. The arm with the float rotates a copper arm that sweeps over a coil of wire. The location of the copper arm on the coil creates a circuit at a given resistance. The amount of current tells the gauge needle what position to go to. The problem with these Eurospare units is that the copper arm that sweeps the coil is not long enough to go to the end of the coil (which would indicate full)....ever. so bending the float arm into any position will not help. I have not found a way to contact Eurospare directly. I have an email out to the storefront that sold the units to me on Amazon. I hope they will do the right thing! I am going to go into the garage and see if I can take a picture to clarify... Jaguar XJ6 series 3 Eurospare arm at full position, against stop. Only reads 3/4. Jaguar XJ6 series 3 Eurospare fuel sender sweep arm not long enough to reach end of coil full position. Gauge only reads 3/4
The problem with these Eurospare units is that the copper arm that sweeps the coil is not long enough to go to the end of the coil (which would indicate full)....ever. so bending the float arm into any position will not help
I see what you are saying in the second picture. You may try to move the pickup lead down 6-8 turns, to see if you get better signal? Unwrap until you get full a signal? Then re-solder lead.
Anyone have a NOS unit that can be bench measured for comparison? Could high resistance in the 30year plus wiring and connections between the pickup and gauge be confusing all these units?
Another cheap way to test is to get a reostat (variable resistor), disconnect factory wires and temporarily wire that into the circuit. Turn the knob and watch the guage go up and down; use your multimeter to measure the resistance when the guage reads empty and when it reads full. That is exactly how much resistance your sending unit should make at full and empty. If using the reostat you can't get it to full or empty your guage may be faulty.
It also looks like there is another possibility: Drilling out the wiper pad mount rivets and re drill the mounting holes, so the wiper is positioned with a full range of movement on pad?
Innovative thoughts. If I cannot return them, I will probably make/cannibalize another, longer sweep arm as the wire that you see is about human hair thickness and Delicate!
Great writeup and responses, you all. My tank senders are in the front of the tanks. Have to remove rear wheel, then remove a round cover plate with four screws. It then reveals the tank sending unit. And seems to have more work room than you all indicate. Can I assume all the same process of removal applies as you Owners of the sending unit behind the tail light? Should I try the turning the tabbed ring with a hammer and brass drift before trying to make or acquire a removal tool? I'll assume I should not try to fix my non-working sending unit and just spring for a new one with new locking ring and gasket? Yes, when I touch the two wires together at the unit, I do get full tank indication at the gauge, so I know it's the sending unit. Thank you ahead of time for your responses.