When you click on links to various merchants on this site and make a purchase, this can result in this site earning a commission. Affiliate programs and affiliations include, but are not limited to, the eBay Partner Network.
Both calipers needed changed because they Both spontaneously leaked out all the fluid in the system, which I discovered in January. Otherwise, Nix would have been on the road a month ago.
Ever since I showed husband the printout of instructions to remove rear calipers without dropping the rear cage (included at the end of this post), he's been Determined to do it that way.
Part of the reason is that Nix's exhaust pipes are Welded together at the BL muffler, rendering them undisassemblable without more heroic effort than we wanted to expend. Besides, he is Nothing if not Stubborn!
He wouldn't even let me help! He said, "Go away, woman, don't bother me if you want to drive your car anytime soon." So I went away and didn't
bother him because I DO want to drive my car sometime soon. It might also have had something to do with the fact there isn't room for both of us down there at the same time. Of course he has a different version of that.
He didn't get the calipers changed out in 2 hours like the write-up said, but he doesn't have 30 years experience working on Jaguars either, this is our first. He didicated a day to detatch the park brakes and another day to remove the main calipers.
When I got in that day he met me with, "I got them out," as he was having a tall cool one.
Picture of Left Rear caliper where he dropped it.
And here's the Right Rear caliper where he dropped it. It's obvious he did the left one first and didn't even pick up tools he was so chuffed!
To do this, certain specialized tools are called for, especially Extra long wrenches and Extra Short wrenches.
These are available at your local Harbor Freight in the US, I don't know where Off Landers would find them.
Here is the article that got him fired up to do this, removing park brake first.
Quote:
The handbrake assemblies can be removed as follows:
Using a large screwdriver, move the handbrake lever to the center of the car so as to disconnect the cable. Bend back the lock plates if there using a thin screwdriver through the gap between the caliper and the brake pipe. Then using a 1/4'' drive air ratchet (or regular man powered) with a 7/16'' socket, remove the two bolts on each side holding in the handbrakes. It is sometimes necessary to use the screwdriver to help lift out the bolts while turning.
Once the bolts are out, remove the brass return spring units and wiggle the handbrake assemblies out of the top of the calipers and slide over the top of the rotor to the rear of the car. They can be removed through the rear opening.
Dissasemble, lube the ratchet wheel, and through bolt, change pads and time to put back. I have found that making the ends of the brass return springs round where they enter the calipers helps get them back in. Also, bend them back so they will go in the holes and the bolt holes will line up. One of the legs should be lower than the other. Also, taper the end of the bolts slightly as this will help guide them back in.
Once in with return spring in place, apply them repeatably until they are adjusted and stop clicking. Put the cable in and adjust so that the slack is just out of the cable, no more. A lot of shops tighten the cable to make the handbrakes work when they have seized up. This is only a temporary repair as they should be self adjusting.
The XJS cable is adjusted on the sill right behind the side of the drivers seat. The XJ6 is adjusted under the car, same setting. If the handbrakes work fine and you are changing out the main calipers, the handbrakes can be slid up on top of the rotors and then slid back into place when the new calipers are in place. This is the same procedure whether the rear suspension is in the car or on the ground.
--
Dick Maury , Rebuild Dept., Coventry West, Inc.
Lithonia, GA, United States End Quote.
More details will follow in this thread as there are lots of pictures and many words.
(';')
The park brakes had not work properly for a Very long time by the look of them. The pads were worn unevenly and wedged.
Replacing the pads is straightforward: Loosen T-bolt, replace pads, tighten T-bolt.
There were no directions how to take the adjusters apart, but husband is very good at that sort of thing, and knowing how things Must logically be constructed he just wades in - besides, he already bought pads, and as he had gone this far, so he pressed on.
There are Numerous small parts in one of these calipers and we recommend you have a dedicated flat surface for the duration.
The most critical are parts of the Self Adjusters, which all have to be in the right place at the right time to work properly. Right away he encountered trouble with disassembly. There is a screw that is supposed to go into a long captive nut (threaded tube), which came loose and turned with the screw. Unless the screw came out there was no way to repair the adjusters.
He ground the head off this screw which allowed the cover to come off and access the adjuster mechanism inside. Then he could grasp the loose tube with needle nose pliers and unthread the remains of the screw with another pair.
When husband finally got them apart (they did Not come willingly as mentioned) he was greeted by a mess of partially solidified brake dust, road oil and grime. It took some time to clean all the parts, being careful not to lose any of them
To repair the captive nut, he cleaned everything with lacquer thinner first, then embedded the threaded tube in Epoxy and left it in the sun for a couple hours to get good and hard. Following are several pictures of a self adjuster showing how the ratchet wheel works.
Notice below the large Blob of black Epoxy holding the threaded tube.
There is a Gross Adjustment screw, held in place by a cotter pin, that's just that; Gross Adjustment. Its purpose is to get the park pads relatively close to the rotors during repairs, so the driver doesn't need to repeatedly apply the park brake to get it into adjustment.
You can see how small the increments are on the ratchet wheel, so 1/4 turn of this screw is a Huge change.
When it came time to reassemble the park caliper, he used a long tapered punch to line up the cover with the body of the adjuster.
He used parrot vise grips to hold everything together while he put the pin through the hole.
While everything was lined up he dropped the pin through the hole and put the cotter pin in.
At this point a new screw can be put into the back of the cover where the captive 'nut' was repaired. There's no need to put 45 pounds of torque on the screw, it only holds the cover in place.
The competed Park Brake Caliper mounted on the main caliper.
Next up, setting up the Park Brakes on the main calipers. He had a Lot of fun with that!
(';')
While he was at it, it seemed like a good idea to repair the exhaust pipe hangers that were disintegrating.
He basically rebuilt the rubber mounting with some high temp silicone. That took a while to cure so he could replace it into the car. And while he found one that was falling apart, it seemed like a good idea to fix both of them.
The hose back there wasn't exactly wonderful either. It hadn't ballooned yet, but it was a bit like a limp spaghetti.
The new one looks a Lot better!
There are finger clamps (for lack of a better term) that align the park brake calipers to the main calipers. The ones he took off Nix were bent at different levels because the halves of the park brake calipers are different levels. He couldn't figure out how they were intended to work, because no matter what he did they wouldn't sit correctly on the calipers. That was the moment he decided we needed to bring home the IRS from the wrecking yard. The rear calipers were virtually unused so he reasoned they were probably installed correctly by someone who knew what they were doing.
The only parts of that IRS he used were those finger clamps.
The parts manual gives the same number for both sides. It was one of those deals where it came apart easily but wouldn't go back together at all. It was quicker to drop the Wrecking Yard IRS than to wait for parts from Who Knows Where.
To familiarize himself with how it all was supposed to go together (it was dirty and dark up in there when it took it apart) he set up the calipers on the table.
To fit the park brake calipers to the main calipers he used 1/4 inch bolts 4 inches long.
Notice how the tips of the finger clamps are at different levels, but still fit correctly into the holes on the park calipers.
After that he set the Gross Adjustment to approximately the right width between the park calipers so he might have a shot at putting it all back in place. In this way, he was able to set up the pads pretty close to the thickness of the rotor.
What follows is in husband's own words. He dictated and I typed.
~~~~~~~~~~~~~~~~~~~~~~~~~~~~~~~~~~~~~~~~
A.G.Olphart, ElinorB's much older husband;
The guy in charge of things she'd really rather not do.
She didn't want to get as greasy as required to change the calipers. Many applications of grease later, here's the little bit I learned about changing calipers with the cage in place, that hopefully will be of assistance to someone.
I wouldn't have tackled this except for the Conventry West writeup, included at the end of this post.
This first two pictures will help to demonstrate a few things I found that don't agree with Dick Maury's writeup.
The parking brake caliper fingers, (the funny looking things in the upper left corner) came from the wrecking yard IRS. Jaguar parts manual shows them with the same parts number for both sides. Neither was deformed on the IRS we bought, but both were deformed under Nix.
I discovered almost by accident that if the parking brake caliper adjustment was correct, these would simply drop in place with no fuss.
The writeup mentioned that one side of the caliper is lower than the other, which is true but it doesn't seem to me that any adjustment is required to accommodate this difference.
On the first caliper I put in I was extremely lucky. I had set the spacing of the holes for these fingers accurately.
I believe the writeup mentions slipping the park brake calipers out a hole of some sort, I didn't figure that one out. After removing the park brake caliper locating bolts, (in the lower left corner of the picture) I slid the caliper rearward around the rotor and let it sit there until the main caliper was removed.
The park brakes were then brought forward around the rotor and taken out the front. As the manual said, on reassembly, reverse procedure -- these must go in first.
Back to the luck on the first parking brake caliper; I'd slipped in one first then installed the main caliper, at which time I rotated the parking caliper along the rotor until it contacted the main caliper.
An unusual amount of jiggery, pokery ensued. They do indeed fit in that gap designed for them but there's no landing zone, they must be in the right position to slip in. It helps to bring both sides forward equally, and with luck both will go in easily. Wiggle the one with the lever, and it too should slip into the slit designed for it in the main caliper.
To the right of the fingers is the lock plate, of which there was only one on Nix. Fortunately they had bent the end tab up to hold the bolts. It would be very difficult to unbend the side lock with the cage still in the car. So If you want to do this, I suggest using the end locking tabs.
(Referring again to the picture above)
Below the fingers are the bolts and guide pins I made that enabled me to assemble the caliper/park brake combination. The ugly bolt on the far right was the first try that didn't work. The threads catch on the finger plates, and any other thing there is, so the guide pins should be a smooth as possible; No Threads.
The parking brake caliper locating pins (the funny looking bolts with washers) from the junk yard cage didn't have a tabbed locking plate. They have what appeared to be thin hardened steel washers with grooves designed to lock them in place. (picture doesn't show grooves)
The guide pins I built came down to aprox. 1/16 inch, as you can see they're the same length as the stock pins.
Back to assembling the fingers. You just insert the finger clamps up over the caliper, and the fingers just drop into the holes in the in the Park caliper, Right? Oops, Not right, sorry. The second caliper I put in was not as magical as the first. The parking caliper has a Gross Adjustment screw to get you close. You have to remove the cotter key that goes through the head of the adjustment screw, on the half of the parking caliper that does not have the lever.
That will allow you to use a stubby screwdriver (not pictured) to set the Gross Adjustment screw.
With your small adjustable dental mirror (also not pictured) adjust the spacing the holes for the fingers to be just slightly wider than the fingers and slip the cotter key back in place but don't bend it. Don't ask how I know that.
If you're Really good, you did this with the parking caliper still in place bolted to the main caliper. Otherwise, like me, you had to rotate it down toward the back of the cage and try again.
With the holes about right, reinstall the parking caliper in the slot of the main caliper, slip the main finger plate in plate and operate the adjustment a couple times (operate the lever, it goes click, click) and adjustment is correct.
I had to use the dental mirror to see the holes and fingers. but I found if I scrunched my neck just right (talk to my chiropractor) I could see the hole in the finger plate and the holes in the main caliper before I put the plate in place.
I was able to verify with my dental mirror that the outer finger of the plate was indeed in the hole although not as deep as the hole in the inner side. That's the way they are in the wrecking yard cage, and that's the way I put Nix back together.
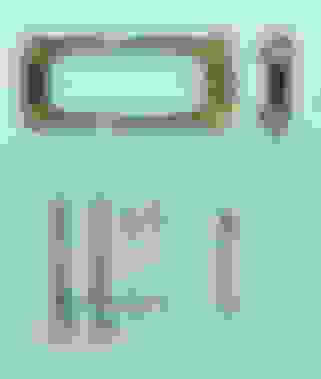
Picture of most of the tools used.
Upper right, 4, 5/8 inch combination wrenches.
Top is the long wrench recommended in the guide, bottom is the short wrench recommended. You'll note the angles seem different between these wrenches. They Are.
Third from the top is an old Fuller wrench which is thinner and enabled me to grasp the lower main caliper bolt with the box (round) end. By very carefully holding it in place and using the old mechanic's torque multiplier trick (see below), I was able to break the bolt loose.
Removing the main caliper bolts is tedious. One flat at a time with an end wrench, but they eventually do come loose and come out with the caliper.
While I had the bolts out I chased the threads, and put anti-seize on threads and shanks of bolts so wouldn't rust in place.
The 3 vertical wrenches on the center are 7/16, used to loosen park brake bolts. I don't remember the order I used them or even if I used them all, but between the 3 I got it to work.
When the strange park brake bolts seem to not be coming out any farther, they've run out of threads. At that point, a screwdriver under the finger plate will help you get them out.
The diagonally positioned wrenches were the Jokers. The largest is 13mm needed to loosen the flare nut that attached to the brake line hose on the side frame. The crows foot was a 1/2 inch that I was able to force over the nut and break it loose. It was only after I removed the brake line to the calipers from the car that I discovered the nut was metric. The 13mm crows foot on a long extension would be ideal for removing that nut.
The last wrench is 10mm which I needed to bleed the front calipers on Nix.
And that's how I did it, I hope it will be of help to someone.YMMV First time for me, but with the help of the instructions, it Can be done.
AG-
~~~~~~~~~~~~~~~~~~~~~~~~~~~~~~~~~~~~~~ Quote:
REMOVING CALIPERS WITHOUT DROPPING CAGE
"There seems to be a lot of differing opinions on replacing rear calipers. As a line mechanic of 30 years, we only charged 1 hour per caliper. It usually did not take an hour.
Just remove the handbrake cable, unscrew the two handbrake bolts ( you will have to pry back the lockplates) and push the handbrakes up on top of the rotor. Unscrew the brake line, bend it slightly out of the way and plug it with a rubber plug. Using a long 5/8 wrench open end from the bottom, loosen the lower bolt.
Using the box end, loosen the top. From here a set of short wrenches come in handy to loosen the bolts. If you are lucky the top one is loose enough to turn with your fingers. Once unscrewed, they will not come out of the caliper but the whole caliper is lifted out.
Replacement is reverse except a long screwdriver to hold the bolts in place until started helps. Make sure the handbrake screws are through the handbrake. Removing them and putting a small taper on them helps.
If the rotors need changing, do this while the calipers are out. Remove one shock to gain access to the 4 axle bolts.
Remove the lower trunion grease fitting and the trailing arm front mount. Lower the arm down, axle,trailing arm and hub as a unit. Then the disc can be taken out. Pay attention to the shims and put them back where they were unless you need to adjust camber.
The holes mentioned on the rotors are for access to the caliper bolts on the ''Dana'' diffs which were put in the XJS for part of the 1985 model year. They redundant on the Salisbury diffs.
Note that the bottom plate does not have to be removed. It will be dented slightly when the lower arm is swung down but can be easily be tapped back into place. I have found on working on cars that if you remove a bolt, you will need to put it back so I try to keep it to a mininum."
--
Dick Maury , Rebuild Dept., Coventry West, Inc.
Lithonia, GA, United States End Quote
(';')
Thank you, Steve, (and Doug, and Jim)
The most important knowledge we gained over these past months, is that we Never want to tackle such a Huge job like this again! We'll break it down into smaller jobs, the success of which can be tested before we have to go on to the next one.
He has been in Seventh Heaven during this project! He's a sucker for every new and unusual tool he sees, and he got to use Many of them over these past several months, some for the first time.
But to be fair, some tools were inherited from his dad, or other old guys who couldn't bear to put their tools in the thrift store so they gave them to husband because they knew he would keep them, and maybe actually use them sometimes, and he has! Some he finds at thrift stores, or yard sales, or sometimes he actually deliberately Buys tools on speculation that he Might need just that item one day. The through sockets we used for installing the springs are an example of that.
I bought the Extra Long and Extra Short wrenches based on Dick Maury's recommendation, even before I knew we would need to do rear brakes so soon. It's always good to have unusual tools like this because you never know when it's Just the thing you need NOW! One of my favorite sayings is, "Tools is Good!" Besides. How does one do stuff without tools??
(';')
Well done i was pondering doing this for ages but just found dropping the irs cage the best in the long run for me. But i had to replace the rubber cage mounts as well so it had to come down.
You had it high enough in the first picture for it to be dropped. Cut off the welds on the mufflers and re-weld them when done.
Should have not been welded in the first place.. always plan for the next "removal"... this time I am using ball joints on all exhaust connections... plus I will
be running the real dual exhaust under the IRS again...
Removing it gives you the needed access for everything, plus you can do "more"... clean and replacement of the four rubber mounts for instance.
Good job on the rear brake hose! Just because a shop for profit does things in a certain way, does not mean it is the best way for us doing our own work.
One person can drop the whole thing in about 2 hours and put it back in place by yourself...been there - done that more than once now...
Last edited by Roger Mabry; Aug 18, 2015 at 04:08 PM.
Thank you, jjd,
As mentioned, we couldn't drop the IRS because the pipes are welded to the mufflers and we didn't want to take the time to have to rebuild the exhaust system along with everything else.
Over the next Winter though, we'll probably refurbish all the bushings etc. o the IRS that's currently hanging in the shop. My rubber doesn't really look that bad, and the 'off-throttle-at-speed' test was OK, but it might not be now that another year has passed and the front is completely refurbished.
But I want to drive her a bit first before we tear into anything else.
(';')
You had it high enough in the first picture for it to be dropped. Cut off the welds on the mufflers and re-weld them when done.
Should have not been welded in the first place.. always plan for the next "removal"... this time I am using ball joints on all exhaust connections... plus I will
be running the real dual exhaust under the IRS again...
Removing it gives you the needed access for everything, plus you can do "more"... clean and replacement of the four rubber mounts for instance.
Good job on the rear brake hose! Just because a shop for profit does things in a certain way, does not mean it is the best way for us doing our own work.
One person can drop the whole thing in about 2 hours and put it back in place by yourself...been there - done that more than once now...
Aww, that's Pretty, Roger!
It took about 2 hours for us to drop the IRS in the wrecking yard, even under working conditions there.
He won't admit it but he wanted to do it this way for the challenge of it; so he could say, "I've done that!"
I know the pipes shouldn't have been welded to begin with. But that's just another item on a Very Long list of things on this car that should Never have been done the way they were; which list of items both large and small, minor and Major, now numbers into the Hundreds! I've had to correct them all in some way.
We got the proper pipes from the wrecking yard car, it's just that we didn't want to tackle that right now. Total rebuild of the exhaust system will come soon enough, and when it does, I need to see exactly what it takes to avoid going through that cage. That's just plain stupid! There is less than 1/2 inch between the pipes and those brand new calipers!! I'll forever envision them cooking when I'm at a stop light in 117 degrees next July.
By the time she's on the road again this time, she should be a Pretty Good Car for a long while -- with the possible exception of back rubber.
(';')
Exhaust under the IRS, first time..different next time
When I did this on the '72 XJ, this was how it was done and then the Jaguar curved exhaust tips. Should have used round mufflers in the Jaguar exhaust tunnels but these had been ordered before finding out how easy it was to avoid going through the IRS cage.
My car, '71 will end up that way as I am "fixing" the missing exhaust holes in the rear valance right now - they were welded up by PO (?). Currently the exhaust exit holes are "cut out" with a new rear valance piece waiting to be used. I used flanges to join the pipes together but this time will use the quality ball joint connections with round mufflers so they do not show from below.... practice makes perfect.
Last edited by Roger Mabry; Aug 18, 2015 at 06:25 PM.
Reason: Add photo
Thank you for the pictures, Roger.
My exhaust is already too low. I'm dragging the cat on the smallest of obstacles; only 4 inches of ground clearance, the Lowest thing on the car.
My mufflers are about under the rear seat. They hide there quite well. One can't see them by just looking under the car, Unlike the cat which is hanging right down there! I intend to toss the resonators though, and replace them with glass packs. In fact, the more I think about it, I wonder if I could get away with 4 glass packs and do away with the mufflers altogether.
I know where to get some Turbo mufflers (fancy name for Long glass packs) with not much more profile than the flat BL mufflers. Musing here, but I need to look into that! I'm getting Really tired of dragging on grasshoppers should I happen to run over one. I can't even take the car to the local Post Office or it drags on the Exit! Not only is it embarrassing but it's Highly Annoying!
(';')
Nice write up thanks, job well done.
I would drop the IRS though, like Roger I have removed and replaced it myself and makes removing the calipers so much easier. Although I did fit the hand brake calipers in situ as I was waiting on the new pins for mounting them to the main calipers and wanted the car on the road.
Not a fun job fitting the handbrake calipers and adjusting in place but certainly doable.
Must be the SWB, as it has never hit anything below
Funny, that you would have trouble hitting things on the ground below the car?
With the S1 SWB, it does not, NEVER has hit anything? Plenty of ground clearance with the exhaust routed below the car. The 80's Corvettes were the same type of exhaust mounting...
Those mufflers (Magnaflow) are the only ones in the car with the LT1 V8. Nothing between the engine and the rear of the car except the piping (H pipe).
Will just use rounds ones this time for better/hidden look. It is very quiet and got even more when the smaller sized Jaguar curved tips were installed.
I've messed with a lot of them and lack thereof over the years. One of the best sounding concoctions was the one on my "lumped" 51 aka 56 ****** 4x4 pickup.
Ram horn manifolds. Off stock and reasonably healthy 283 SBC.
Two longish glass packs. No "H" or "X" pipe. Short turn outs in front of rear wheels.
perfect purr, with a bit of a "bite". Not enough to attract the ears of a cop, though.
And, I am pleased with most of the exhaust system on the 83. After market ram horns. Ground to get valve cover clearance, by me. Ground, drilled and tapped to simulate GM EGR attachment. Looks and works just right. Chickened on drilling and tapping big holes to accept the GM air pump hoses. Son came up with a pair of old air rails. I altered them slightly and cleaned them up and aluminum coated them to 'look right". The after market ram horns had hoes for them!!
A pair of Sun Coast down pipes came next. Nicely done, good price. Flat gaskets. I drilled them and welded on bungs for the O2 sensors. I done good. Decent torch skills. Brass nuts put on with antiseize. so far so good.
Budget out the window, so care exercised for the muffler shop work. Nicely executed pipes to the Jag mufflers. "H" pipe included. Cats just astern of the transmission.
Got away with that. BAR wants them way up front!!!
A tad odd,as the muffler shop pipes are face welded to the Jag mufflers !!! Possibly and even probably a bit restrictive.
OTH, the down pipes and the muffler shop pipes are bigger than the Jag pipes, so....
A PO had glass packs welded in to include the curly pipes.
Imperfect, but it sounds great and works just fine. At least to my far from perfect ears!!!
Would I consider under the IRS, yup!!! A decade or so ago, I saw and heard a nice car configured that way. A tad odd, but OK.
Elinor, why is your car so low???? I've no dragging issues??
Clarke:
Thank you. I think I've mentioned here somewhere that what husband Really wanted was to say he had done it this way. Sort of Guy Thing bragging rights I think, although his tongue would rot out before he admitted it.
Roger:
When we first saw the car it had honest Dual Exhaust. However, when the PO went to an *Honest* smog shop so he could Legally transfer title, BAR said he had to only have Single exhaust because that's how the Engine came out of the factory!
So he took it down to the El Cheepo Exhaust establishment and had them hack together something that would pass. In so doing, he told us that NOW (not before) the cat dragged. Just Look at this Mess!!
It's just another item on the list of things to make right.
(';')
Just finished the rear brake removal on the '78. Took about 3 hours, boy those caliper bolts are tough to get at. I will be getting some slim ratchet spanners for the re-install.
Thank you, Mick,
Husband is Delighted to know that someone found this post helpful. He says it makes it all worthwhile. Of course, getting it done and conquering a challenge didn't hurt either.
(';')
I put the car on a 4 post lift at our club's shop at 8am today and my back and neck gave out at 1:30pm with the new calipers in but only the left parking brake assembly in that caliper and the fingers still refusing to line up. My old calipers were so frozen that we had to drive the pads out from the back with a big metal handled screwdriver. Fortunately I had pasted this write-up into a word document and printed it out along with Dick Maury's write-up, because we used your photos to re-assemble the new parking brake pads after two of the old ones came out in pieces (probably from my having to drive the parking brake assemblies out of the old calipers with a long screwdriver). My buddy Chris said he'd pay $20 to see someone do this job in two hours, and I would too. How about a real time video, Dick?
I had to leave the 86 DD6 on the club's lift today and will have to go back and try again when I have recovered from today's indignity. This was 5 1/2 hours so far using a lift, standing up straight, and with a headband light to sort of see what I was doing; I can't imagine trying to do this from a creeper on my back (which is what I thought I might have to do before we got the lift). Chris said when he did his 86 XJ6 he had to take the calipers back out 3 to 4 times before he got everything to line up; I sure don't look forward to that, but when one finger on the left side is in a hole the other side feels to be 1/4" off, and this is after we had it all assembled together on the bench. A mystery! And unfortunately one that must be solved.
It would be so much easier if the parking caliper and main caliper could go back on as a unit; then perhaps it could be done in an hour per side if you didn't have to drive out the old pads first.
Time for a beer....or two or three. massage chair here I come.