When you click on links to various merchants on this site and make a purchase, this can result in this site earning a commission. Affiliate programs and affiliations include, but are not limited to, the eBay Partner Network.
The cap fits perfectly on the 22D at each and every point.
Rotor seems to have the right gap, high also, but I think I'll replace with suggest part all the same. (did movement test as JagCad suggested)
Some repairs to the earthing wires in the distributor today have helped, still not starting but getting a regular pulse now from all the cable in and out of distributor.
Much better. Glad that I could help, at least a bit along the trail.
IC engine needs. Fuel, spark, and compression, each in the right amount and at the right time. I keep reminding myself of that when I mess with them.
So, now, you have the spark part of the equation. Next is time. Strobe time again.
Or the old light in series on the Dist to coil wire. Blinks as the points open and close.
Match to the "correct" TDC!!
The chain jumped the drive sprocket on my electric chain saw. It's on the bench for a fix. Then lumber jack work on my distressed Hawthorne tree... And weed whacking on the front "pasture".
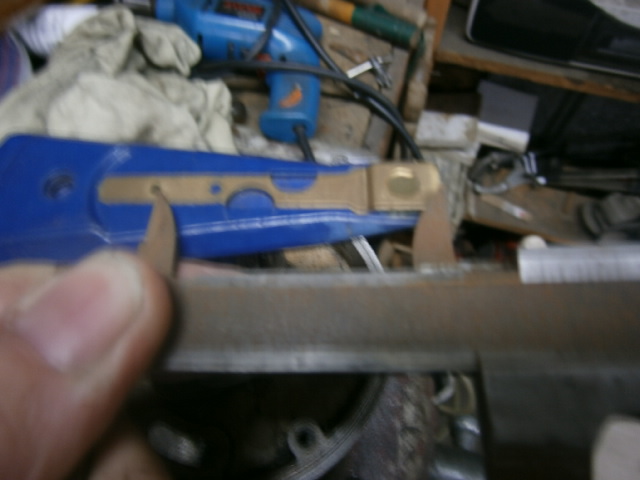
Got new rotor today, just few shots to compare the red classic cars one with the specified part. Only physical different I could easily detect with eye was the red one being 2mm shorter than the Bosch one. Bosch rotor 2mm or so taller than. 'neck' beneath rotor tip to base also shaped more on Bosch.
With new rotor, more petrol and clean carbs I am still encountering a pulse into the distributor but none out. contact set is new, rotor is turning well, wiring has been checked. oldest components here now are the low tension connector and (replaced last year) the condenser. But neither of these are likely to entirely stop pulse/spark leaving distributor and going to the 6 plugs, right?
My only suggestion at this stage is going to be a tad involved.
Pen and paper, and write down as you go.
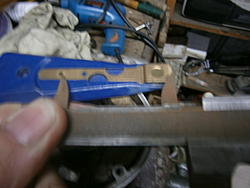
1) Remove the cap, find something to measure the distance from the CENTRE of the carbon contact in the centre post to the vertical face of one of the plug terminals inside the cap.
2) Take the old rotor (Red) and measure from the centre of the witness mark that the carbon brush has made to the end of the brass strip.
3) Take the new rotor (Black) and do the same.
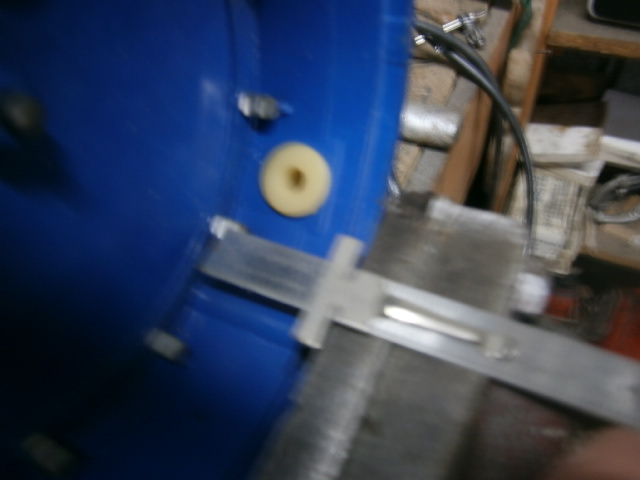
4) Install the Red rotor, and work out a way to measure the distance from the rim of the distributor casing to the top of the rotor brass strip point. I used a thin steel rule across the distributor, measure the height, then add the rule thickness.
5) Change rotors and repeat #4.
6) Now measure the distance from the rim of the cap, using the actual inner edge that sits ON the distributor where you placed the rule in #4 & 5 above, to the centre of any of the spark plug contacts inside the cap.
My reason for typing all that is that the Red rotor has been contacting the bottom of those spark plug contacts inside the cap, WRONG PLACE. ALL rotors "jump" the spark from the tip to the plug contact at "about" the centre of the vertical plug contact.
The Red rotor looked too long also.
I agree that the Black rotor looks the same length????.
Summary:
Either the rotor is still wrong for that distributor, as the dizzy may not be from a Jag, many 6 cyl cars used that Lucas dizzy, as I mentioned way back. Triumph, Rover are identical to look at, and have the same offset drive tang etc etc, but different cap and rotor combination.
I cannot find anywhere my OLD Lucas books that gave the cap and rotor for any specific dizzy number.
I went through this with our Daimler S2 4.2 in 1993, and I finally worked out it had a Rover dizzy fitted, NO big deal, just had to remember to look at Rover when needing a cap and rotor.
I still maintain there is a mismatch here with dizzy and cap/rotor, and maybe the Jag info needs to be placed in the backgound for a moment.
If that measuring is as clear as mud, let me know. I have a V12 cap somewhere, and will do what I scribe and take photos later if needed. I dont have a distributor, so you have to work that height thing out.
EDIT 5.30pm
What I am looking at is the measurement in #1 is "almost" the same as the measurements in #2/3. That then establishes the compatibility of the rotor with the cap.
Also the height of the rotor, so as to supply the spark via the vertical contact strips at about the halfway mark.
Lots of things to do, but a bent centre shaft can be all it is, or as I have said, incompatibility of the rotor to the cap.
This is very easy and simple to do on the bench, but if you are not comfortable removing the distributor, fiddling about, will get it done in-situ.
Last edited by Grant Francis; May 8, 2017 at 03:02 AM.
That's quite a list!
on inspection (before I get onto that list) the red and black rotors (very hard to compare them perfectly) but as said red is about 1.5mm shorter in height. hard to be sure, but matched on top of one another the black one looks to be 1.5mm or so shorter than the red one from tip to tip. the brass arm/pointer when viewed front on with both flat on a surface, the black one has the brass arm about 1mm higher than the red one.
Examining the caps (old and new) in some detail this time, the older cap is better made and of a more solid material. the graphite shaft on a spring inside the cap is long and springs nicely on the older cap, while the newer cap it is shorter and the spring motion a bit wobbly. shaft maybe 9.5mm on older cap and 3mm to 4mm on newer cap. both press back and release ok tho. the caps fight opening to opening neatly and mirror one another to the eye. i had the car running last year wit the old cap and old arm (broken gone) but have not had it running well if at all with the new cap and newer arms, my only anecdotal evidence.
2) red 26.5mm
3) black 28mm
witness mark on red very very slight hard to see, mark on new black on even tho not used often is very dark and easy to see contact point
4) hard to do but 10.5mm for black and 12mm for red
6) wasn't sure but thought you meant from lip down into cap to brass spark plate
both caps same from lip to centre of vertical brass plate (where spark should jump) is about 32mm
OK, work done again for another week, and what I scribed above has been niggling at me all this time, as a tad confusing.
Sooooo, as FREEZING as it is in the shed, I found a V12 distributor base, bits missing, but it serves the purpose.
I took some snaps of what I was trying get across before. Shaking from the cold, but I think they are clear enough.
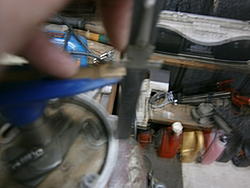
Measuring the rotor "length", from the carbon brush contact point to the tip.
Measuring the apposing length of the cap, carbon brush centre point to the plug contact vertical.
You will NEVER get these 100% with the measuring instruments we mere mortals have available, but they should be very close. The gap between the end on the rotor and the vertical of the cap is an"air gap", so contact is NOT actually made, and if there is contact, 2 things happen, (1) the rotor breaks apart, (2) the cap smashes into numerous pieces. Conversely, it that "air gap" is too big, the arcing is huge, and the quality of spark delivered to the spark plug is lousy.
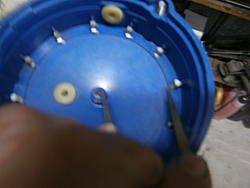
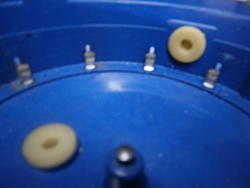
This is the measuring of the height of the cap, from the section (rim) that sits on the edge of the distributor casing.
Measuring the height of the rotor from the same ridge the cap sits on.
This measurement and the cap measurement should be about the same. You are looking for "arc marks" at the midway point of the vertical of the cap contacts.
Looking at this V12 cap "arc marks" are a tad too low, so in this case the rotor needs "packing UP" about 1mm.
OK, its a V12, and they are super fussy with this "Arc mark" height, and the 6cyl is not so.
If the snaps are too fuzzy, let me know and I will retake tomorrow during daylight, and some warmth.
Last edited by Grant Francis; May 10, 2017 at 04:39 AM.
Look inside the rotor base, there is a metal spring thingy pushed inside, OK, found it, good.
I have had 3 cars, 2 were Jags, 1 was a 1963 Beetle, and that metal thing was getting the spark energy from the carbon brush, and grounding it through the dizzy shaft. How you ask????
Took me ages, and eventually on the Beetle, I noticed a small witness arc mark and basically established the POOR insulation quality of the rotor was allowing the HT energy to pass straight through it and out to earth, rather than jump the air gap, and then jump the spark plug gap, passage of least resistance applies here.
Replacing the rotor with another, fixed them all. How the hell you test that on your car is a good Kiwi question, since you have 2 rotors that appear dud, but these items are now not as popular as they were 5 years ago, but someone has to make them, and maybe the quality is crap, dunno. We only sell Bosch at work, and yes, we have issues with caps etc from time to time.
Maybe removing that metal thing from the rotor, and ty it again will prove something. That metal thing is pushed waaaaay up inside the rotor, and may just be causing a path from the brass strip to itself by location.
Interesting treatise on rotor to cap matching. It should not be necessary. The new parts should fit as delivered. But, in the new reality, no longer a given. Just cuz they are new doesn't mean they are good.
I could add one more dimension to check. Or confirm it's presence or lack of presence.
The center of the rotor should contact the button in the cap, gently. If too big, the spark will not jump to the rotor for distribution to the cylinders. And, as I recall, that is the issue here.
A dab of "modeling clay" on the center of the rotor. Place the cap in place and secure to its normal fully seated position. Remove carefully, up motion only, no side to side wiggles. Eye ball the squeezed clay, or even apply the rule.
I have this feeling that the gap will be rather wide!!!
FYI here is the 'new' cap link on the seller's site. no info on exactly how it compares to the original one that came wth the car, other than my own visual comparison.
Carl, the V12 is that fussy, and many have no idea about it, and many a misfiring and stumbling V12 can be sorted quite well by simply getting that spark "arc" at a better place on the cap contacts.
The 6 cylinder, not so fussy, as the cap is less than 1/2 the size.
My only reason for suggesting the rotor height here was waaaaay back when the Red rotor was shown in a snap, and I saw what I believe to be "rub marks" on TOP of the Brass pointer, which to me meant that the rotor was actually contacting the cap contacts on the bottom section of them, and apposed to it swinging past those contacts with no more than an air gap for the spark to jump across.
The original rotor was stated as "broken and gone", and again I wondered why. Rotors do not generally break up unless the strike the cap.
I simply smelled "mis match" as the car is being put back together piece by piece, and for that the owner needs to be congratulated.
My experience with Lucas distributors, and Lucas Ignition parts in general from employment with them here is the late '70's.
We worked on a distributor number, including the prefix and any suffix, and then waded through a very thick parts manual, and once that family of distributors was found, the cap/rotor/contacts/ advance capsule/weights/springs, etc etc were all listed clearly.
I used that same manual for our S2 Daimler, which had the cap and rotor missing, and now I cant find that damn book anywhere. I doubt I have ditched it, but I have been known to do dumb stuff over the years, dunno, and I am angry at the moment at the thought I did do something like that.
Aftermarket now is just way tooooooo vague, and mistakes take place. It happens at my work regularly.
I will stooge around some odd data files on our work computers tomorrow, and maybe I will find what I want to help here.
Last edited by Grant Francis; May 12, 2017 at 05:17 AM.
I certainly can't add anything helpful to the depth and breadth of Grant's experience on the subject. But I'll toss in some editorializing....
I think this might be another case of parts manufacturers over-condensing their offerings. Replacing three part numbers with one type of thing. Subtle differences in build spec get lost in the process. Not to mention quality of manufacture in general.
Add to that a problem of catalog listings and applications getting muddled over the decades as info gets transferred from one data base to another...over and over again....either thru modernization or because of the seemingly constant changes of corporate ownership of parts manufacturers.
Years and years ago I was very happy with Lucas ignition components and sought them out. Now, not so much. I think I had (unknowingly at the time) been getting "old" Lucas parts....before Lucas sold its automotive division to another company. The "new" Lucas ignition parts seem iffy to me. They just don't look or feel the same.
I know that some owners of Marelli ignition V12s are scrambling to find and grab up what few remaining bits of true Marelli inventory are remaining out in the world...as the replacement offerings from other suppliers just ain't the same.
Cap BD286 has a matching rotor of BD250.
Cap BD290 has a matching rotor of BD287.
NO pictures that I could use, BUT,
The BD250 looks like the rotor you have (the Black one).
The BD287 "looks" taller, and a shorter brass strip.
NO pictures of either cap.
Then I found OLD, and I mean OLD Microfische slides, wow. Where is the reader, dunno. Knew a customer who once had one, still got it, even better, does it work????, yep.
Stopped off on the way home.
Lucas numbers:
Rotor DRB104.
Cap, DC17, also known as 54417212.
Then I found the fische listing the distributor numbers, and 22D6 41065A/B. and 22D6 41368A as the 2 possiblle distributors for the XJ6, 1970 to 1976.
Then the poop hit the fan, 3 film slides missing, and YES, they are the ones I need to marry up those distributor numbers with the cap and rotor fitted to each of them.
Now I am at that brick wall, and I still maintain there is a mismatch of cap and rotor on that distributor, but since I cannot put my hands on the info, or the distributor itself, I am done.
And here I was thinkin' it was called "dizzy" coz that best described how the little critter felt after whizzin' around in there with the blue light sabre in hand. No???
I sense Grant's frustration but what perseverance to try to get the necessary data. Similarly, I have spent days seeking a Stromberg carby for Australia's commonest GM Holden motor as fitted to a previously LPG fed forklift. None!!! Perhaps Aden, it's time for basics . . . unless from Grant's excellent treatise on measuring in both the horizontal and vertical plane to verify the rotor to post arc gap, you can correct the rotor mismatch . . . then . . . beg, borrow, steal a known fully working replacement unit in total. Yes, complete unit of distributor, matched rotor and cap. Then, fit, time, and fix unit and confirm start and run. Whether you source from a Jag or alternate as per Grant's list is immaterial - just that it be a known working 6cyl unit - and that you wire HT leads to 1,5,3,6,2,4 firing order (ccw). Why?
The key (for me) is the vertical midway position of the "arc witness marks" up the internal faces of the peripheral posts. Even in Grant's shivery pics (hic!) they are clearly seen in the V12 cap . . . not so in Aden's original pic which we agreed appeared to show actual contact marks to the "bottom end" of peripheral posts.
Some things just get right up my nose, when I know I have the info, just cannot find it. Then add the fact nearly all aftermarket suppliers use the Bosch Catalogue for these items, and Bosch was always the opposition to Lucas, and their Lucas listings were, as Doug has mentioned, Bosch biased, purely for parts rationalisation purposes. Maybe I can find my OLD Echlin Ignition books, and they will give a different slant on things. That is tomorrows task.
As for the carby, I dont have one, but worth an ask to Clarke. He goes to NZ, time to time, and there would be one or 2 laying around over there.
He, or even DrPhil may well have one also.
Last edited by Grant Francis; May 13, 2017 at 06:46 AM.
Thanks Grant . . . but I finally modded one to fit. Needed carb base to fit 70mm manifold stud ctrs. Found several 76mm but finally modded one of 66mm ctrs. Throat dia of throttle body only 2mm smaller than manifold but on a fork lift, not exactly concerned with standing 1/4s. Done and dusted now . . . ground/slotted outer ears of manifold holes to fit wider mounting centres, cut a new gasket, and fitted larger washers under mounting nuts. All old tech stuff but constantly embarrassed by comments of wreckers "Gosh; what a coincidence . . . must be only 10 years ago, I was asked for an identical carby". Ironic chuckles all round. Anyway, LPG rental gone; back to gravity petrol.
Just a parallel reminder of how fast the "old tech" (and data supporting it) is disappearing.
As for the carby, I dont have one, but worth an ask to Clarke. He goes to NZ, time to time, and there would be one or 2 laying around over there.
He, or even DrPhil may well have one also.
No carby or carby bits to spare here Grant,(maybe I missed the carby part of the thread.unless you meant cap. We have one of those) but this is what we do have to offer.
Hey Aden, I had all sorts of dizzy problems a year or two back. Only fault we could find while on the Bat Phone to Grant (Me & the good Dr Phill) was a worn base plate. We went the S3 electronic route for a quick and good fix.
They were fitted to an S3 engine running S1 electronics so should be the same for S2.
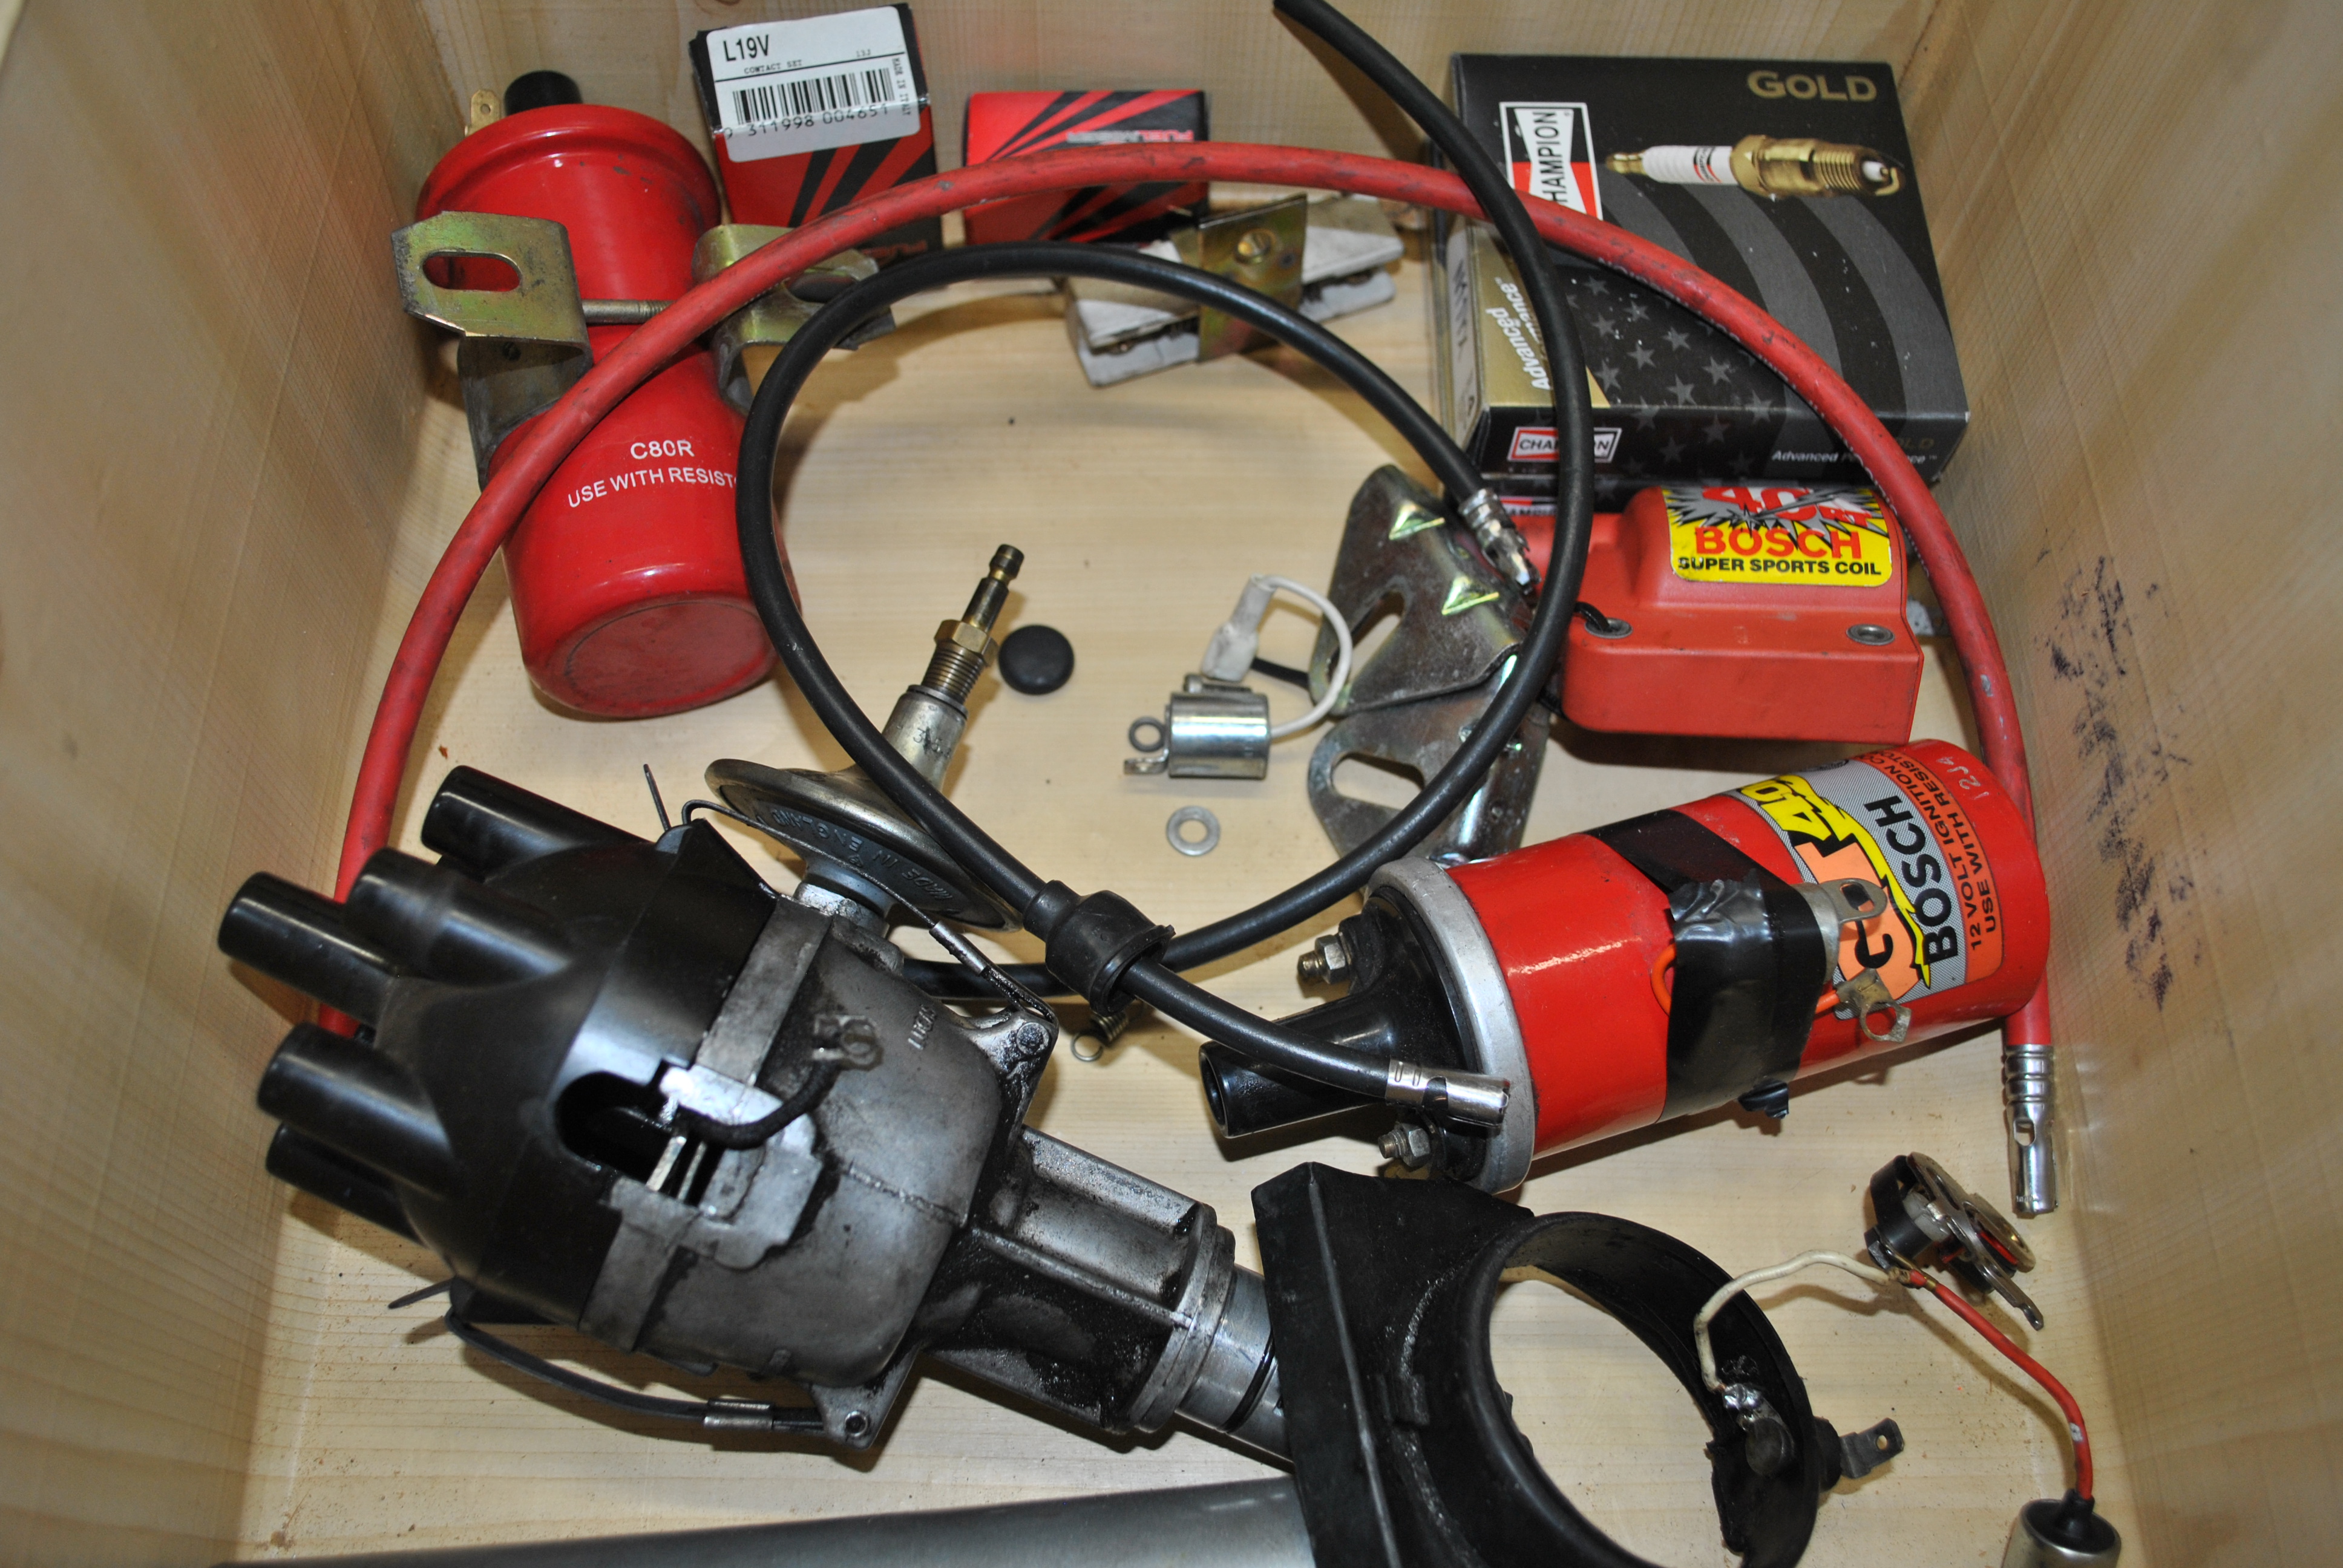
But what I have in my stash as a good lot of stuff,
Good known parts
Ballast resistor
LV19V points(new)
BD250 rotor(new)
LC163 condensor(new)...or 103,can't tell. But it's th right part for the dizzy.
C80R coil
GT40R coil(newish)
GT40RT coil
And a set of good known working spark plugs( but they are Champion)
Plus all the dizzy and all old parts in known working order.
If you want to try them before spending more hard earned on parts you can have them for the price of postage from Brisbane. ( I nearly chucked them in a shed purge a couple of weeks ago but just couldn't bring myself to do it,you know, new parts you paid for you just can't dump)
I can get them away to you on Thursday if you are interested.(next day off)
EDIT
Originally Posted by cat_as_trophy
WOW!!!!
Similarly, I have spent days seeking a Stromberg carby for Australia's commonest GM Holden motor as fitted to a previously LPG fed forklift. None!!!
Cheers,
Ken
OK, Found the carby part. Sorry Ken, can't help there.
Maybe give ABC wreckers at Rocklea a call, they do a lot of that old Holden stuff.
I can ask some questions for you in NZ if you have details, I know a couple of guys still in the parts game.
1. Son acquired an old denizen heavy duty forklift. Origin based on a WWII era Dodge weapons carrier. Derived from a 4x4 dodge 3/4 truck. Amazing, he found a rebuild kit
for it's original one barrel Ball & Ball carb. No more leaks and it runs just a bit better.
2.Way back circa 1956, I bought a well used and scruffy 37 Packard 110 business coupe. Powered by a flat head six. But, it's Carter carb was seriously corroded. But, my former employer gave me a carb he had just serviced, but had minor issues remaining and as such could not charge for it.
It's base was just tiny bit too big. But, as Ken did, I used a rat tail file and slotted the holes to fit. Just fine. Even the Packard old tech "oil bath" air cleaner fit. It ran very nicely.
Then, I was promoted and we moved to California. I sold it to my neighbor. He used it as a drive to work car for quite a spell. Then, wishing to go into business, swapped it for a derelict Studebaker pickup. Swapped out it's non running V8, for A Studebaker a junkyard 6 that did run....
o1xjr - thanks, no idea what'd be involved in Aus import tho
wow, lot of new info!
Cap BD286 has a matching rotor of BD250.
Cap BD290 has a matching rotor of BD287.
NO pictures that I could use, BUT,
The BD250 looks like the rotor you have (the Black one).
The BD287 "looks" taller, and a shorter brass strip.
That sounds exacting, pity other info missing.
folklifts, studebakers and junkyards oh my!
is there a required model spark plug lead? I have a jumble of different colours, makers and ends as well as 'model' numbers. Is there a recommended type/brand/series/model/numbercode for these I might be missing.? I don't have much faith in my timing light any more.
yes, having 'known good' substitutes to swap in and out would be idea, just don't have access to such at this time.