When you click on links to various merchants on this site and make a purchase, this can result in this site earning a commission. Affiliate programs and affiliations include, but are not limited to, the eBay Partner Network.
This weekend was the much anticipated repair of the passenger side rear quarter window, which had been inoperative since we got the car. The drivers side was also inoperative when we got it, but I managed to free it by connecting directly to a fully charged battery very briefly (with no pesky circuit breakers to spoil the fun) Unfortunately the battery trick proved ineffective on the passenger side (although it did succesfully heat the motor up very nicely)
We removed the whole drive unit from the car and started dismantling it. We got all the way to inside the motor itself before we found the issue. The motor shaft had seized in the housing. Once we thoroughly cleaned and lubricated everything, it miraculously came back to life. I don't mind buying new parts, but theres a great sense of satisfaction in making the old part work again.
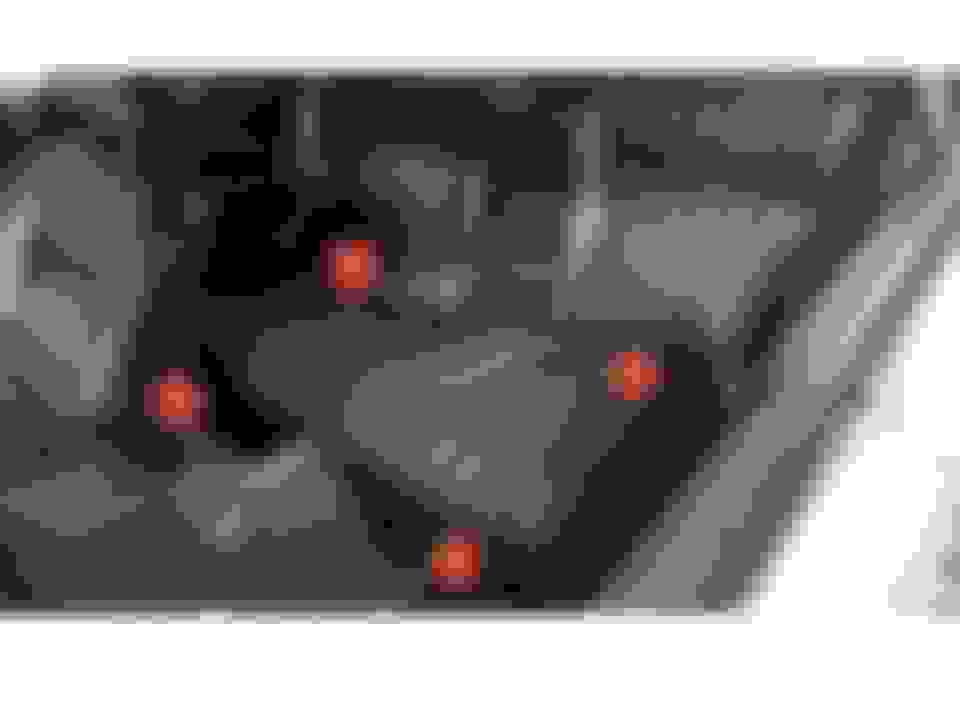
Lessons learned : When you disconnect the motor from the drive arm (see picture attached to understand what I'm talking about) the spring tension relieves itself fairly abruptly, so its best not to have fingers in the way when that happens.You should also pay very close attention to which way the spring is mounted on the arm, particularly the center of it, and which way the hook goes (see crude red arrows in the picture). If you were to inadvertentely put the spring on the wrong way, when you finally got it back inside the car, you would find the window would not go up, because the spring is now going against the motor force, instead of helping it. The best way to work out which way round the spring goes would be to remove the drivers side mechanism and compare it. They should be a perfect mirror image of each other. When you reassemble, its best to try and have the drive cog in roughly the same place on the mechanism as it makes it easier to line up the screw holes.
Obiously none of that happened because @smgdata and myself are professionals, but you could see where the lesser skilled person could make this mistake. Now, moving on.......... :-)
The test run with all the windows down was amazing. Even at freeway speeds, there is very litle noise, just a great feeling of openness and fresh air. It is also noticably more comforable than sitting in a convertable in the sun, because your head isnt geting baked.... all you get is shade and a nice breeze. We were debating whether this was by design, or a fortunate accident.......either way we are happy it turned out like that.
In more news, we fitted new seat belts, mainly because the old ones were, well, old and I kind of wanted dark blue ones. When I was a young pup in the UK, a friend of mine had a Mini Metro MG (UK folks will get this, others can google it). It had red seatbelts. When I was 17, that was just the coolest thing in the world. Over the course of time we came to find out that the seat belts were by far the best part of the car. Anyway, that memory stuck in my head and now I've finally been able to tick off "add colored seat belts to a car" from my bucket list. These are very generic 3 point retractable belts available online. I got them from this place 3 Point Retractable Lap & Shoulder Seatbelts
In yet more news I got a color match for the paint that's on the car. The car was repainted around 1990 and is still very presentable, but I need to do some minor touch up here and there. The issue is there was no information on what color the car was. Even if we had known, there was a pretty good chance the color would have changed/faded after all this time, so getting a custom match seemed like a good idea.
I went to Martin Auto Color in San Jose and worked with a gentleman caled Michael. He used one of those camera things like you see in Home Depot for when you really, really need your walls to be exactly the same color as your socks. Once the "picture" is taken, it is compared against their database online and it came out wth a 90% match with an Artic Silver Metallic.. Michael then went out back and worked on mixing the paint. He came back with a rattle can. I thought, that must be the primer or top coat, but no he said, thats the color. Now, how on earth do you get color into a rattle can? Turns out there is a whole system for doing it that uses lots of syringes and stuff, which is beyond me to explain, but what a cool technology!
Thats it for now. Hope the US folks are enjoying the long weekend.
Thanks for the info on the door motors and paint. Door motors especially are on my list of future fixes.
You've just about down to the wire, aren't you?
When you start paint touch-up there's not much left. As it sits, from this distance it looks just pretty darn fine!
(';')
getting that back window to go down the correct way and as Sarc said rebuilding the motor was extremely gratifying. also after putting the The right side twice I was able to get the left one in in three minutes.
I had my first go on the freeway and just as I remember from my xjc6 it was incredible.
it just goes down the road and we were getting looks from every direction.
Great work. Not much I can add as to remote locks. My Jeep has 'em
but, IMHO, not worth buying new batteries for the fob?
As to the distributor. In olden days, the shaft had a wick under the rotor. a few drops of engine oil took care of lubing the upper mechanicals.
Rubbing blocks on the cam were lubed wit a "special" light clear grease. Many of use used petroleum jelly, aka Vaseline.
Yup, that crud is known as varnish! After cleaning it, I would use any of the above to protect it from more of the same. Sparingly, so as not
to mess with the electronics.
What a fantastic project! Inspirational stuff, thanks for documenting your hard work and sharing it!
We are getting there. We receive a lot of help and advice from this forum, so I thought it only fair to report on our progress in the hope that it will help others down the road.
It's never dull with these old cars....... you fix one thing (ie the rear windows) then it breaks something else (rear window seals)
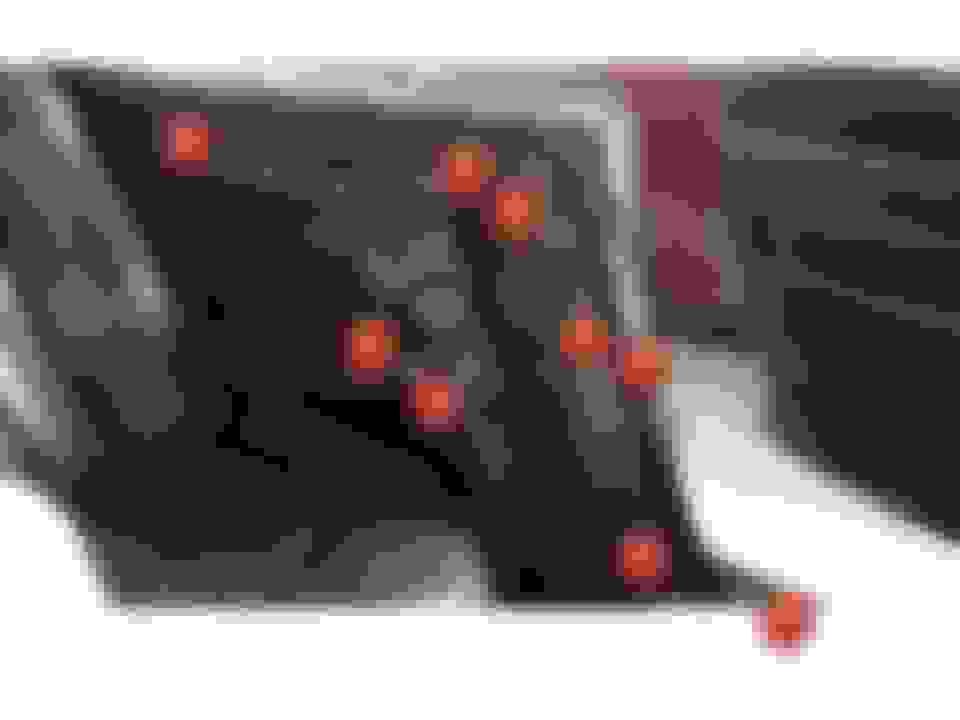
The problem is seen on the left, and what it looked like "some time" after
Interestingly, only the front part of the seal failed. This actually makes sense when you watch the rear windows going up and down because the front part of the seal has to go over the thick chrome trim piece which is on the front of the quarter window. After 40 years the rubber was anything but rubber, so after one or two ups and down of the rear window, both sides looked like a rat had gnawed at them.
I found the instructions in the ROM pretty vague, so in case anyone else needs to do this, hopefully the following pictures are commentary will be helpful.
[NOTE : The numbers on the instructions correspond to the numbers in the pictures]
1. Remove the rear seat base by removing the 2 cross head screws at the base of the seat. Lift the front of the seat base up and pull the seat forward.
2. Remove the rear seat back by removing the 2 straight head screws now exposed. Push the rear seat back firmly up to disengage it from the clips along the top of the seat back
3. Remove the sill tread plate which is held on by 4 screws
4. Gently pull off the felt seal
5. Remove the small screw securing the chrome armrest fixture
6. Remove the large armrest screw now exposed
7. Gently peel back the rear quarter card liner to reveal 2 more small screws which holds the panel in place at the front of the opening. Remove these small screws
Pull the bottom of the rear quarter card out towards the middle of the car to release it.
8. Remove the plastic cover over the seat belt and unbolt the seatbelt
9. Remove the 2 screws now exposed and pull the crash rail up to remove it
10. With the crash rail off, unscrew the 4 screws holding the INNER window seal and trim in place (The piece is actually removed already in this pic, but you can see the screw holes)
11. You have now exposed the fixtures that are holding the outer chrome trim piece in place. The first 3 are pop rivets, which we drilled out.
12. There is also a small screw towards the back of the trim piece, which you can access from inside the car.
13. The bonus points go for finding the tiny screw hidden behind the window rubber. Good luck not dropping this inside the car when you take it out
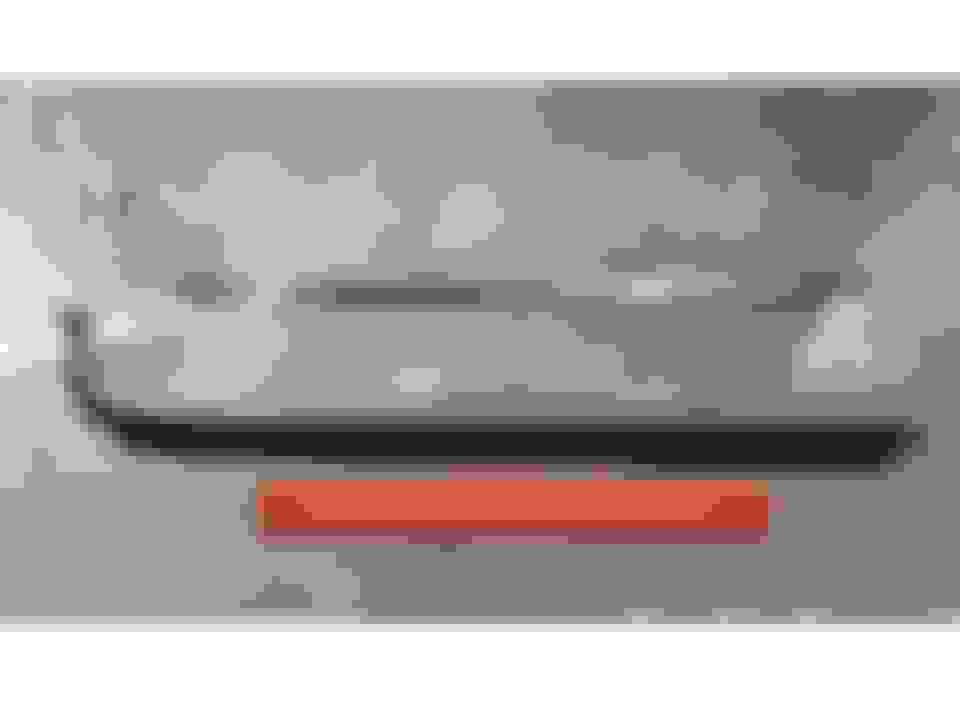
Once you have the chrome trim piece out of the car, you can remove the old seal. Ours was like solid rock due to its age. We sprayed some white silicon around before putting the new seal on, which helped it slide along the trim piece.
Yup! Project creep at its finest.
It's a bit sad you had to take apart all that hard work you did before just to fix a little rubber seal. In fact it's really poor!
You've posted very clear instruction how to do it though. Great tutorial!
(';')
another satisfying project.
getting those back screws off was a lot of fun.
I also got my pop rivet "badge"
now those seals have another 40 years left in them.
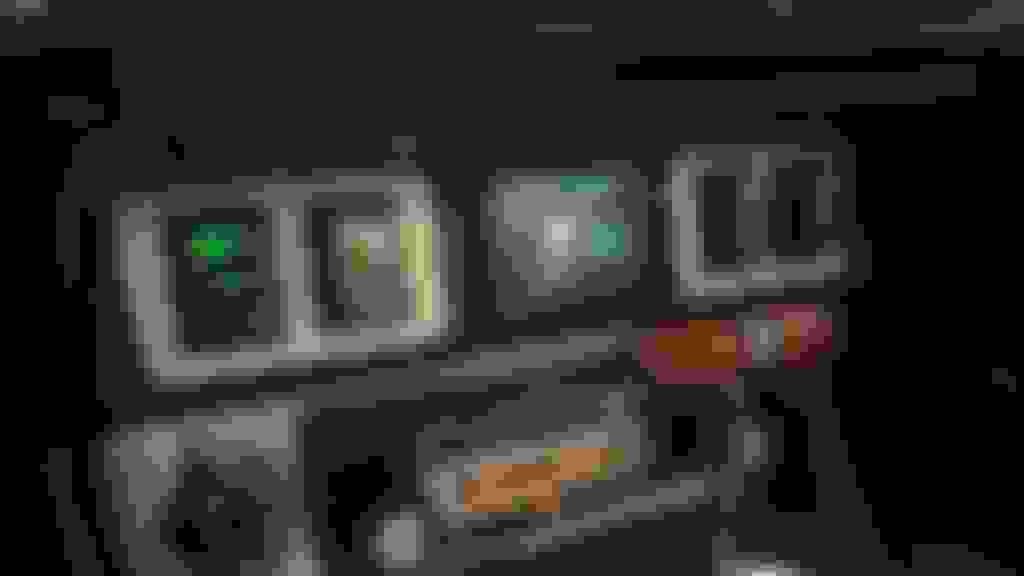
The latest job to get done was replacing the dash illumination with LEDs. When I was in charge of the S3 which @Rhett is now the custodian of, I had often thought about changing the dashlights out on that car, but I never did because I felt it added to the cars character. On the coupe the lighting was even worse, and also very uneven, with some gauges brighter than others and some different shades of green/white. So I decided to try going with LEDs. I am personally very pleased with the results, but I know it won't be to everyones taste. I am documenting it because I couldn't find an exact, current list of LEDs that you needed. After some trial and error I now have LEDs in the 6 gauges, the 4 switches, the clock, the warning lights, and the ignition and lights switches, replacing the fiber optics there. Part numbers are given at the bottom of the thread.
Procedure : speedo and tacho need to be pushed in and rotated counterclockwise to release them. They each have one bulb, which has a red wire going to it. The bulb holder just snaps in and out. As the outer casing of the holder acts as an earth, you should check to see its nice and clean where it snaps in to the gauge.
Procedure : 4 smaller gauges (fuel, temp, batt, oil) If you have a small child, now would be the time to introduce him to the joys of classic car ownership and bribery, because trying to remove the bulbs for the 4 smaller gauges is a little bit difficult if you have big sausage fingers like me. Your access is through the hole for the speedo or the tacho, depending on which side you are doing. You can either choose to pull the bulb holder out with the gauge in place (Thats what I did) or you could try to release the single knurled wheel that holds each gauge in and remove the gauge through the front of the dash. When I was doing the dashwood I remember at least one of the gauges had extra "gubbins" connected to it, so the chances of getting all that back together would be slim. Apart from the small child method, I'd be interested to hear if there is a better way to do these bulbs. The observant of you will be asking yourself "why didn't you do this when you had the dash out ?" Yes, great question......... most of the time the work is logical, but that was for sure an oversight on my part. Anyway, it means you get 2 posts out of it.
The original green hue is created by using a white bulb and a green plastic cap. Unfortunately the combination of heat from the bulb plus 40 year old plastic means the plastic caps are either burnt black (giving almost no light out) or burnt all the way through (giving white light). The LEDs I got are slightly bigger than the original bulbs, so I had to "remove" the green plastic caps. On my gauges they were all burnt through, so "removing" meant sticking your finger in and wiggling it around to remove the remnants of the green plastic caps and make sure the bigger LEDs would fit.
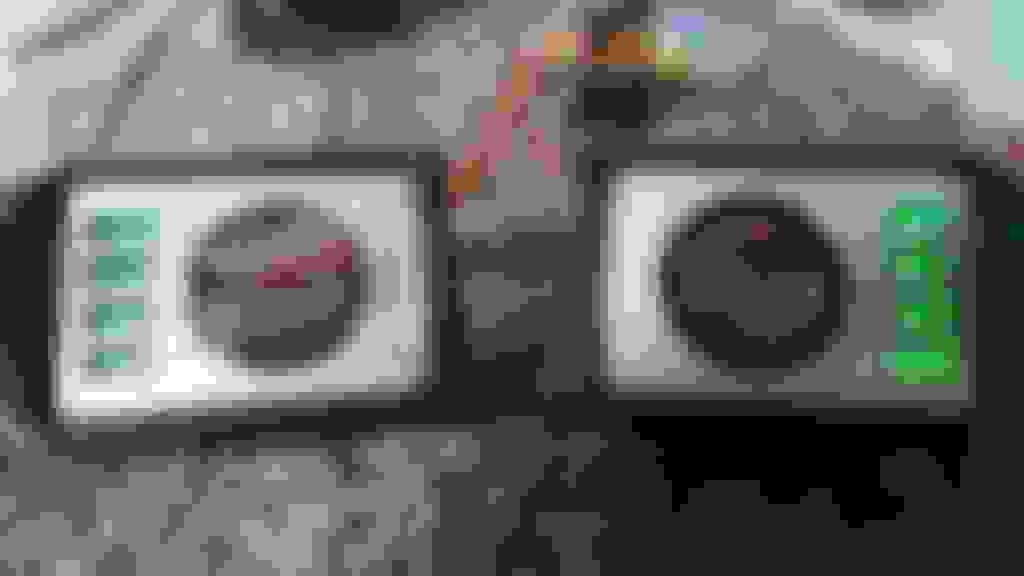
Procedure : 4 auxiliary switches (fuel, heated screen, light 1, light 2) Each group of 2 switches is just a push fit, so you can carefully lever the pair of switches out of the front. I have a set of soft plastic trim removers which I got from Harbor Freight 5 Piece Auto Trim and Molding Tool Set which as great for stuff like this. The bulb holder is in the middle of the pair of switches. Here's the cool part....... The single bulb provides both the back illumination, and also the selector illumination for both switches (ie on the fuel switch, you either have the green arrow on the top of the switch, or the red arrow on the bottom of the switch) This miracle is achieved by there being light paths in the switches that, depending if the button is in or out, directs light to the top of the switch or the bottom. Really slick design. I used green LEDs in here first, which lit up the back illumination and the top selector illumination great, but, strangely didn't light up the bottom selector illumination. After thinking about this for a while I worked out that the red bottom illumination is basically a red filter, so if you give it green light, nothing gets through (because there's no red in the light source). If you give it white light, it filters out everything apart from the red light. So....... these selector switches MUST USE white LEDs (Everything else used in this project is green)
Procedure : The clock is also removed by gently levering it out of the console. One bulb holder is there on the back.
At this point I had the gauges and the center console all done and it was looking great.....but...... my eyes kept going down to the light switch and the ignition switch, both of which have been dark since I got the car. I know these are illuminated through the fiber optic system, and I do get some illumination on the heater controls, so I know the opticell is working but after investigating, I found the fibers going to these 2 switches were not working. Luckily I had 2 green LEDs left over (the ones that didn't work correctly in the aux switches) so it seemed like a good idea to use these instead of the fiber optics.
Procedure : Ignition switch and light switch. Remove the 2 long screws holding each trim piece on (accessed from below the dash). Remove the dashliner as you will need access to add the electrical connections. The fiber optic pushes into a small hole on the back of the switch. I used a dremel to enlarge this hole slightly such that the LED fitted nicely in the hole. I then used some tape to keep it there. You need to find some way to connect wires to the LED itself. I guess I could have found a specific bulb holder, but as the LEDs are cheap, and in theory will outlast the car, I just soldered wires directly to the LED casing. Be careful not to heat the casing up too much if you do this. The wiring for the LED has to go through a metal hole in the dash, so I used some simple 2 way connectors so I could connect the wires easily after threading them through the metal holes in the dash. Power is easy to get from the rheostat which is on the dashliner. Red/white wire is illumination power. Ground can be done anywhere you can find.
Procedure : Warning lights (oil, ignition, brake, parking brake, etc) Simply pull off the cover to expose the bulbs. Note which way is "up" on the cover before you put it back on. Note the LEDs only work one way, so make sure you have the lights active when you insert the LEDs. If they don't light up, just pull them out and rotate180 degrees and re-insert
Conclusions : The actual finished product isn't as green as it appears in the pictures. It looks pretty good and is still in keeping with the car IMHO. I didn't do the indicator lights inside the speed and the tacho (turn signals and heated screen) because they are working, and are hardly ever on. The LEDs in the gauges do dim somewhat with the rheostat, but I have them on full anyway.
Thanks so much for taking time to write this clear and detailed account of the subject. So useful to have all the info in one place, especially with pics. Presumably this should work identically on Series III...
Curious: do you or did you have a NG900 Saab, or a Buell motorcycle? Your screen name seems familiar to me from somewhere else, can't think where.
I'm conflicted about swaping out the gauge lights in the S3, as I've come to rather like their hue and I'm rather accustomed to the rather dim output (although She hates it on the rare occasions She drives the car). That said, I love and deeply envy the properly illuminated switch gear.
Thanks so much for taking time to write this clear and detailed account of the subject. So useful to have all the info in one place, especially with pics. Presumably this should work identically on Series III...
Curious: do you or did you have a NG900 Saab, or a Buell motorcycle? Your screen name seems familiar to me from somewhere else, can't think where.
Best,
Andrew.
Glad its useful. Nope, thats not me. I am on this forum, the Aston forum, and was on the Acura forums when the Mrs had an old one.