When you click on links to various merchants on this site and make a purchase, this can result in this site earning a commission. Affiliate programs and affiliations include, but are not limited to, the eBay Partner Network.
Regarding temperature gauges, I installed one of these on my XJ8 after reading about it on the forums. Simple to install, and probably saved a lot of damage to the motor when I blew a head gasket. XK8 / XKR / XJ RealGauge - TheJagWrangler
When repairing the head gasket, I decided to remove the bottom of the sump, (they are 2 piece, upper and lower). Found about 2 pints of sludge. Might be an idea to check yours as well, as I think a mix of coolant and oil causes the sludge.
SBS, I know you only used the green stuff for temporary solution. But Phobman, I don't think that's right, checked with my car savvy CA friend, he wrote back: "We have green for old-fashioned cooling systems, and yellow/orange for aluminum motors and radiators. "
So X150 owners, do not use the green stuff unless a stop gap situation.
Universal green stuff is almost always dexcool dyed a different color. Prestone with Cor-Guard is the main exception being dexcool with added phosphates, an american twist on traditional japanese antifreeze.
I have similar problem, not overheating, but loss of compression and I am having the dickens of a time removing the head bolts. I have only been able to remove 3. What sockets did you use?
thanks
Hi, I used a snapon 13mm hex. The key to any head bolt removal is to have a nice clean fit socket/spanner. Use a breaker bar and give it a good initial power jolt to break the seal.
The new bolts I now have are T-60 star head bolts which need a long T-60 to fit into the head casting.
I will post pictures of both bolts for comparison tomorrow.
don't know what the problem is, but you have my sympathy
Thank you for your sympathy 🤗
You probably do know what the problem with my engine is, especially after you read my opening post. But maybe like I often do, you forgot😂😂
I often go into the bathroom and forget why I even went in😂
Are you going to port and polish heads? Please say yes (and post pictures).
😂😂 I wish I had the time to do so brother, however it will just be a straight forward rebuild 🤗 The only mod that this car has are the XKR bonnet vents that I put in , because I liked them 😎
Planning to get the heads and timing gear on tomorrow.
I will however over the next few days I will post plenty of pictures along with what the most awkward procedures were/are during both dismantling and rebuilding the engine.
Is there after market parts for this engine? Rock Auto have only few parts for the 4.2 jaguar engine just curious about part source and costs .
Thinking to buy one ...
I asked a similar question regarding sourcing aftermarket timing chain kits ect. Also were XK owners sourced parts from.
I asked this on another XK forum last week. I got the usual "I did a google search for you" and " must be new to the internet " " use the jaguar dealership" ext ext.😕
Mmm, that's a shame, anyway, I am posting this thread on here now👍🤘
I am surprised there are not after market suppliers for parts for our Jaguars X150s.
Take my other cars for example its very very rare that italian car owners actually use the main dealers for parts. The majority use companies like eurospares.co.uk and superformance.co.uk for all our parts from engine to suspension.....every thing. They even re manufacture once rare to locate parts.
There definitely a market for after market XK parts. But that's just my opinion, usually it means nothing 😭
Thanks Cee Jay. Now have seen a couple of kits. They are a little more complex than I had hoped. I�ve reached the age (�Old Guy�) that I occasionally create more problems than I solve. Especially, if it ain�t really �broke� yet. My strategy may end up being, �at the first sign of overheating, Immediately pull over and call for a tow truck (even if I�m in my own driveway 😂. I�ll keep my eye on the forum in case an �easy� fix comes along.
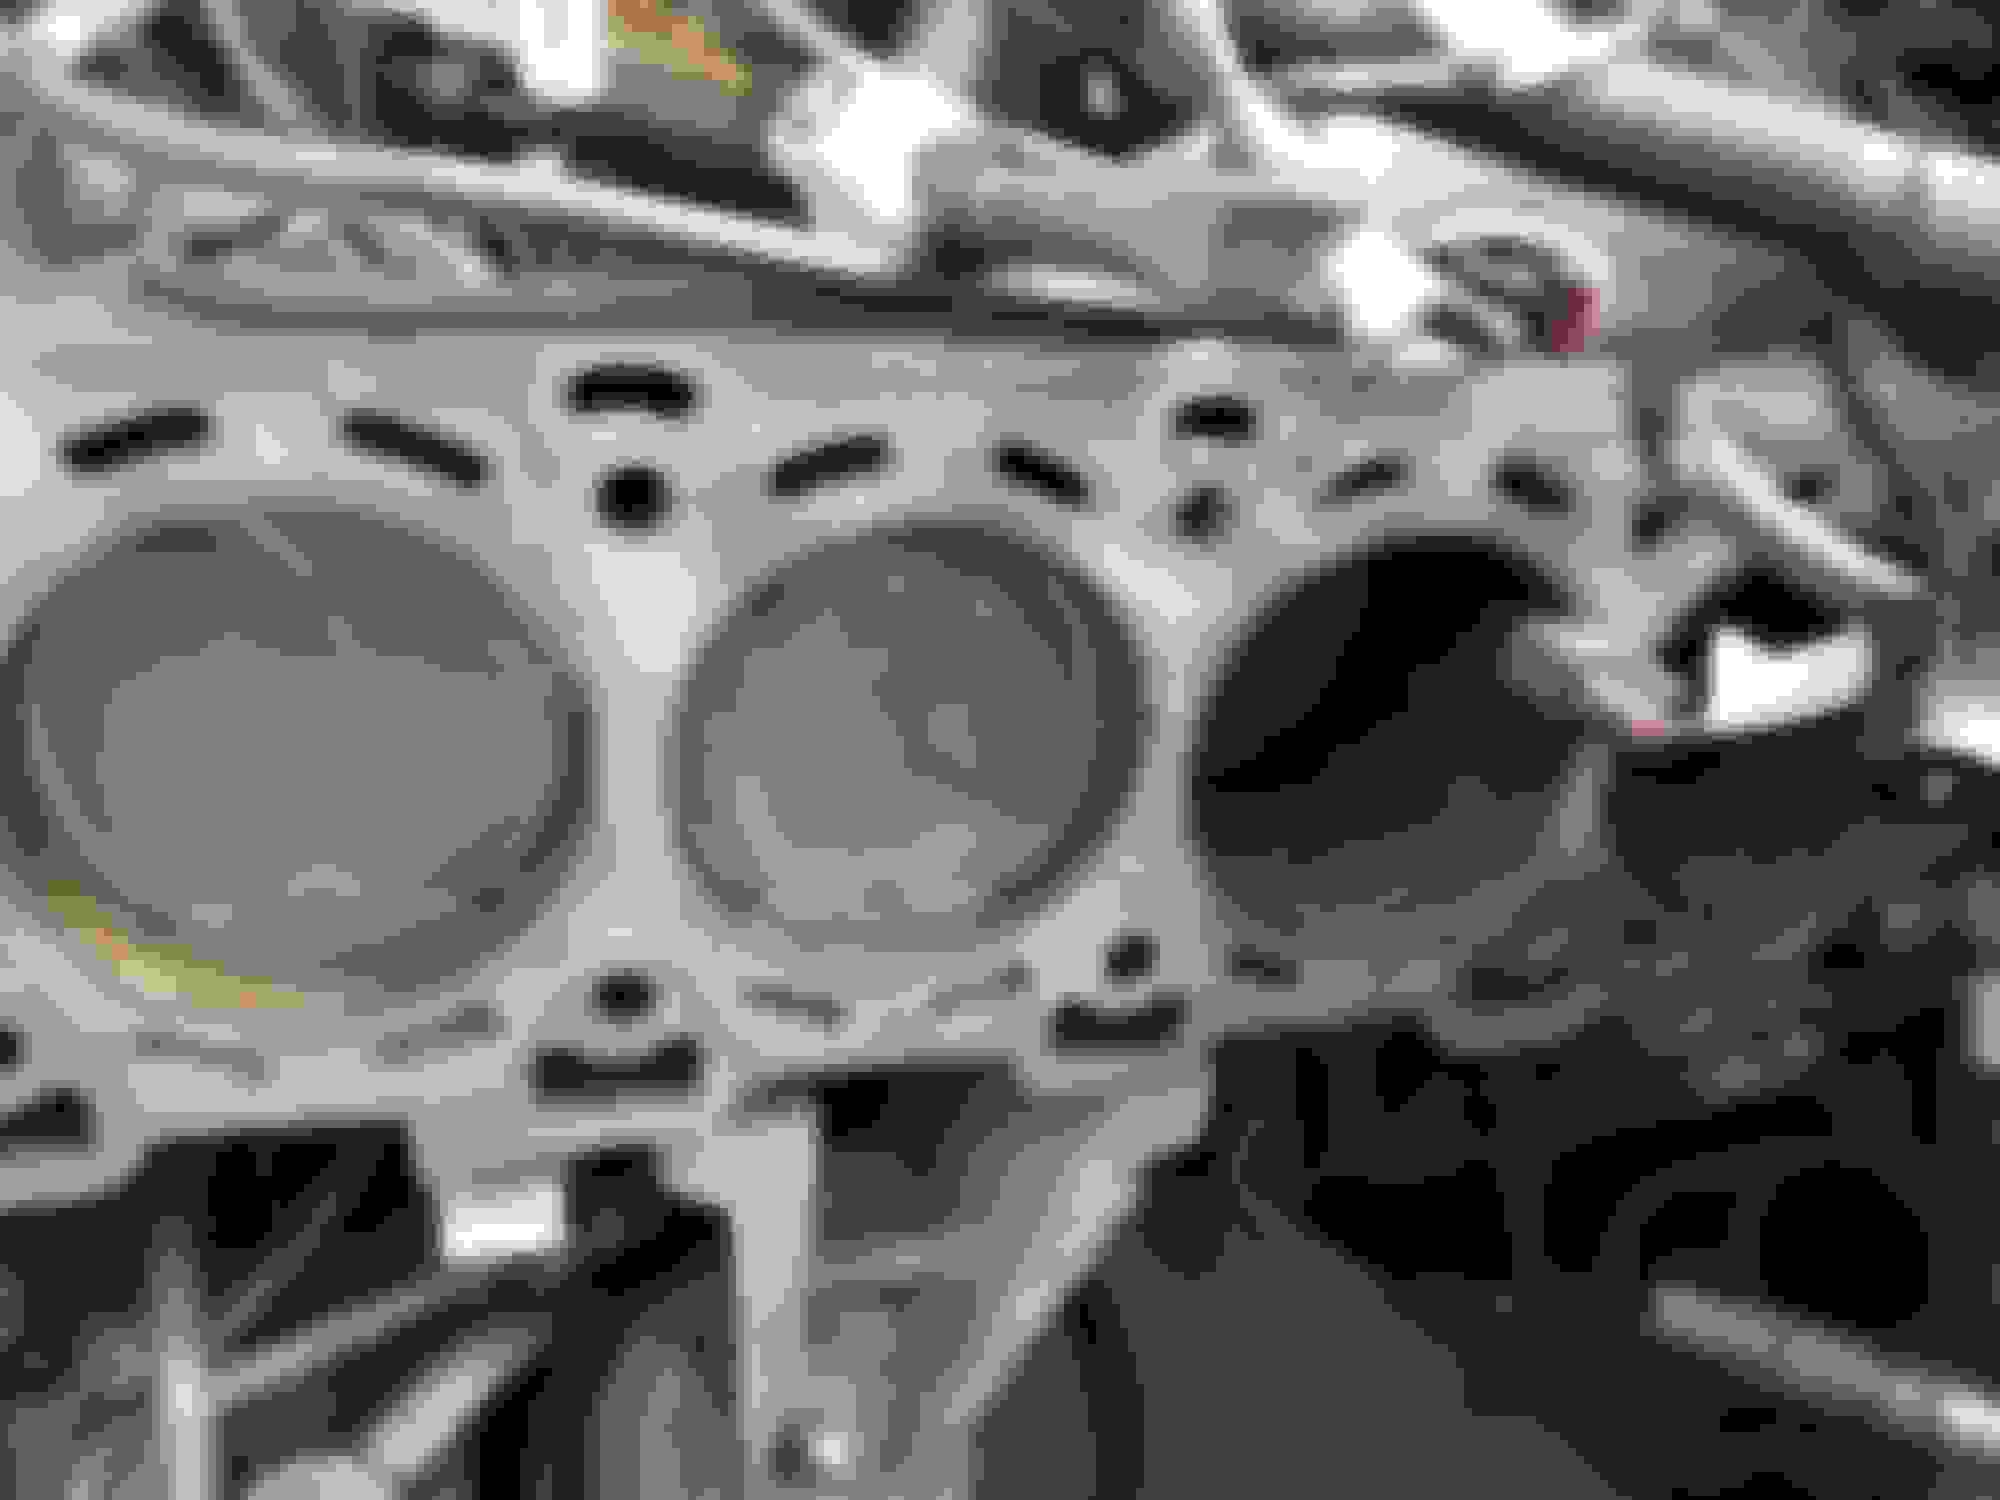
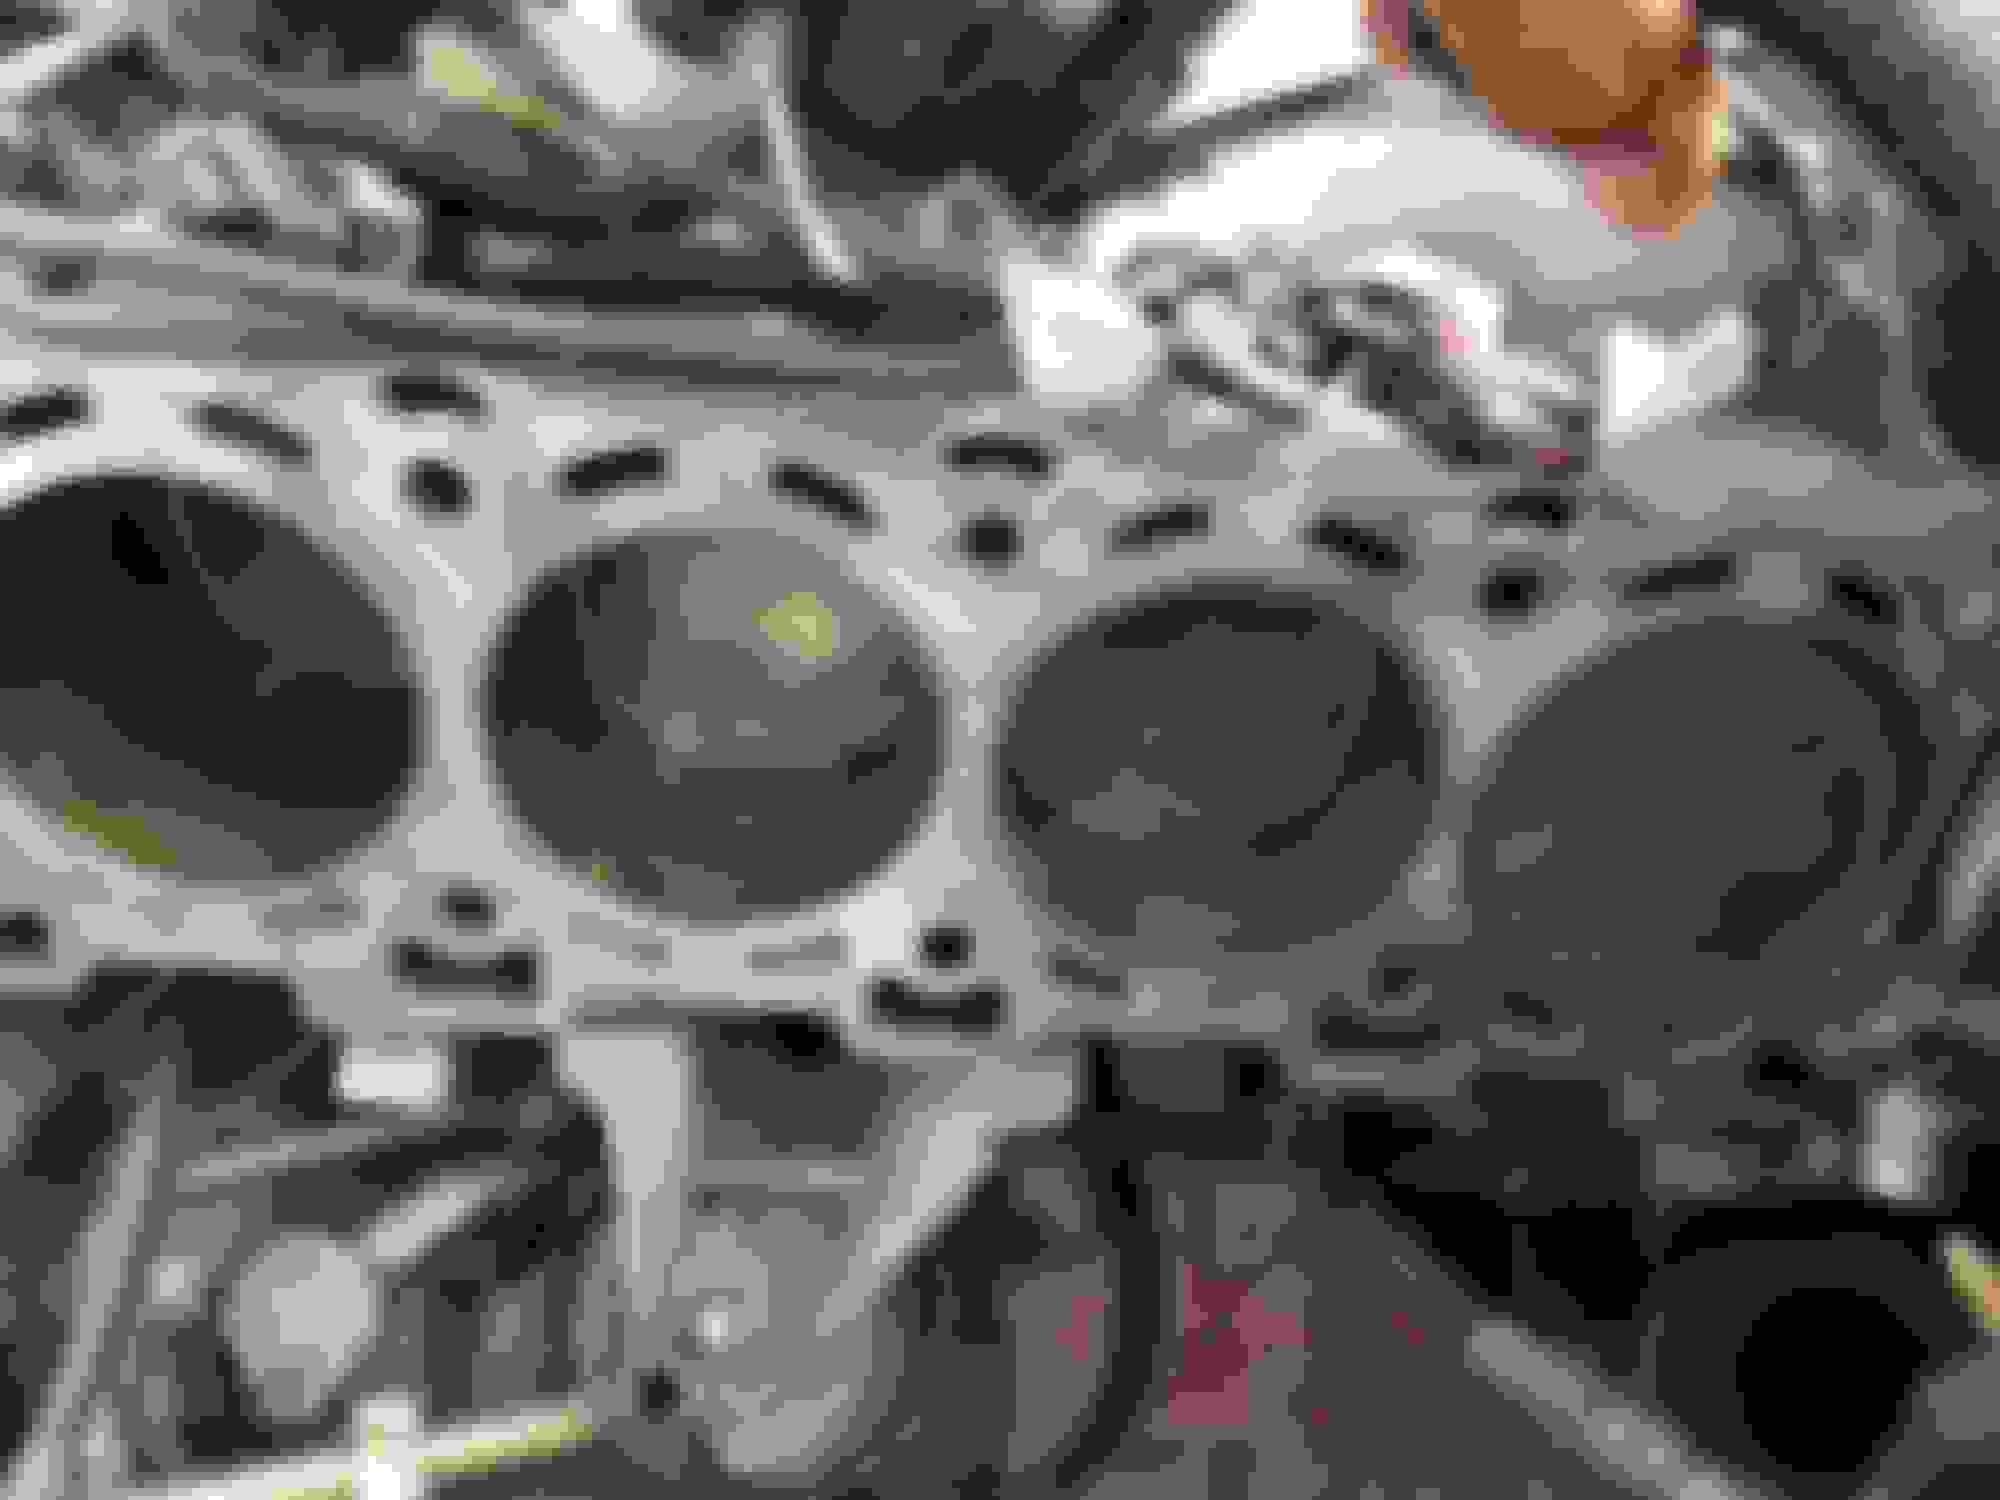
Yesterday the block deck was inspected for imperfections, deck levels and cracks. All looks good and will be putting the new heads on tomorrow.
Rebuilt the replacement heads, cleaned all the valves, as always the inlet valves were clean, it's always the exhaust valves that have carbon deposits on them. Re ground each valve into its seat by hand. I have to say that I have never come across valve colletts so small as the ones on the 4.2 engine. They are tiny compared to other colletts I have changed.They are so small they can very easily be lost if you dont keep your wits about you😳
Getting the buggers back into the collar takes some long tweezers and steady hand/nerves🙄
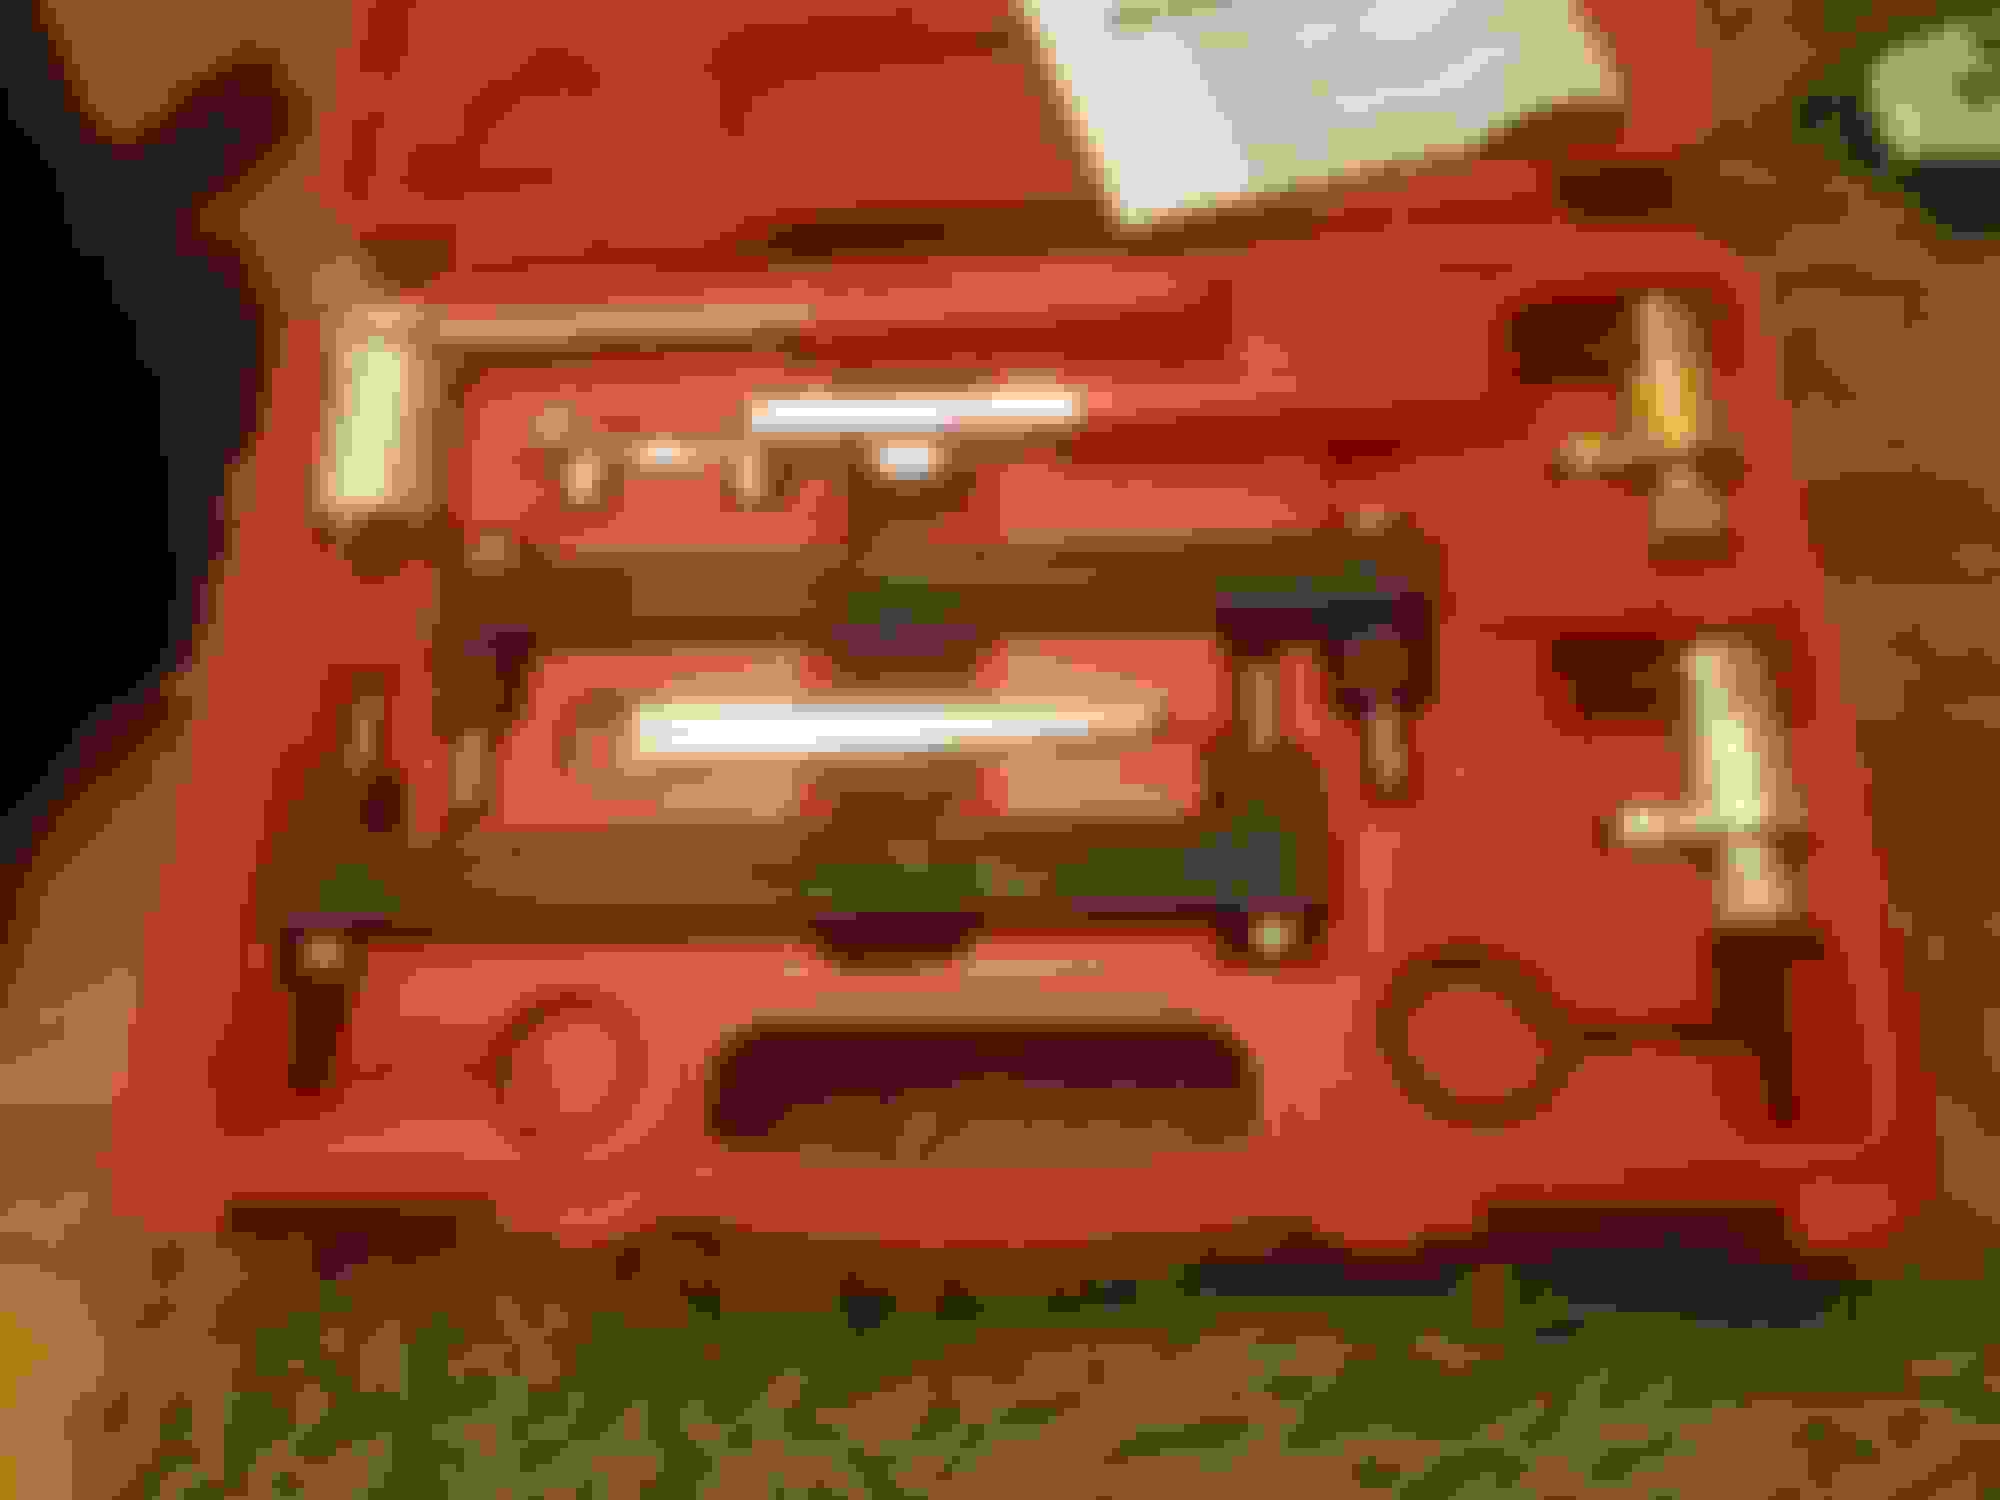
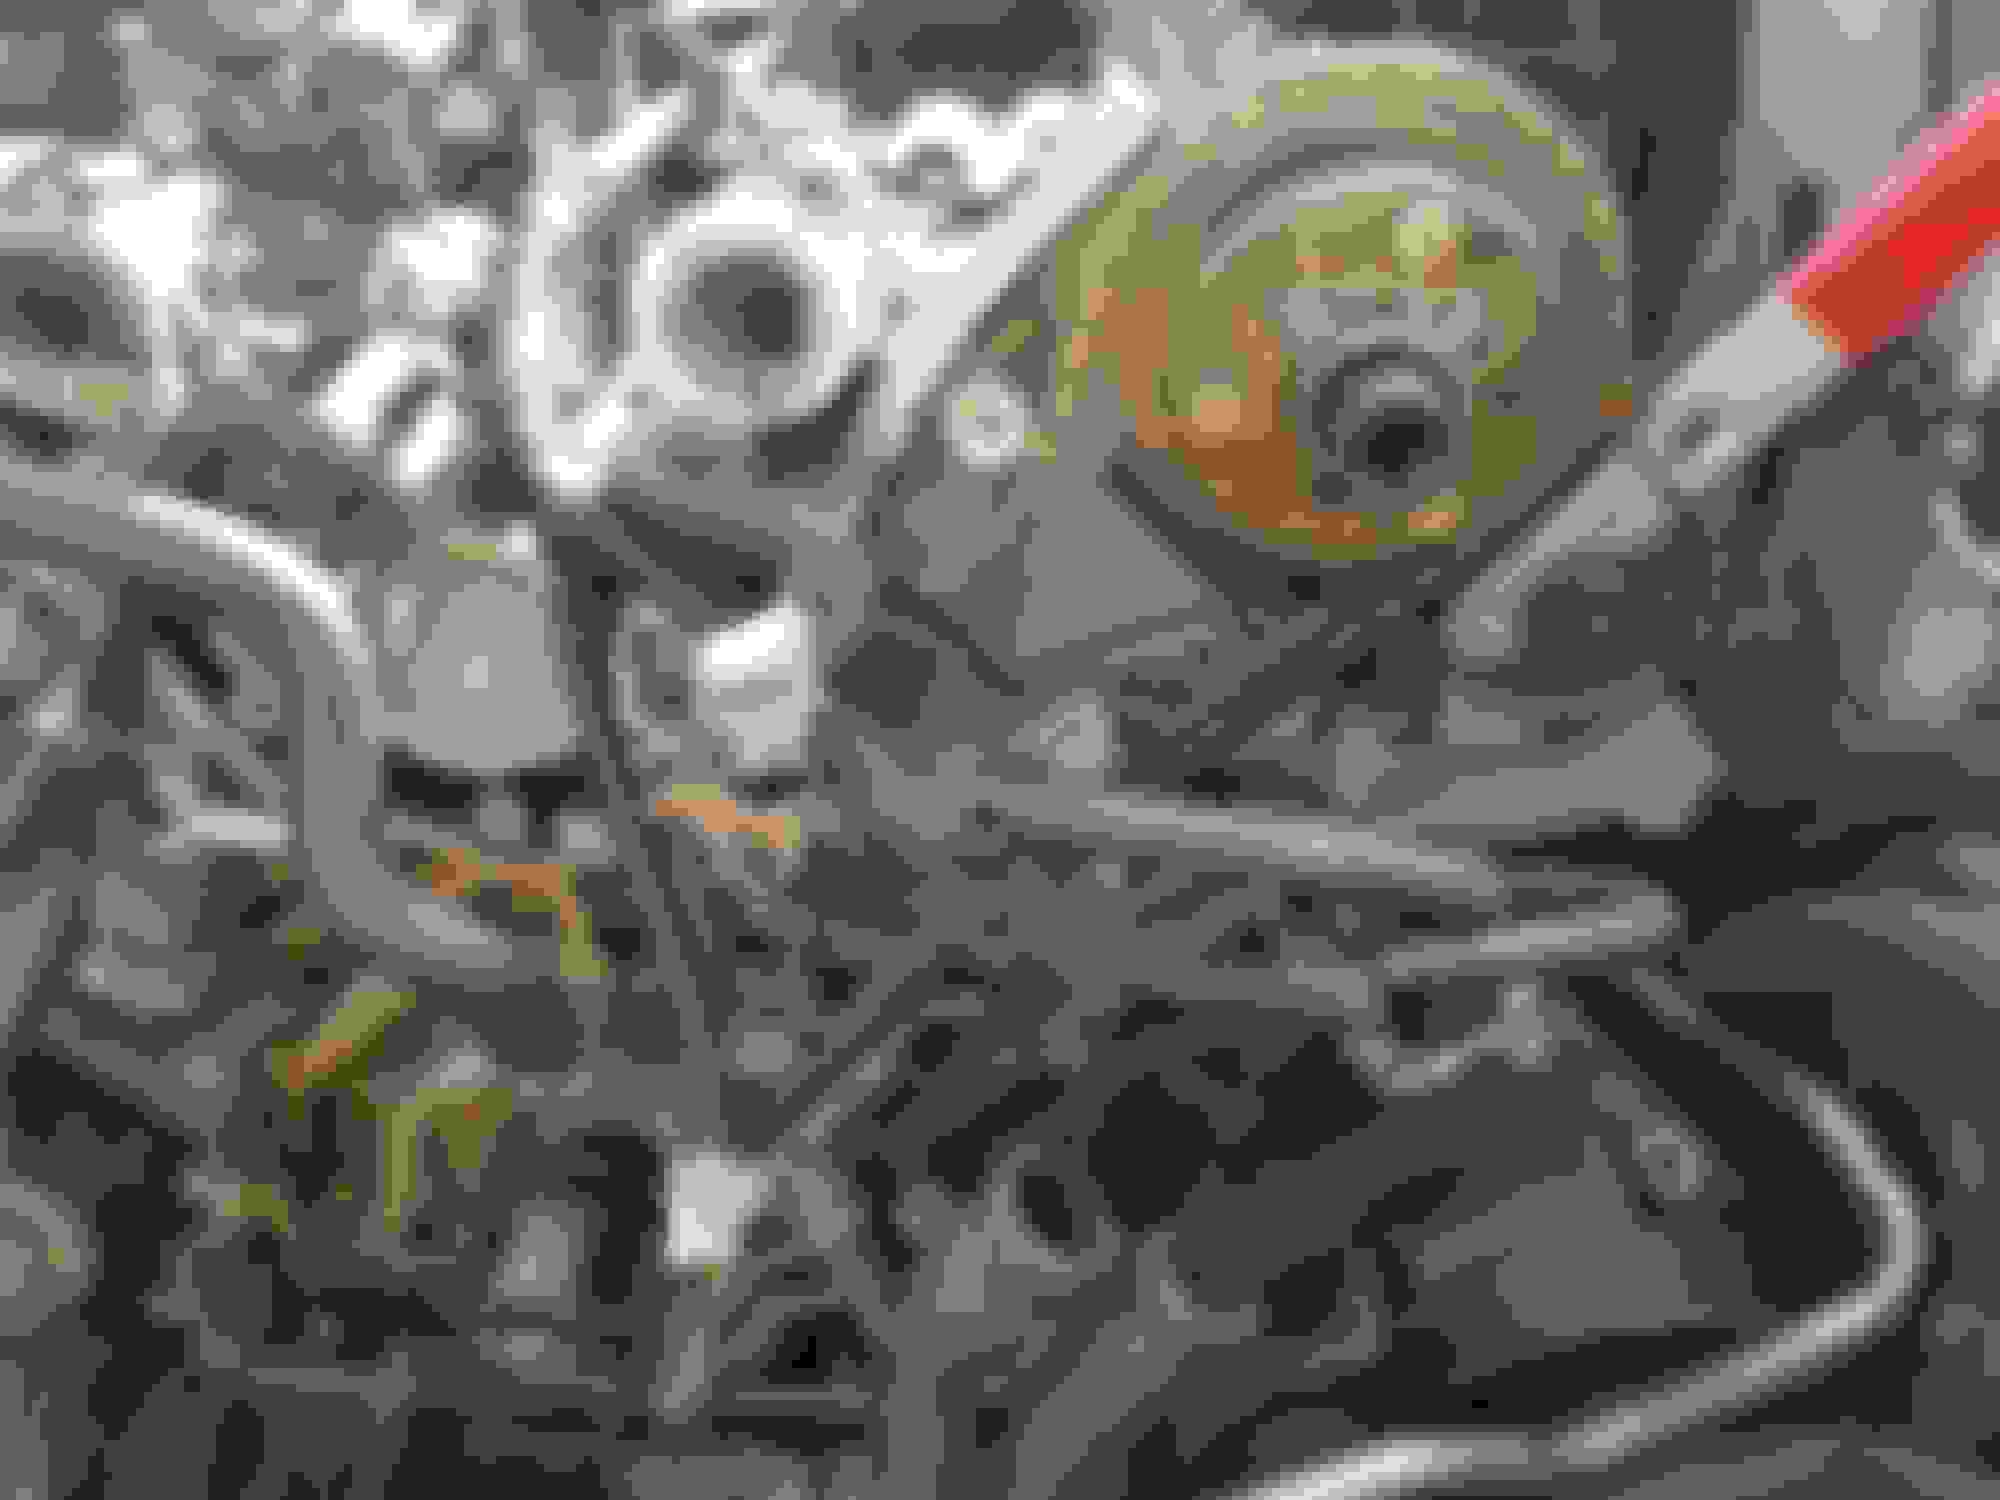
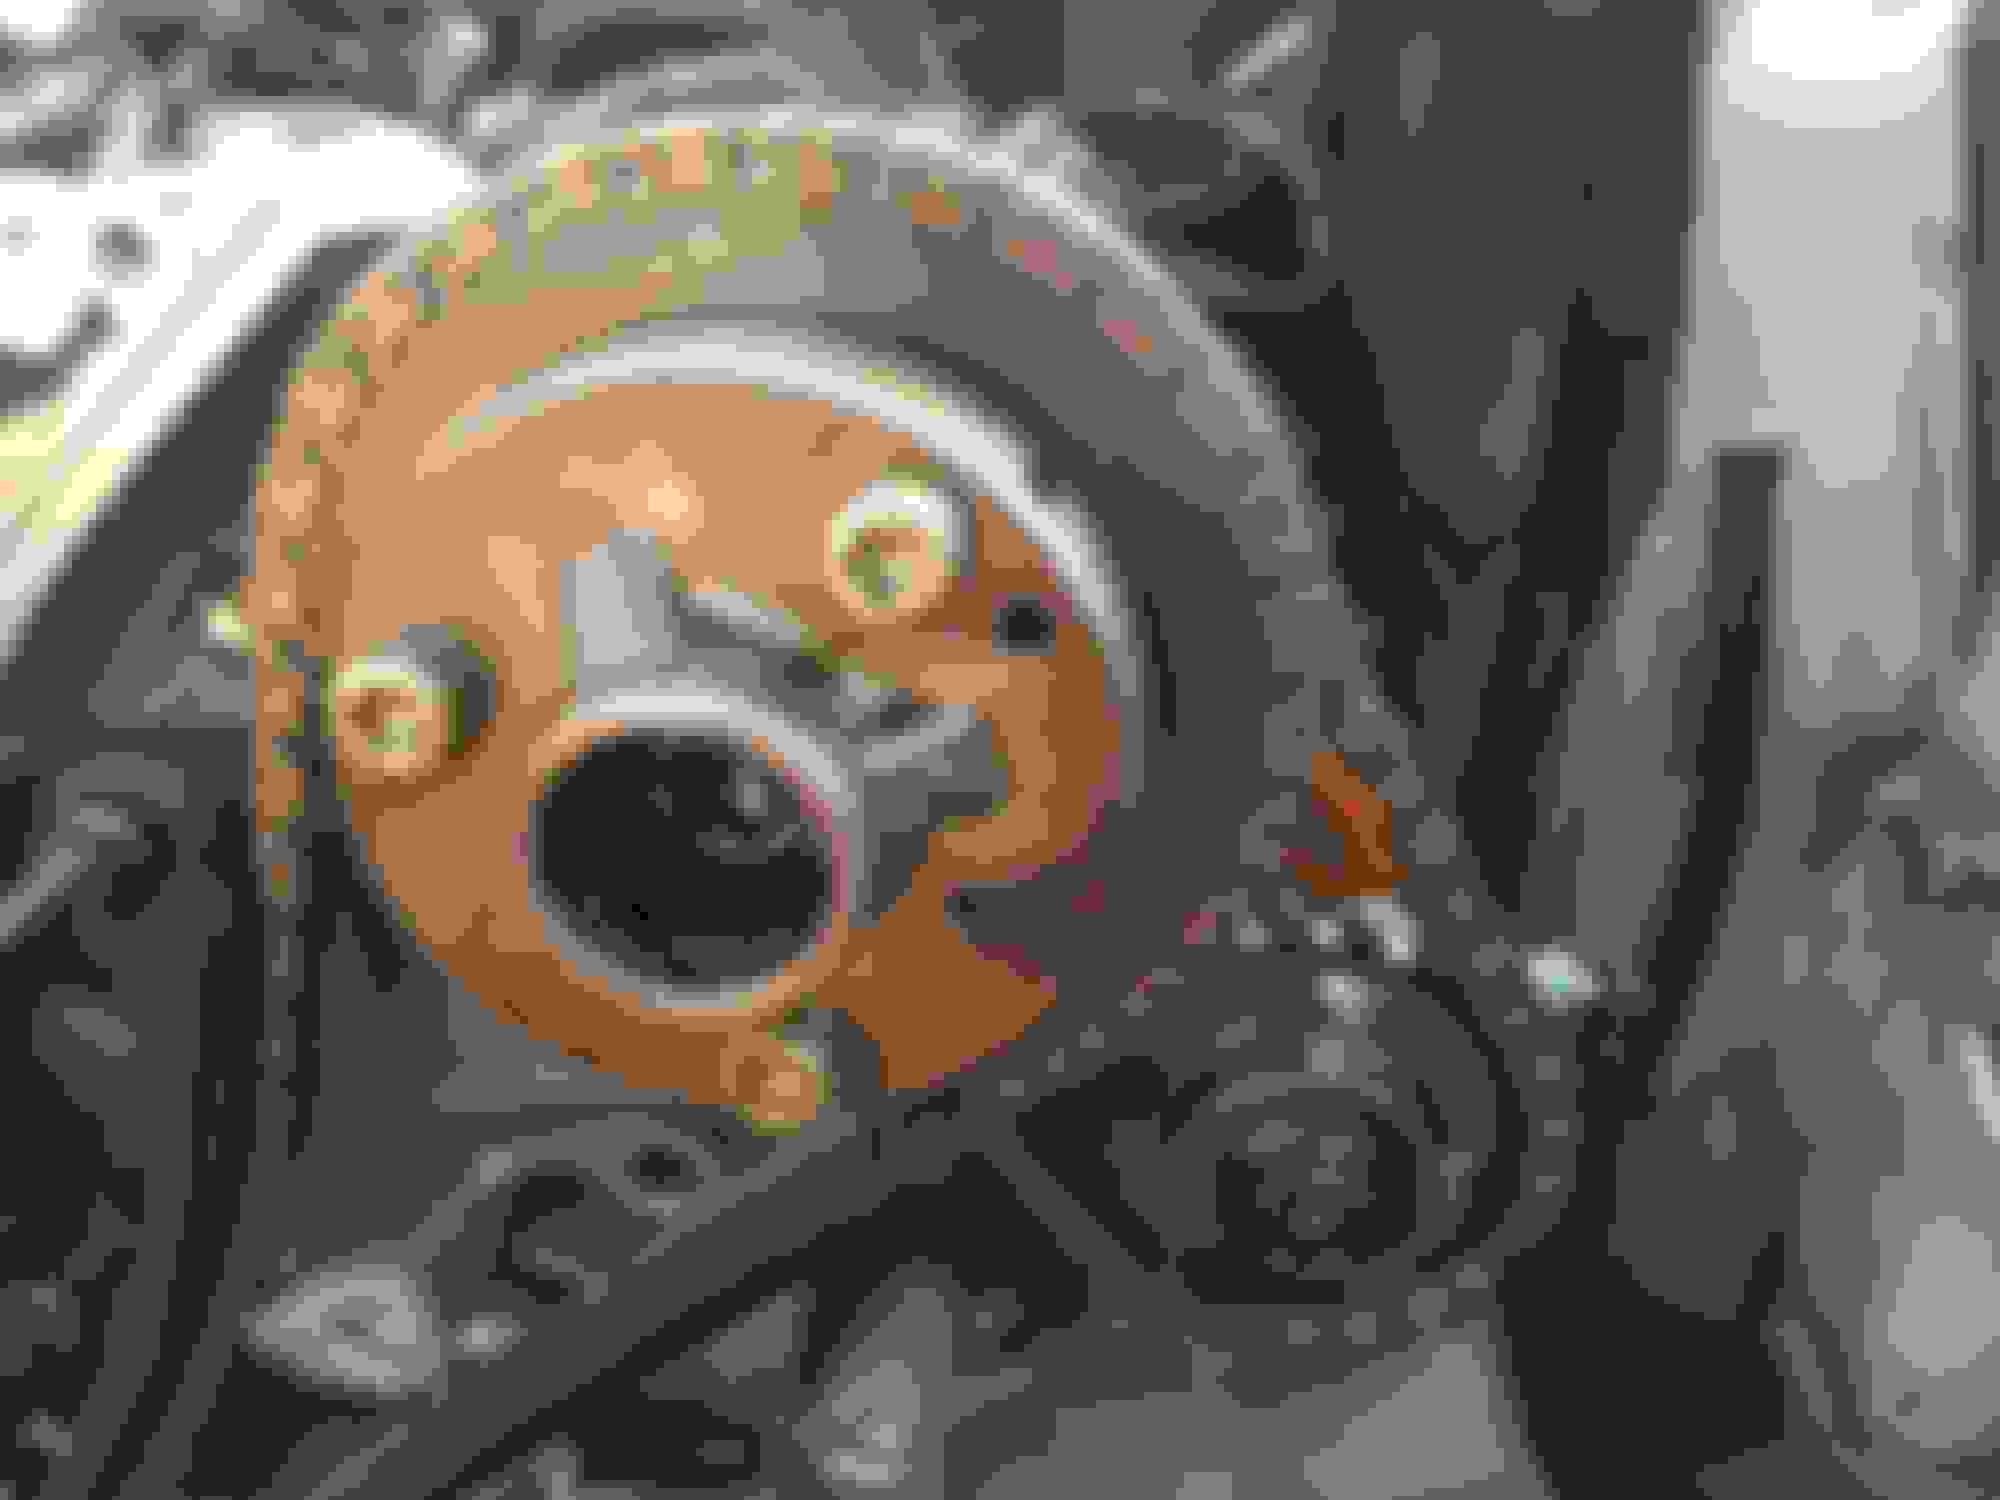
I have no doubt that you might have seen the X150 timing kit already, but for the sake of the thread I include a picture. In hand is the TDC lock. This lock is inserted into the bottom of the bell housing in the hole that is used by the crank position sensor. I used In endoscope to look into the hole to make sure the oval/rectangle shape is right in the middle of the sight hole. There are square shapes all around the fly wheel apart from that oval/rectangle which indicates TDC. Then the little lock which has the same shape at the end simply slips in👍
The sight picture through the crank position sensor hole. One shows one of the squares, one shows the fly wheel turning and about to move onto the oval/ rectangle TDC indicator shape.
The sight picture through the crank position sensor hole. One shows one of the squares, one shows the fly wheel turning and about to move onto the oval/ rectangle TDC indicator shape.
Does this relate to flywheel key location? On the 5.0 the hole is lined up when the pulley key is exactly at 6 O'clock, wondered if it is the same on this engine. FYI, I don't think it is TDC.
I have good experience with this kind of real temperature display showing the OBD values and having an audible alarm
₪ 36.95 40%OFF | Car HUD Head Up Display OBD2 II EUOBD Speedometer Overspeed Warning System Projector Windshield Auto Electronic Voltage Alarm https://a.aliexpress.com/_mK8SRm7
It blends well with the dashboard
I'd like to ask about a minor issue I had when attempting to remove left bank cover. The oil stick tube lug is above the bank cover and I couldn't not pull it out from above therefore could not remove the cover. What is the best way to remove this please?
I'd like to ask about a minor issue I had when attempting to remove left bank cover. The oil stick tube lug is above the bank cover and I couldn't not pull it out from above therefore could not remove the cover. What is the best way to remove this please?
Have you tried pulling the whole tube from the block?
I'd like to ask about a minor issue I had when attempting to remove left bank cover. The oil stick tube lug is above the bank cover and I couldn't not pull it out from above therefore could not remove the cover. What is the best way to remove this please?
Hey, yes the dipstick thing is a head scratcher.
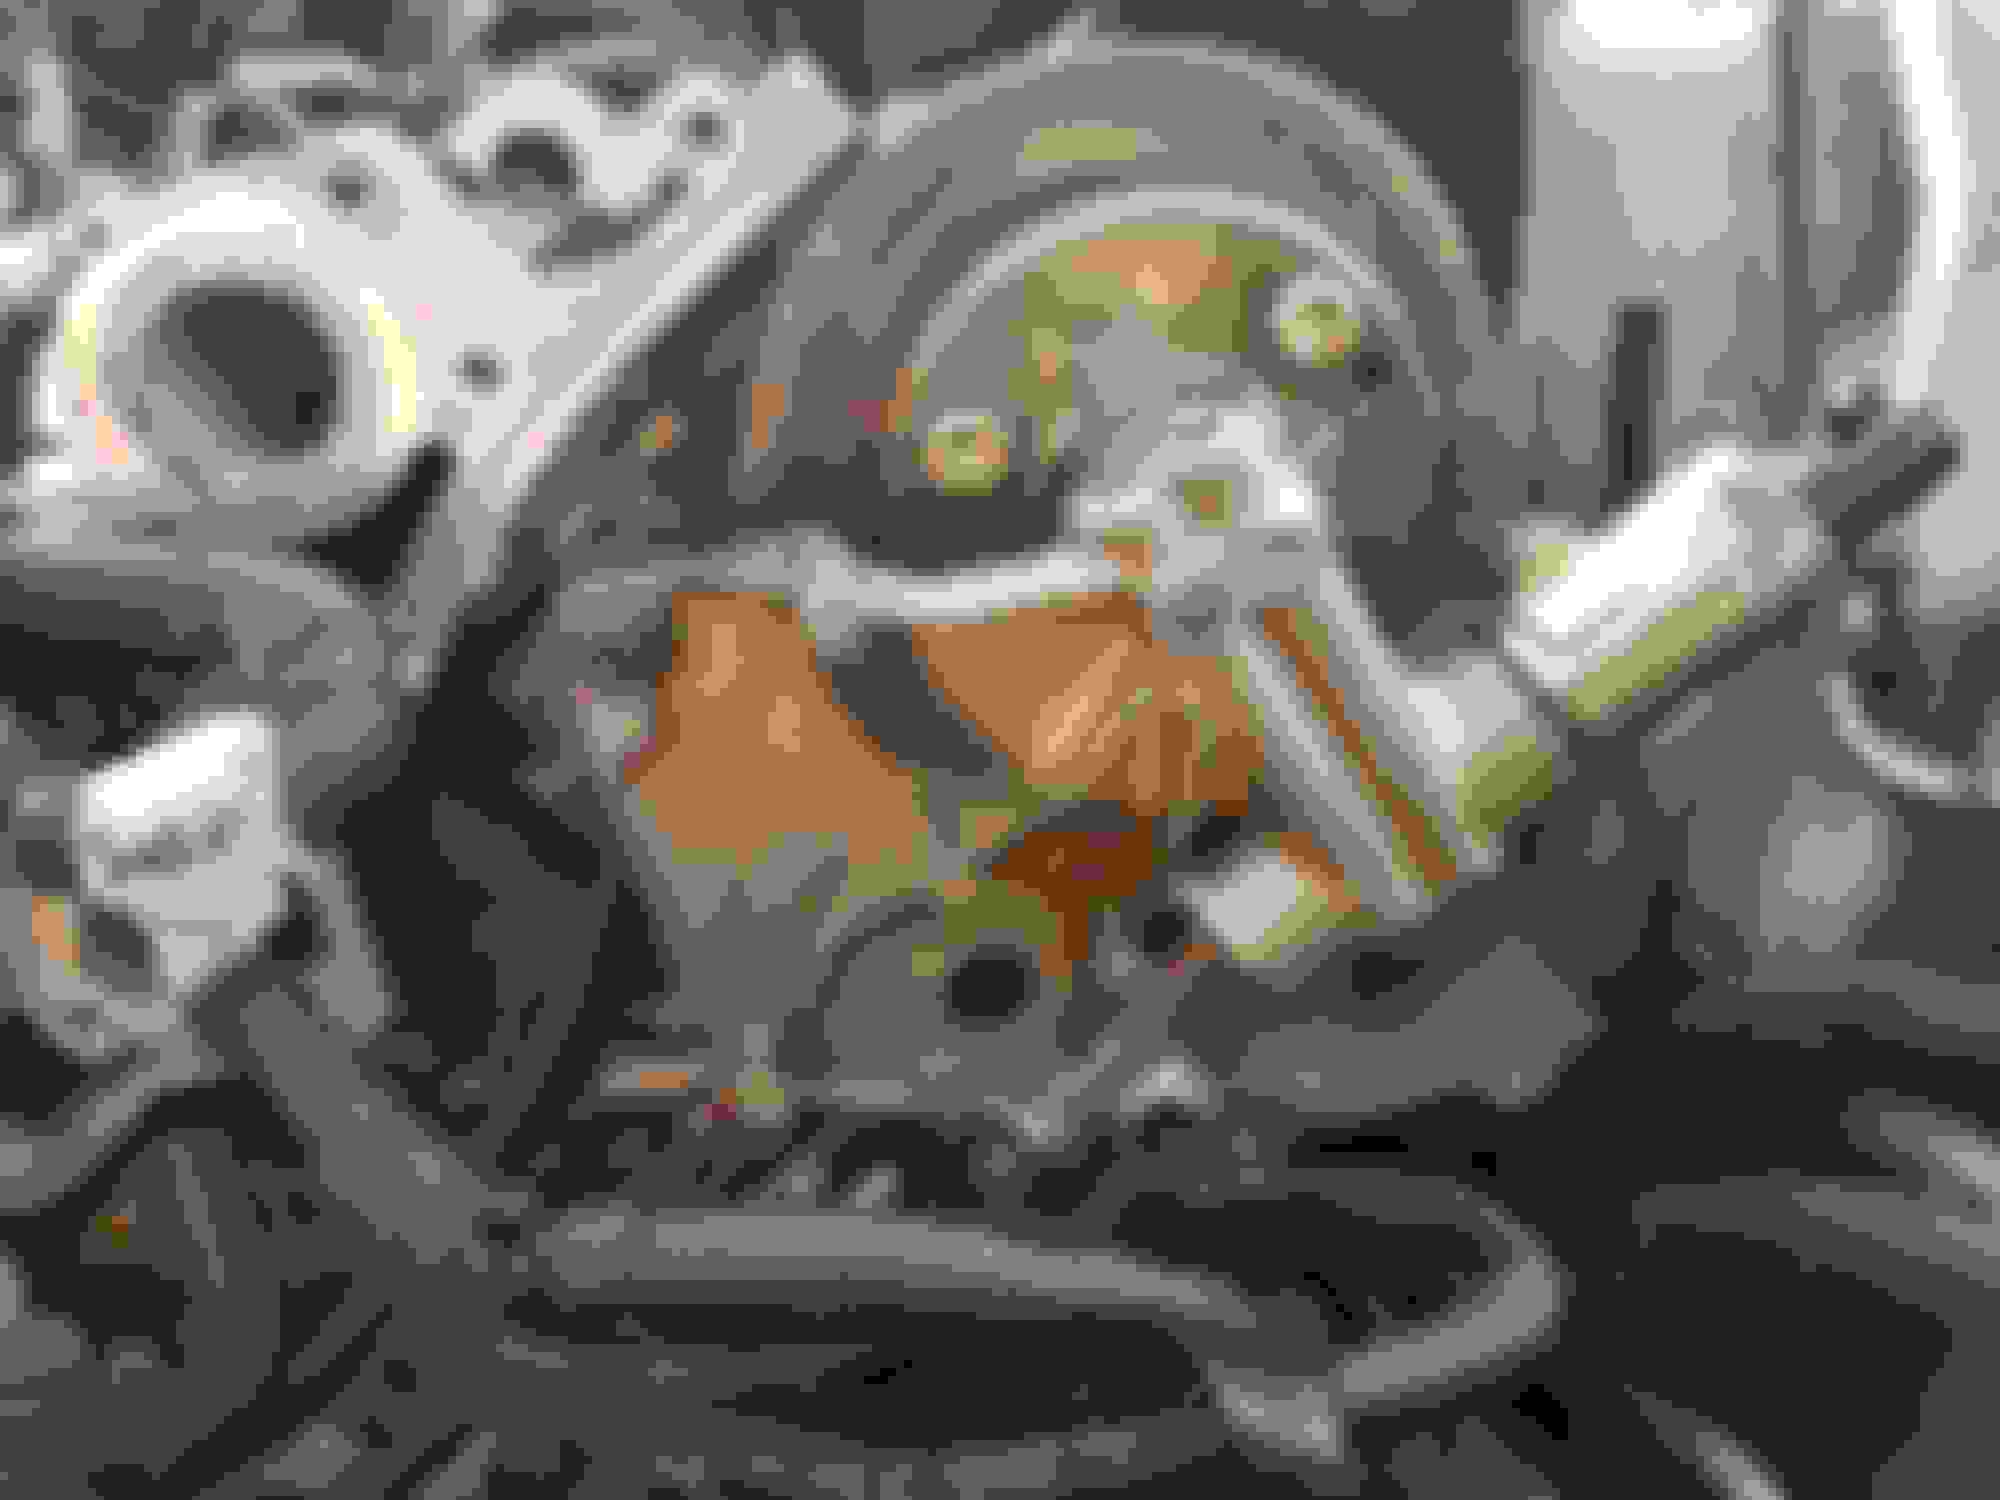
The secret is that although there are bolts that go all around the rocker cover, there is one that's a stud. That's what the dipstick tube is attached to. Once the top nut is removed, simply lift the dip stick tube tab over the stud and rotate it to the side.
. Then on the bortom of the same stud , simply unscrew the hex nut connected to the stud.
I am including a picture of said stud so you can see what I am describing. 🤘
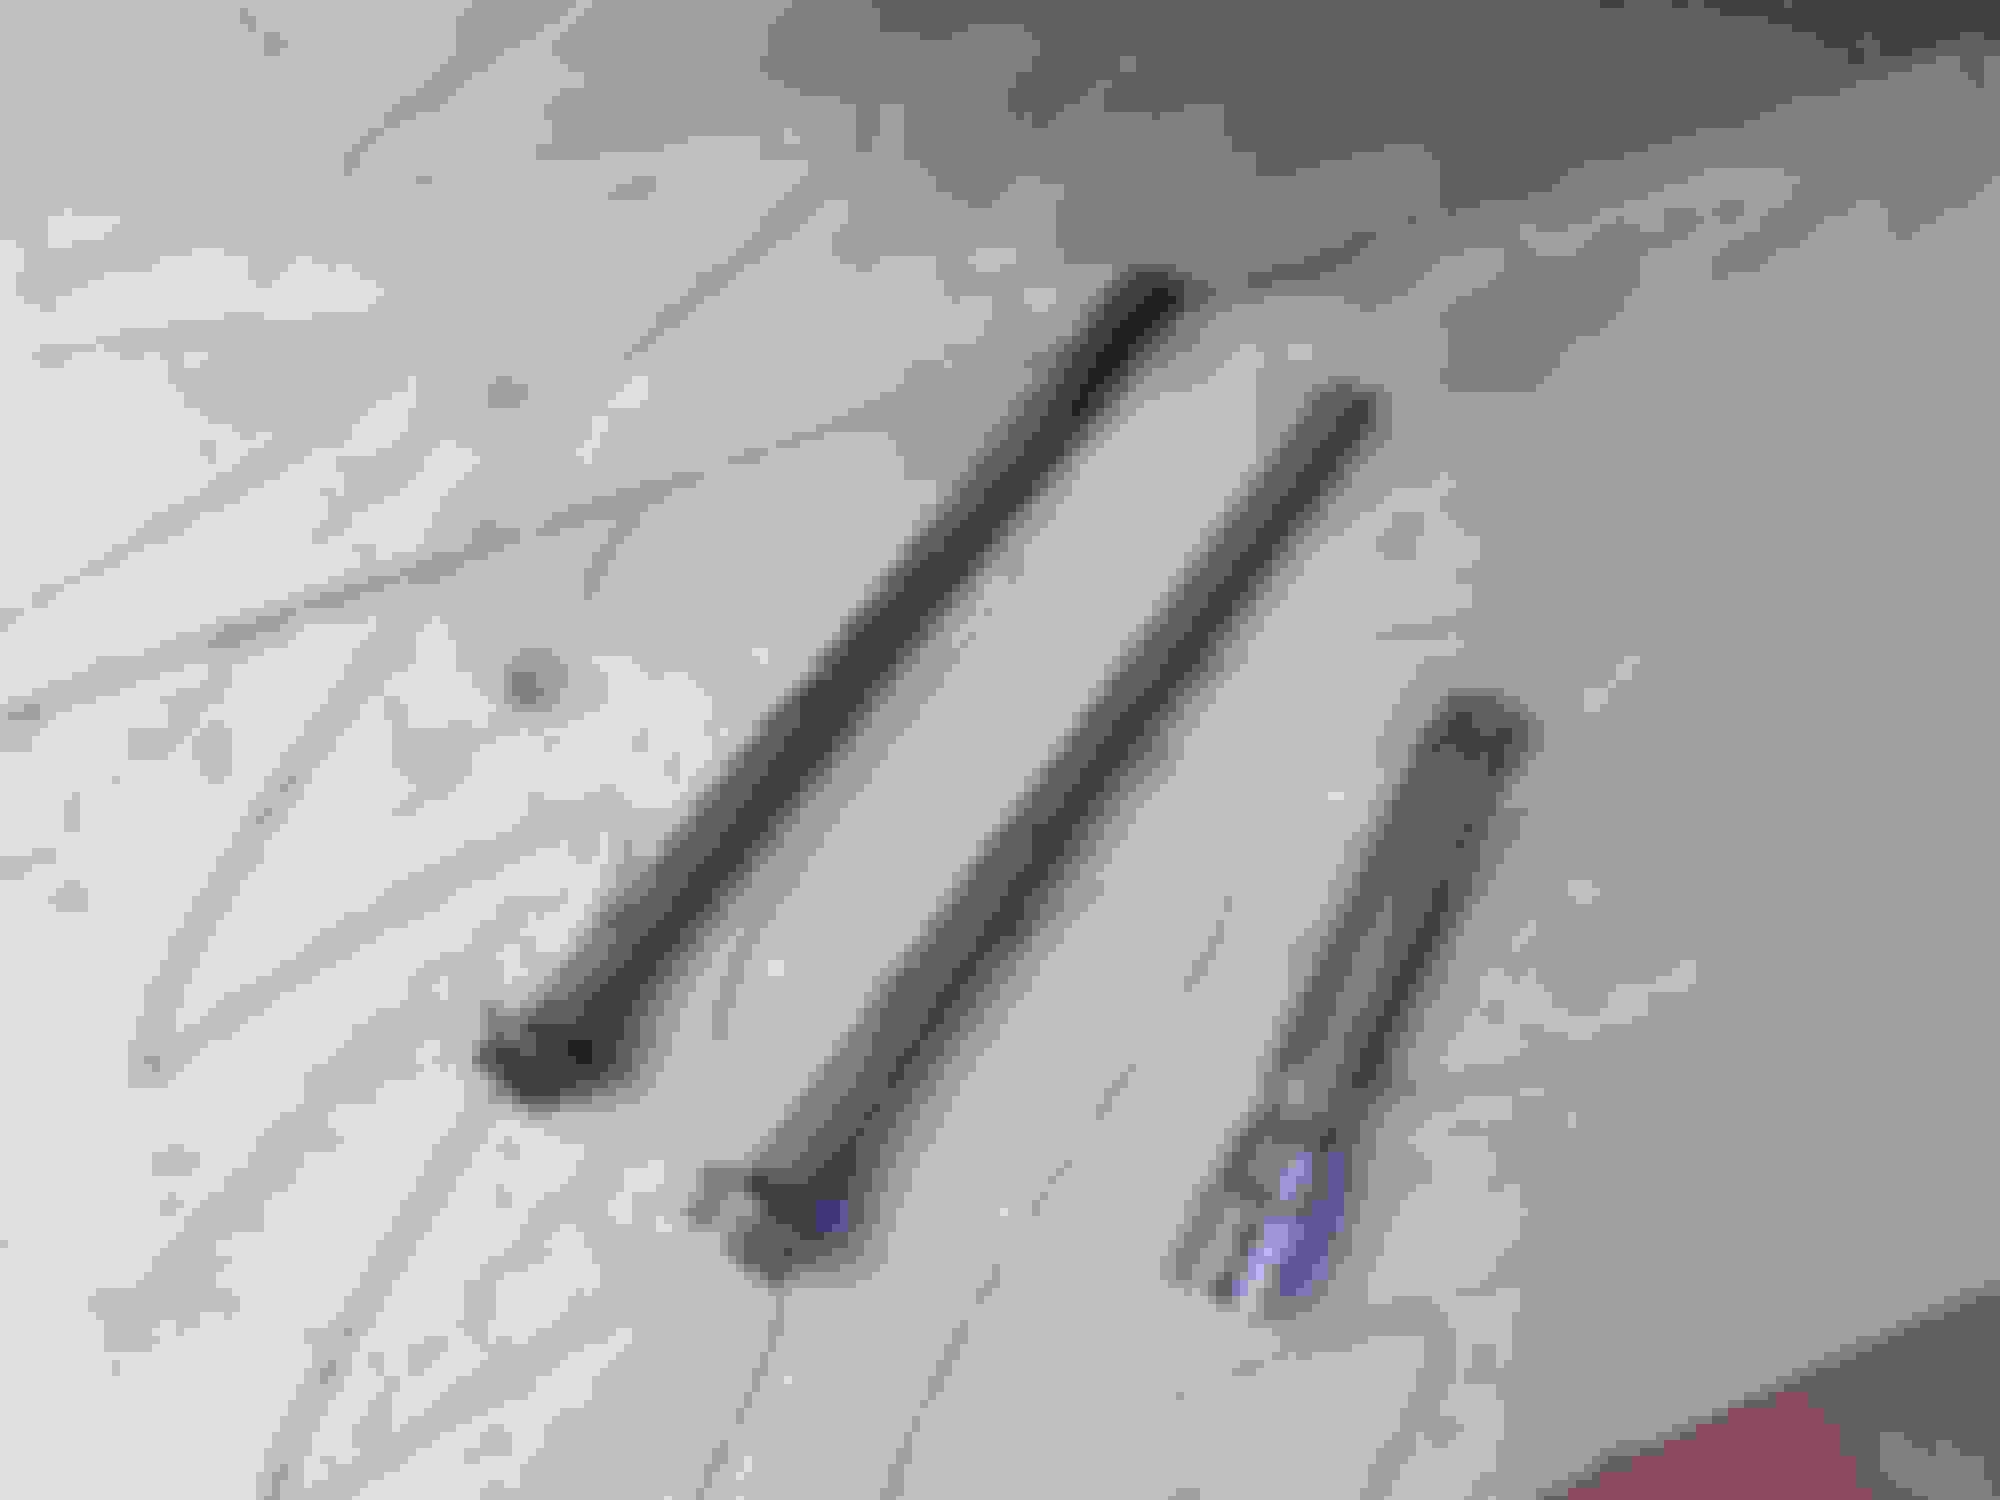
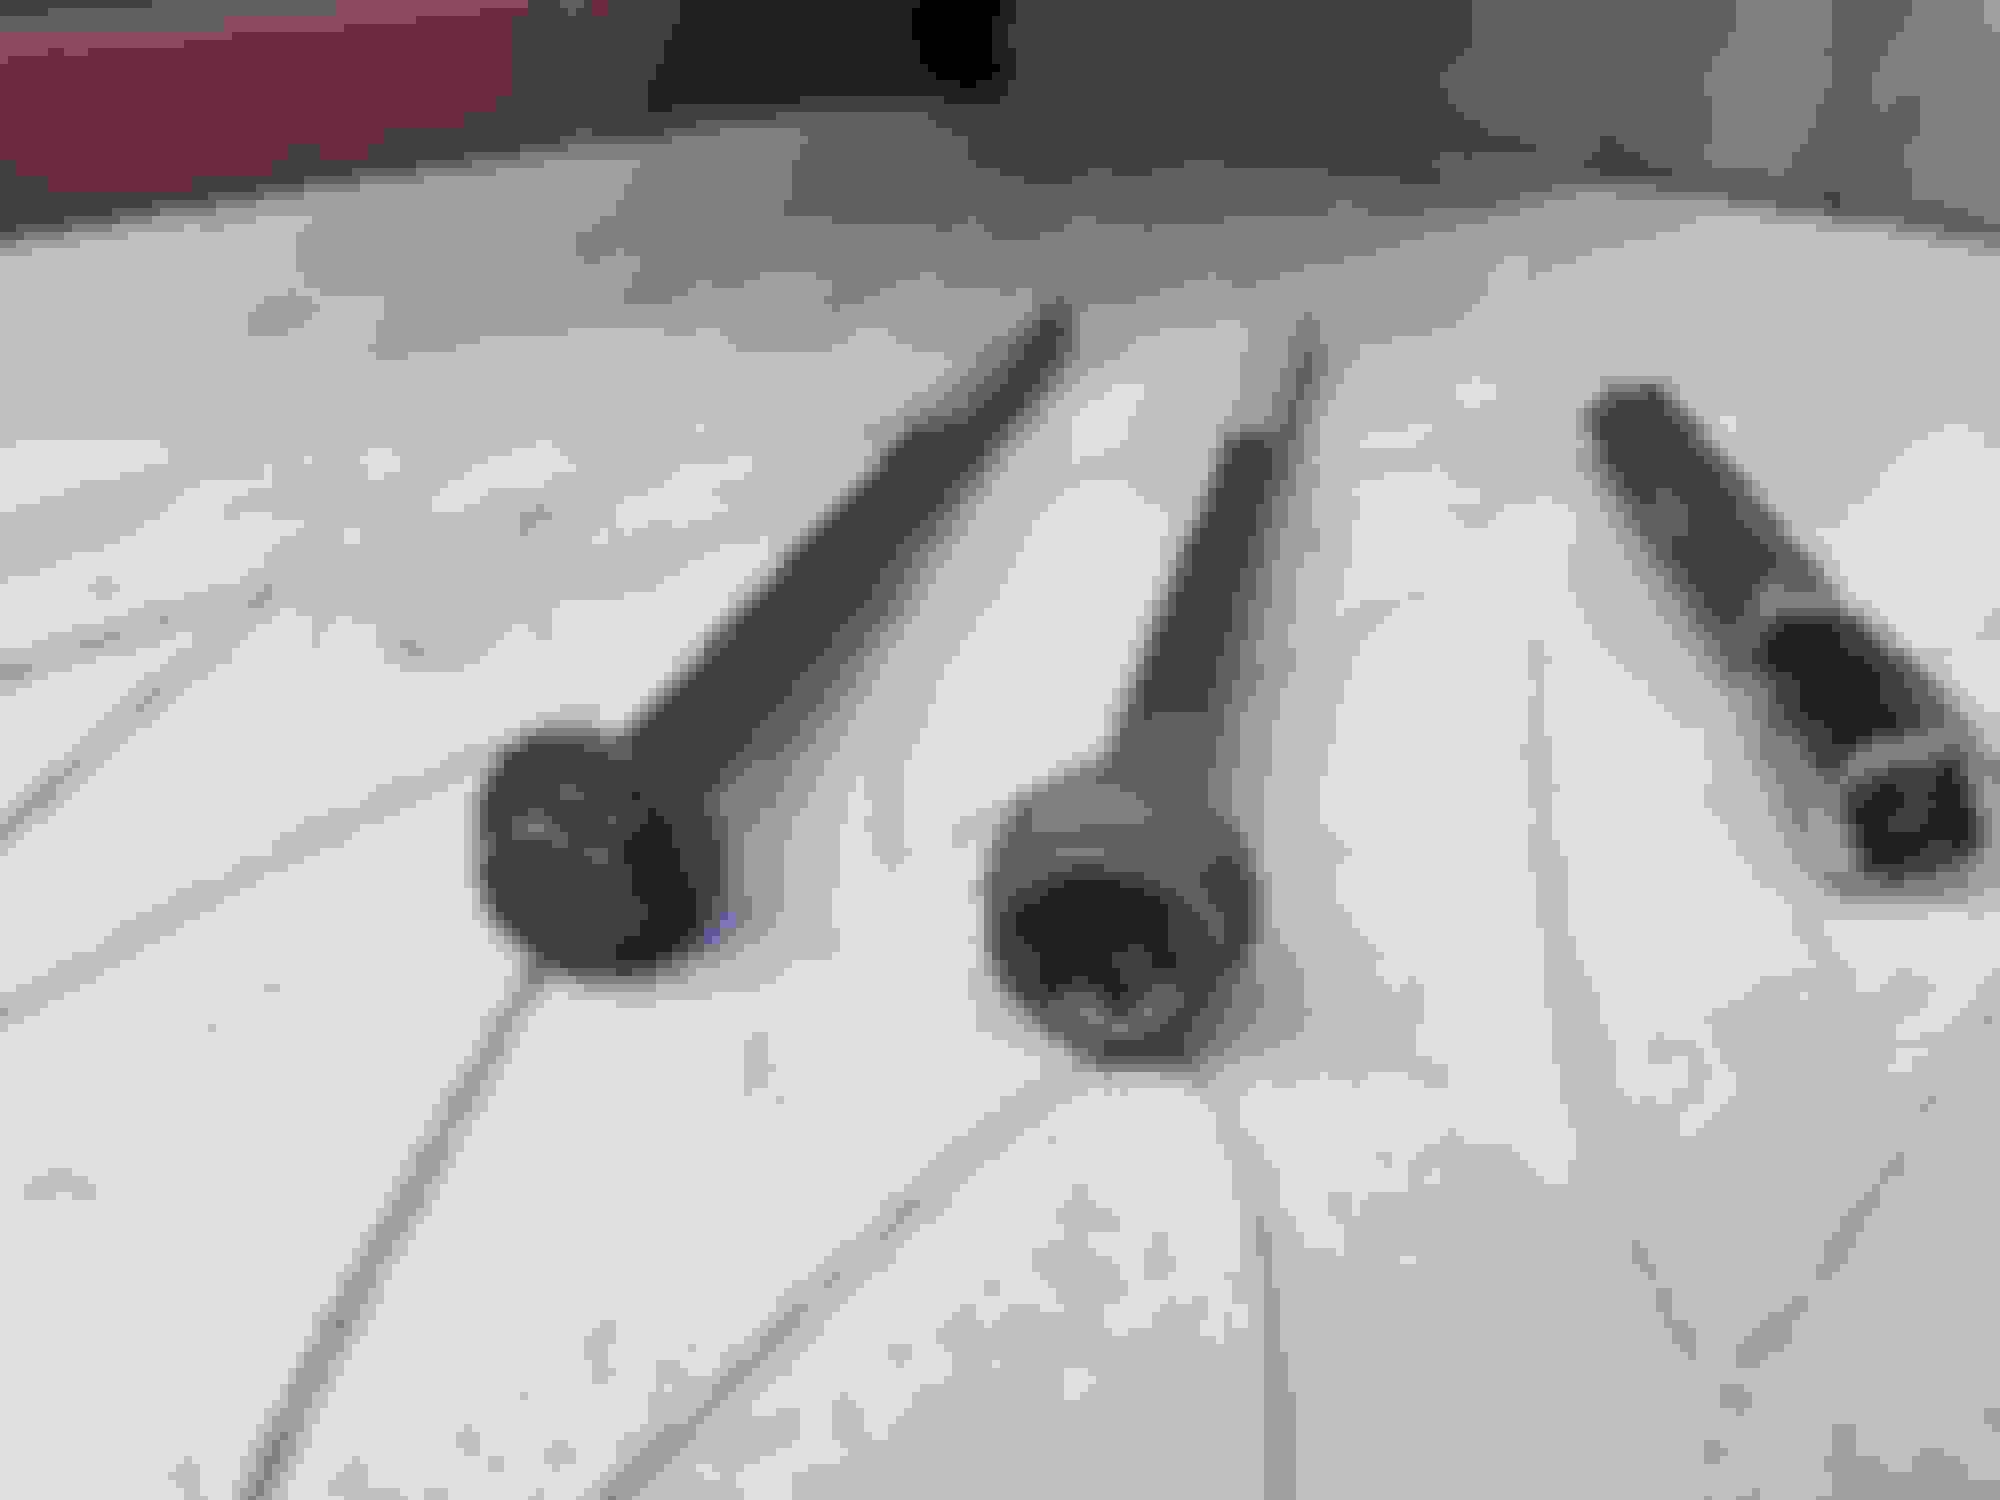
Picture of old and new head bolts.
The new units are T-60 star bolts.
You will need a long T-60 because the short fat type will not fit the castings.
Surprised the workshop manual says use engine oil to lubricate the threads.
I always use molly grease on both threads and shoulders of the bolts.
This give you a more accurate torque figure.
As i have said previously, do not even try to remove the exhaust manifolds while the engine is in the car. You really cannot unless you take away all the underside of your car including suspension and subframe.
Remove the head and exhaust together, it's very easy to to.
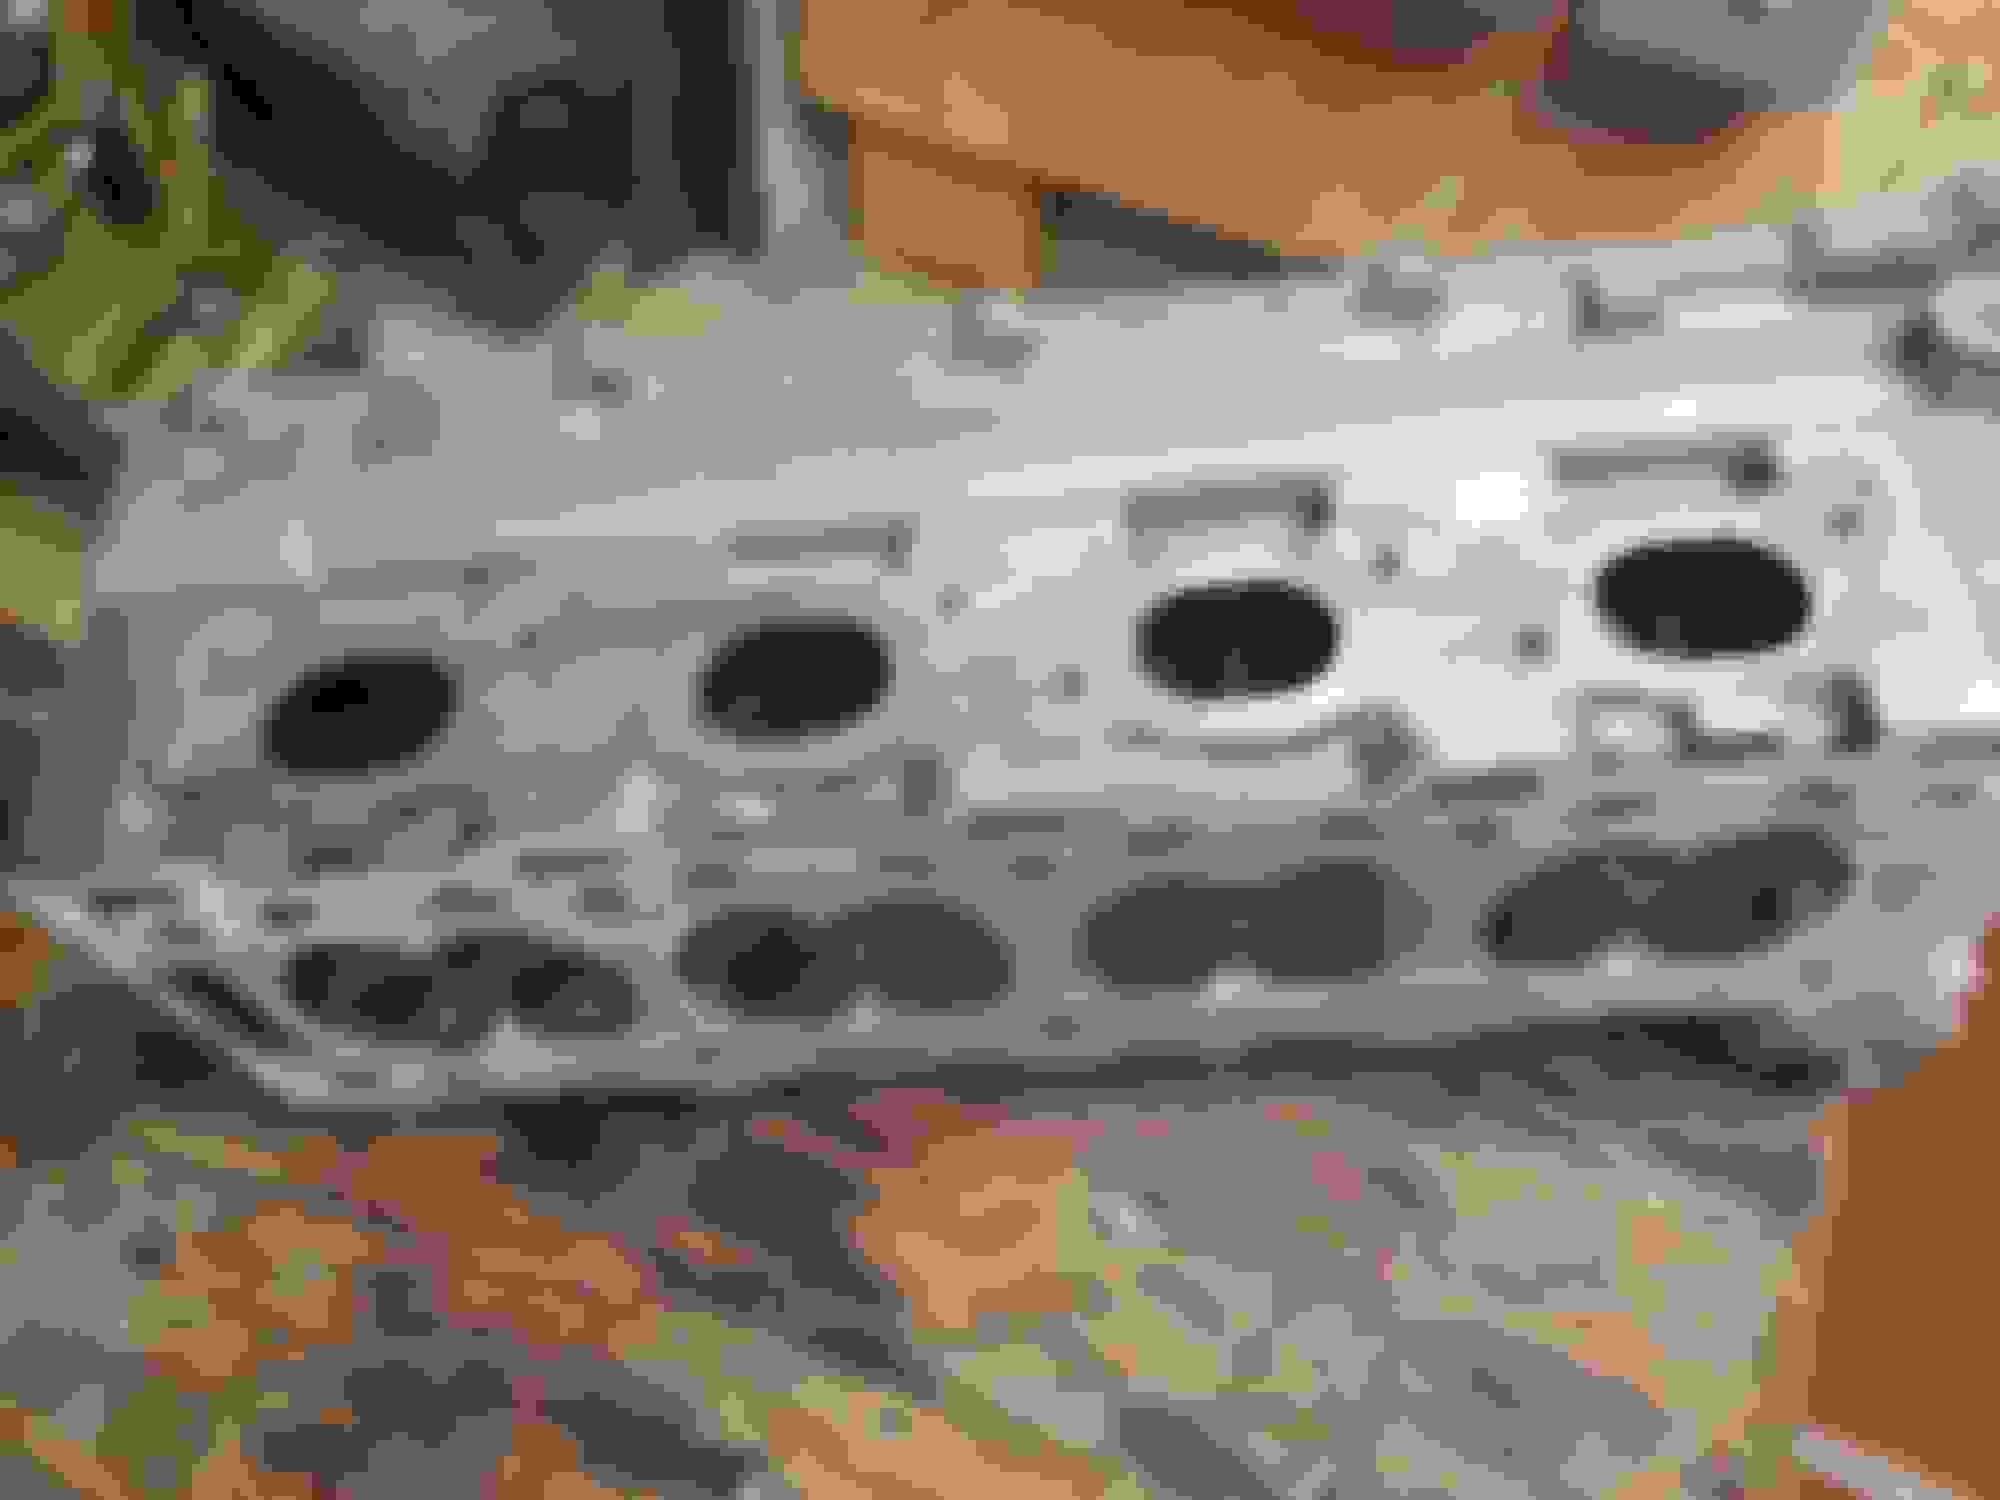
Below I have included photos of how the exhaust manifold and shielding attaches to the head. Back plate/gasket, manifold and cover, using 8 bolts and spacers.
This will help you understand more about the unit.
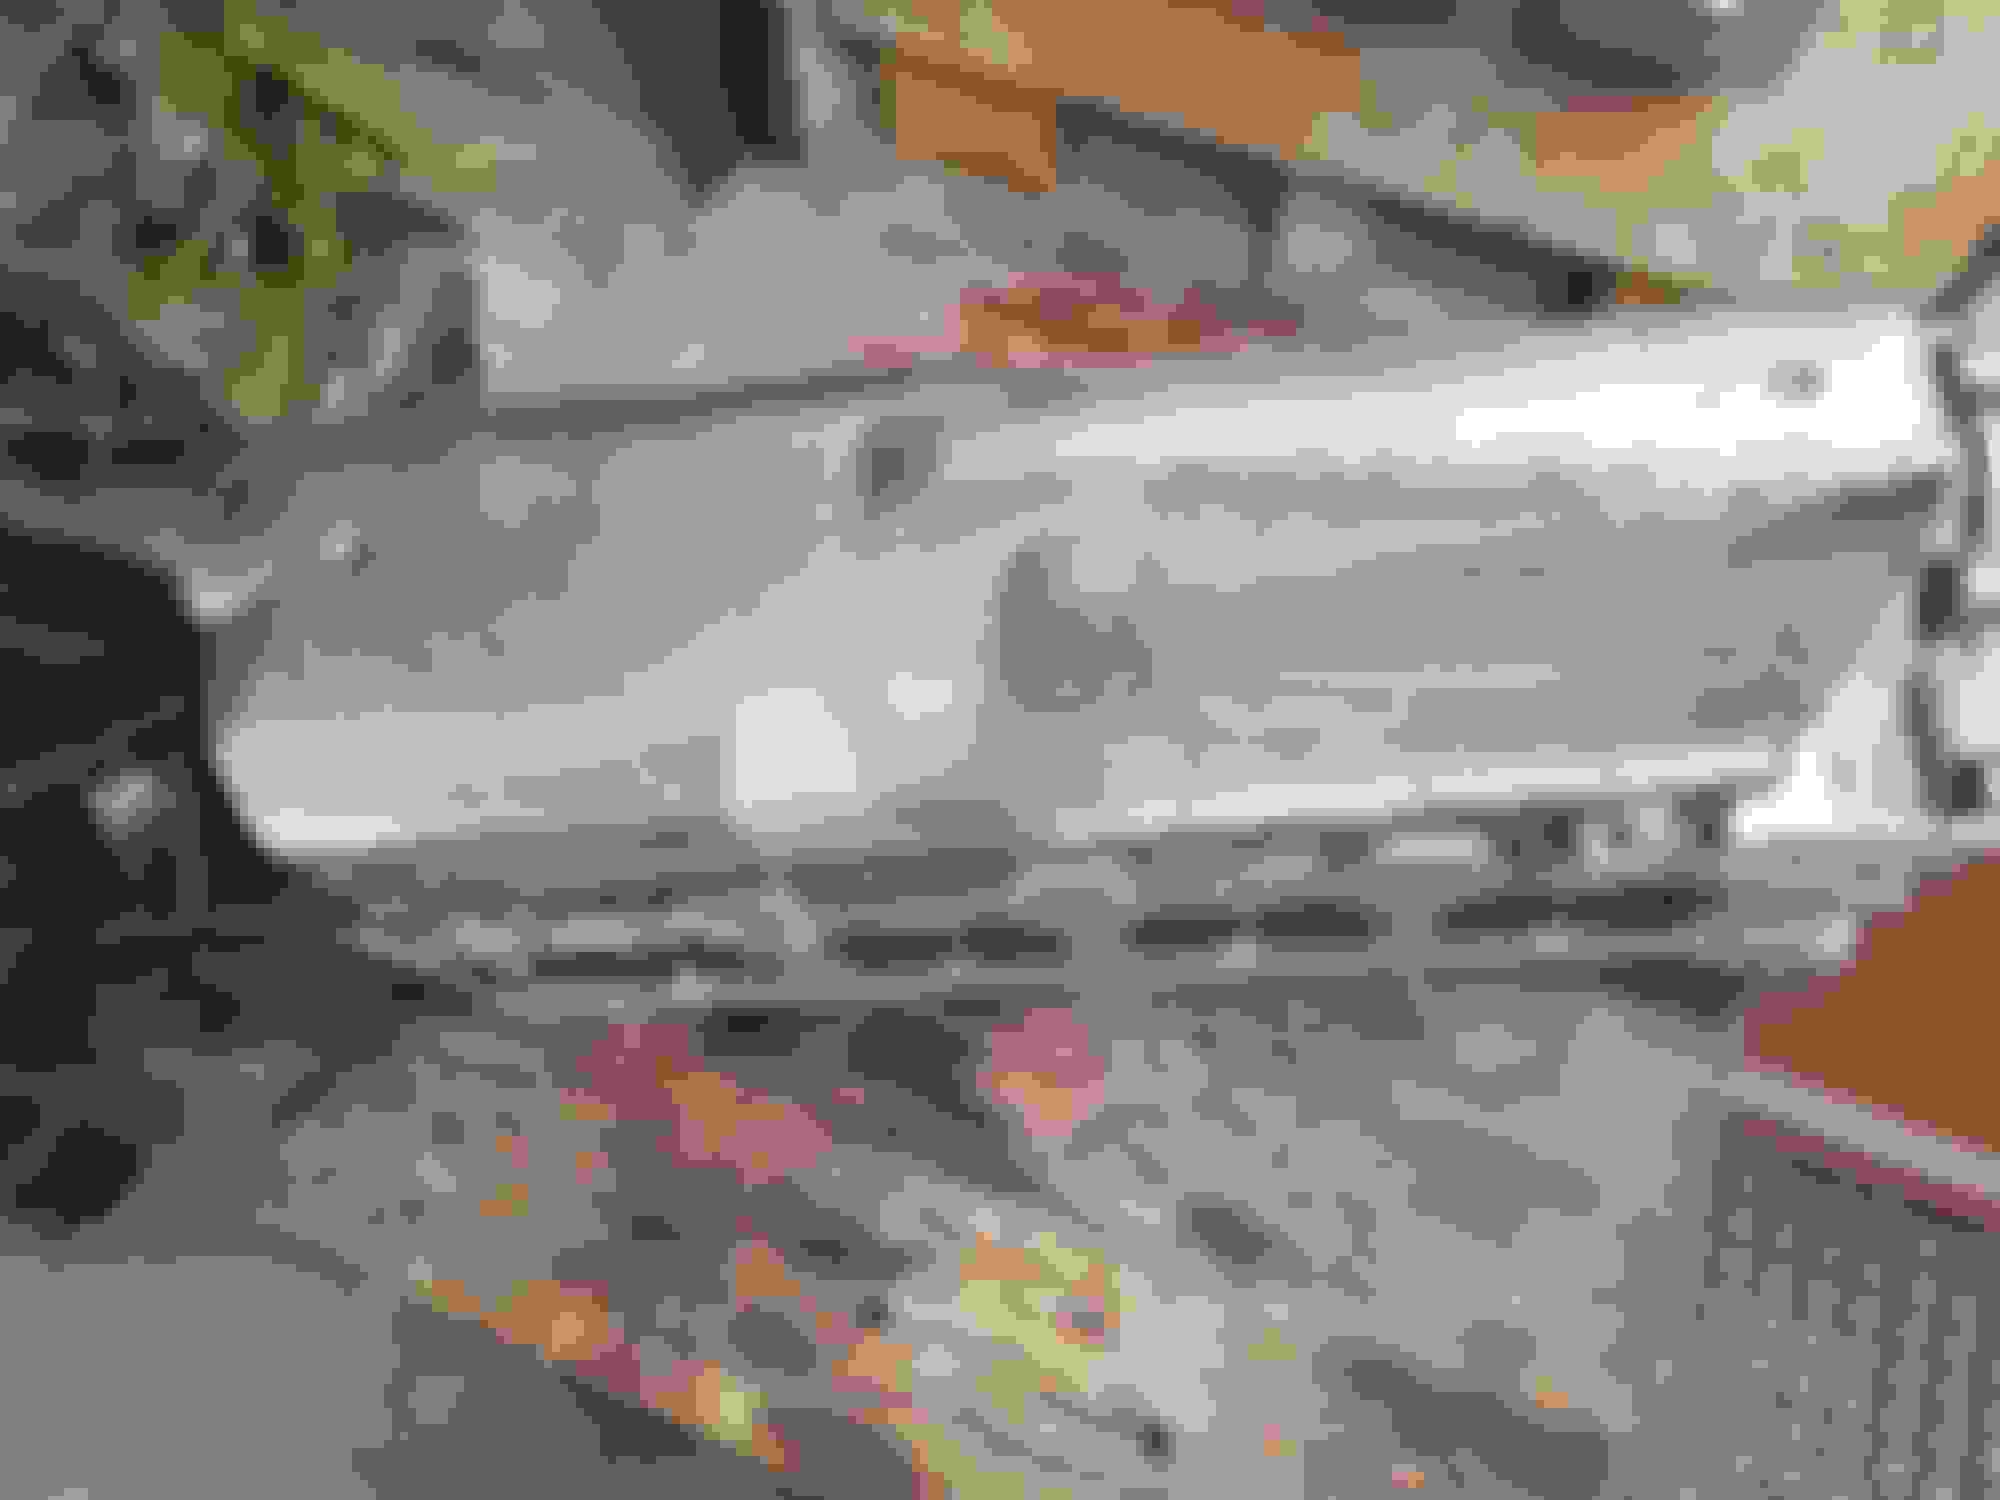
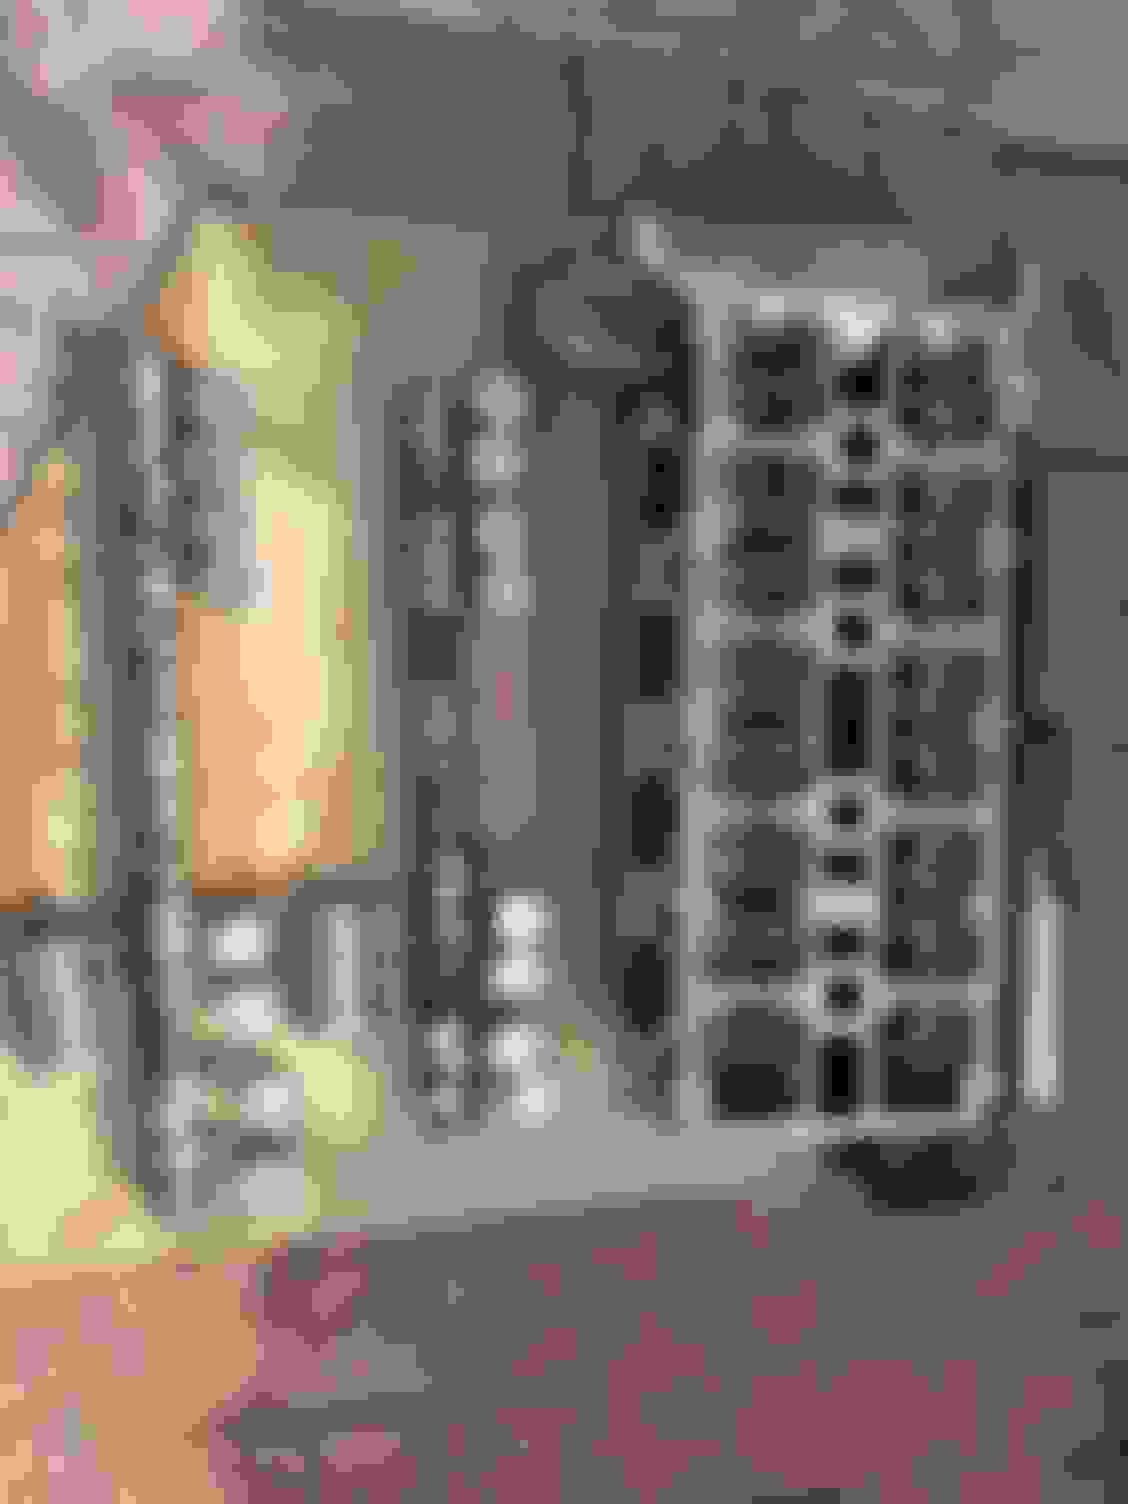
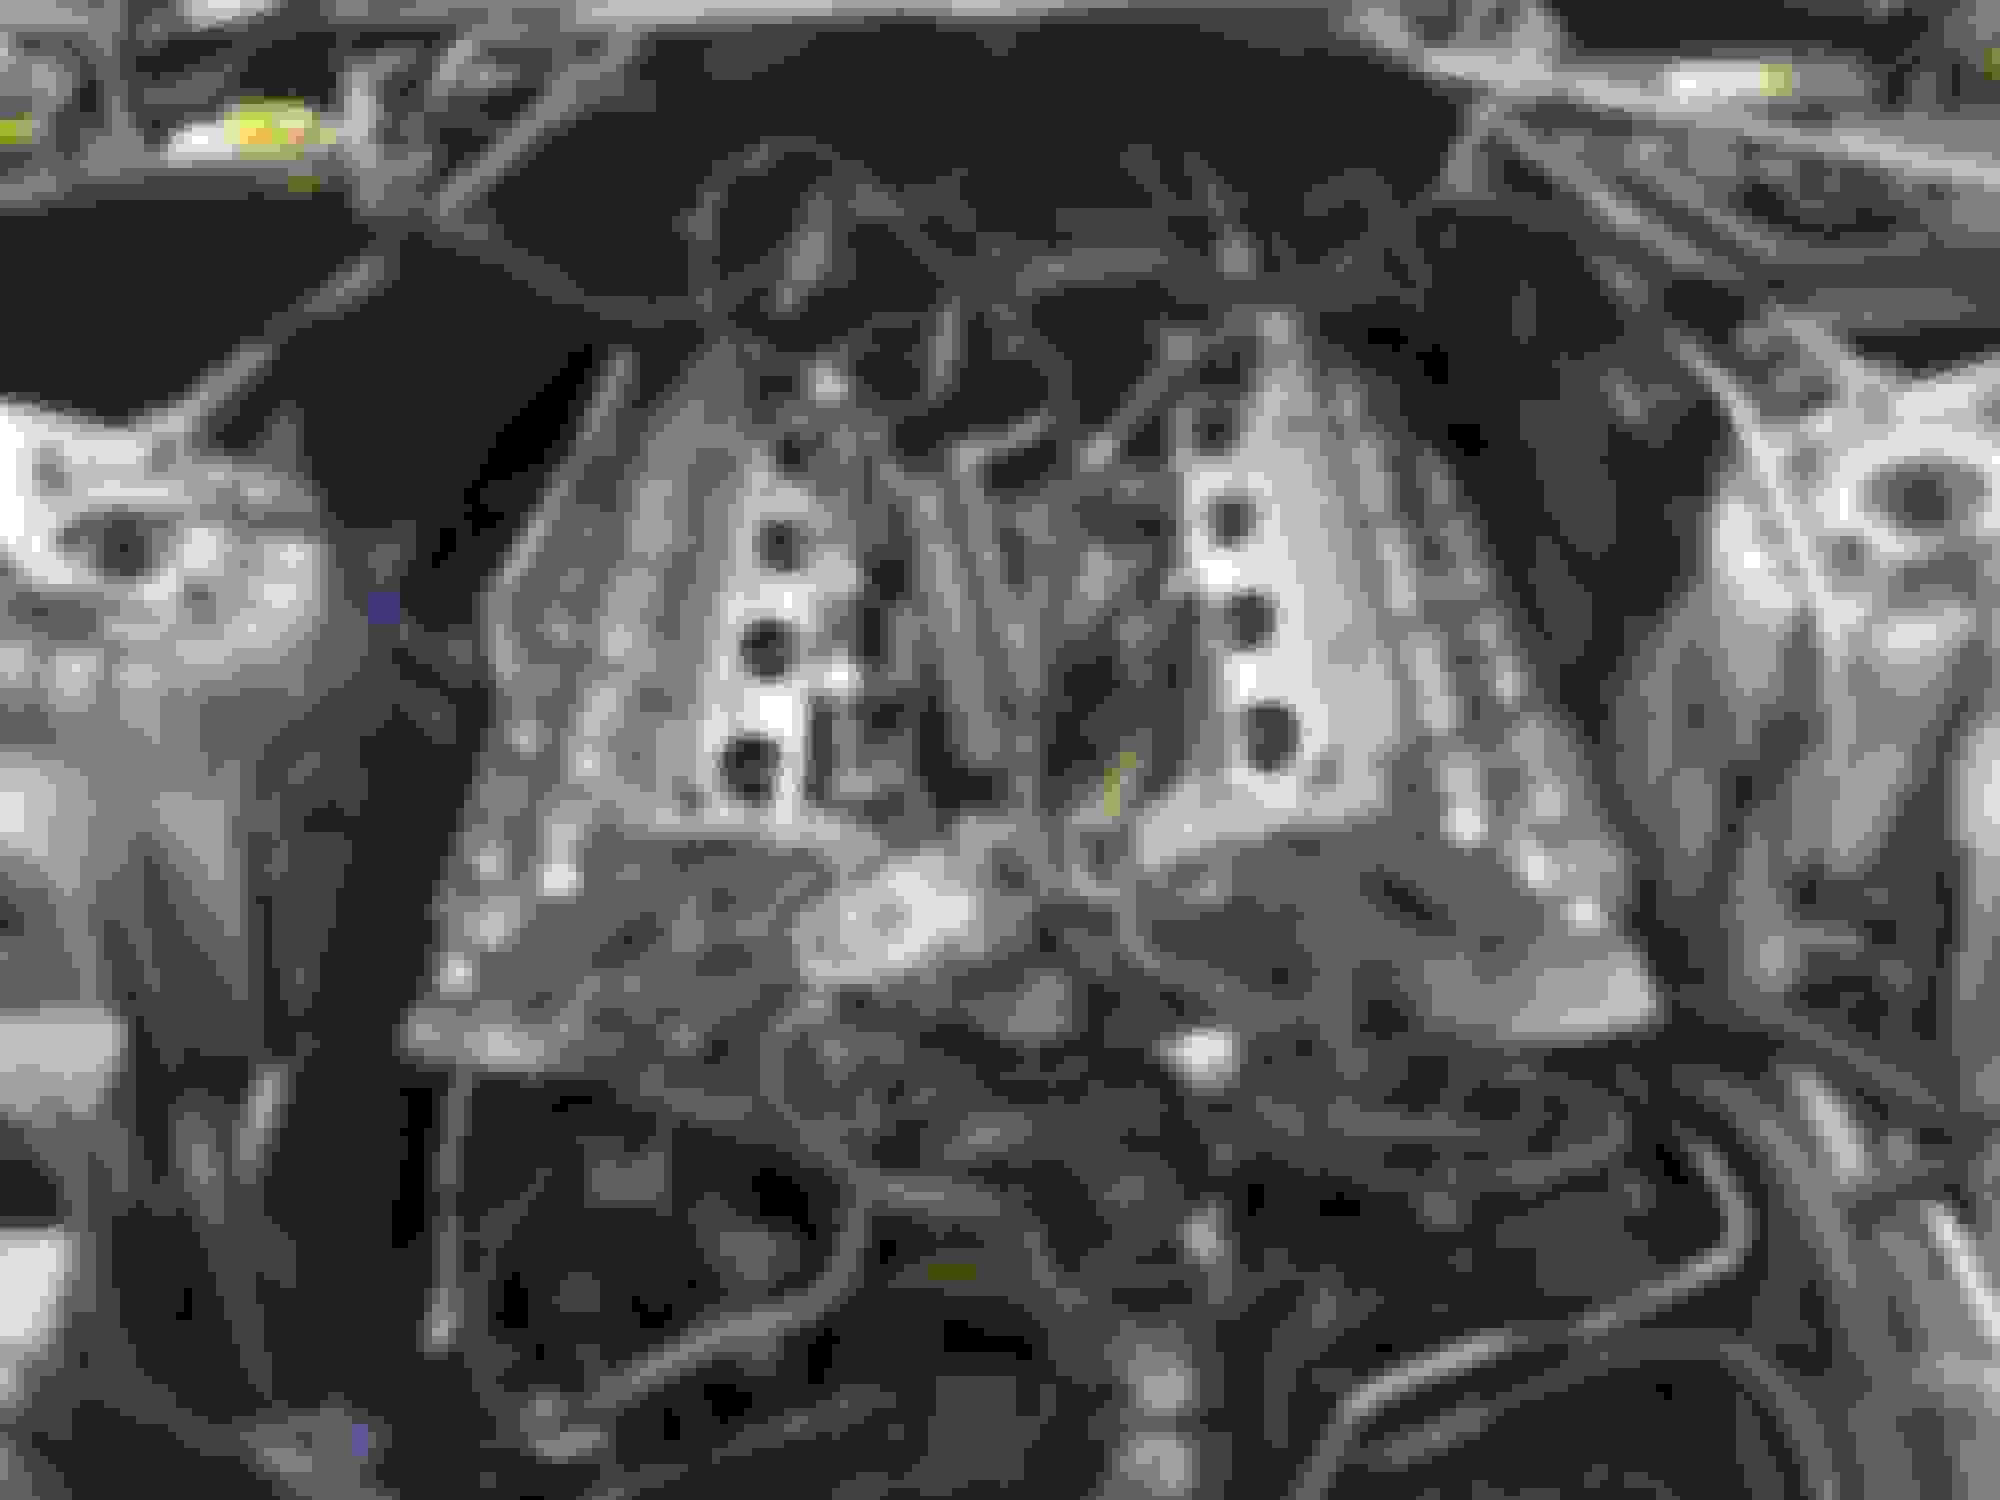
Some pictures of the new rebuilt heads.
head gaskets and fitting.
Also shows why its earlier to work on without the front being on. As demonstrated by my son.
Starting with the left bank followed by the right.
If I could give one tip regarding timing the engine, get the timing kit.
Yes you can make your own tools, but why bother when all you need is in the kit.
The counter torque tool was invaluable, it's the one with the red handle by the way. So were the cam locking bridges.
Also here is a little video I made of how to reset a primary timing chain tensioner. Might help some one. https://youtu.be/ZU4SifiuFZc


 . I�ll keep my eye on the forum in case an �easy� fix comes along.