
Coolant radiator and AC condenser replacement


Thread Starter
|
Veteran Member


Joined: Apr 2012
Posts: 1,854
Likes: 987
From: UK
My AC condenser has a leak so I needed to swap it out, as usual it is more difficult than expected and had unexpected knock on consequences.
Here we go, about three hours work today.
I used a cheap �3 UV torch from ebay to see the leak, I checked all the a/c hoses and connection, this was the only area where the leak test dye showed up.

Removed the coolant reservoir top.

Then removed the lower valance and alternator ducting.

While your under there remove this a/c pipe from the clip on the fan housing.

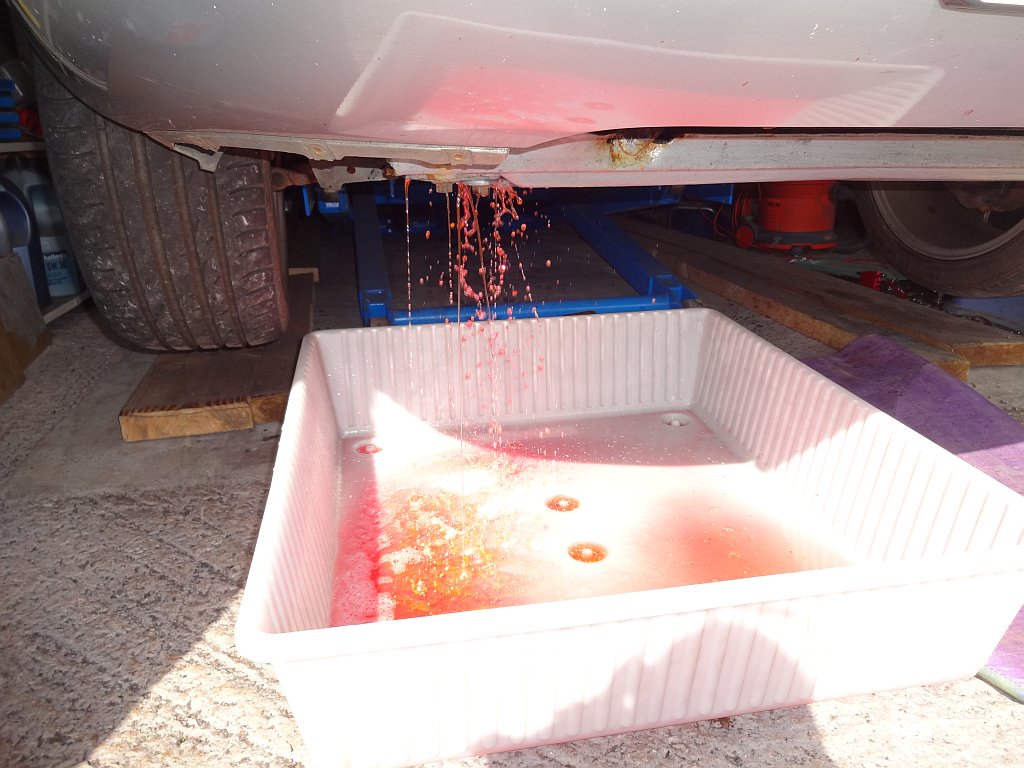
Next, unscrew the coolant drain plug.

Expect the coolant to splash all over.
Disconnect the main fan alectrical connector.

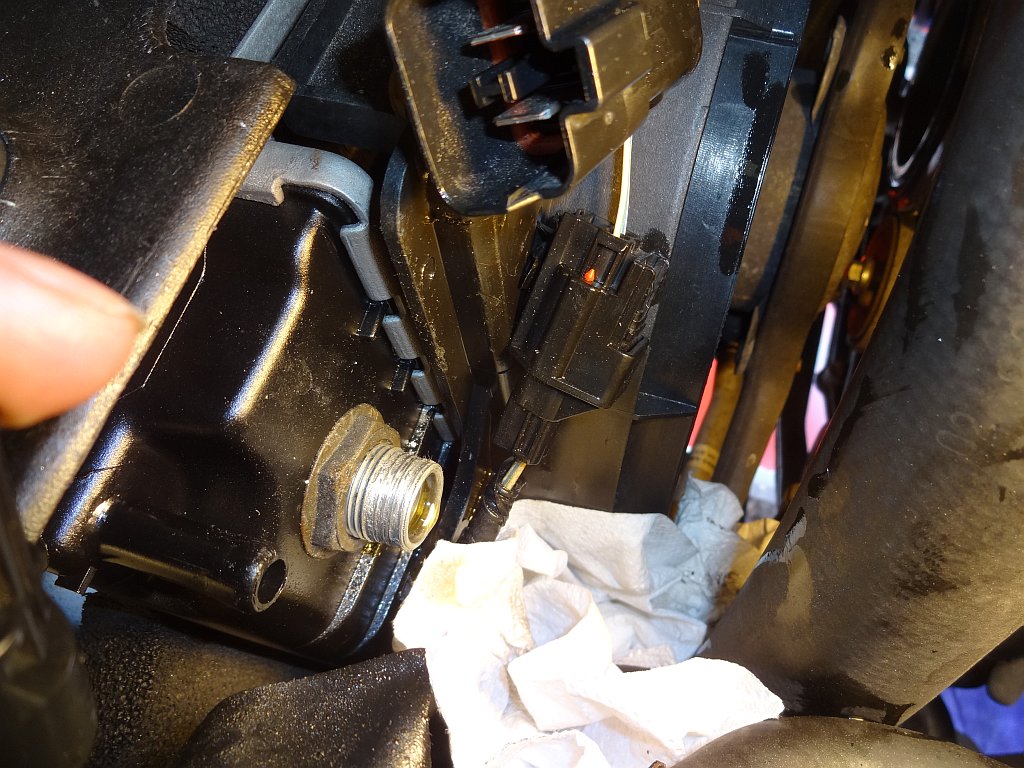
Then remove the transmission cooler top hose connection, 24mm spanner is needed.

Retrieve the o-ring, I will use new orings on reassembly.

Bad news you can see that the aluminium bush is totally stripped, a real pita!
Next prize off the other electrical connector from its mounting. You disconnect by pressing here.

Next you need to remove the retaining nut.

Then remove the torx screws from the top valance and remove.

Round to the other side of the car. Remove the top hose clip.

A tool like this helps pull the hose off.

Once the hose if off you can access the retaining bolt at this side.

Unclip the a/c pressure switch cable retainer.

Then you can lift out the fans, once you have removed the engine cover.

Slide out the retaining bolts if they have not fallen out already.

I modified one of mine previously as it was spinning in the radiator.

Next remove the pipe clip on the lower hose and remove, mine was too awkward to get to so I removed to clip from the other end instead. The transmission oil cooler lower hose should then removed. This one also stripped for me.

Some transmission oil will come out, I collected most of this, I estimate that about 100ml was lost, I will refill this amount into the cooler when replacing.

I put a couple of glove fingers over the cooler pipes to stop dirt ingress.

On to the X brace removal.

It was actually easier to remove the bolts from here.

The lower bolts are here.

It can then be lifted out.

Next remove the two bolts from the top of the drier.

Then the two nuts from the condenser fittings.

Although both nuts came off OK, one of the two unions would not split apart so I cut the pipe with some bolt cutters as its being replaced. It will be easier to split the union with the radiator out the way.

Lifting out the rad/condenser would be much easier as a two man job but it can be done on your own.

I will spend a bit of time cleaning up/derusting and repainting in here while I'm waiting for a new radiator to be delivered.

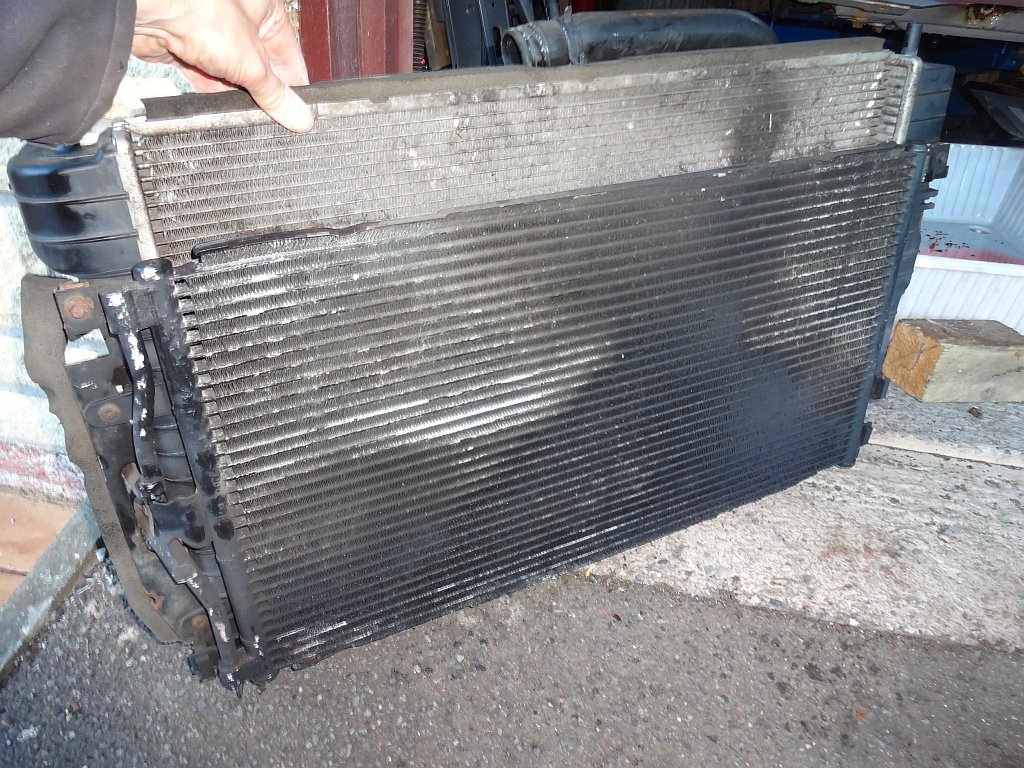
Here is the rad/condenser, I will need to strip down to reuse the various brackets. You can see where my previous engine oil cooler leak was.
Here we go, about three hours work today.
I used a cheap �3 UV torch from ebay to see the leak, I checked all the a/c hoses and connection, this was the only area where the leak test dye showed up.
Removed the coolant reservoir top.
Then removed the lower valance and alternator ducting.
While your under there remove this a/c pipe from the clip on the fan housing.
Next, unscrew the coolant drain plug.
Expect the coolant to splash all over.
Disconnect the main fan alectrical connector.
Then remove the transmission cooler top hose connection, 24mm spanner is needed.
Retrieve the o-ring, I will use new orings on reassembly.
Bad news you can see that the aluminium bush is totally stripped, a real pita!
Next prize off the other electrical connector from its mounting. You disconnect by pressing here.
Next you need to remove the retaining nut.
Then remove the torx screws from the top valance and remove.
Round to the other side of the car. Remove the top hose clip.
A tool like this helps pull the hose off.
Once the hose if off you can access the retaining bolt at this side.
Unclip the a/c pressure switch cable retainer.
Then you can lift out the fans, once you have removed the engine cover.
Slide out the retaining bolts if they have not fallen out already.
I modified one of mine previously as it was spinning in the radiator.
Next remove the pipe clip on the lower hose and remove, mine was too awkward to get to so I removed to clip from the other end instead. The transmission oil cooler lower hose should then removed. This one also stripped for me.
Some transmission oil will come out, I collected most of this, I estimate that about 100ml was lost, I will refill this amount into the cooler when replacing.
I put a couple of glove fingers over the cooler pipes to stop dirt ingress.
On to the X brace removal.
It was actually easier to remove the bolts from here.
The lower bolts are here.
It can then be lifted out.
Next remove the two bolts from the top of the drier.
Then the two nuts from the condenser fittings.
Although both nuts came off OK, one of the two unions would not split apart so I cut the pipe with some bolt cutters as its being replaced. It will be easier to split the union with the radiator out the way.
Lifting out the rad/condenser would be much easier as a two man job but it can be done on your own.
I will spend a bit of time cleaning up/derusting and repainting in here while I'm waiting for a new radiator to be delivered.
Here is the rad/condenser, I will need to strip down to reuse the various brackets. You can see where my previous engine oil cooler leak was.
Veteran Member
Joined: Apr 2014
Posts: 4,731
Likes: 2,950
From: Jersey, Channel Islands
Thanks, RD, for the usual high standard writeup.
I see quite a few detail differences between the 4.0 and the 4.2 with regard to the wiring and plumbing routing; perhaps that's why I lost hardly any trans fluid.
Another member (I think it was phanc) warned me about the issue you encountered with the trans oil cooler nuts. Were they very tight?
At least you're over the worst. Good luck with the reassembly.
Thread Starter
|
Veteran Member
Joined: Apr 2012
Posts: 1,854
Likes: 987
From: UK
Did a bit more today. First a look at the condenser pipework, I had to bend the pipes outwards from the body of the condenser to match the original and clear the radiator. Next i will need to get the two unions in a vertical up and down position to match the other pipework.

I then went on to remove the drier.


And then the lower ac pipe.

A bit of heat allowed the union to be split.

Having to do this job on the Jag is a pita and a distraction from a full restoration i'm doing on the 450SL.

Next I did a bit of hoovering and wiping up, next I will get stuck in with the powerfile.

Thread Starter
|
Veteran Member
Joined: Apr 2012
Posts: 1,854
Likes: 987
From: UK
The new radiator turned up today with the bush adapters suitable for the 4.2, great service as I only ordered it yesterday �220 from ebay.

I tried the bush fit in the end oil the oil cooler hose, it wouldn't thread on as expected, I was thinking that the threads would be clogged up with the aluminium stripped off the old cooler. On close inspection I could see the issue.
Any suggestions on how the clean this internal thread out?
New hoses would be the best part of �150 and a real pita to fit.
Thread Starter
|
Veteran Member
Joined: Apr 2012
Posts: 1,854
Likes: 987
From: UK
After a couple of hours with a lathe thread cutting tool and a modified tap I've got this on the first hose.


Unfortunately the second hose is tricky to reach so is going much slower, already spent three hours on it, I think the threads on it may be damaged, I'm going to try to make a hollow "tap" out of an M20x1.5 hydraulic fitting to chase it out.
Unfortunately the second hose is tricky to reach so is going much slower, already spent three hours on it, I think the threads on it may be damaged, I'm going to try to make a hollow "tap" out of an M20x1.5 hydraulic fitting to chase it out.
Veteran Member

Joined: Nov 2014
Posts: 2,674
Likes: 1,574
From: Eastern USA
If you got the Nissens radiator, double check the top left side bleed nipple. Mine was open, but the original Jaguar radiator had it plugged. Yet another step to take care of in that job.
Also, don't forget to replace these o-rings on the bottom of the treads you just cleaned up.
While you are there, you might want to double check the lines to the oil cooler, now that you have great access. Your left side one looks like it is leaking a bit. To the best of my knowledge, these lines are off the pump, and the return goes to the head, so the whole thing is under some (serious) pressure. There is a TSB calling for the replacement of these lines on the early 4.2. Besides, I believe these hydraulic lines have a lifespan of 10 years. There are 2 o-rings on the engine block side that could be replaced, too, as it looks like there is a possible leak there. To be honest, I did this to my own car, and ended up tearing the old/original rubber off the return line crimp just by maneuvering it out of the way, so I ended up ordering a brand new set.
While I was there, I replaced the belt. Unknown age to me, cheap, great access, so why not.
Best of luck, thanks for sharing the pictures.
Thread Starter
|
Veteran Member
Joined: Apr 2012
Posts: 1,854
Likes: 987
From: UK
This job is really growing arms and legs.
Well I gave it another hour, hands and back now aching but the job is done! I really struggled seeing what I was doing clearly but found the solution was wearing three pairs of glasses.


Well I gave it another hour, hands and back now aching but the job is done! I really struggled seeing what I was doing clearly but found the solution was wearing three pairs of glasses.
Trending Topics

Senior Member

Joined: May 2019
Posts: 133
Likes: 43
From: Virginia
Do you know how much PAG oil needs to be added when recharging? My car needs 25 oz of freon after evacuated and I recall hearing 4 oz of PAG oil but my buddy thinks I need 8oz of Pag oil. Any advice would be appreciated
Veteran Member
Joined: Apr 2014
Posts: 4,731
Likes: 2,950
From: Jersey, Channel Islands
It's a bit of a guessing game, as you have to estimate what remains in the system after the evac.
This might help:
https://carfromjapan.com/article/car...-to-ac-system/
My new Denso compressor came with 120ml of oil, which the installation instructions stated was sufficient for the complete system. This tallies with the advice given in the above link.
I recommend replacing the receiver/dryer while you have things apart - particularly if the plumbing has been open to air for any period of time.
Senior Member
Joined: May 2019
Posts: 133
Likes: 43
From: Virginia
Thanks so much for the great article. Looks like I only need 1 oz after I replace the condenser and you probably saved me from blowing the seals out of my compressor by overfilling. You are a gentlemen and a scholar my friend!