
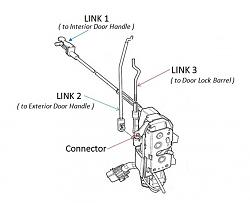
Driver’s Door Latch – disconnecting the link to the lock

Thread Starter
|


Joined: Dec 2011
Posts: 120,439
Likes: 17,014
From: Durham, UK
I needed to remove my driver’s door latch for the usual microswitch failure.
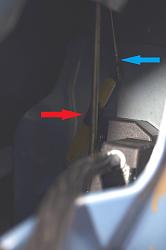
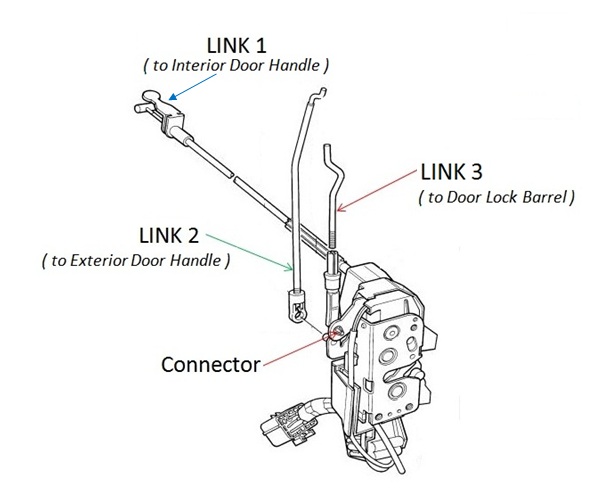
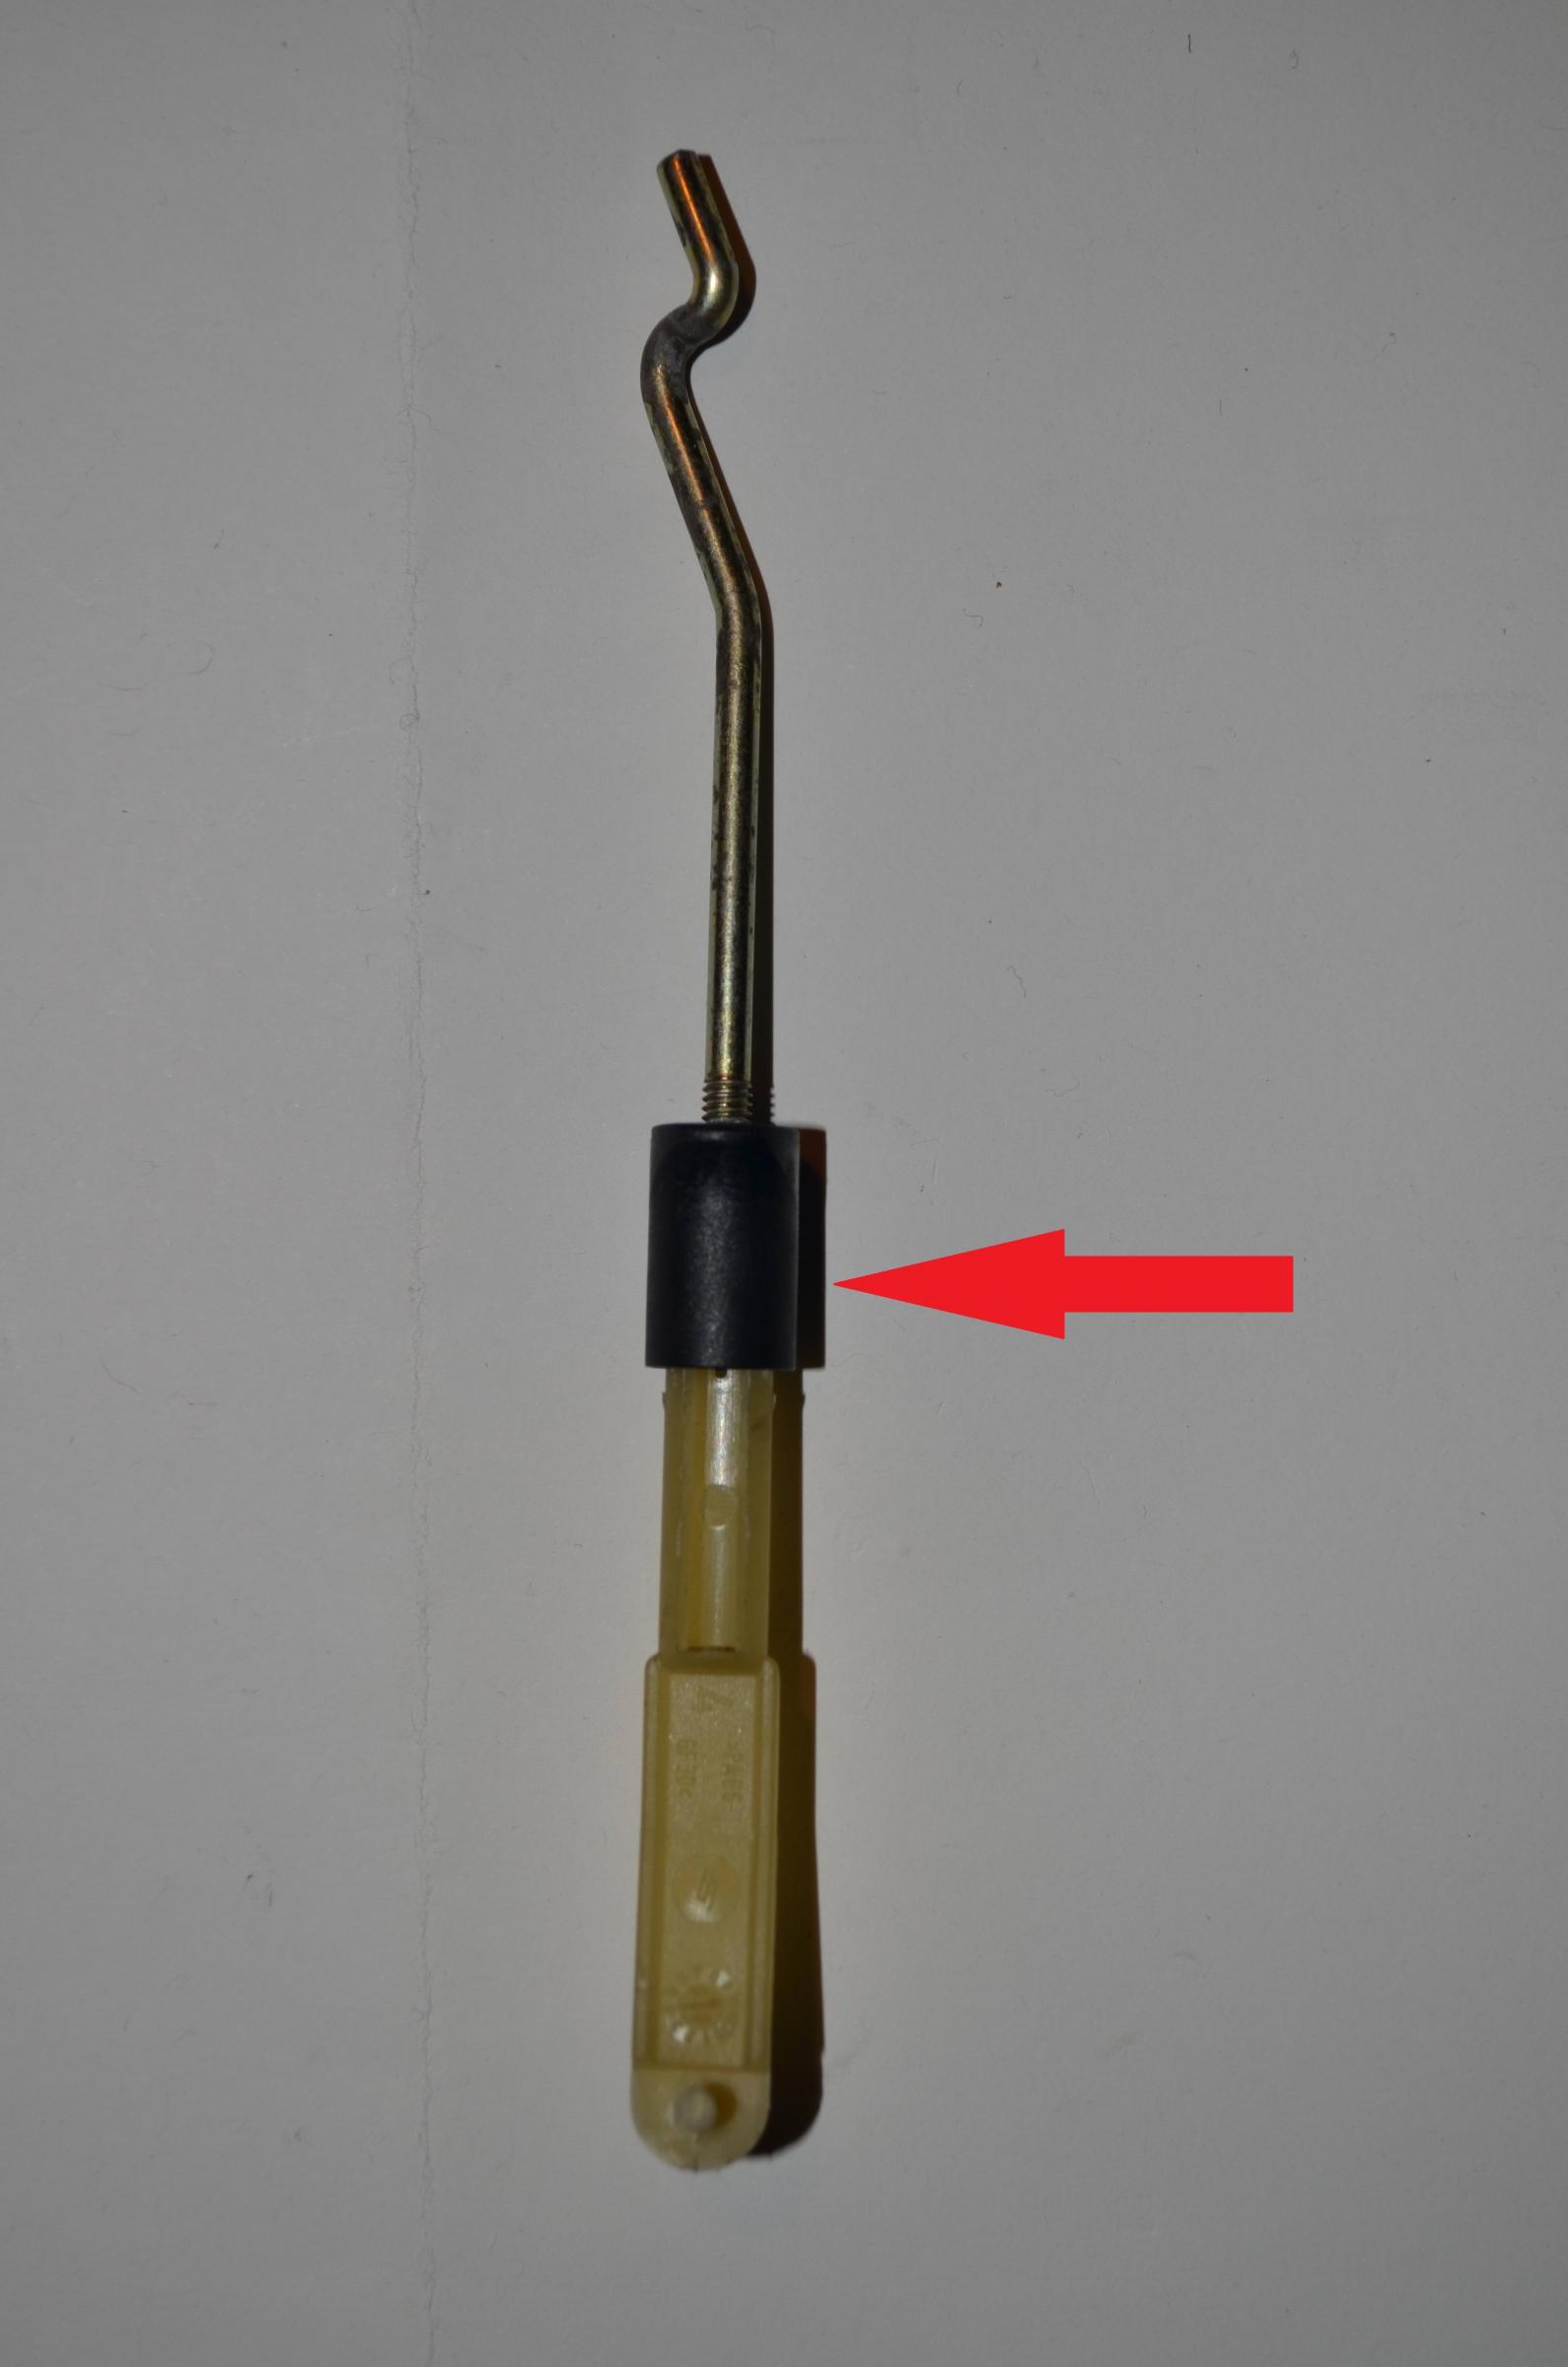
Plenty of good information in the FAQ’s except for disconnecting the link from the Door Latch to the Door Lock (LINK 3 in the drawing). It soon became obvious that any attempt to force the connector (circled in red) through the arm on the Door Latch would damage it.
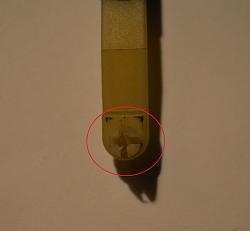
Inspecting the rear of the plastic clip with a mirror showed that it has four tabs (circled in red) which are fixed with a central locking pin. (the pin has been removed in this pic to show the tabs more clearly)
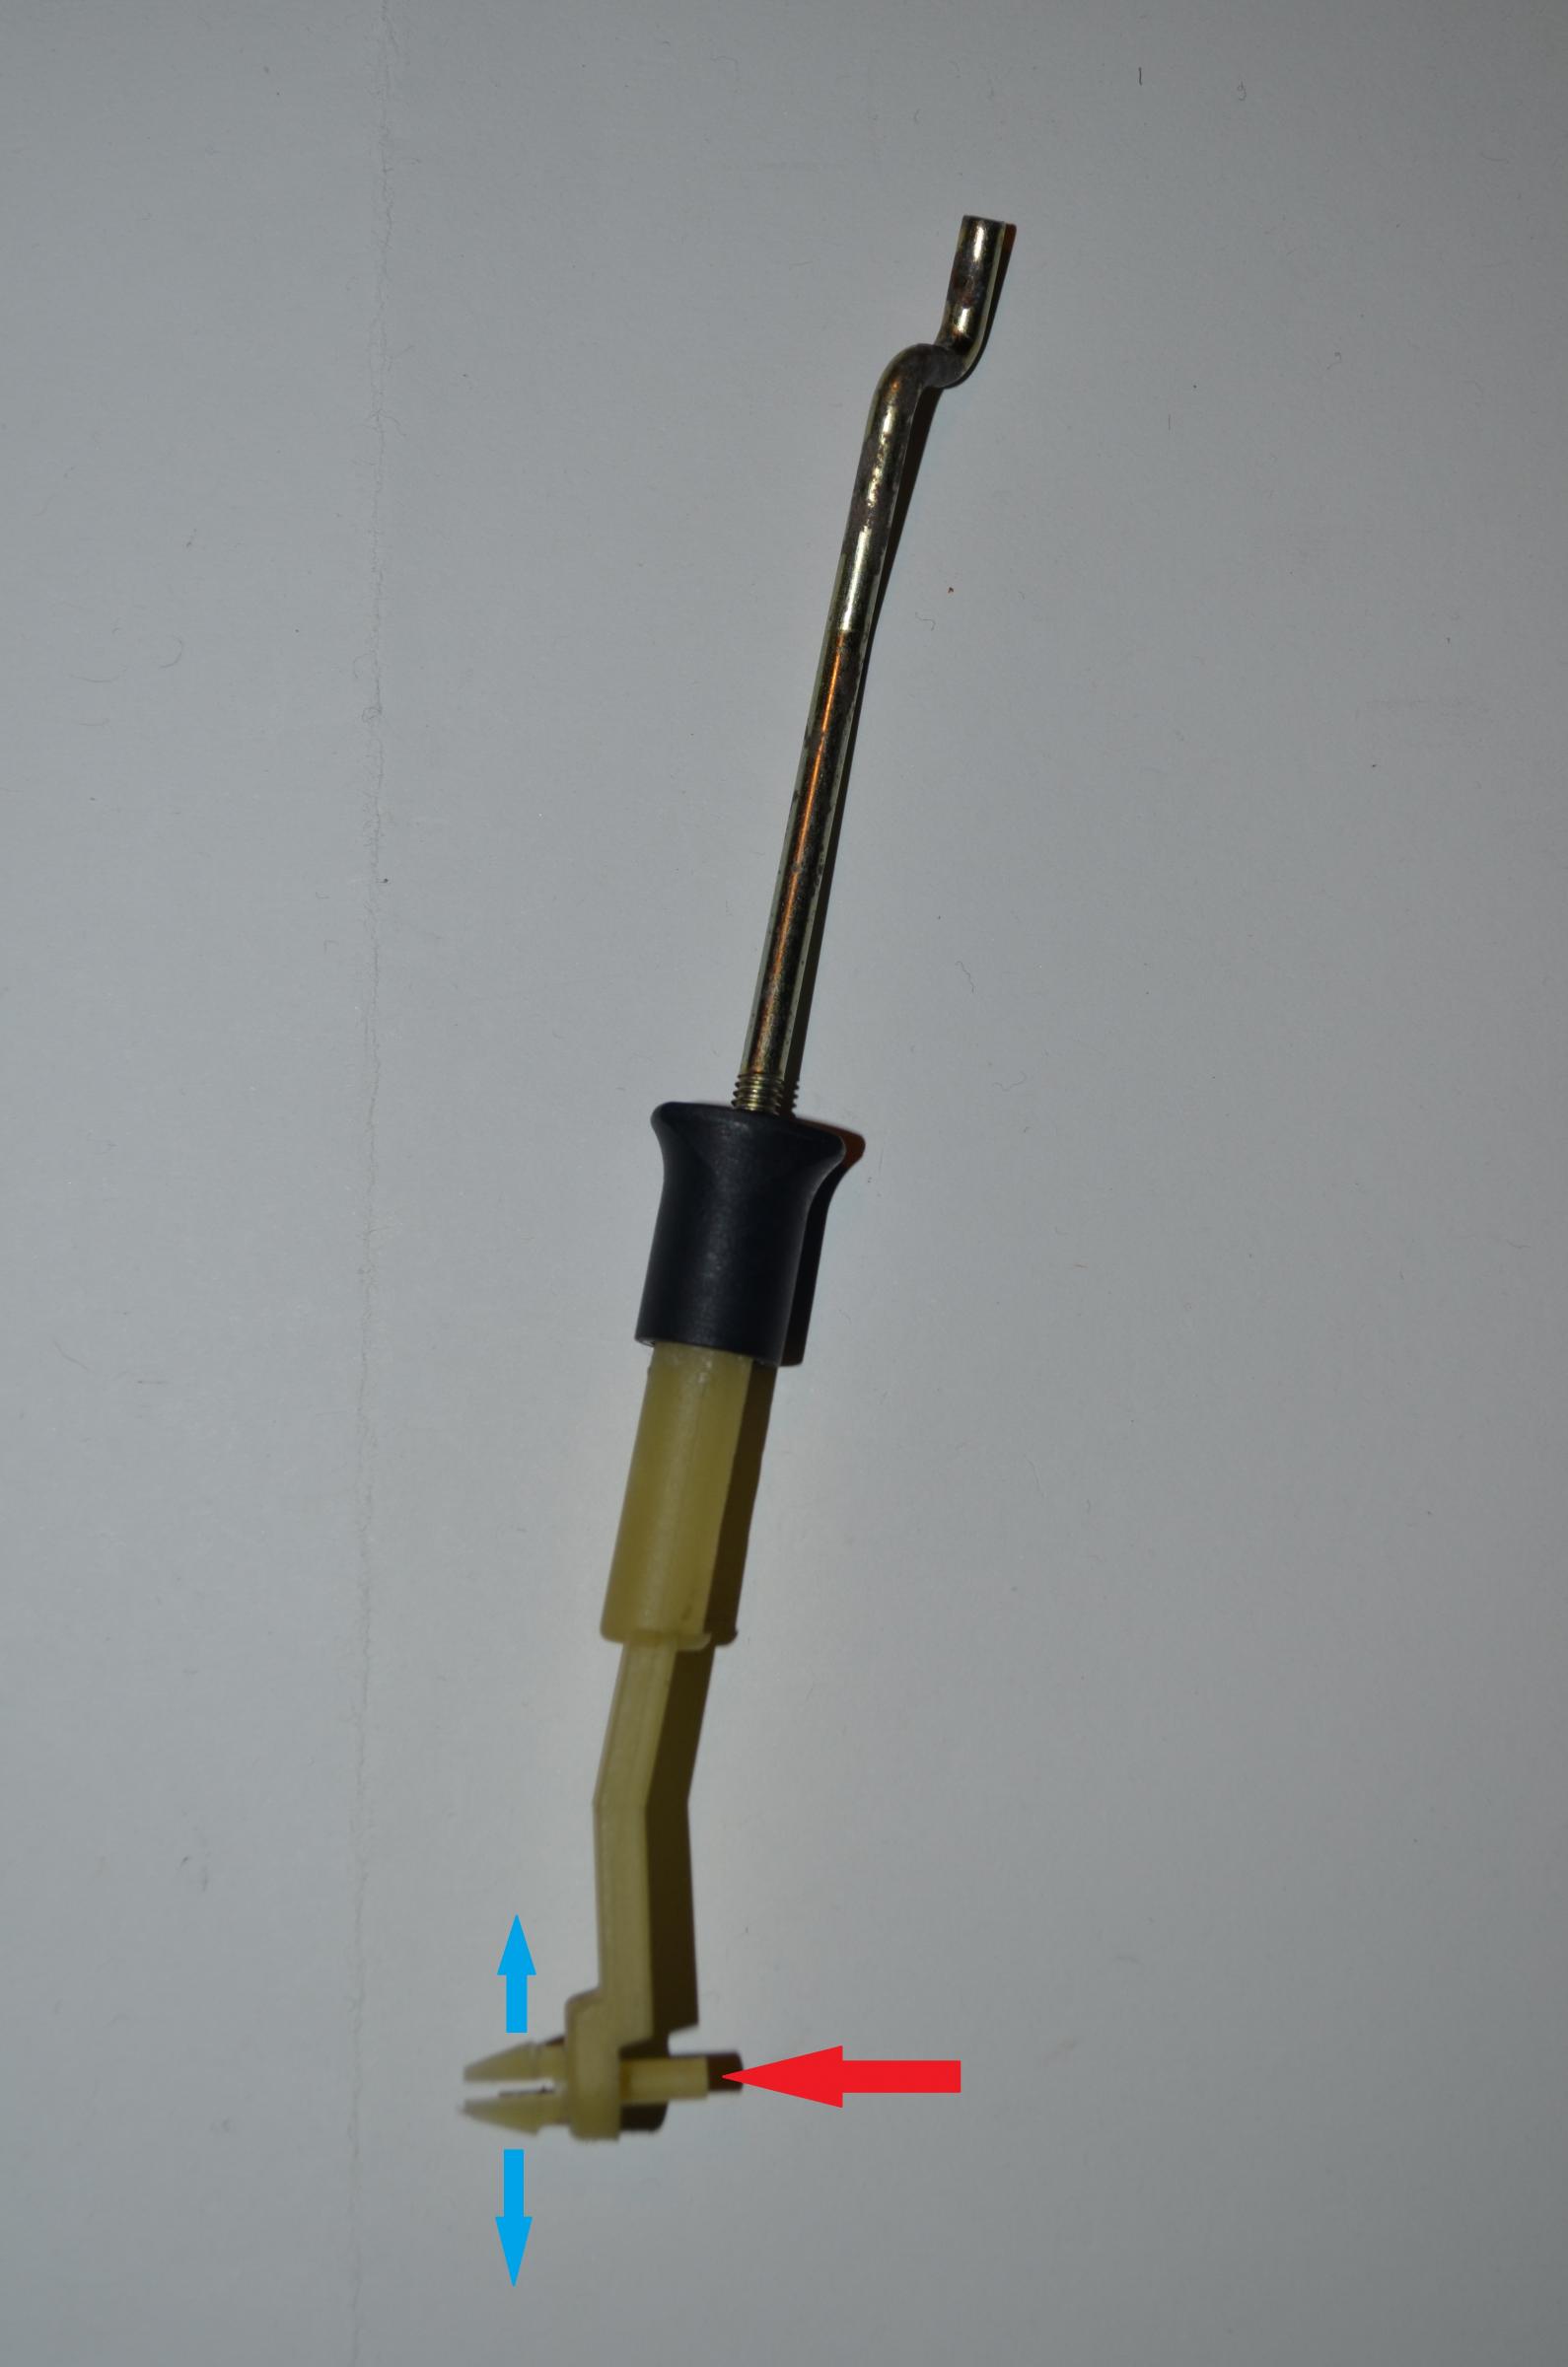
When the plastic link is originally fitted to the Door Latch during manufacture, the locking pin (arrowed in red) is pressed in the direction shown to spread the four tabs and prevent them from coming out of the arm in the door latch.
I couldn’t push the locking pin out with the Door Latch fitted in the car and couldn’t remove the Door Latch without removing the plastic link – Catch 22.
The only solution appeared to be to remove the outer door handle to disconnect LINK 3 at the top and then remove the Door Latch from the vehicle.
With the Door Latch on the bench, it was obvious how LINK 3 should be removed without having to take the Door Handle off.

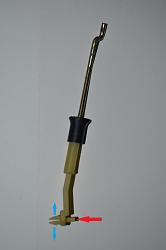
1. The black collar (arrowed in red) is pushed down the plastic section of LINK 3
2. This reveals a groove in the plastic section
3. The upper metal piece of LINK 3 can easily be pressed out of the plastic section (arrowed in red) which is left attached to the door latch. The upper metal section (arrowed in blue) stays attached to the door lock.
4. The door latch can then be removed from the vehicle.
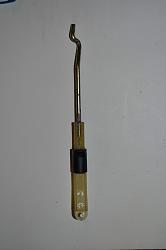
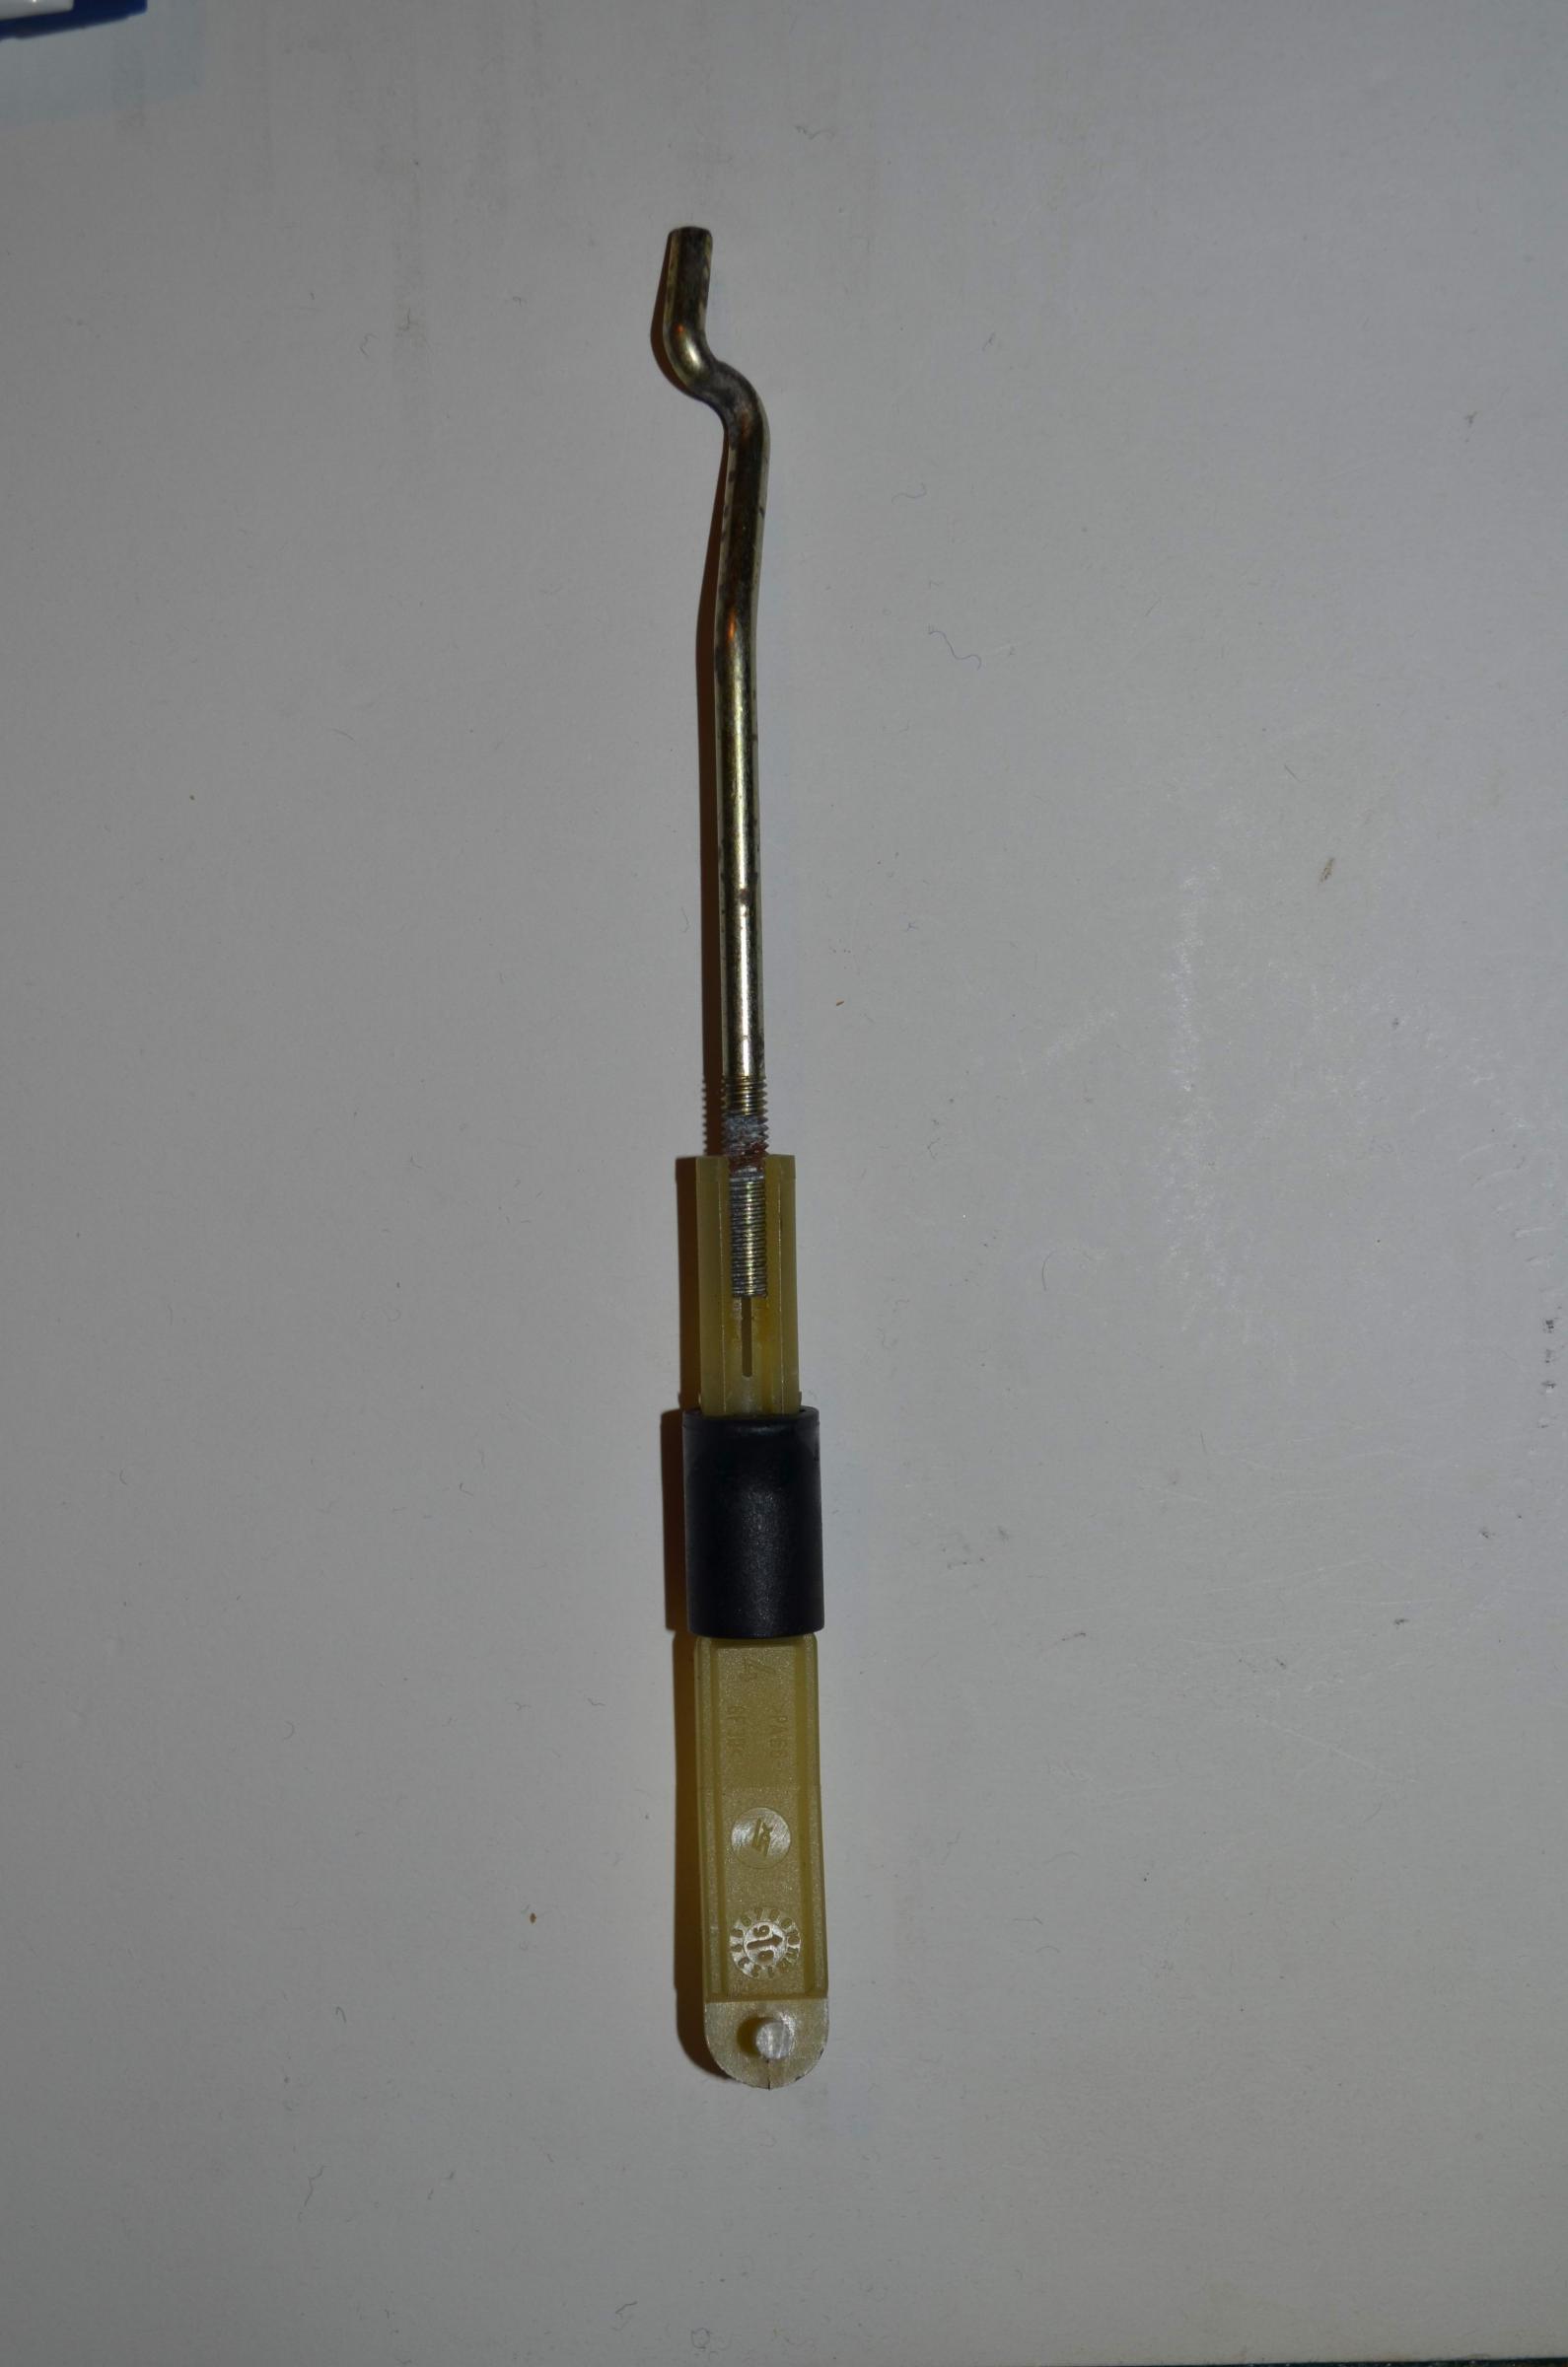
The following pic shows the plastic LINK 3 fitted to the door latch but without the locking pin. I’m sure this is adequate to hold the link in place but I replaced the locking pin.
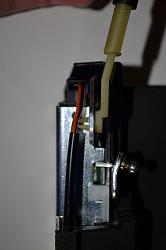
On refitting the door latch to the vehicle, the two parts of LINK 3 are easily clipped back together and locked by sliding the black collar back up the plastic section.
Graham
Plenty of good information in the FAQ’s except for disconnecting the link from the Door Latch to the Door Lock (LINK 3 in the drawing). It soon became obvious that any attempt to force the connector (circled in red) through the arm on the Door Latch would damage it.
Inspecting the rear of the plastic clip with a mirror showed that it has four tabs (circled in red) which are fixed with a central locking pin. (the pin has been removed in this pic to show the tabs more clearly)

When the plastic link is originally fitted to the Door Latch during manufacture, the locking pin (arrowed in red) is pressed in the direction shown to spread the four tabs and prevent them from coming out of the arm in the door latch.
I couldn’t push the locking pin out with the Door Latch fitted in the car and couldn’t remove the Door Latch without removing the plastic link – Catch 22.
The only solution appeared to be to remove the outer door handle to disconnect LINK 3 at the top and then remove the Door Latch from the vehicle.
With the Door Latch on the bench, it was obvious how LINK 3 should be removed without having to take the Door Handle off.
1. The black collar (arrowed in red) is pushed down the plastic section of LINK 3
2. This reveals a groove in the plastic section
3. The upper metal piece of LINK 3 can easily be pressed out of the plastic section (arrowed in red) which is left attached to the door latch. The upper metal section (arrowed in blue) stays attached to the door lock.

4. The door latch can then be removed from the vehicle.
The following pic shows the plastic LINK 3 fitted to the door latch but without the locking pin. I’m sure this is adequate to hold the link in place but I replaced the locking pin.

On refitting the door latch to the vehicle, the two parts of LINK 3 are easily clipped back together and locked by sliding the black collar back up the plastic section.
Graham
Last edited by GGG; Feb 20, 2013 at 08:43 AM.


Junior Member
Joined: Feb 2013
Posts: 5
Likes: 0
From: New Zealand
Crucial knowledge. Thanks very much. Any idea how critical it is to return the metal piece to the same position as previously in the plastic collar?
Or how to get it back to the right position if it hadn't been marked prior to getting excited and removing it?
Or how to get it back to the right position if it hadn't been marked prior to getting excited and removing it?

Thread
Thread Starter
Forum
Replies
Last Post
99xk8guy
XK8 / XKR ( X100 )
12
Sep 29, 2025 10:51 PM
FS[Western US]: XJS Lock Set with Keys- Doors, trunk, glove, gas, and ignition
XJsc-guy
PRIVATE For Sale / Trade or Buy Classifieds
6
Nov 23, 2015 01:56 PM
Currently Active Users Viewing This Thread: 1 (0 members and 1 guests)