
Here I go ...


Thread Starter
|
Member
Joined: Aug 2012
Posts: 60
Likes: 2
From: San Antonio TX
Starting tomorrow I'm gonna work on the plugs, valve cover gaskets, and secondary tensioners on my 1997 XK8. I have never done anything like this before ... the most I've done is an alternator or water pump. Wish me luck ...
I've watched the videos and read a lot, and will do a bit more before I start. If there are any things I need to know or watch out for that you guys can think of, please let me know. Much appreciated!
PKB
I've watched the videos and read a lot, and will do a bit more before I start. If there are any things I need to know or watch out for that you guys can think of, please let me know. Much appreciated!
PKB
Veteran Member
Joined: Jun 2011
Posts: 2,134
Likes: 542
From: Costa Mesa, CA
If you can do the water pump, you can do tensioners.
Take your time, zip tie method I am assuming here, right? s-l-o-w-l-y loosen the cam caps evenly (I use a criss-cross pattern) and make sure the cam is dislodged from it's home before finishing the last 10% of the cam cap bolts- it sometimes likes to "pop" up and needs a little persuasion. be careful with the breather hoses (full and part load) they tend to be brittle. Also a good time to clean out the part load breather hole while the cam covers are off. Don't forget the dab of sealant where the timing cover meets the head before installing the cam covers.
Take your time, zip tie method I am assuming here, right? s-l-o-w-l-y loosen the cam caps evenly (I use a criss-cross pattern) and make sure the cam is dislodged from it's home before finishing the last 10% of the cam cap bolts- it sometimes likes to "pop" up and needs a little persuasion. be careful with the breather hoses (full and part load) they tend to be brittle. Also a good time to clean out the part load breather hole while the cam covers are off. Don't forget the dab of sealant where the timing cover meets the head before installing the cam covers.
Veteran Member
Joined: Dec 2007
Posts: 1,408
Likes: 494
From: Ormond Beach FL
My advice is to remember that almost everything screws into aluminum which if nothing else, loves to strip out its threads. Use a 1/4" drive instead of a 3/8" drive and a nut driver instead of a wrench. Finesse over force.
Last edited by GordoCatCar; Jun 21, 2013 at 02:11 PM.

Veteran Member


Joined: Apr 2010
Posts: 7,657
Likes: 3,018
From: Arlington VA USA
The fuel injection relay is a safer choice to remove because the car may start on residual fuel in the system otherwise.
Veteran Member
Joined: Apr 2010
Posts: 7,657
Likes: 3,018
From: Arlington VA USA
If the hydraulic tensioners are not pre-pressurized with oil before the car starts for the first time with new tensioners, the chain may skip a tooth.
Trending Topics
Veteran Member
Joined: Aug 2009
Posts: 1,205
Likes: 434
From: Milwaukee, WI
Thread Starter
|
Member
Joined: Aug 2012
Posts: 60
Likes: 2
From: San Antonio TX
Hi all -
Here it is the 1st of December and I finally was able to get a start on this project. Back in June a few days after I planned to start, my father was diagnosed with cancer; since then I haven't had time to get back to this, but here I am now.
I'm in the process of removing the drivers side valve cover. It is slow going because I'm trying to remove as little as possible. The coil pack closest to toward the cab on the drivers side - it is soaked in oil, as were all of them - I'm not sure why but this one appears to have rust on it -

I have a few questions. They are I think pretty easy for those who have done this before. First, how do I get these little clips off without breaking them?
Second, here's another clip that I am struggling with. A lot of plastic is brittle and I've broken a few already. How does this come off?
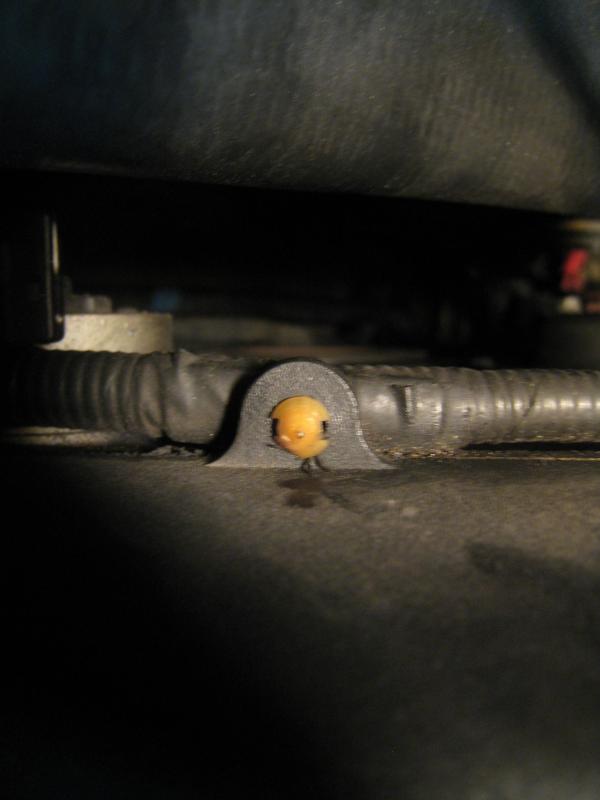
Third - what is this and what does it do? I haven't removed it yet but I have to in order to get to the last couple of bolts.
Thanks all -
PKB
Here it is the 1st of December and I finally was able to get a start on this project. Back in June a few days after I planned to start, my father was diagnosed with cancer; since then I haven't had time to get back to this, but here I am now.
I'm in the process of removing the drivers side valve cover. It is slow going because I'm trying to remove as little as possible. The coil pack closest to toward the cab on the drivers side - it is soaked in oil, as were all of them - I'm not sure why but this one appears to have rust on it -

I have a few questions. They are I think pretty easy for those who have done this before. First, how do I get these little clips off without breaking them?

Second, here's another clip that I am struggling with. A lot of plastic is brittle and I've broken a few already. How does this come off?

Third - what is this and what does it do? I haven't removed it yet but I have to in order to get to the last couple of bolts.

Thanks all -
PKB
Thread Starter
|
Member
Joined: Aug 2012
Posts: 60
Likes: 2
From: San Antonio TX
Another question I have is - I don't see a way to get to the last lower cam bolt without removing the small coolant reservoir above it ... unless someone knows of some trickery that isn't apparent to me right now.
Veteran Member

Joined: Oct 2012
Posts: 3,752
Likes: 1,617
From: Puerto Rico
Get a u-joint for your � inch drive and patience.
(The floppy kind)
Over here we call them borrachitos. (Little drunkards)

As for the other questions:
1. Most of mine either came off on their own or they broke. Didn't find a way to avoid damage there.
2. Oil breather hose. You're supposed to squeeze and gently pull off. Shimmy it like you would a screw, very gently. It's very delicate. The hose connected to that is probably very brittle as well. Try not to destroy it. (It can be mended, I did.)
3. NPI, not a clue. I can't really tell from that shot. Is it connected at the distal end of each valve cover? Me thinks it's connected to a sensor.
Seems like your spark plug seals were shot. That's why your coils are oily. Don't know about the rust. Aliminium engine + rubber coil end. Doesn't add up. My calculator reads error. To me it looks like dirty oil.
Last edited by giandanielxk8; Dec 1, 2013 at 02:39 PM.

Senior Member
Joined: May 2011
Posts: 359
Likes: 101
From: CA
Giandaniel, thanks for cultural uplift. Borrachitos - love it!
Layla, like he said, it takes a mixture of gentleness and firmness to get those connectors off. How much? Never can tell. I've broken bits too, after the first you kinda get a feel.
Steve
Layla, like he said, it takes a mixture of gentleness and firmness to get those connectors off. How much? Never can tell. I've broken bits too, after the first you kinda get a feel.
Steve

Senior Member
Joined: Feb 2010
Posts: 830
Likes: 141
From: Daytona, USA
Rust on those coils is pretty normal....the coil covers don't seal very well. Won't affect their function. You can spray everything with Boeshield T-9 before putting the cover on to protect from corrosion. Good luck with your project.
Thread Starter
|
Member
Joined: Aug 2012
Posts: 60
Likes: 2
From: San Antonio TX
Thanks - utilizing the u-joint and extension and some finesse and patience as prescribed, I have the cover off now... in the process of cleaning it all up.
I also have the chain zip-tied but not sure ... never mind - found some videos on Youtube - it's easier than I thought. I'm just tender footing around everything I guess.
and
I also have the chain zip-tied but not sure ... never mind - found some videos on Youtube - it's easier than I thought. I'm just tender footing around everything I guess.
and
Last edited by Layla801; Dec 1, 2013 at 05:45 PM. Reason: wanted to add video links
Thread Starter
|
Member
Joined: Aug 2012
Posts: 60
Likes: 2
From: San Antonio TX
The gasket kit I picked up from the local Jag shop is the wrong one so I'm at a standstill for the night. I'll swap these out tomorrow and resume. Thanks all for the responses and help, I do appreciate it.
Thread Starter
|
Member
Joined: Aug 2012
Posts: 60
Likes: 2
From: San Antonio TX
Last post before dinner ...
Here's another shot of that device that I asked about earlier. It is on the drivers side next to the coolant reservoir:

Here's the old tensioner:

Last question: what's the best way to scrape off all this residue from the old seals?
Goodnight all -
PKB
Here's another shot of that device that I asked about earlier. It is on the drivers side next to the coolant reservoir:

Here's the old tensioner:

Last question: what's the best way to scrape off all this residue from the old seals?


Goodnight all -
PKB
Thread Starter
|
Member
Joined: Aug 2012
Posts: 60
Likes: 2
From: San Antonio TX
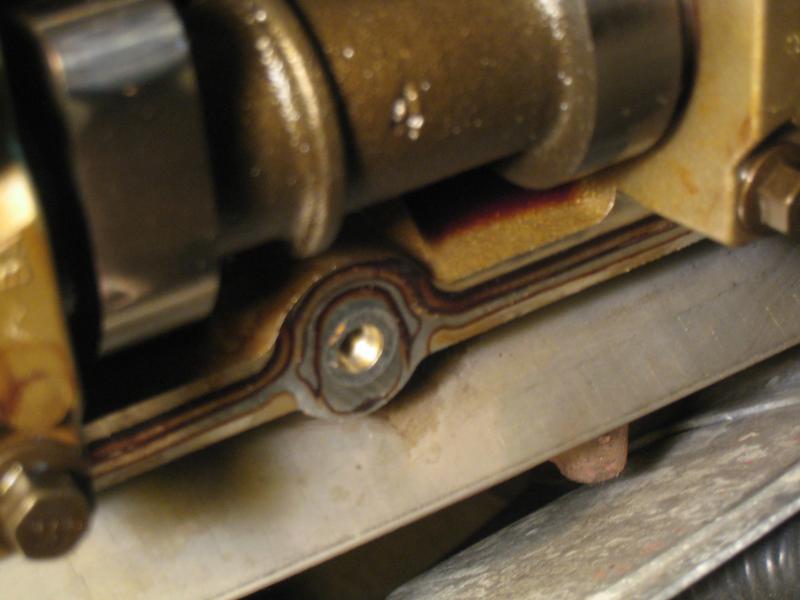
Well folks I am hosed. I had the new tensioner in and everything hand-tightened. I started to torque the tensioner and camshaft bolts down - I didn't get new bolts, I was using the old ones - and broke one tensioner bolt and one camshaft bolt. The threaded ends are stuck in the holes.
Does anyone know a good mechanic (in Houston) who makes house calls?
... and yes, the old tensioner was cracked .. the slipper was there but was brittle and came off in my hands.
Thanks
PKB
Does anyone know a good mechanic (in Houston) who makes house calls?
... and yes, the old tensioner was cracked .. the slipper was there but was brittle and came off in my hands.
Thanks
PKB
Last edited by Layla801; Dec 30, 2013 at 02:43 PM.