
My project...


Thread Starter
|
Senior Member
Joined: Jul 2012
Posts: 165
Likes: 22
From: Lexington, SC
Good day all!!!
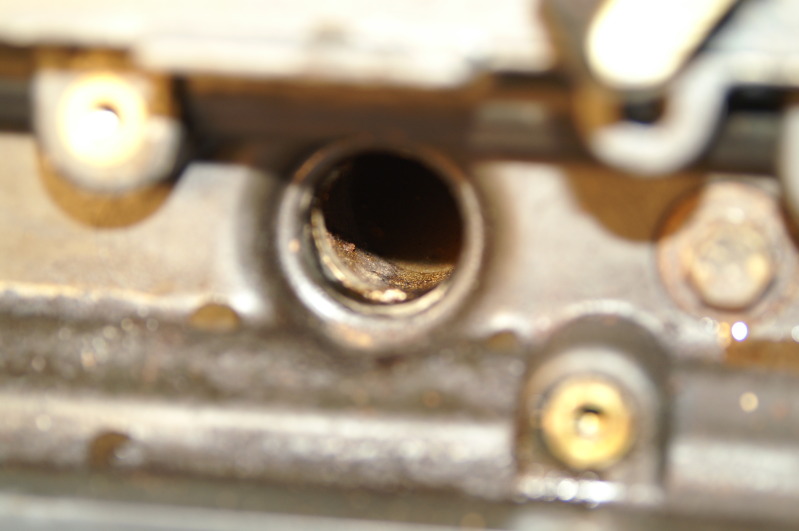
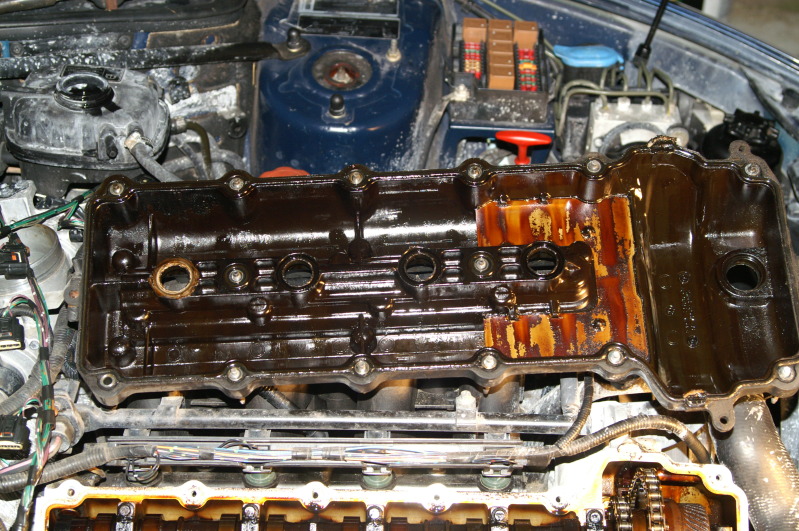
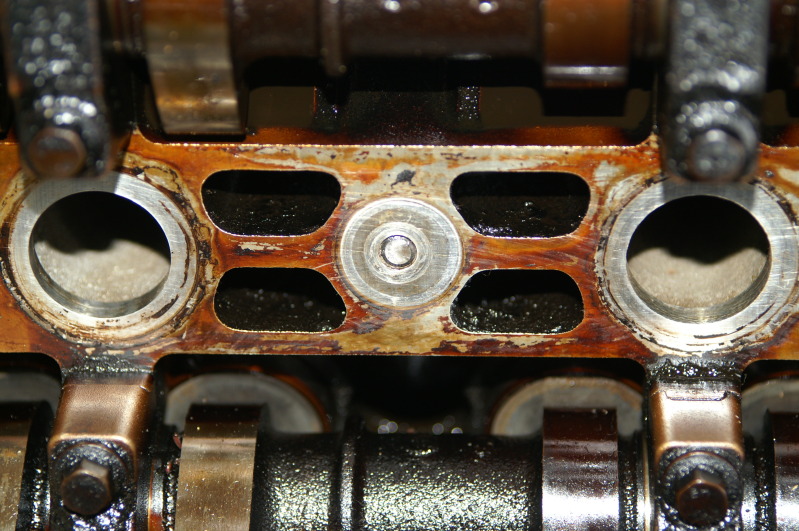
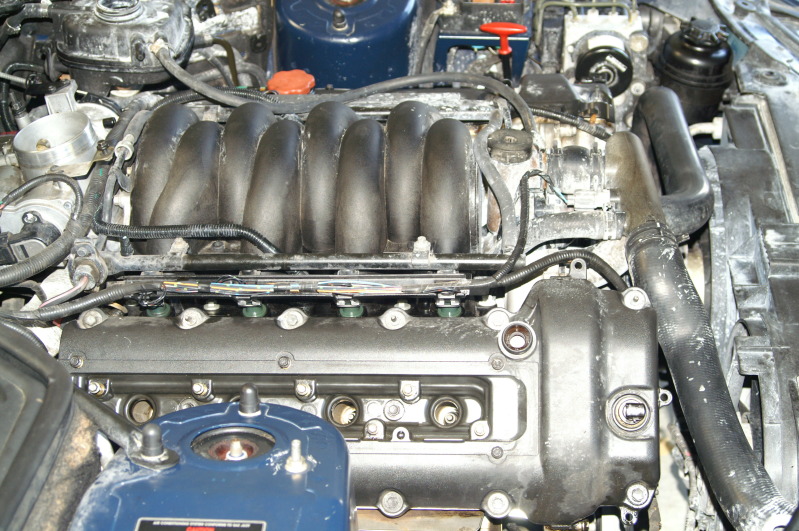
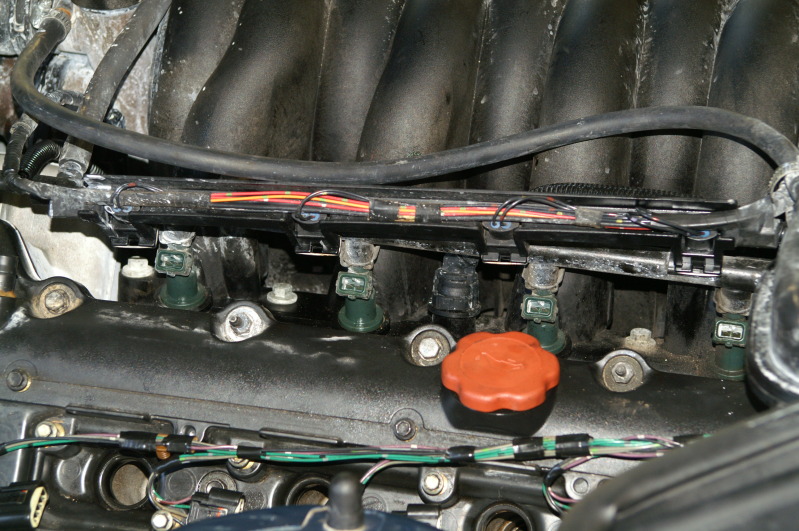
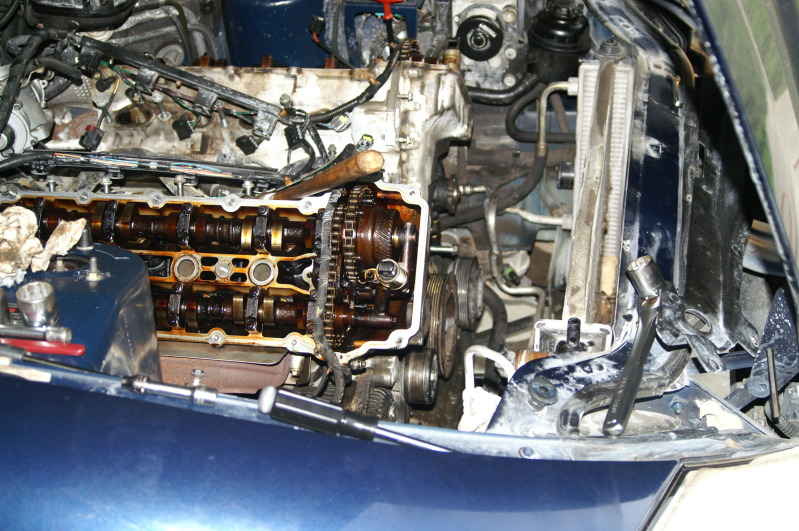
Well, I got a late start on the car today, but I managed to get the coils tested and the pass side valve cover off... I made an interesting discovery, which may prove to my liking... five of the eight spark plug wells had large amounts of water in them... I will see tomorrow if the water is through cracks in the cylinder heads or was a result of careless maintenance and a repair job done poorly... I'm surprised the car ran at all!! Here are the motor pics... I had to put the top up due to lawn maint, but will put it down to take finished interior pics tomorrow...
Water in the spark plug well...
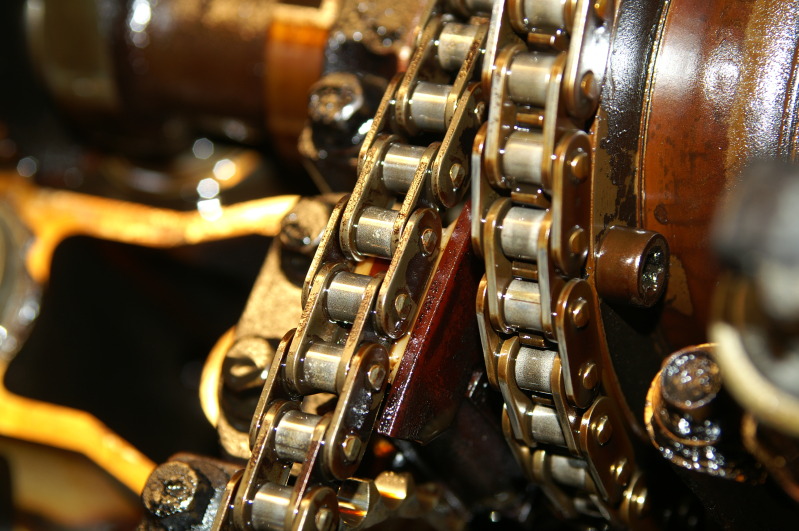
Broken secondary tensioner... It's a good bet the other is the same way...
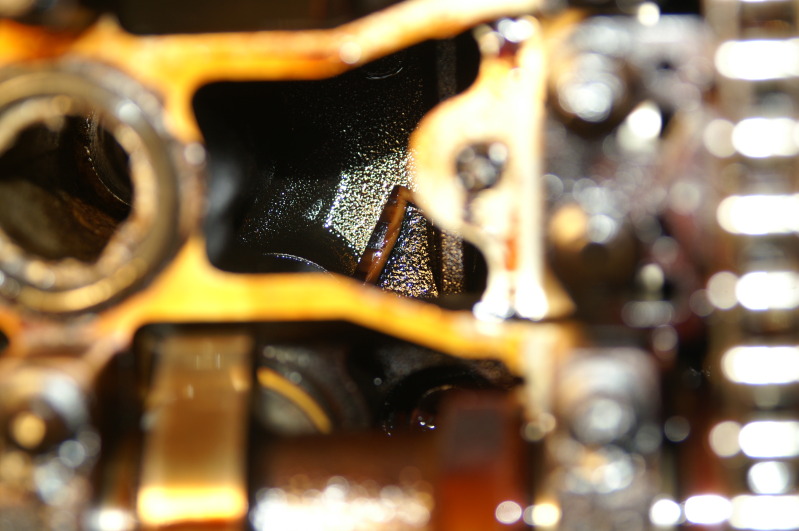
Where one piece ended up...
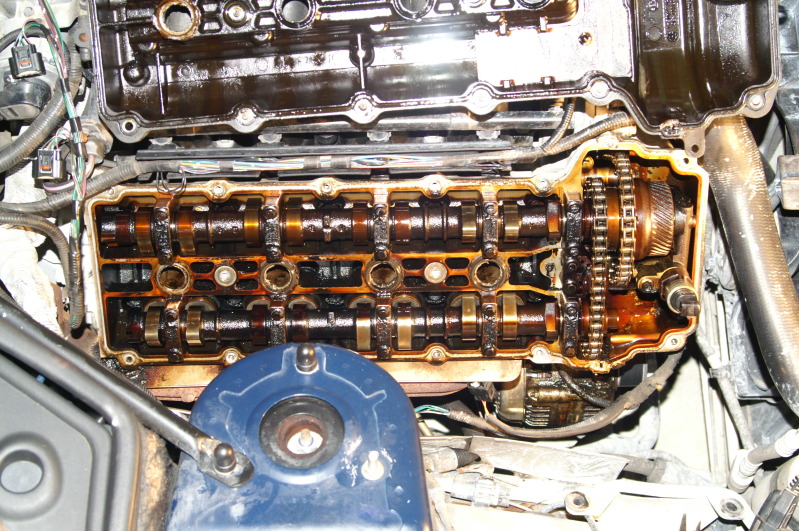
Well, there is good news and bad news with this next picture... The bad news is:
This is how much sludge is in the motor........
And the good news:
This is how much sludge is in the motor!!!!!
That's it for now...
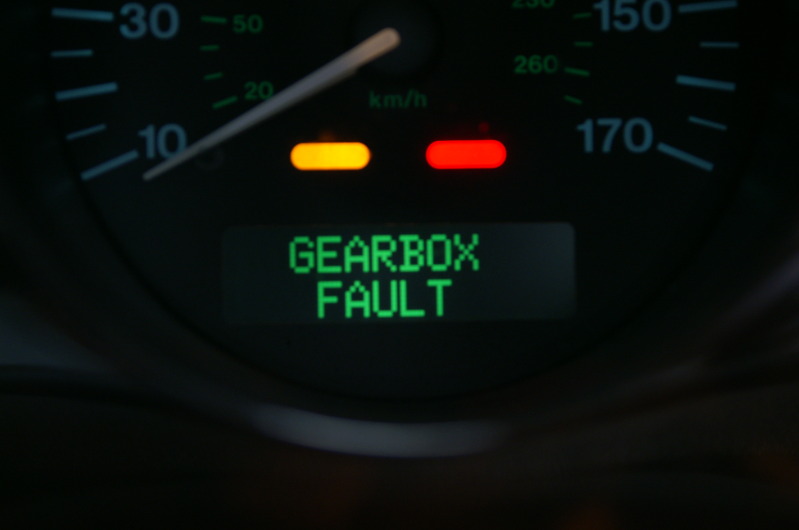
One final question for the night... What does the error message "Gearbox fault" mean? My owners manual says "Transmission" not "Gearbox"...
Okay, enough for tonight...
Cheers all!!!
Well, I got a late start on the car today, but I managed to get the coils tested and the pass side valve cover off... I made an interesting discovery, which may prove to my liking... five of the eight spark plug wells had large amounts of water in them... I will see tomorrow if the water is through cracks in the cylinder heads or was a result of careless maintenance and a repair job done poorly... I'm surprised the car ran at all!! Here are the motor pics... I had to put the top up due to lawn maint, but will put it down to take finished interior pics tomorrow...
Water in the spark plug well...
Broken secondary tensioner... It's a good bet the other is the same way...
Where one piece ended up...
Well, there is good news and bad news with this next picture... The bad news is:
This is how much sludge is in the motor........
And the good news:
This is how much sludge is in the motor!!!!!
That's it for now...
One final question for the night... What does the error message "Gearbox fault" mean? My owners manual says "Transmission" not "Gearbox"...
Okay, enough for tonight...
Cheers all!!!


Veteran Member


Joined: Dec 2010
Posts: 8,833
Likes: 2,921
From: Douglasville Ga.
Gearbox=Transmission. Your trans. may have been replaced. If they didn't match numbers exactly the selector switch may be causing a problem.
Considering the number of issues you are facing, you probably need a Jag specific code reader to access transmission, abs and other fault codes. Autoenginuity will do this, but there may be other, less expensive options.
RJ______________
97 XK8 Conv 85K mi
Considering the number of issues you are facing, you probably need a Jag specific code reader to access transmission, abs and other fault codes. Autoenginuity will do this, but there may be other, less expensive options.
RJ______________
97 XK8 Conv 85K mi
Thread Starter
|
Senior Member
Joined: Jul 2012
Posts: 165
Likes: 22
From: Lexington, SC
That is what I was thinking too... I really doubt it is due to cracks in the cylinder heads (BOTH of them)... I guess that would be the worst case scenario...
Cheers!!
Thread Starter
|
Senior Member
Joined: Jul 2012
Posts: 165
Likes: 22
From: Lexington, SC
Gearbox=Transmission. Your trans. may have been replaced. If they didn't match numbers exactly the selector switch may be causing a problem.
Considering the number of issues you are facing, you probably need a Jag specific code reader to access transmission, abs and other fault codes. Autoenginuity will do this, but there may be other, less expensive options.
RJ______________
97 XK8 Conv 85K mi
Considering the number of issues you are facing, you probably need a Jag specific code reader to access transmission, abs and other fault codes. Autoenginuity will do this, but there may be other, less expensive options.
RJ______________
97 XK8 Conv 85K mi
My code readers are on a slow boat back from Germany anyway... I may consider getting one specifically for the Jag...
Cheers!!
Thread Starter
|
Senior Member
Joined: Jul 2012
Posts: 165
Likes: 22
From: Lexington, SC
Good day,
Well, I put the top of the motor back together after hours of cleaning... I don't think I have a head gasket leak, but I have either a burnt valve or the variable timing isn't closing the intake valves all the way at idle... It did run 70% better than when there was water in the spark plug wells... I even tempted fate and took it out for a spin to see how the trans acted... The car still needs a lot of work, but it did okay thus far... She still has a serious flu bug, but a lot of attention will get her back to health... I doubt I will get out of pulling the cylinder heads... I don't think it will be a bad idea in the long run, even if it is a variable timing issue... I left the camera in the car... I'll post pictures later on...
Cheers for now!!


Joined: Dec 2011
Posts: 120,439
Likes: 17,005
From: Durham, UK
Plenty of work left to do or not - that's some achievement to get to this stage from the initial pic set.
Graham
Thread Starter
|
Senior Member
Joined: Jul 2012
Posts: 165
Likes: 22
From: Lexington, SC
Thank you... Now I get to pull it all apart again to see what is not acting right... It is a good thing I love doing this stuff...
Cheers!!!

Thread Starter
|
Senior Member
Joined: Jul 2012
Posts: 165
Likes: 22
From: Lexington, SC
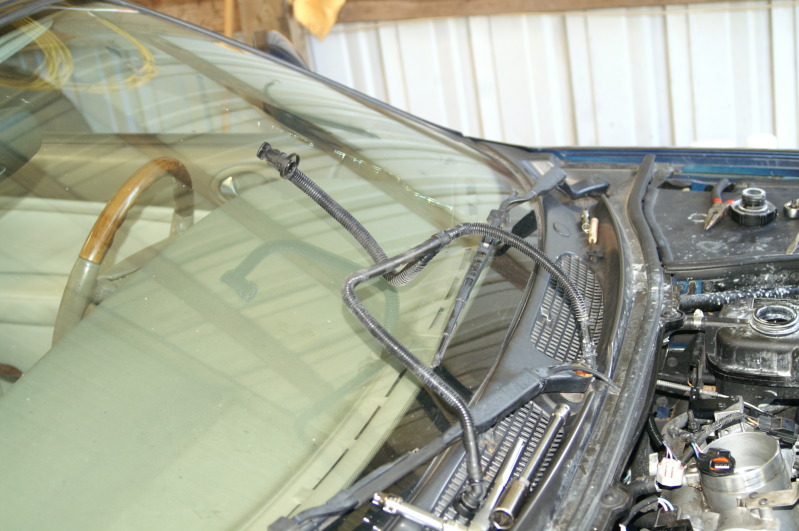
Good day everyone!!
Well, it has been an interesting day to say the least... After letting the car cool for about two hours, I started pulling everything apart... To add a note that I noticed the power steering pump pulley moving around a bit when it was running... You will all be shocked when you see why...
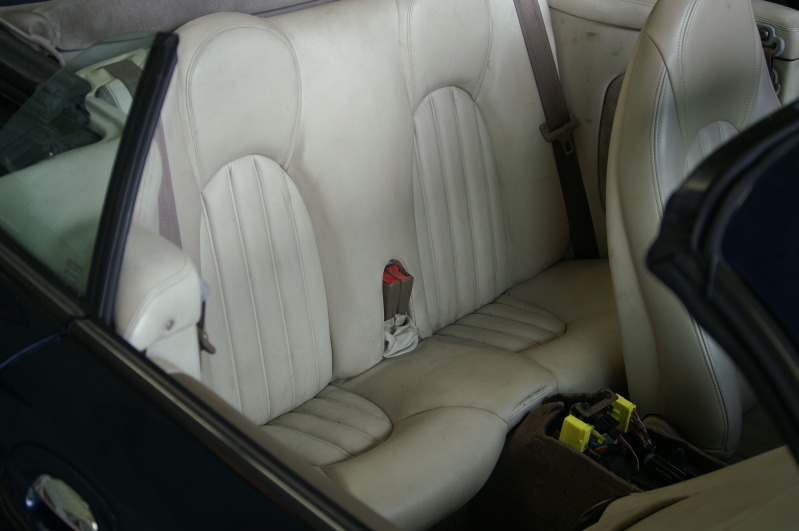
First things first... Here is the rear seat all put back together as it should be... I will have to do a detailed cleaning when I get the console back in... The black marks are from the hydraulic hose covering turning to dust when I removed them...
These are the codes I'm getting on the dash... None of the needles work, except the gas gauge (I hope)... Will these codes stay until a computer deletes them? I pulled my battery to recharge it for over an hour, but all these remained even before I started it for the first time after reconnecting the battery...

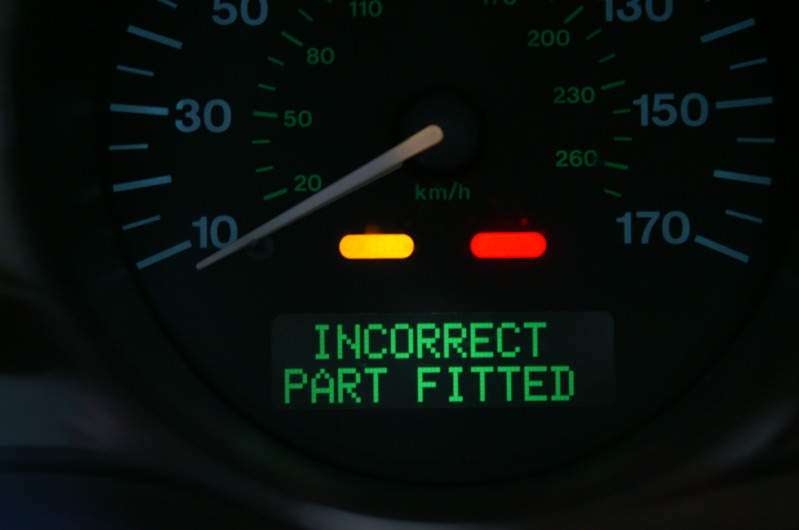
Now this one didn't exist prior to pulling the battery... I have no idea what part it is talking about...
One of the great things about the previous mechanic...
Here is my starting point... Maybe a before picture...
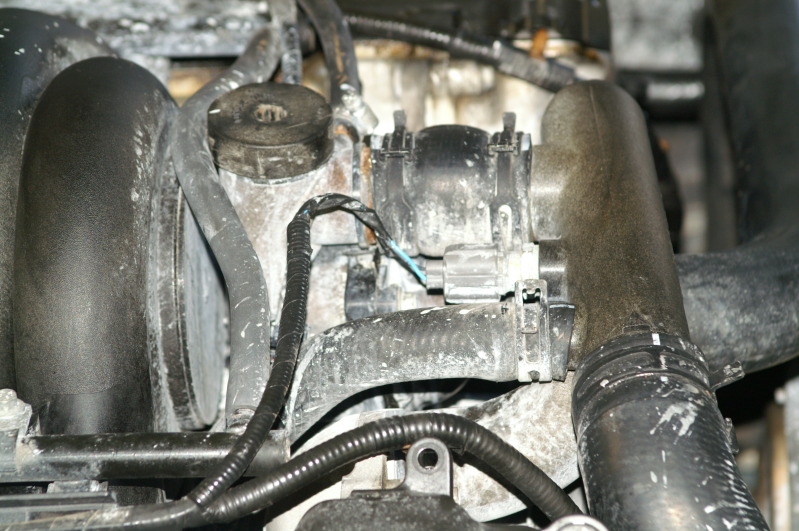
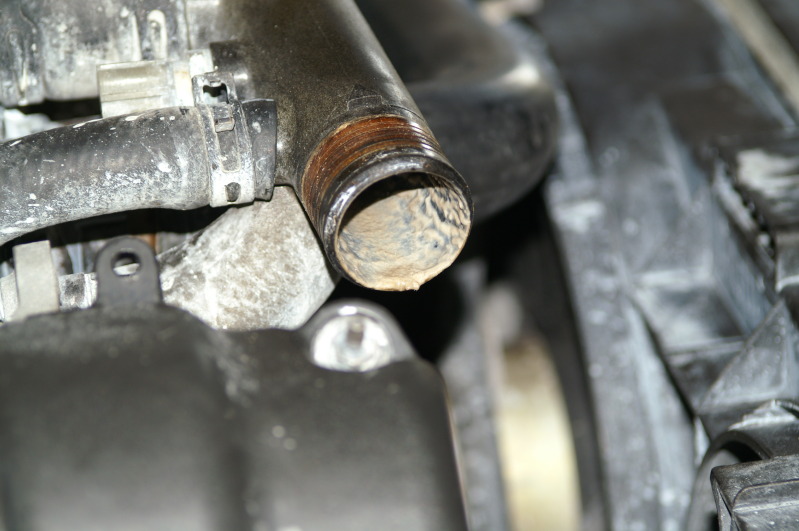
Almost popped that small hose today... It didn't look like that before the test drive... I found out later, there was NO coolant in the system... Just plain old water and some kind of sealer crap, which is where all the white residue is from...
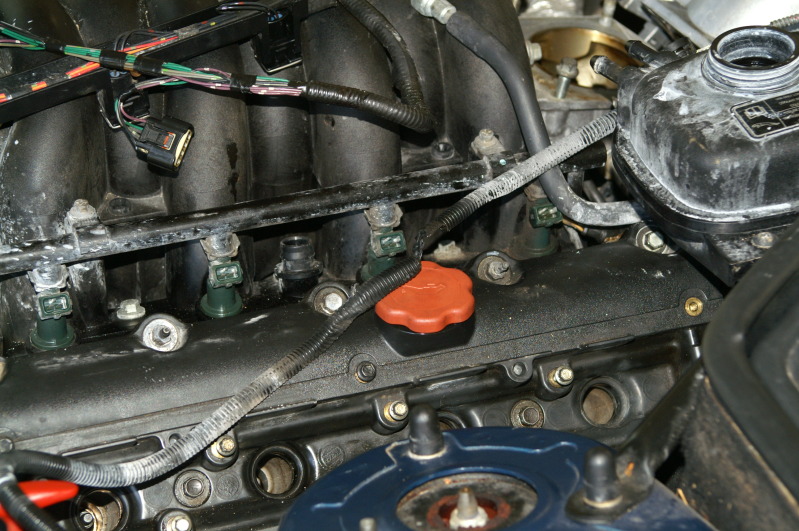
These were easy to pull off with the help of a flat screwdriver... push in the metal bar, off they come... Start at the front and work your way back... Very easy!!
I hate these push on connectors!! Well, getting them on is a breeze, but pulling them is frustrating!!! Yep, the crack is getting longer...
And this one melted on the block...
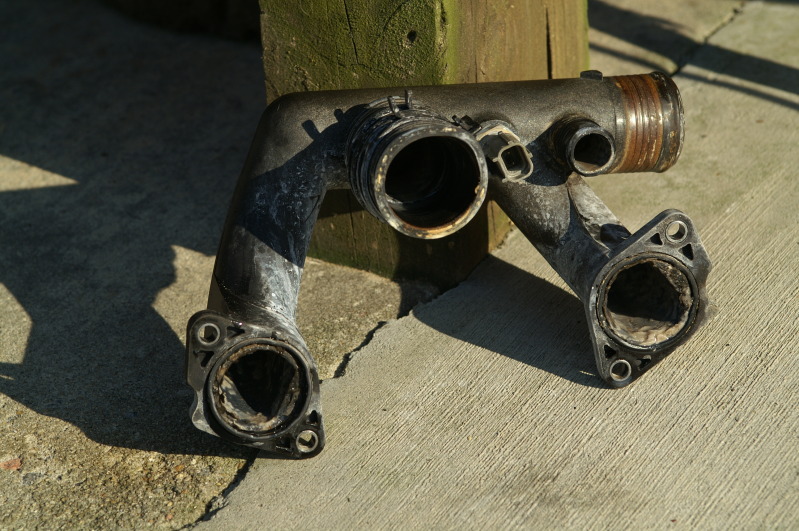
This is just some of the nasty crap in the cooling system...
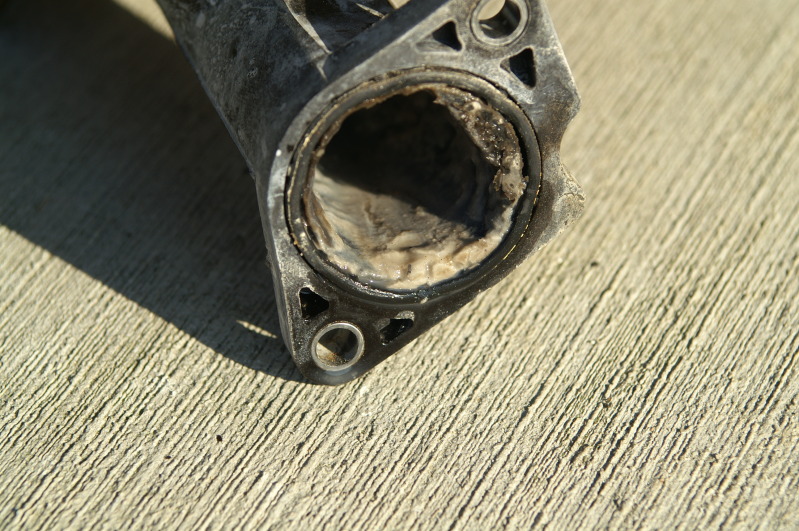
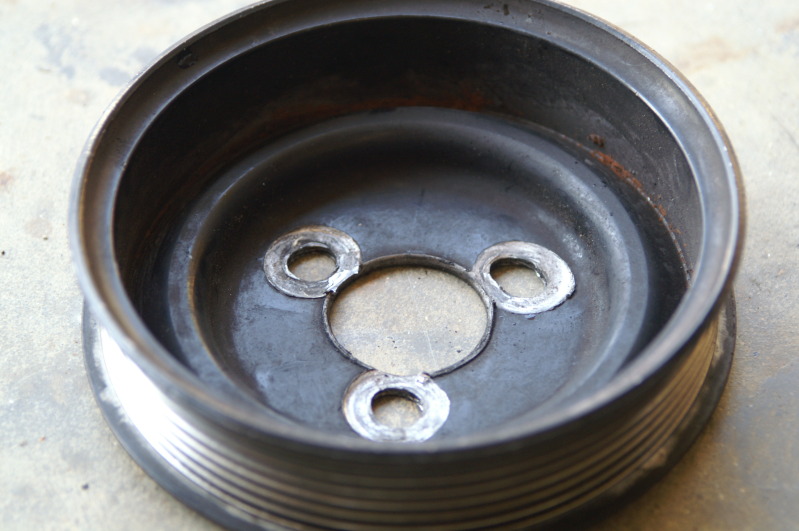
This is what I pulled off the power steering pump...
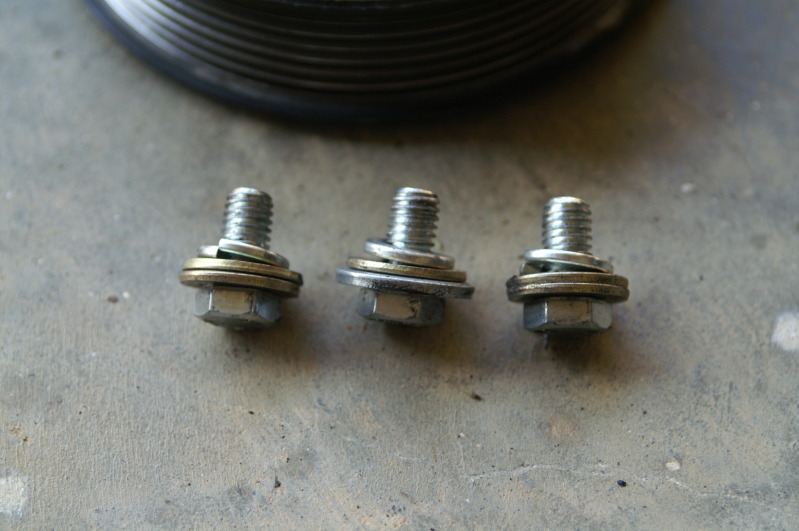
And the crazy crap that held it to the pump... I'll be nice and keep my thoughts to myself about the one that did this...
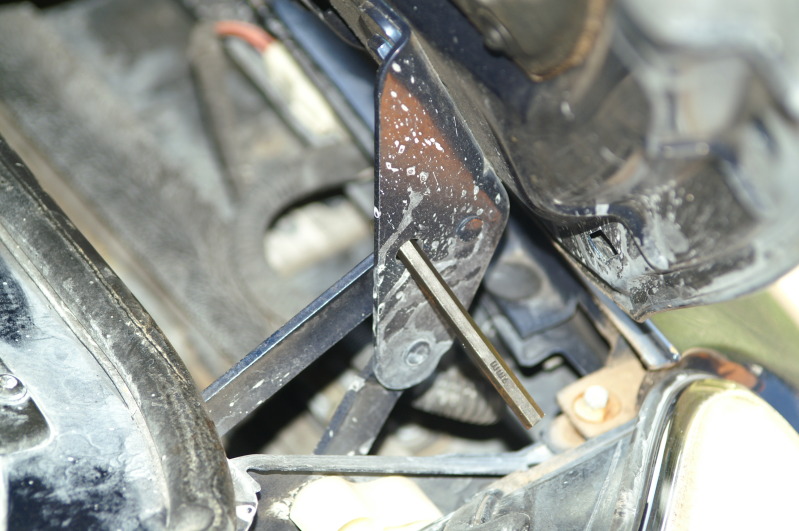
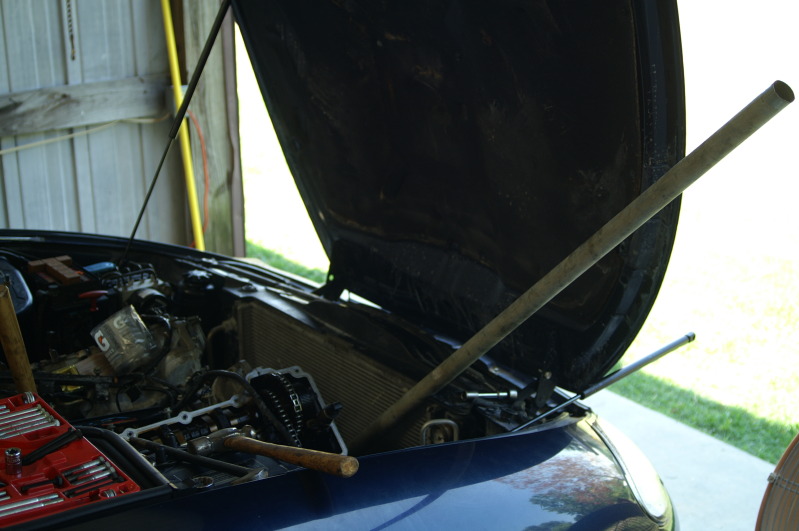
This is my hood locking tool... Maybe I can use one of the bolts in the above picture tomorrow... I may need that 7mm allen wrench...
Getting the rest of the accessories off to get the chain cover off...

Finally!! Everything off... EXCEPT the crank pulley... Any thoughts? My pulley puller is...... (Good guess!!) .....on a slow boat from Germany... That idler pulley is hand tight... I used it to wrap the serpentine belt around to hold the crank while I broke the crank pulley bolt free with the 24mm - 1/2 in drive... The only time that hasn't worked for me is when the belt snapped... Now that bolt was tight!!!
All my parts... I cleaned all this up before closing up shop for the night... I can't wait to get that engine bay cleaned up... And the bottom of this motor is a complete oily mess... Oh, the water pump was kind of coming apart... I think the part the gasket fits around was crumbling... And the fans are almost a two-person job!! That thing is crazy heavy...
Well, that is it for now...
On a side note, I have an 01 right rear tail light that I got with the deal... I'm not converting them over, so anyone need it, or you know anyone that needs it?!!?
Have a great night everyone!!!
Cheers!!
Well, it has been an interesting day to say the least... After letting the car cool for about two hours, I started pulling everything apart... To add a note that I noticed the power steering pump pulley moving around a bit when it was running... You will all be shocked when you see why...
First things first... Here is the rear seat all put back together as it should be... I will have to do a detailed cleaning when I get the console back in... The black marks are from the hydraulic hose covering turning to dust when I removed them...
These are the codes I'm getting on the dash... None of the needles work, except the gas gauge (I hope)... Will these codes stay until a computer deletes them? I pulled my battery to recharge it for over an hour, but all these remained even before I started it for the first time after reconnecting the battery...
Now this one didn't exist prior to pulling the battery... I have no idea what part it is talking about...
One of the great things about the previous mechanic...
Here is my starting point... Maybe a before picture...
Almost popped that small hose today... It didn't look like that before the test drive... I found out later, there was NO coolant in the system... Just plain old water and some kind of sealer crap, which is where all the white residue is from...
These were easy to pull off with the help of a flat screwdriver... push in the metal bar, off they come... Start at the front and work your way back... Very easy!!
I hate these push on connectors!! Well, getting them on is a breeze, but pulling them is frustrating!!! Yep, the crack is getting longer...
And this one melted on the block...
This is just some of the nasty crap in the cooling system...
This is what I pulled off the power steering pump...
And the crazy crap that held it to the pump... I'll be nice and keep my thoughts to myself about the one that did this...
This is my hood locking tool... Maybe I can use one of the bolts in the above picture tomorrow... I may need that 7mm allen wrench...
Getting the rest of the accessories off to get the chain cover off...
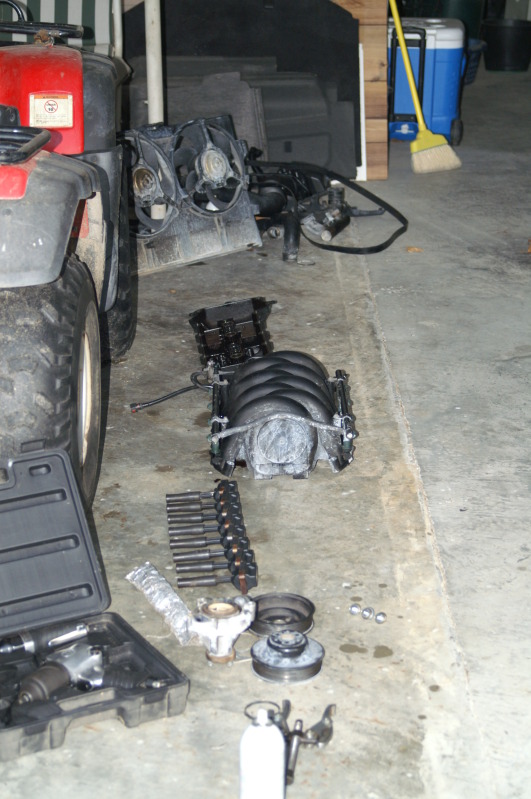
Finally!! Everything off... EXCEPT the crank pulley... Any thoughts? My pulley puller is...... (Good guess!!) .....on a slow boat from Germany... That idler pulley is hand tight... I used it to wrap the serpentine belt around to hold the crank while I broke the crank pulley bolt free with the 24mm - 1/2 in drive... The only time that hasn't worked for me is when the belt snapped... Now that bolt was tight!!!
All my parts... I cleaned all this up before closing up shop for the night... I can't wait to get that engine bay cleaned up... And the bottom of this motor is a complete oily mess... Oh, the water pump was kind of coming apart... I think the part the gasket fits around was crumbling... And the fans are almost a two-person job!! That thing is crazy heavy...
Well, that is it for now...
On a side note, I have an 01 right rear tail light that I got with the deal... I'm not converting them over, so anyone need it, or you know anyone that needs it?!!?
Have a great night everyone!!!
Cheers!!
Last edited by bluexk8ragtop; Jul 28, 2012 at 10:40 PM.
Thread Starter
|
Senior Member
Joined: Jul 2012
Posts: 165
Likes: 22
From: Lexington, SC
My wife says I over do it some times with my CDO (same as OCD but in alphabetical order like it should be!!!) And I plan on keeping this car for awhile, so I'm gonna get it where it should be...
Cheers!!


Thread Starter
|
Senior Member
Joined: Jul 2012
Posts: 165
Likes: 22
From: Lexington, SC
Well, here is the latest updates... I'M STUCK!!! I can't tear into the motor any farther than I have to this point...
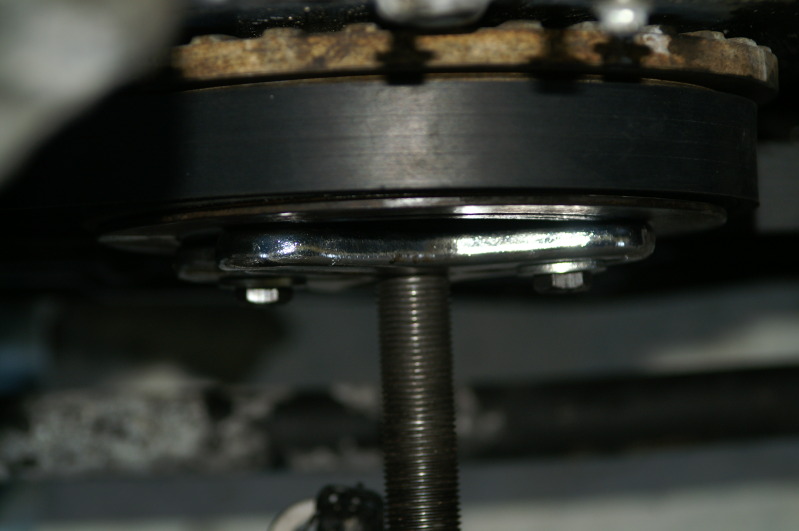
Here is the crank with my borrowed puller all hooked up... I had longer bolt in there, but the shorter ones allowed me to literally tighten the puller up against the pulley... I figured this would give the puller more integrity and not flex so much... Believe me when I say, It WAS flexing with the longer bolts... Actually, it still is here, but not as noticeable... Notice the belt that holds the crank in place... This belt is fairly new and springs back when I take it out... An older belt will still hold, but it will crack at the fold... Oh, notice the pipe around the 1/2 drive ratchet? Wait till you see how long it actually is...
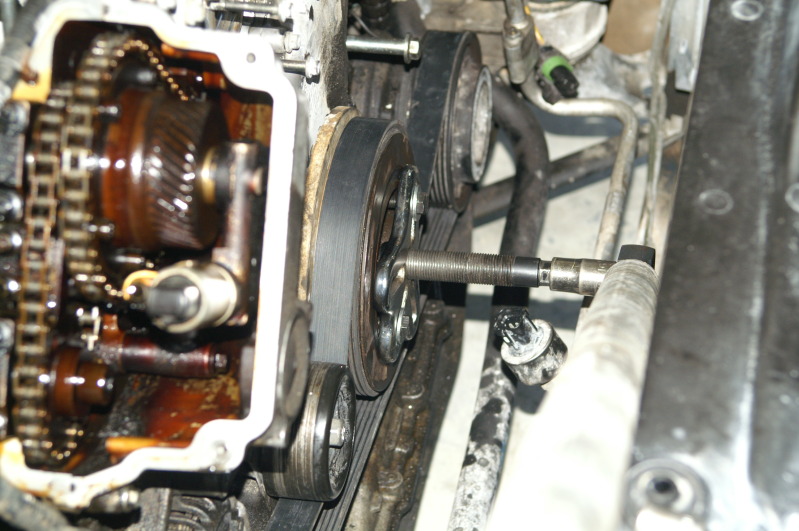
Here you go... This is also how I busted the crank bolt free... With a 32mm bolt, there should be NO reason this has to be pressed on this tight!! I am sure that if I torque on this much more, something will POP!!! And I have a feeling it will be the puller!!
I don't know if you can see the flex the puller has on it... But it's there...
And the washers I'm crushing and distorting under the pressure...
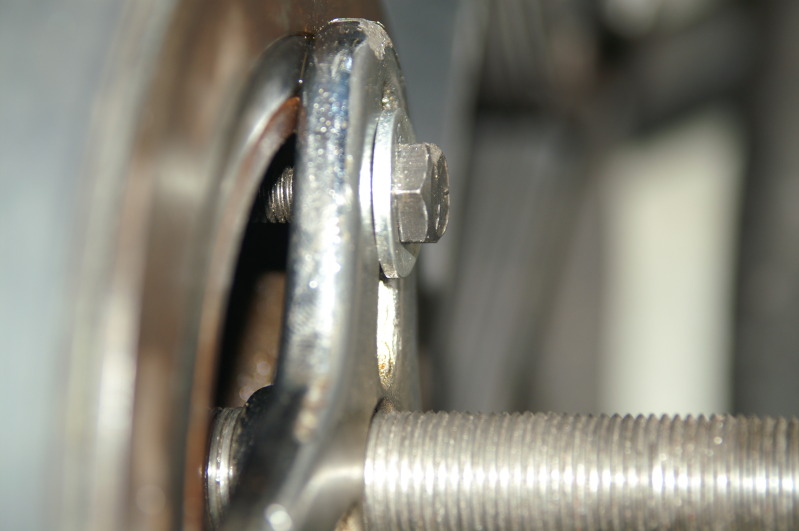
Here is that bolt that holds things on... And this had locktight stuff which added to it's inability to come loose... Talk about OVERKILL!!!!

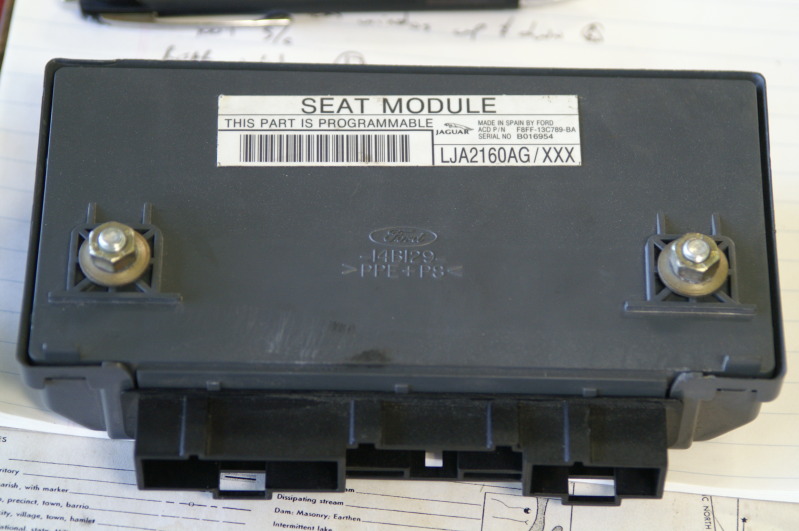
Here is my seat module that failed... I think I can fix the bad spot on the board, but I have to verify what I think is the problem, is actually the problem... Oh, if you didn't know, these are interchangeable between seats... The drivers seat uses the port not used on the pass side for UP and DOWN functions... My drivers seat module works the pass seat...
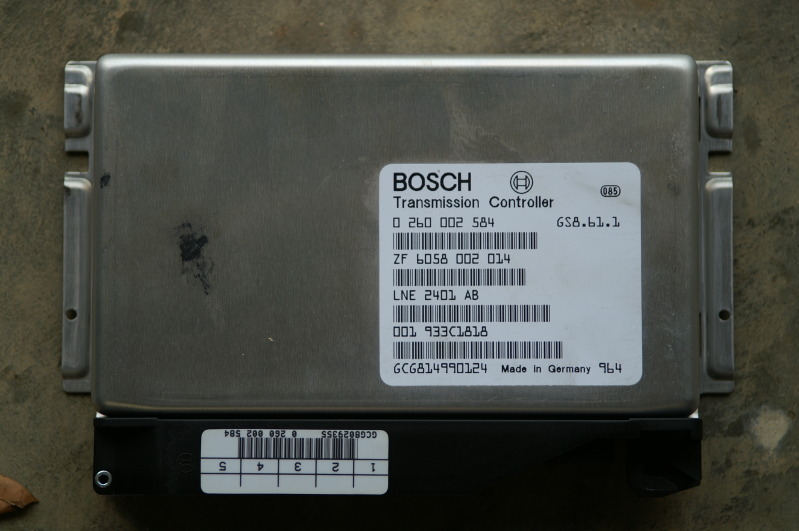
And finally, this is where I need a little help guys and gals... How do I find out if these are original, or if they should even be in this MY with my VIN?!?!
Trans Computer
Engine Computer
Thanks for tuning in everyone...
Cheers for now!!
Here is the crank with my borrowed puller all hooked up... I had longer bolt in there, but the shorter ones allowed me to literally tighten the puller up against the pulley... I figured this would give the puller more integrity and not flex so much... Believe me when I say, It WAS flexing with the longer bolts... Actually, it still is here, but not as noticeable... Notice the belt that holds the crank in place... This belt is fairly new and springs back when I take it out... An older belt will still hold, but it will crack at the fold... Oh, notice the pipe around the 1/2 drive ratchet? Wait till you see how long it actually is...
Here you go... This is also how I busted the crank bolt free... With a 32mm bolt, there should be NO reason this has to be pressed on this tight!! I am sure that if I torque on this much more, something will POP!!! And I have a feeling it will be the puller!!
I don't know if you can see the flex the puller has on it... But it's there...
And the washers I'm crushing and distorting under the pressure...
Here is that bolt that holds things on... And this had locktight stuff which added to it's inability to come loose... Talk about OVERKILL!!!!
Here is my seat module that failed... I think I can fix the bad spot on the board, but I have to verify what I think is the problem, is actually the problem... Oh, if you didn't know, these are interchangeable between seats... The drivers seat uses the port not used on the pass side for UP and DOWN functions... My drivers seat module works the pass seat...
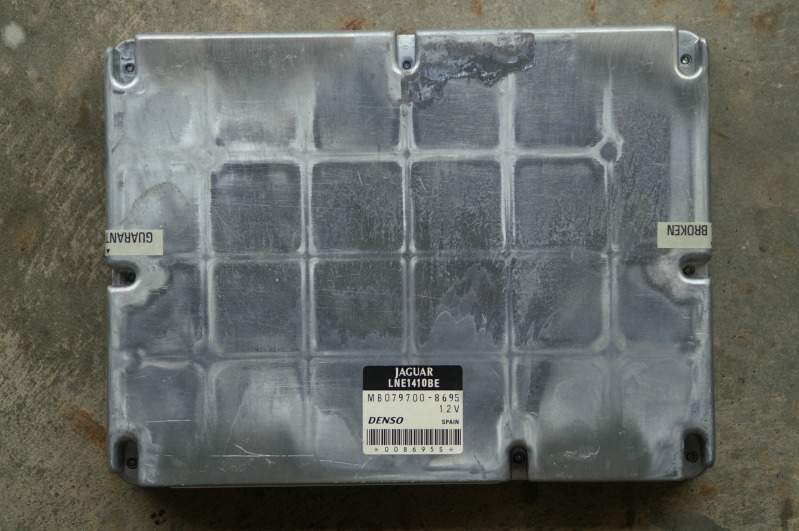
And finally, this is where I need a little help guys and gals... How do I find out if these are original, or if they should even be in this MY with my VIN?!?!
Trans Computer
Engine Computer
Thanks for tuning in everyone...
Cheers for now!!

Senior Member
Joined: May 2011
Posts: 359
Likes: 101
From: CA
Hey Blue,
I don't think I can provide any practical help to you, but you have all of my good wishes and respect for tacking your job with such enthusiasm! I know you'll be successful.
Please keep the narrative and pictures coming, your story is captivating!
Steve
I don't think I can provide any practical help to you, but you have all of my good wishes and respect for tacking your job with such enthusiasm! I know you'll be successful.
Please keep the narrative and pictures coming, your story is captivating!
Steve
Joined: Dec 2011
Posts: 120,439
Likes: 17,005
From: Durham, UK
........And finally, this is where I need a little help guys and gals... How do I find out if these are original, or if they should even be in this MY with my VIN?!?!
You may have to move the RH side carpet to see it. It'll give you the original modules fitted.
Graham
Thread Starter
|
Senior Member
Joined: Jul 2012
Posts: 165
Likes: 22
From: Lexington, SC
Mine match up, so they should work... I tore apart my ECM to see if I had any caps that threw up on the circuit board... I guess the good is I don't have to replace the caps cause they were all good... The bad is I still don't have anything concrete to blame the error codes on...
I didn't do anything to the motor today... I got all the stuff I needed to finish the trunk (anti rust paint and matting material)... That gets finished up tomorrow... I also got a heavy duty puller... We'll see if it was worth the effort to rent it for free... LOL!!!
Have a great one all!! More pictures tomorrow...
Cheers!!