Norma Connector - replace seal?
#21
XKR1975: I did end-up replacing the octopus hose assembly and I did not drain the radiator, only because I could not get the drain plug to budge and stopped as I did not want to break it.
I did drain the reservoir using a turkey baster. After that I just had a large catch pad under the octopus and removed the temp fix and let the coolant drain-out of the hose into the catch pad.
So doing this in a parking structure.....????.....you are going to spill coolant, no way around it so be prepared for that; catch pad, kitty litter, towels. Other than that being in a garage or parking structure is not much different except I did not have any cars parked next to me to worry about.
Good Luck.
The following users liked this post:
XKR1975 (03-05-2017)
#22
#23
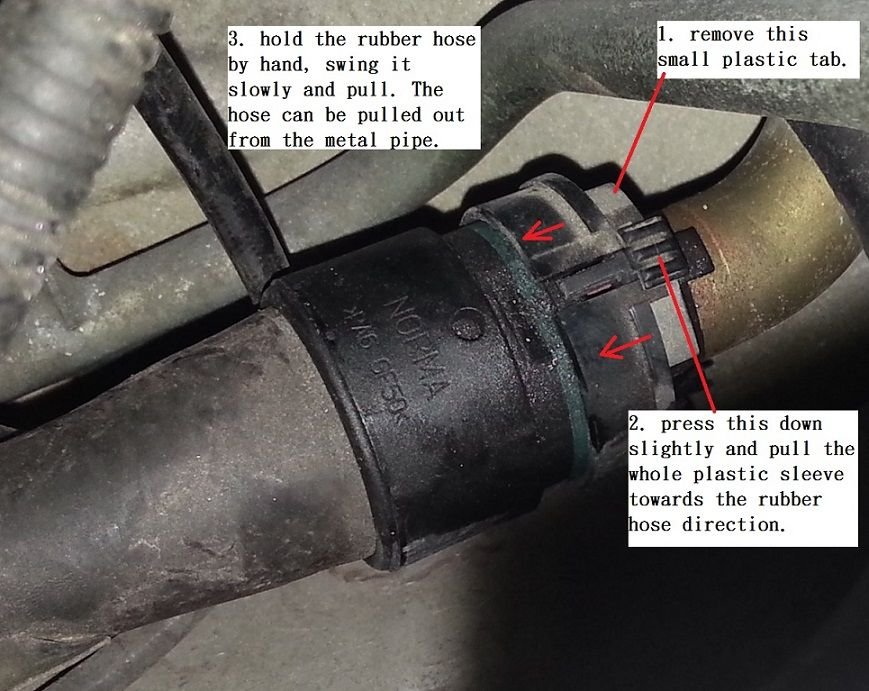
You can just remove the Octopus and let the coolant drain out if you don't have pets or don't care where the coolant goes. Replacing the beast isn't hard, just fiddly and intimidating. Start to finish it should take you about an hour. Old hose off: Take a LOOOONG screwdriver and position it against the ring on the right connector, just under the little tab. Give it a rap or two with a dead hammer and the collar slips back. Grab and twist like a ******* and it will come loose. You may have to tap it a bit with the screwdriver, but don't whale into it.
Clean the aluminum stub with steel wool.
Left connector is easy: take the same screwdriver and break off the tabs. The fitting falls apart. Clean the seat. Remove the other connectors with long pliers. Remove the hose from the left.
Here's the part that usually costs an extra hour: Put the old hose next to the new one and orientate the collars to the positions they will be easiest to access when the hose is put back in. This done, re-insert the new hose from the left.
Here's the part that lots of people forget and will shave another 30 minutes off the install: rub your fingers liberally with dish-washing detergent (I use DAWN) and anoint the inside of the fitting and the pipes they are connecting to. Push the left connector in first, not second, not fourth; but FIRST. Then fit the right connector. I found using an underhand grip works best (I do not have huge hands). WIGGLE THE CONNECTORS AFTER INSERTION TO ENSURE SEATING. Then connect the other hoses. I've done this a number of times and haven't had a failure yet.
Cheers,
Zaphod
#24
#25
Hey Zaphod, Before you start....
Some folks missed the point that the right side Norma Connector is easily released with a circular plastic fitting available in sets at any FLAPS. They are cheap, but the store might even loan you the set. The left side connector easily releases with just two small screw drivers placed under the catches. Don't sweat the Normas. They're easy. Just get that set of release tools.
Some folks missed the point that the right side Norma Connector is easily released with a circular plastic fitting available in sets at any FLAPS. They are cheap, but the store might even loan you the set. The left side connector easily releases with just two small screw drivers placed under the catches. Don't sweat the Normas. They're easy. Just get that set of release tools.
#26
Hey Zaphod, Before you start....
Some folks missed the point that the right side Norma Connector is easily released with a circular plastic fitting available in sets at any FLAPS. They are cheap, but the store might even loan you the set. The left side connector easily releases with just two small screw drivers placed under the catches. Don't sweat the Normas. They're easy. Just get that set of release tools.
Some folks missed the point that the right side Norma Connector is easily released with a circular plastic fitting available in sets at any FLAPS. They are cheap, but the store might even loan you the set. The left side connector easily releases with just two small screw drivers placed under the catches. Don't sweat the Normas. They're easy. Just get that set of release tools.
Cheers,
Zaphod
#31
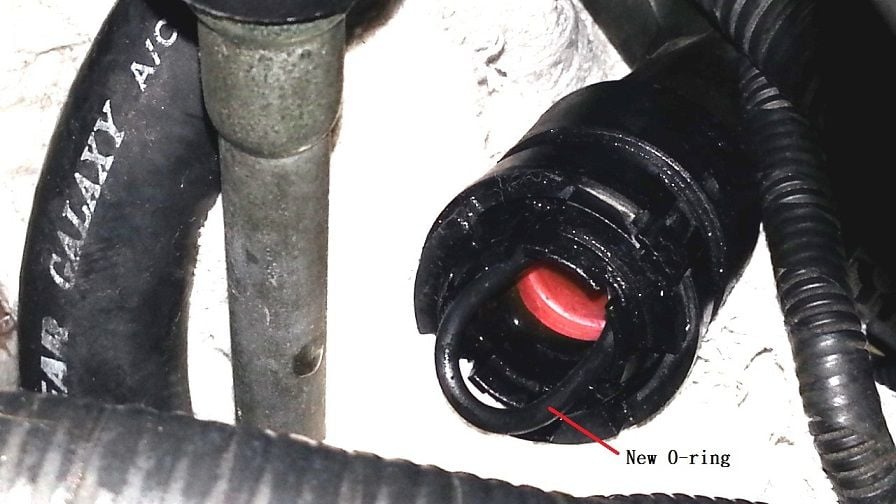
9- install the new ring.

10- connector with new o-ring.

11- metal rib holding the connector.
I did the O-ring replacement many years ago. Up to now, the hose still worked well, no leaking at all. Since I found that the pictures I posted in forum was lost, I reload them again today. see if it can help others.
#32
#33
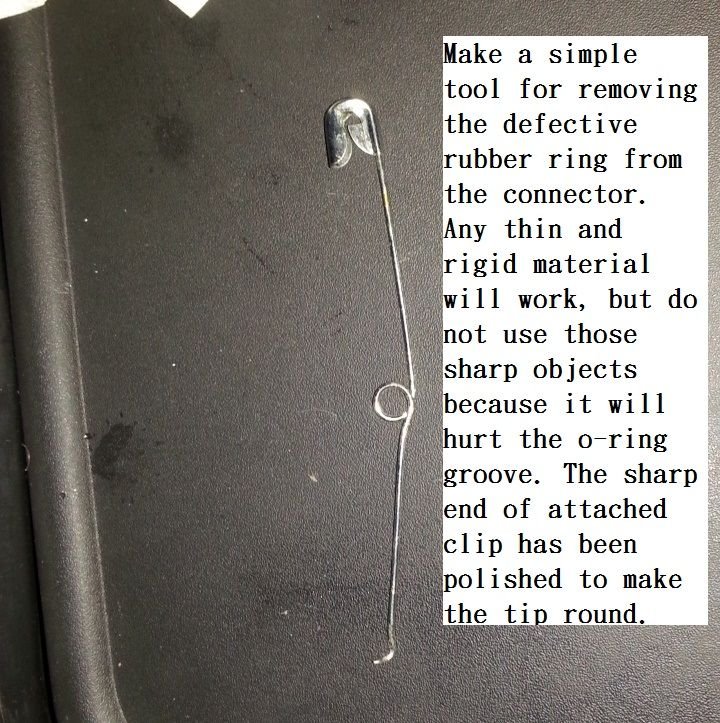
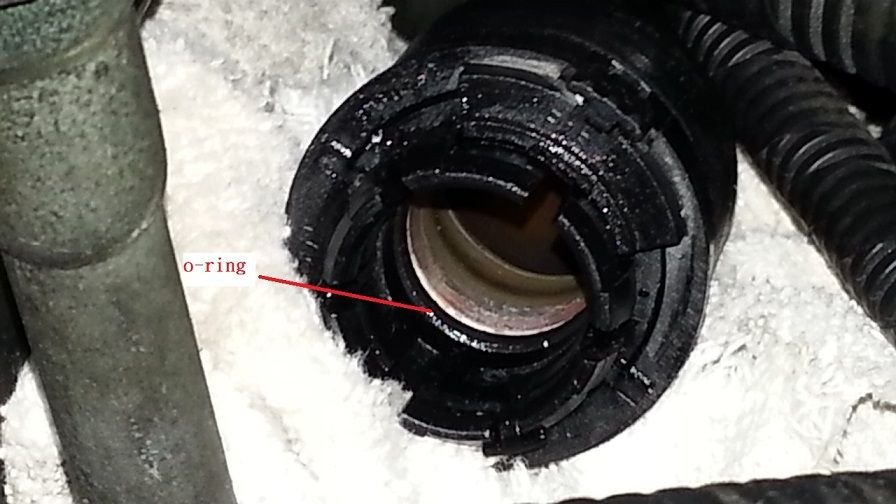
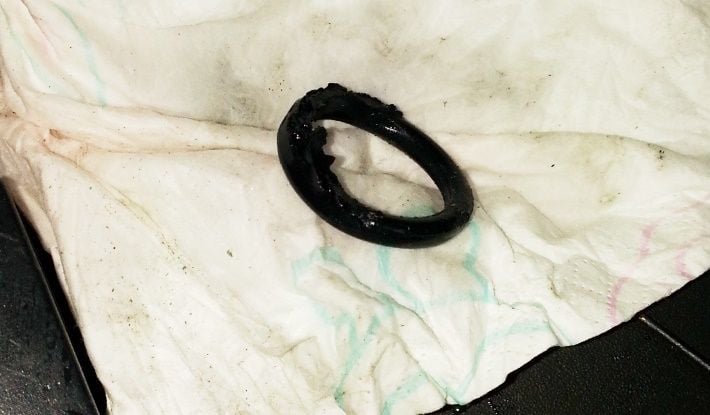
That is the Octopus Hose MJA6728AC, coolant leaking is caused by the broken O-ring. Normally we should replace the whole hose set, but it will need a lot of labor work. Since the problem on my car is due to the o-ring only, I replace it as showed on the pictures. I made the similar change on another side, it is the problem of the O-ring too.
The following users liked this post:
Jon89 (12-07-2018)
#35
#36
#39
#40


