
Rear wing repair


This phenomenon is using a product with hydrazine (N2H4) which converts the rust (Fe2O3) to the black, primable magnetite (Fe3O4) you see in your pictures. It is magnetic and is permanent, similar to gun blueing.


Thread Starter
|
Veteran Member


Joined: Apr 2012
Posts: 1,854
Likes: 987
From: UK
Not as permanent or as effective as I would wish as 18months later the rust is back and worse than it was in the first place.
Thread Starter
|
Veteran Member
Joined: Apr 2012
Posts: 1,854
Likes: 987
From: UK
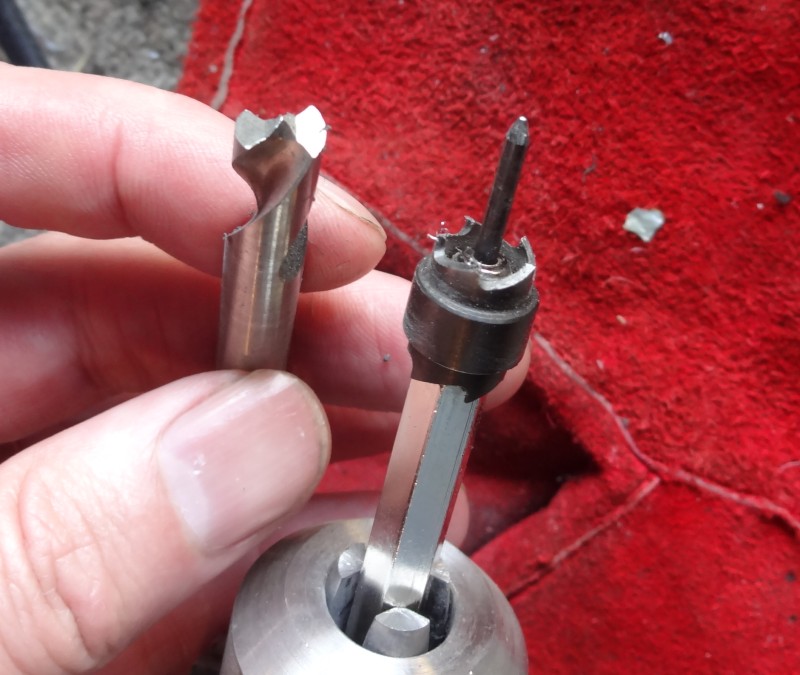
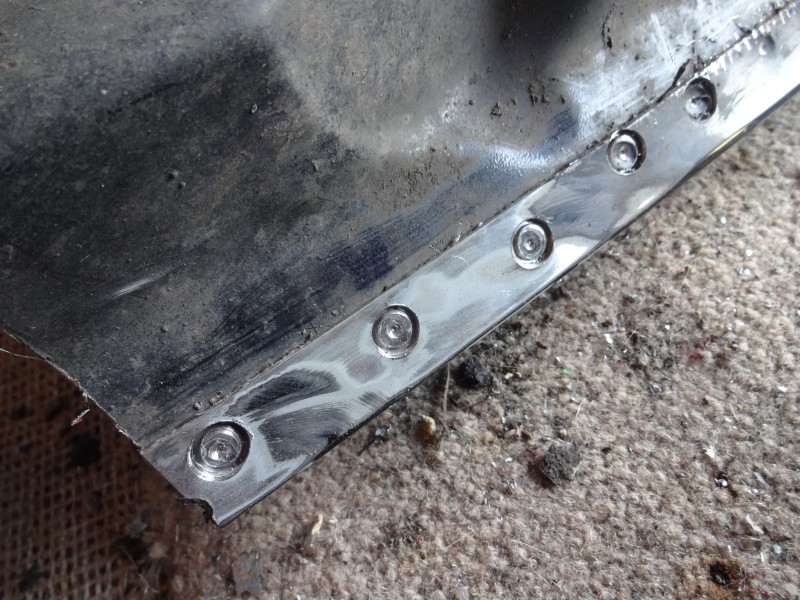
I stripped down the other donor wing section today and used the cutter to split apart the spot welds, this is a better tool than the spot weld drill as it is slightly larger in diameter so more likely to cut out the entire weld. So much less chiselling today.
Next I'll strip off the paint with some industrial paint stripper, the stuff from the local hardware shop did not touch the paint when I tried it.

Next I'll strip off the paint with some industrial paint stripper, the stuff from the local hardware shop did not touch the paint when I tried it.
Thread Starter
|
Veteran Member
Joined: Apr 2012
Posts: 1,854
Likes: 987
From: UK
Back to work after a week in St Wolfgang.
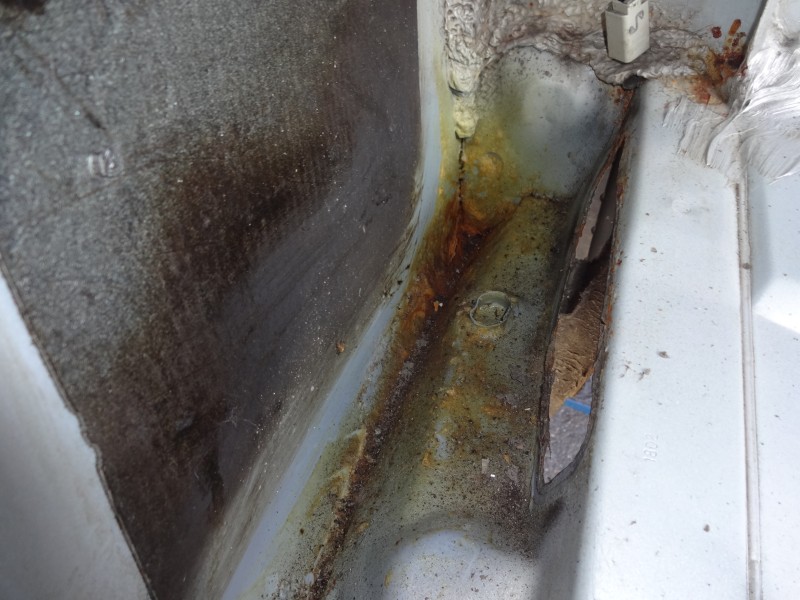
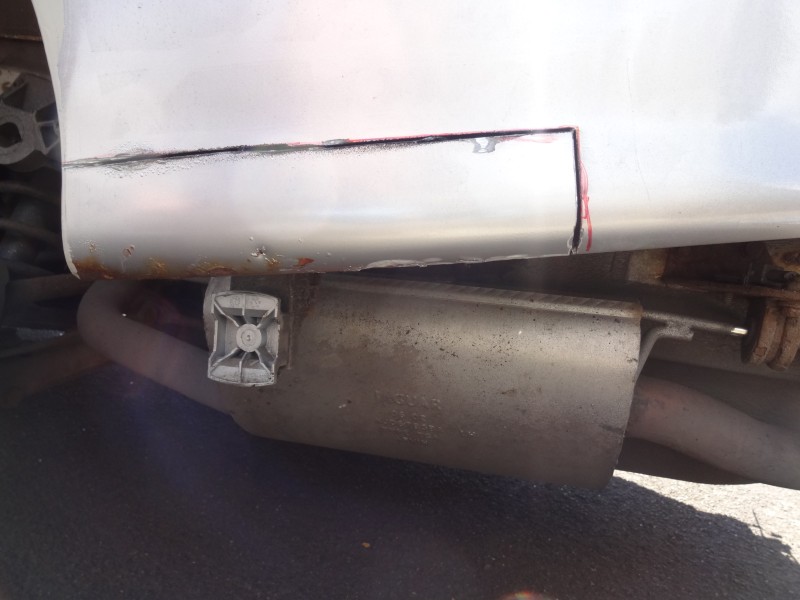
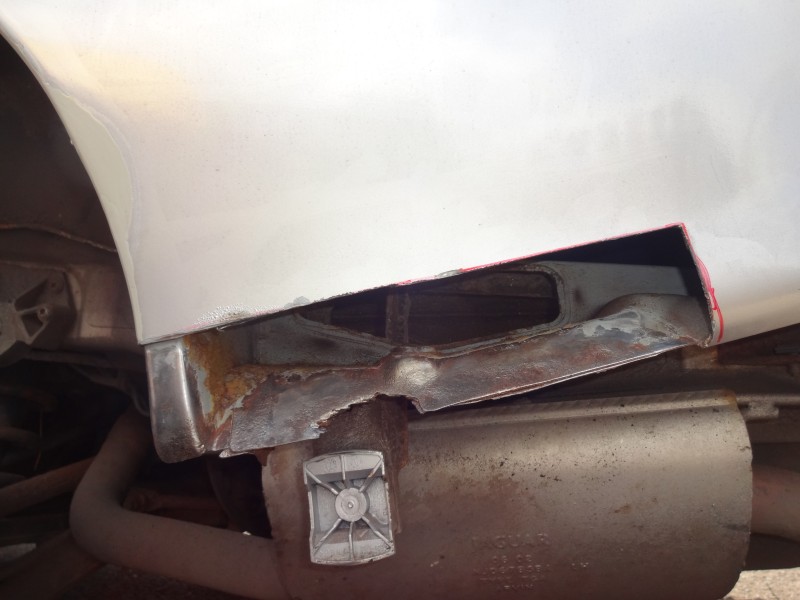
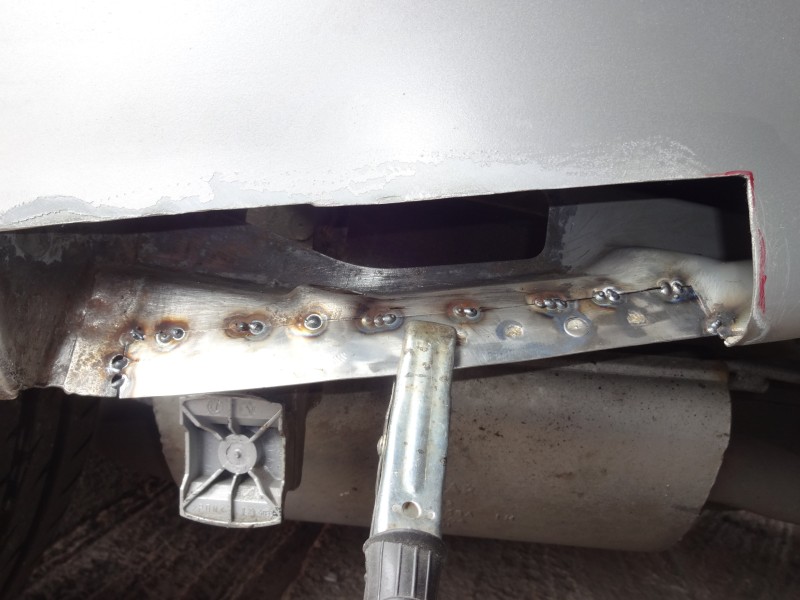
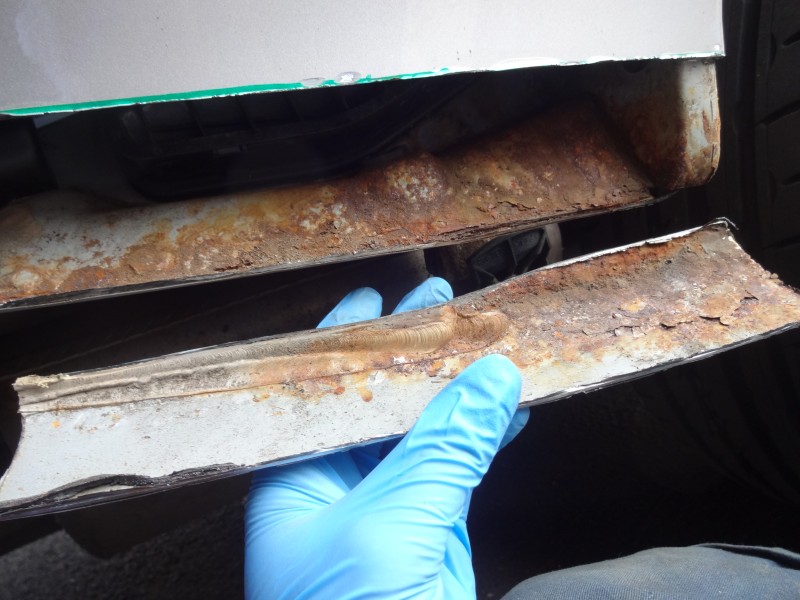
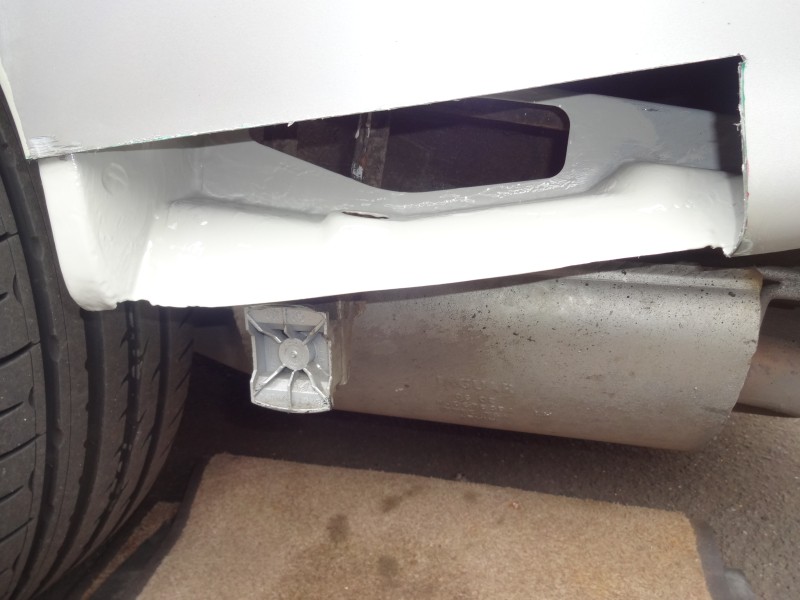
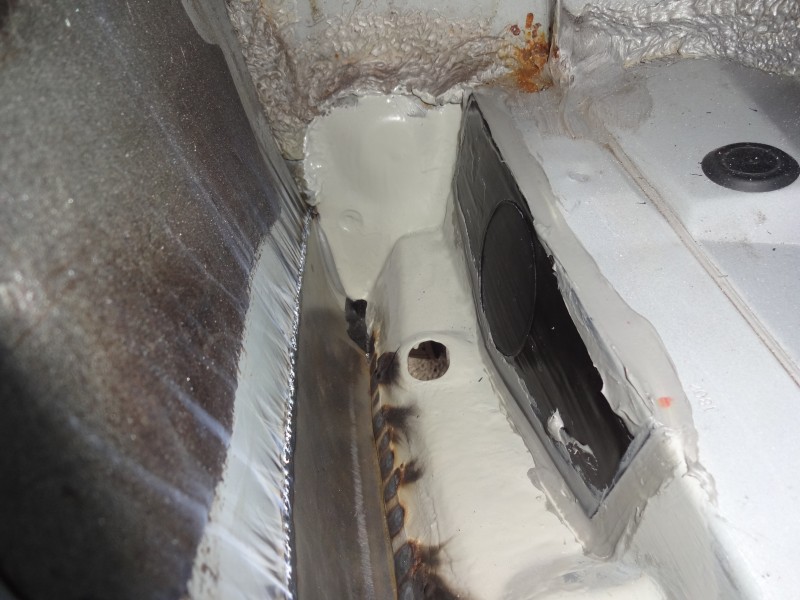
This is what the inside of the wing looked like, I had primed it then sprayed it with waxoyl 20 months ago when I tried to get rid of the rust first time round.
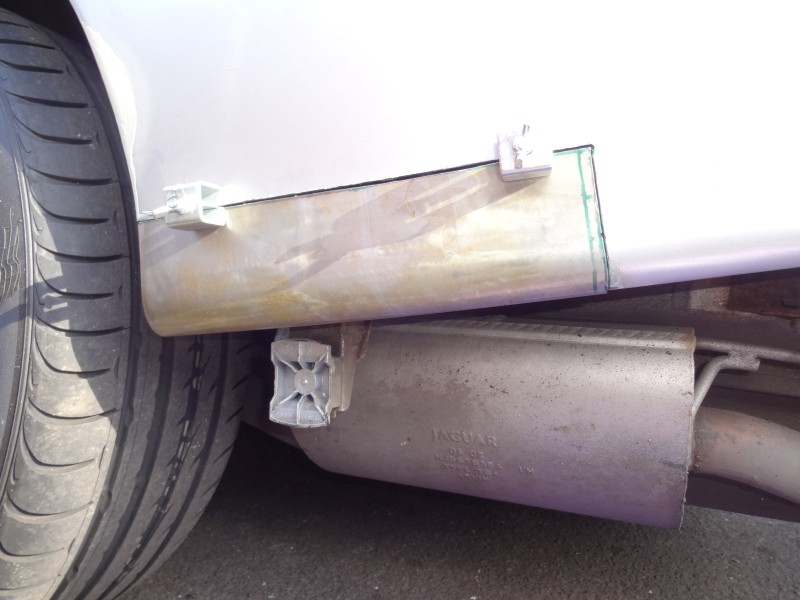
However the air vent is the big problem, it lets in lots of water and crud.
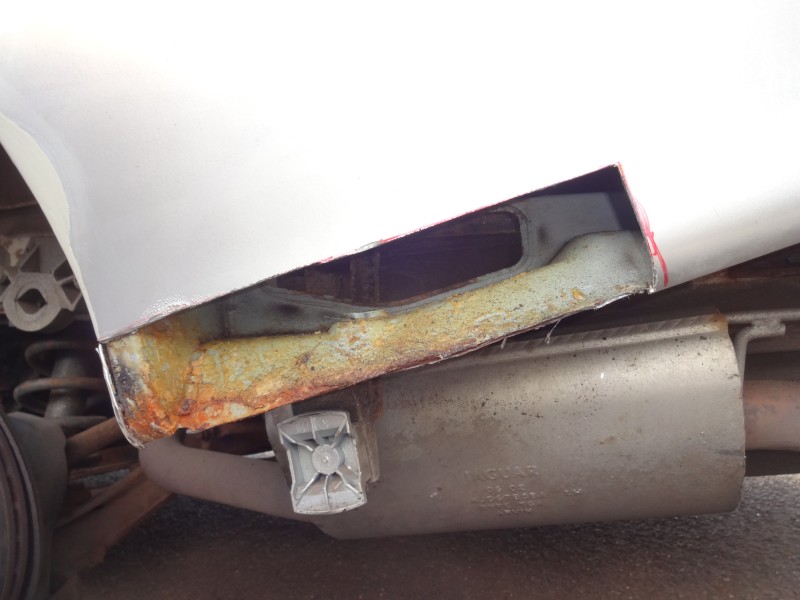
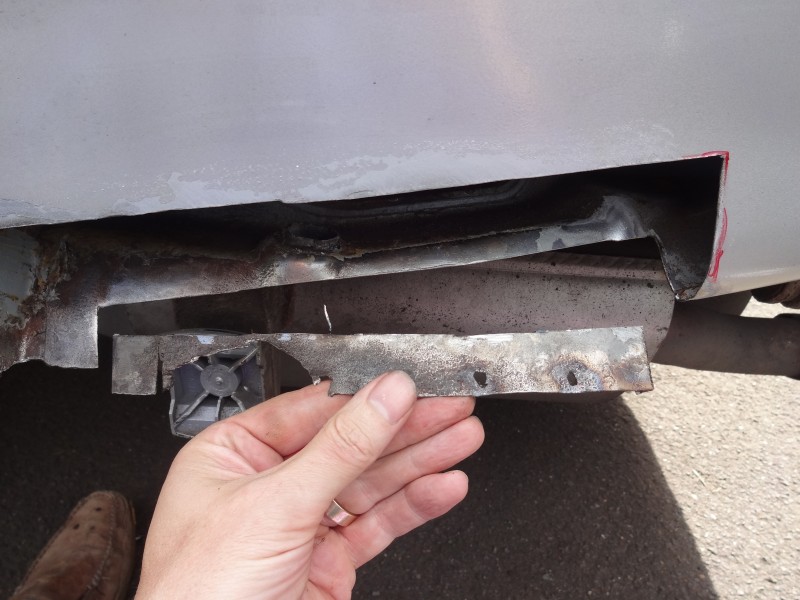
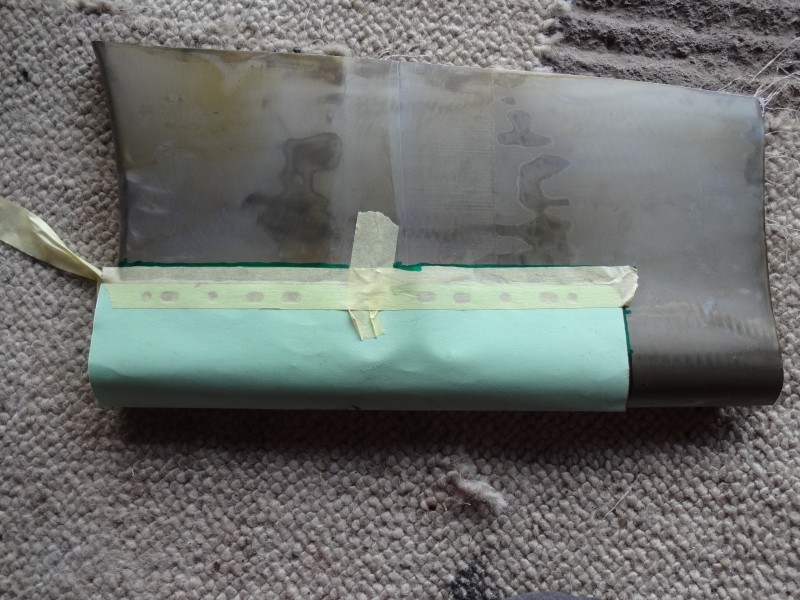
I made up a paper template and marked round it, tricky on a curved surface.

Then cut it out.
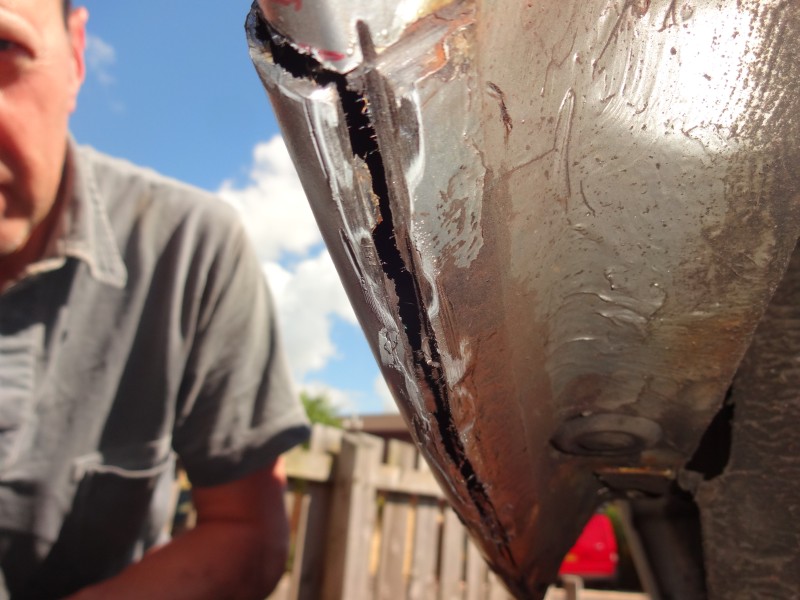
The zinc primer and waxoil had not prevented the rust regrowing.
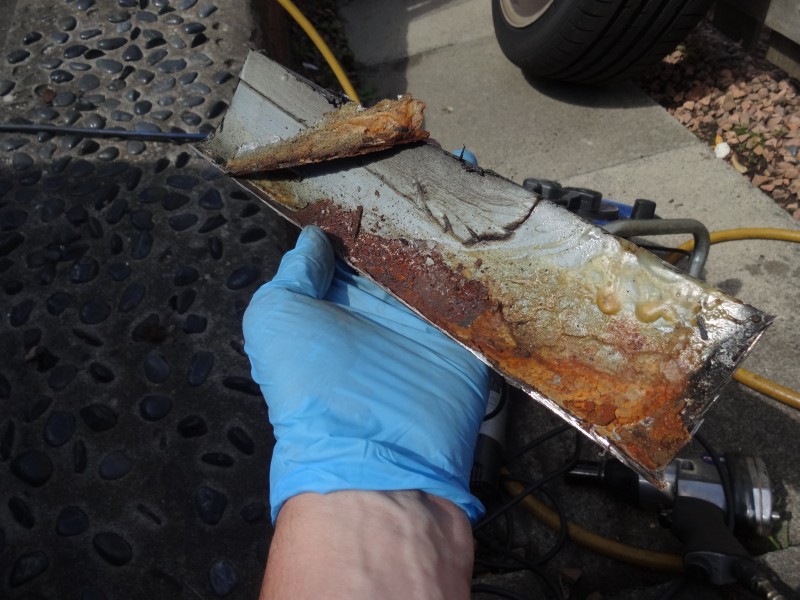
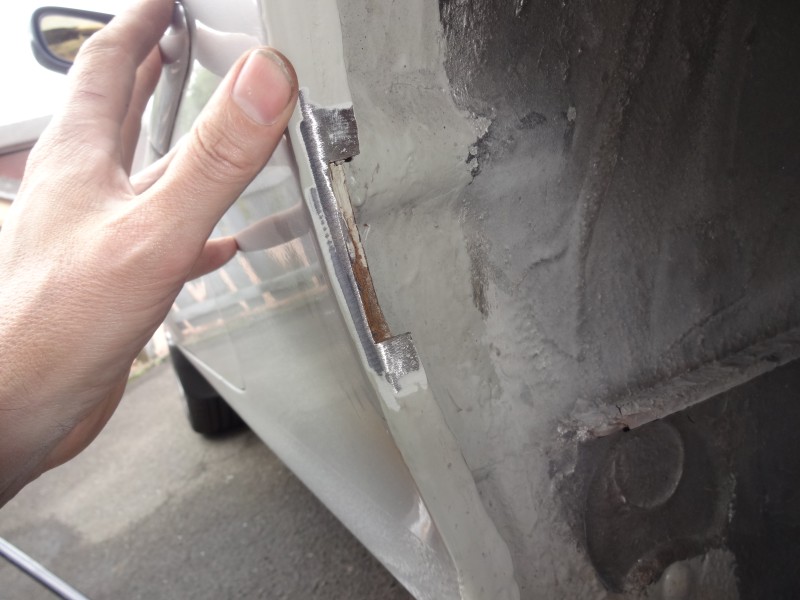
I then cleaned up what remained, part of the inner wing disintegrated.
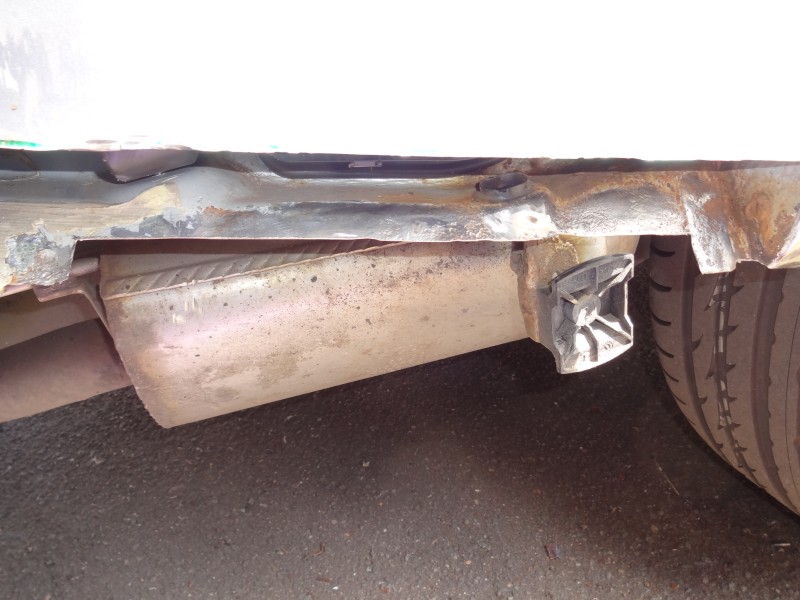
So I cut it out and cleaned up all the surfaces with 40 grit.

And made up a patch panel from the donor.
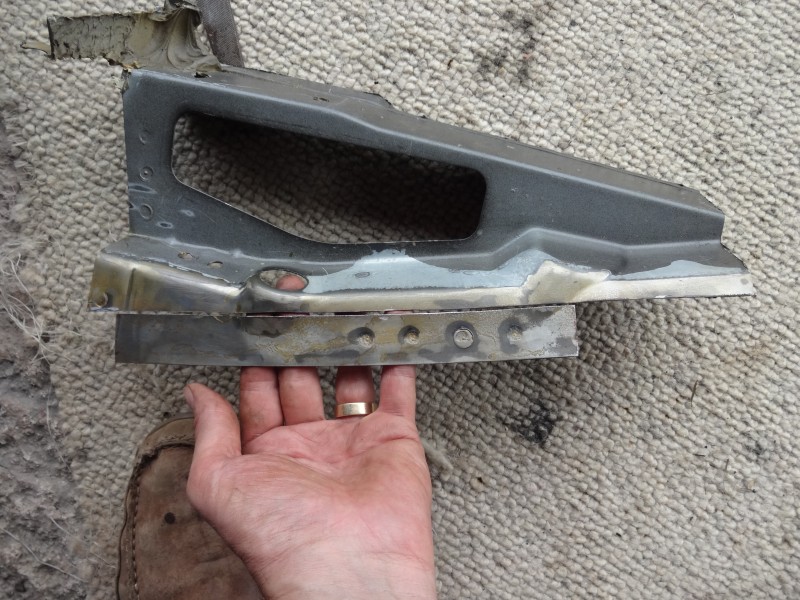
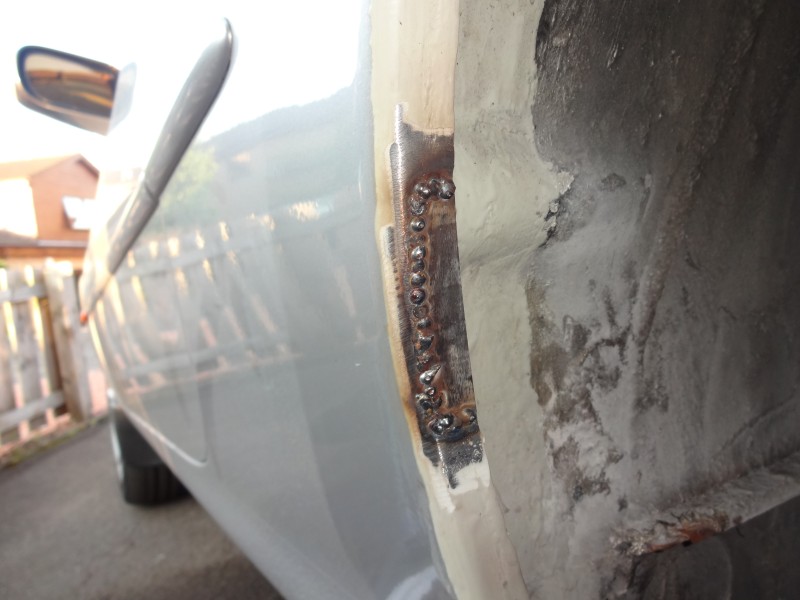
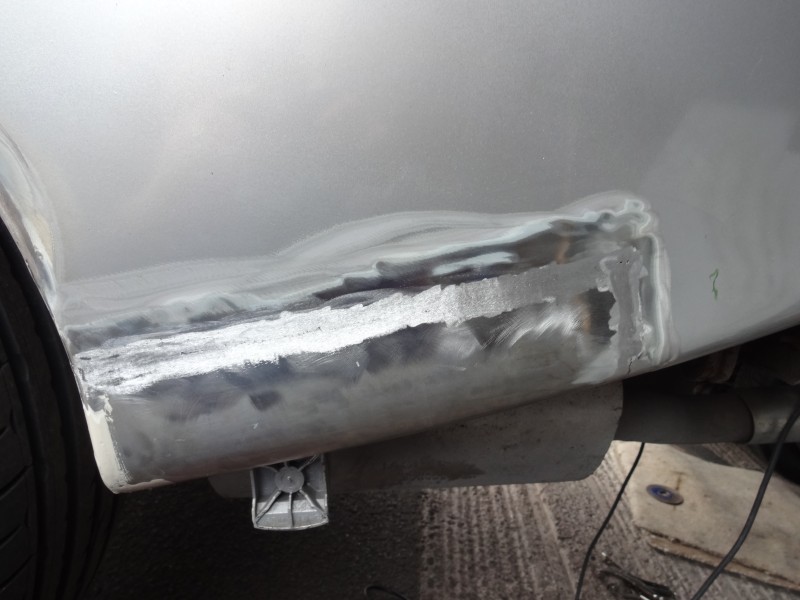
And then welded it in.
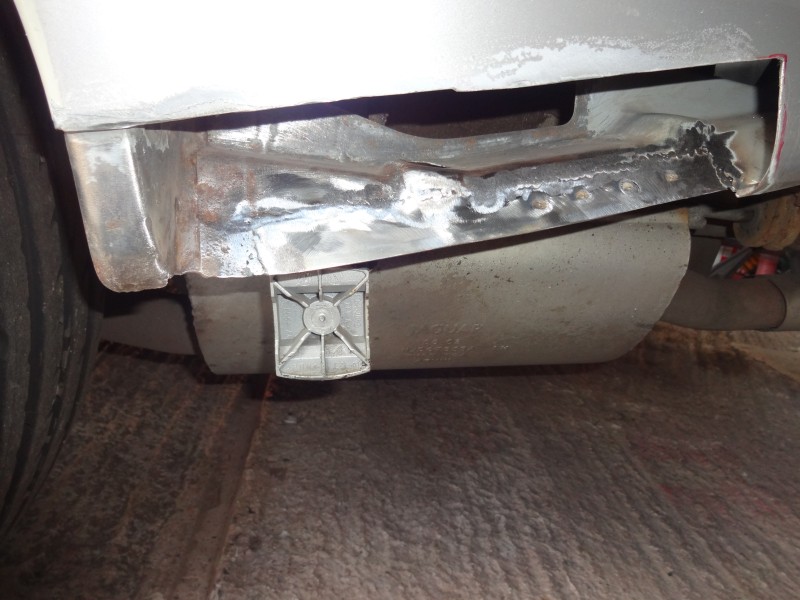
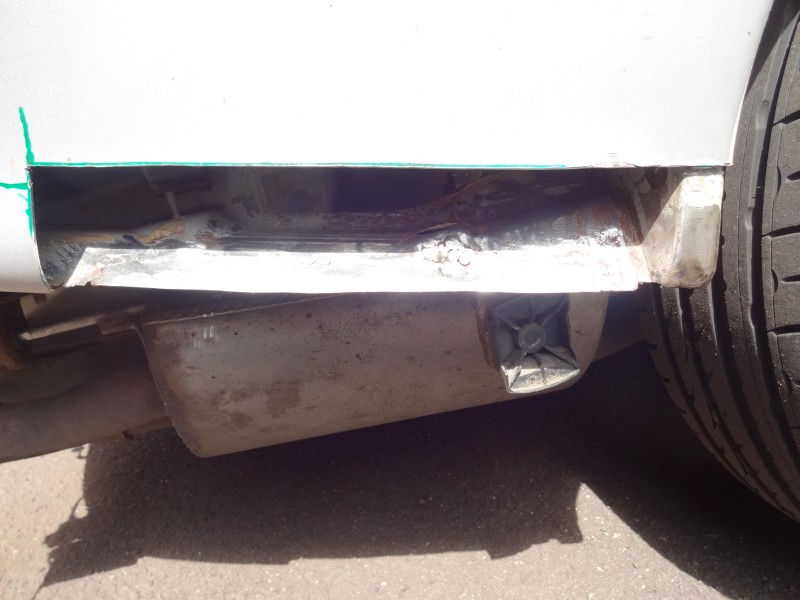
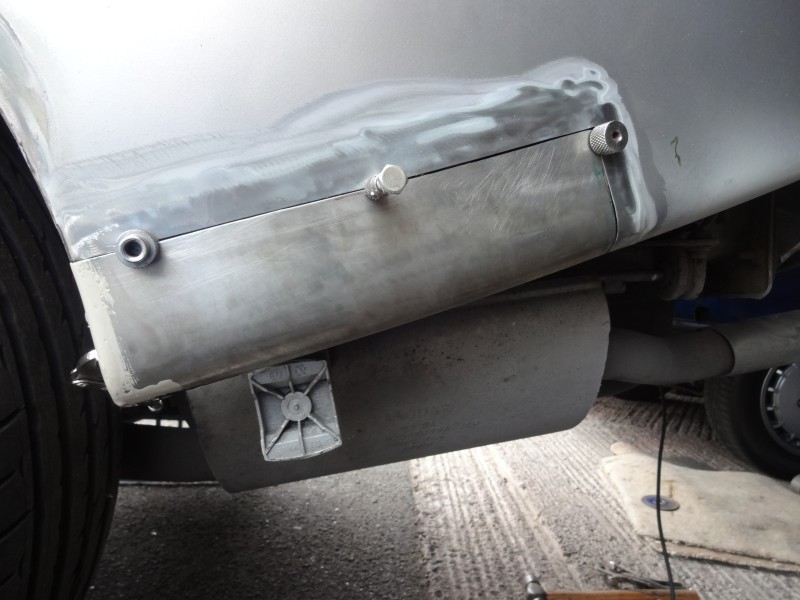
Next I cut out an oversized patch from the donor.
Then fitted it over the wing and scribed round it.
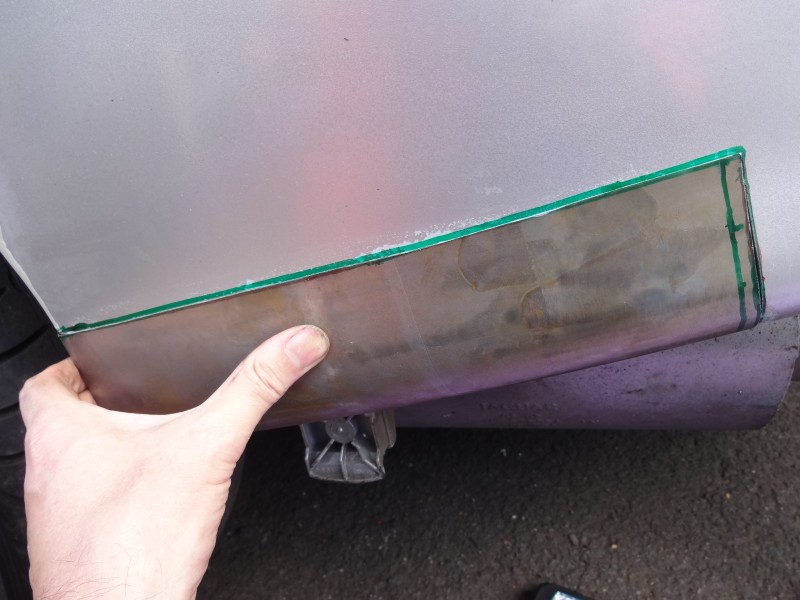
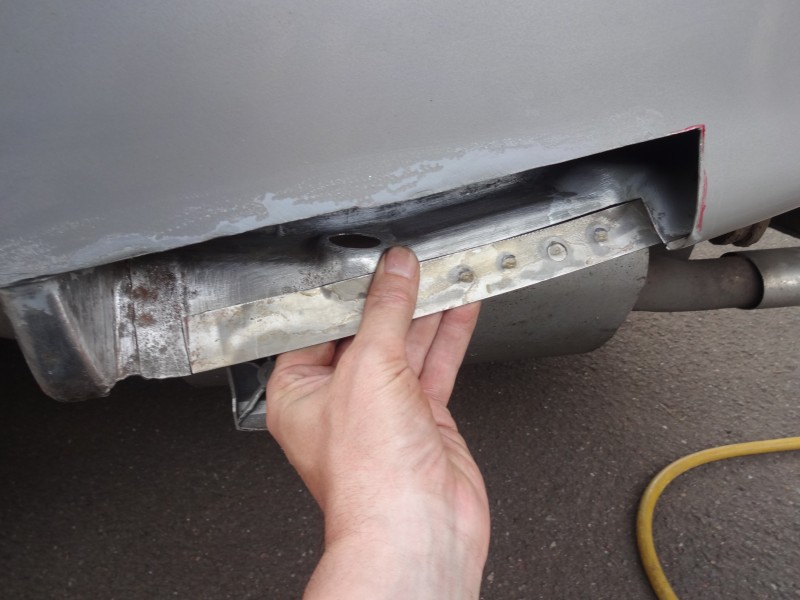
And then cut out to the donor shape.

I then had to fettle a bit but am now almost ready to weld in the donor.
This is what the inside of the wing looked like, I had primed it then sprayed it with waxoyl 20 months ago when I tried to get rid of the rust first time round.
However the air vent is the big problem, it lets in lots of water and crud.
I made up a paper template and marked round it, tricky on a curved surface.
Then cut it out.
The zinc primer and waxoil had not prevented the rust regrowing.
I then cleaned up what remained, part of the inner wing disintegrated.
So I cut it out and cleaned up all the surfaces with 40 grit.
And made up a patch panel from the donor.
And then welded it in.
Next I cut out an oversized patch from the donor.
Then fitted it over the wing and scribed round it.
And then cut out to the donor shape.
I then had to fettle a bit but am now almost ready to weld in the donor.
Thread Starter
|
Veteran Member
Joined: Apr 2012
Posts: 1,854
Likes: 987
From: UK
I've been doing this out on my drive as its been warm an sunny the last couple of days.
On to the other side today, just as bad as the other side.
Another cut out of the inner wing.
And a patch welded in.
Getting access to the inner wing is tricky.
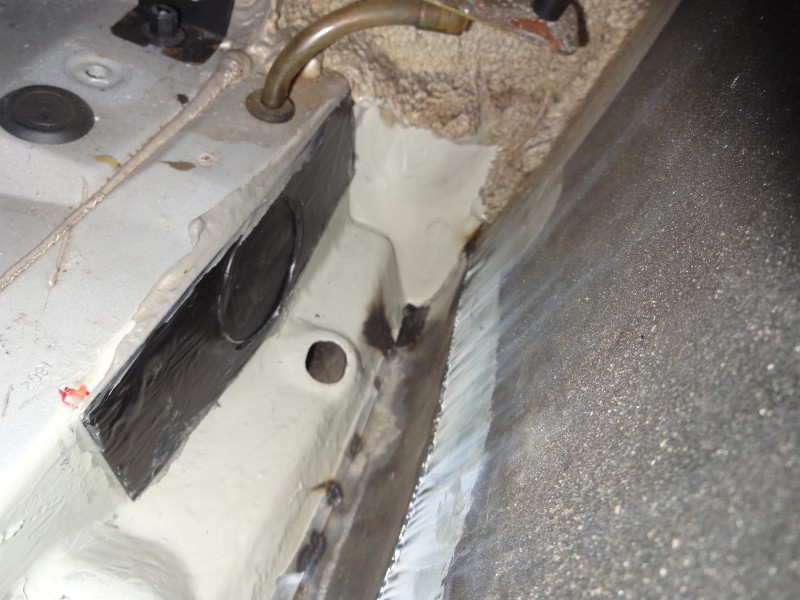
First I removed the amp/cd cage, the outer cage is held in by 5 bolts, the first three came out ok but the fourth captive nut sheared off, need to sort that out later.
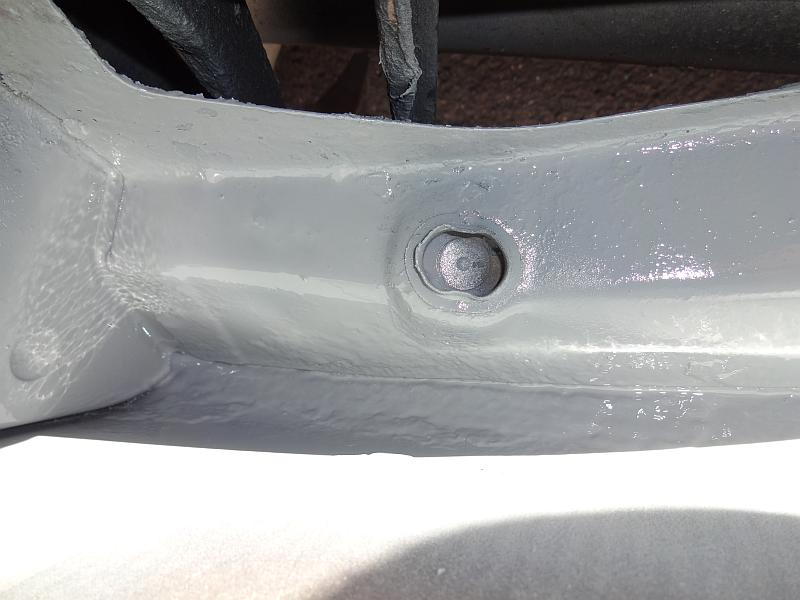
The fifth fixing point is a nut in the middle behind the cage and can not be seen, you have to remove it by touch, the outer cage can then be manipulated out. You can see the stud for the fifth fixing point below.
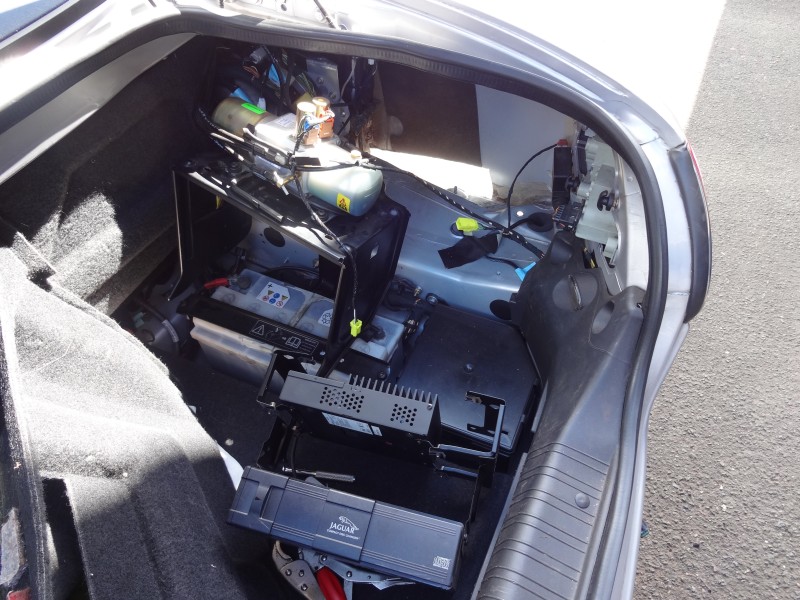
The stud.
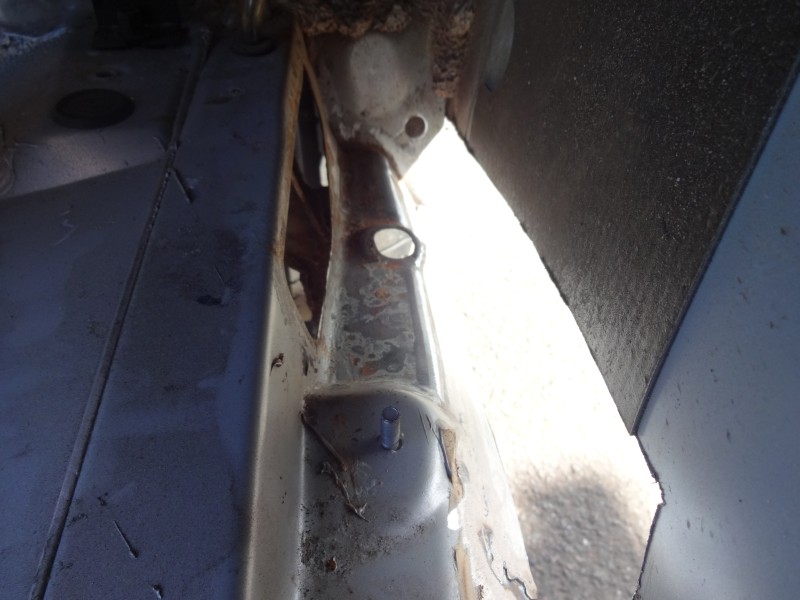
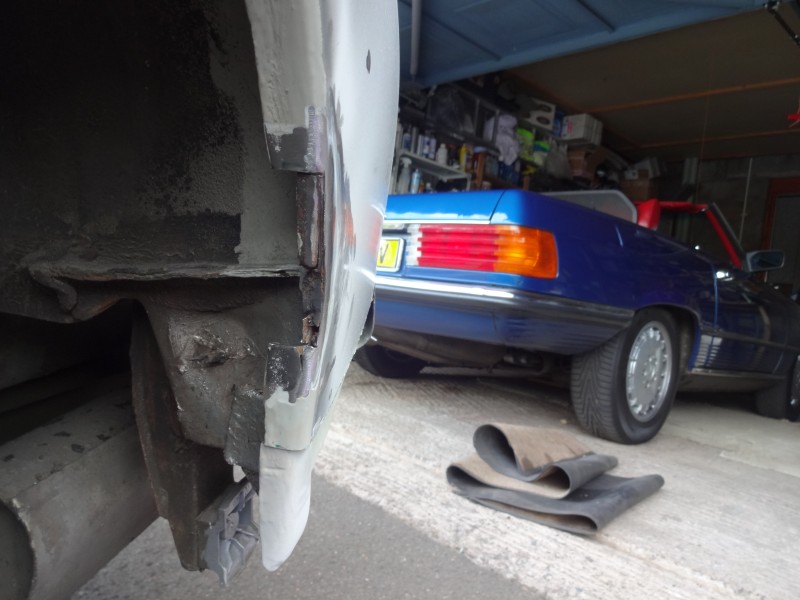
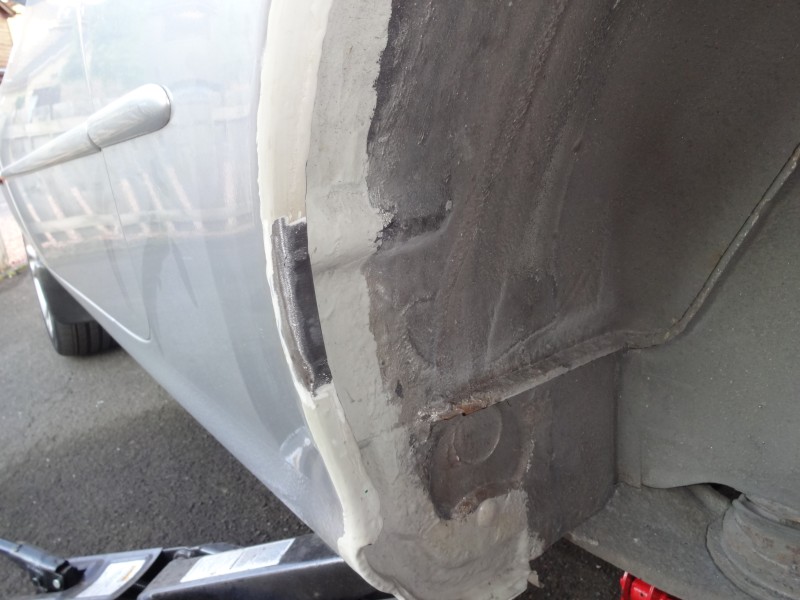
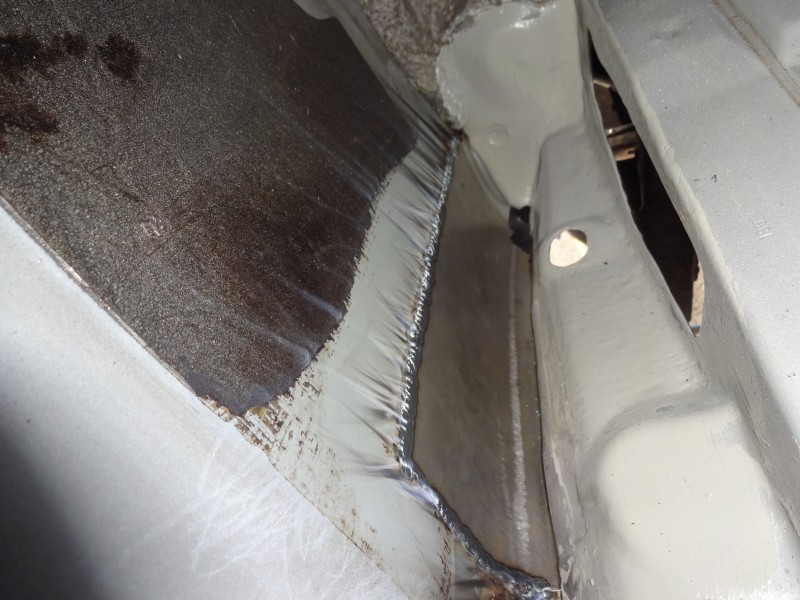
On to repair some of the wheel arch problems, this area was badly rusted so I cut it out.
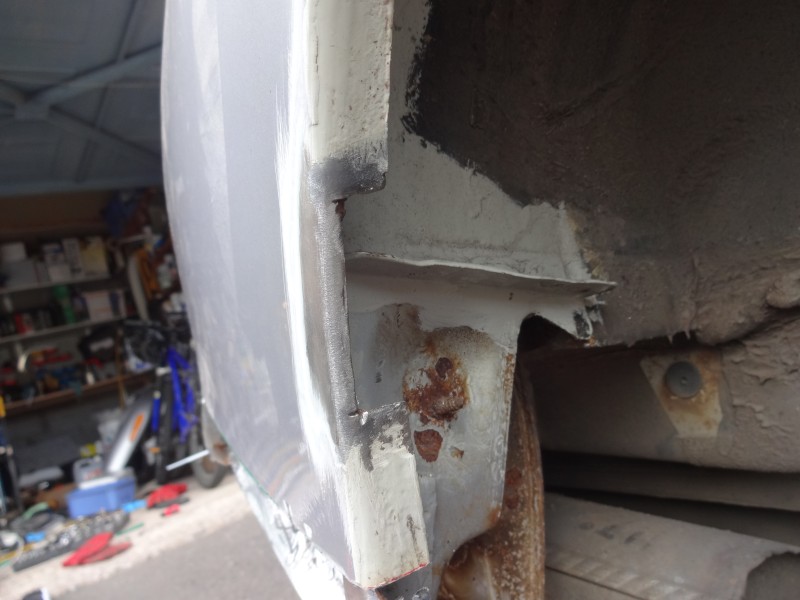
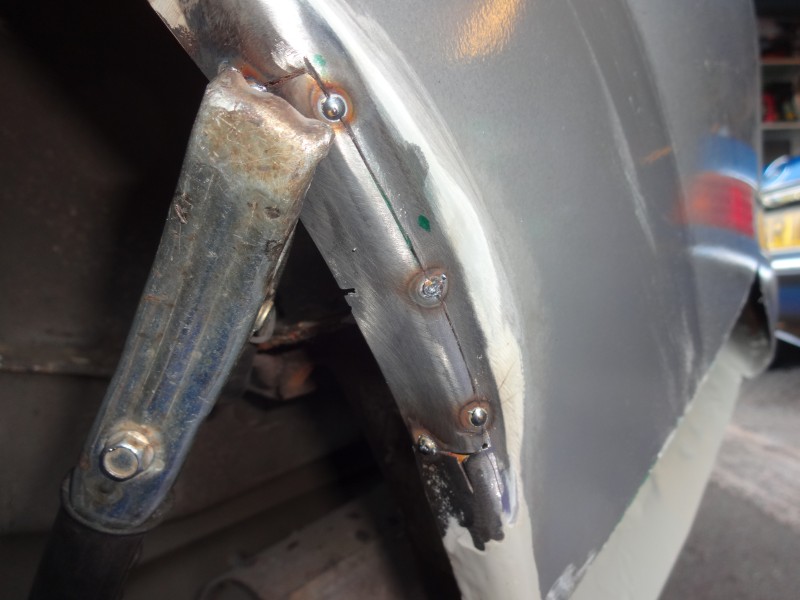
And welded in some new metal.
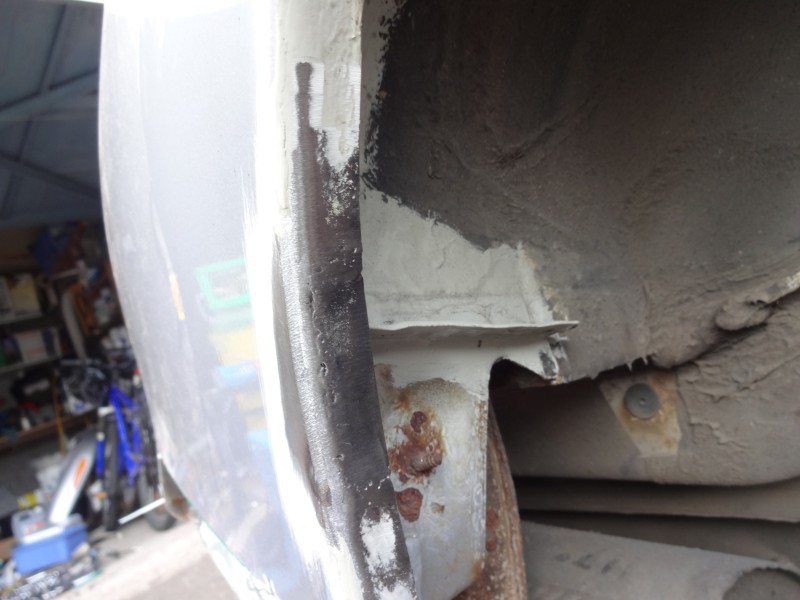
Next I painted what I could with two part epoxy, ill strip back some of that for welding which I should get to in the next few days.

As for the two large air vents, I plan to glue in two patches using seam sealer to stop it all happening again.
Thread Starter
|
Veteran Member
Joined: Apr 2012
Posts: 1,854
Likes: 987
From: UK
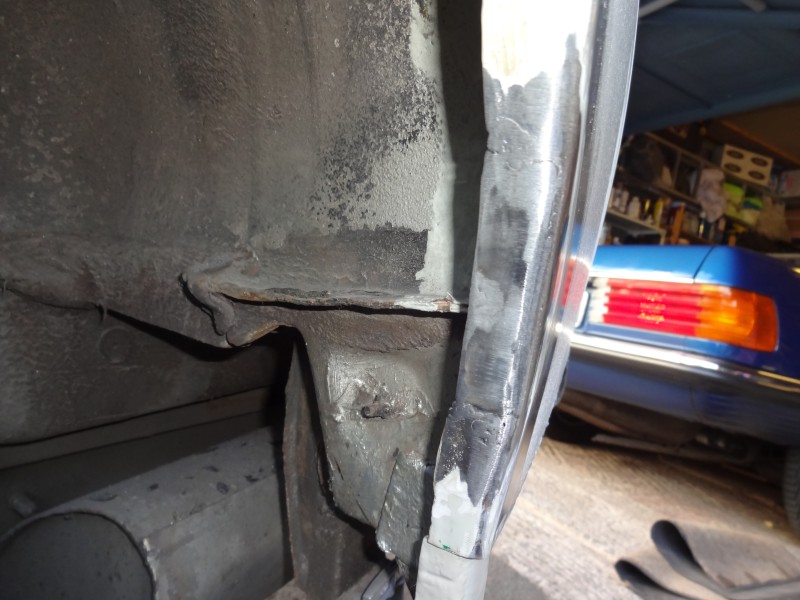
Got another two hours in tonight, this time a couple of patches on he left rear wheel arch.
Cut out a couple of sections.
I cut a section from one of the donors and used a bit of 0.8mm sheet for the other section.

Stitched in both sections, I had a few problems with the glue between the sections blowing the weld puddle into a crater but continues to patch up.
Then ground them down, not perfect but it will do.
Cut out a couple of sections.
I cut a section from one of the donors and used a bit of 0.8mm sheet for the other section.
Stitched in both sections, I had a few problems with the glue between the sections blowing the weld puddle into a crater but continues to patch up.
Then ground them down, not perfect but it will do.
Thread Starter
|
Veteran Member
Joined: Apr 2012
Posts: 1,854
Likes: 987
From: UK
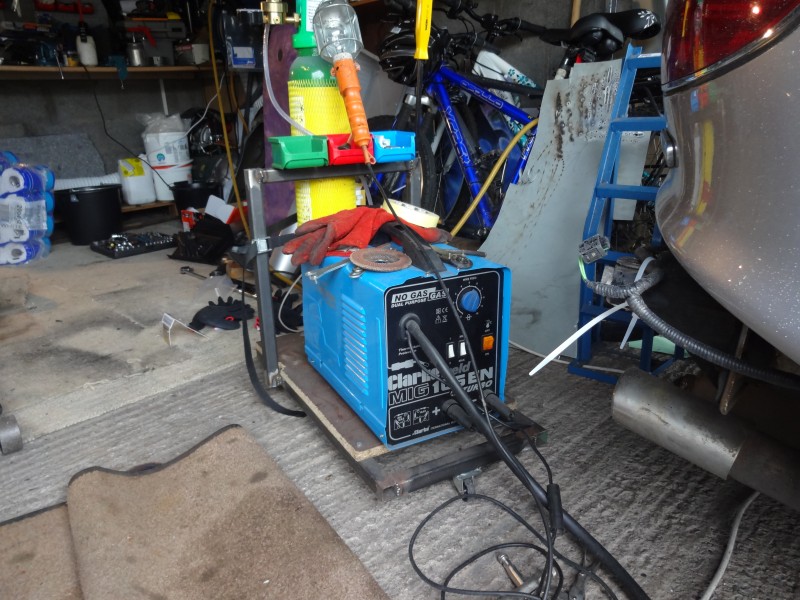
Here is my set up, bought second hand from gumtree, seems to be ok for this car body work.
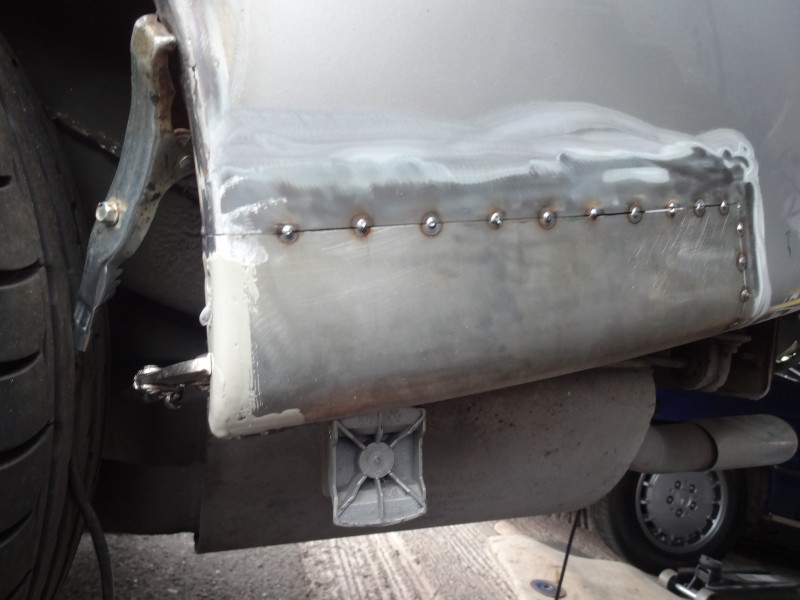
I decided to go with magnets rather than the clips as they seemed to give too big a big gap.
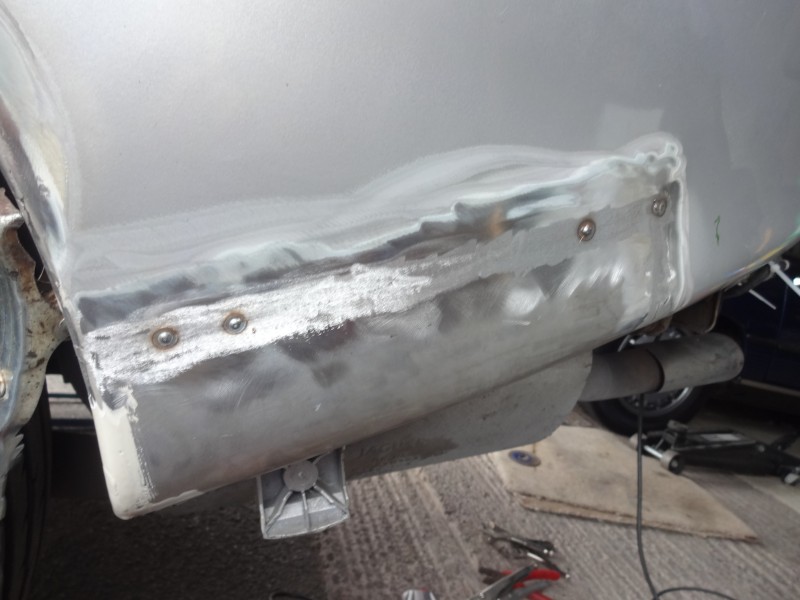
Tacked in place.
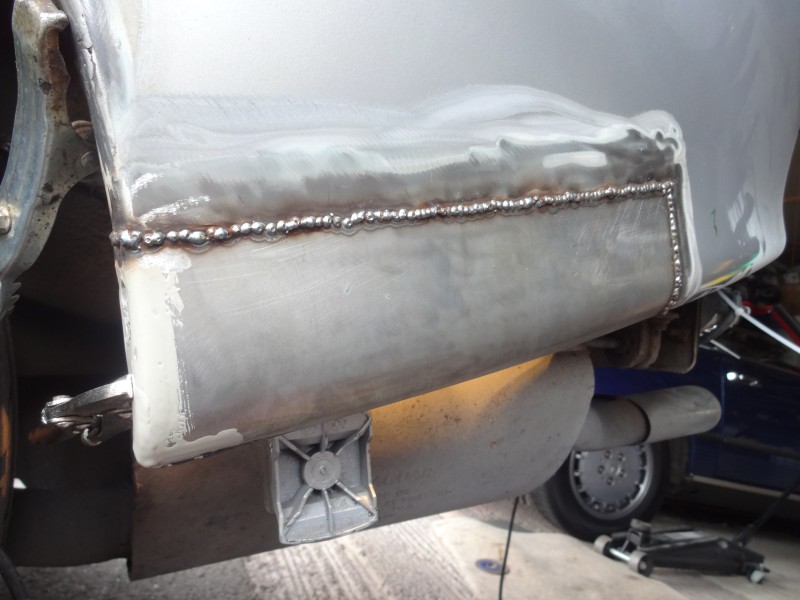
Stitched up.
From the inside.
Ground down.
Fixed a few pin holes.
Other side.
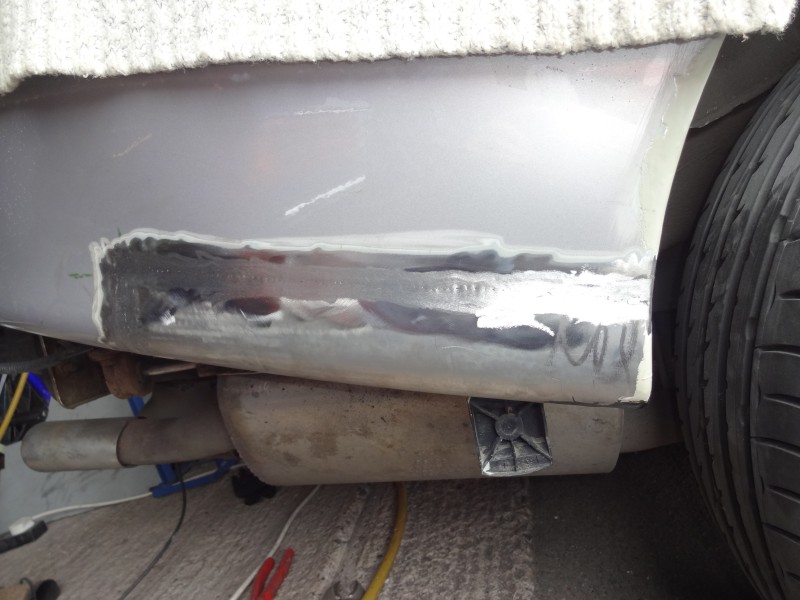
Made up same "blanks" to seal off the stupid huge air vents.
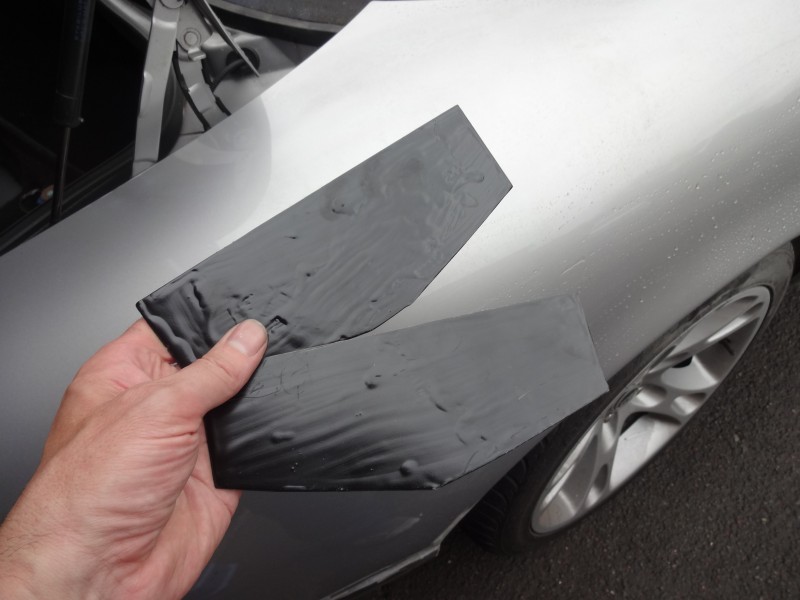
And sealed them in place with seam sealer.
So the left wing is looking good but I have a bit of a kink in the right wing, wish I had a dolly set, will try to sort out with a hammer and filler.
I decided to go with magnets rather than the clips as they seemed to give too big a big gap.
Tacked in place.
Stitched up.
From the inside.
Ground down.
Fixed a few pin holes.
Other side.
Made up same "blanks" to seal off the stupid huge air vents.
And sealed them in place with seam sealer.
So the left wing is looking good but I have a bit of a kink in the right wing, wish I had a dolly set, will try to sort out with a hammer and filler.
Veteran Member
Joined: Sep 2012
Posts: 1,473
Likes: 655
From: Devon. U.K.
Questions for RaceDiagnostics .................
My 97 Convertible is generally rust free so I'm going to remove the rear bumper and have a look in the hope that I won't find anything as bad as yours. If so - can you (or anyone on the forum) think of any reason why I should NOT seal up the ventilator holes as you have done ? I can't think there's likely to be much danger of condensation in the boot (trunk) and ventilation is hardly an issue, particularly in a convertible ?
Also - could the job be done from the outside ? - passenger side would not be difficult from the inside, but I would prefer not to have to remove the CD changer, amplifier, hydraulics for the hood etc unless absolutely necessary.
I will probably use the "Flashband" type self-adhesive repair tape which sticks to pretty much anything and is strong enough for a job like this.
Obviously, that's Plan A and assumes there's little or no rust or corrosion. If not, it will be Plan B but I don't know what that is yet.
Thanks,
David.
Thread Starter
|
Veteran Member
Joined: Apr 2012
Posts: 1,854
Likes: 987
From: UK
It would be difficult.
Thread Starter
|
Veteran Member
Joined: Apr 2012
Posts: 1,854
Likes: 987
From: UK
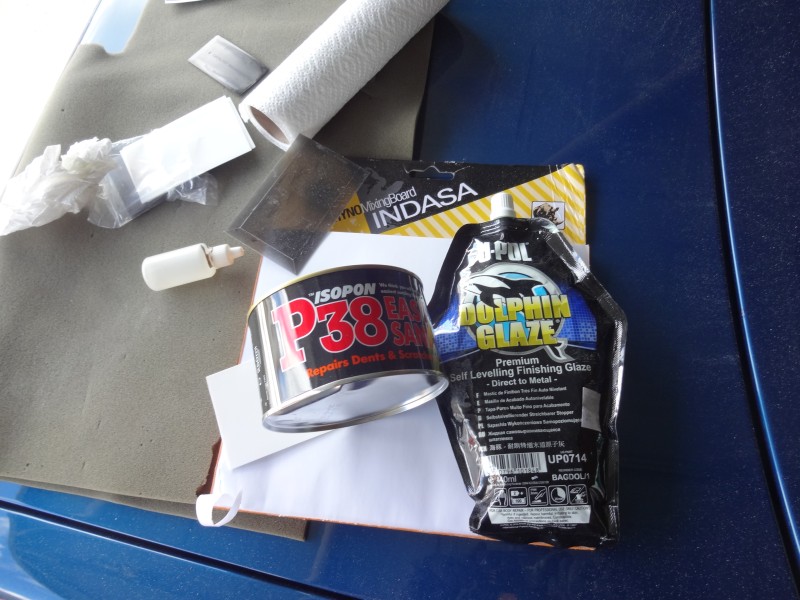
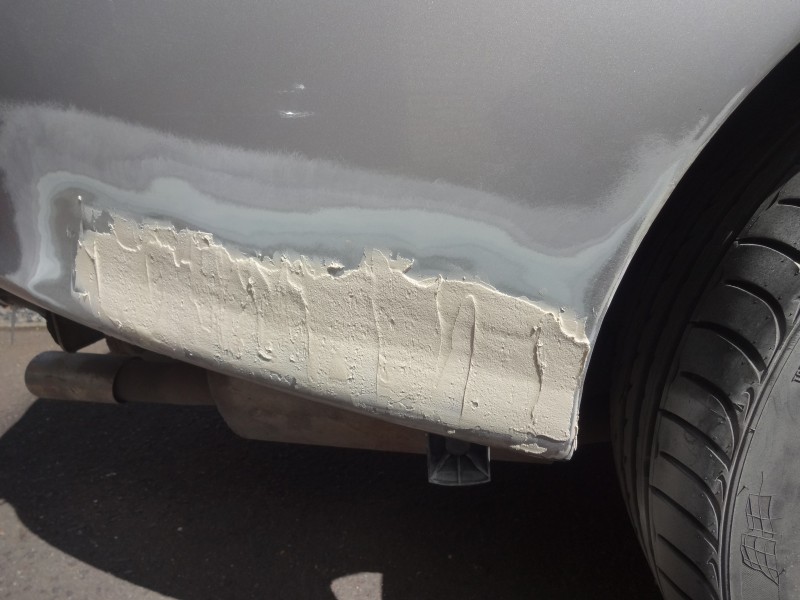
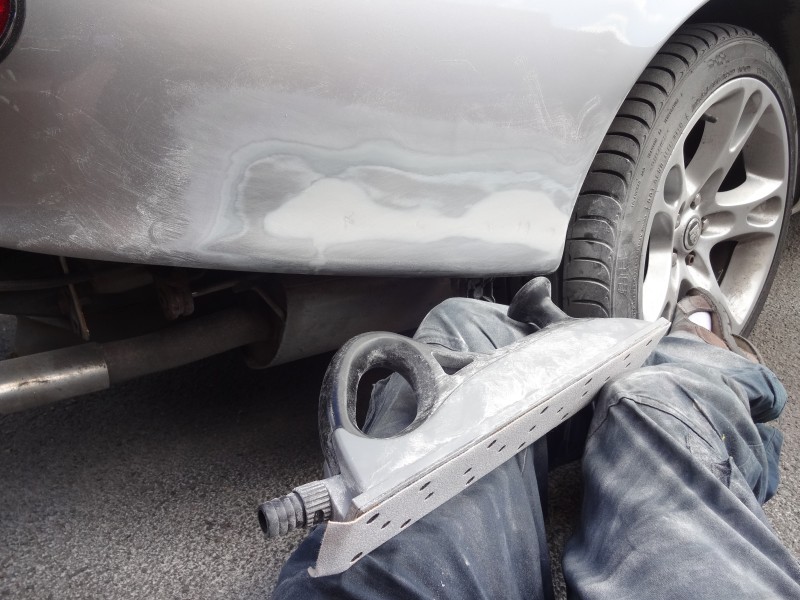
Today's wepons of choice.
First I sanded back the paint from the repair.
Turns out that the P38 is junk, it went on very rough, this was after 5 mins of sanding.
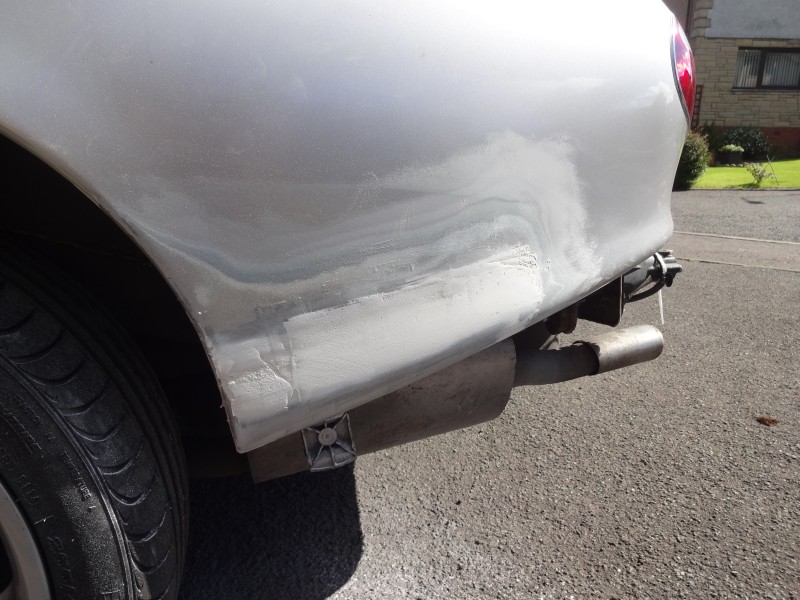
Sanded with 40 and 80 grit.
Next the dolphin glaze, very smooth but it was going off fast in the heat today.

120 and 180 grit to get this.

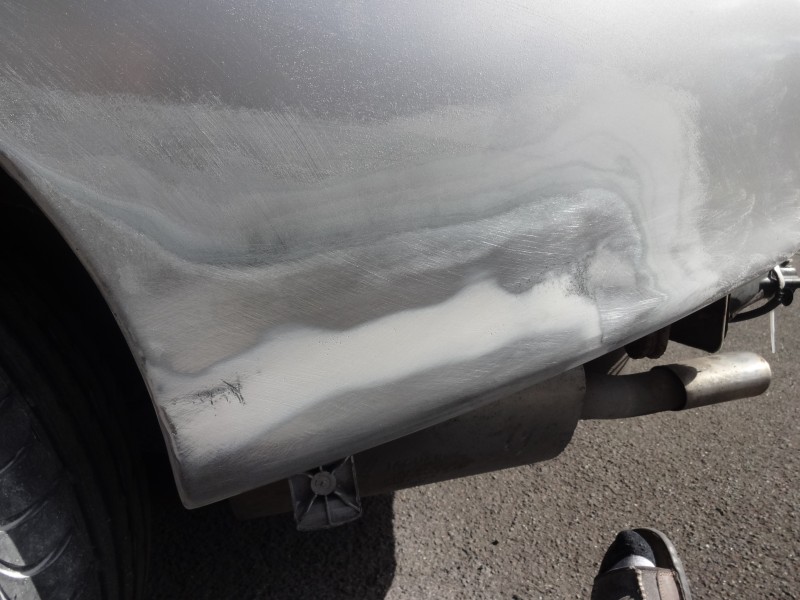
On to the other side.
This shows how rough the P38 was going on.
.
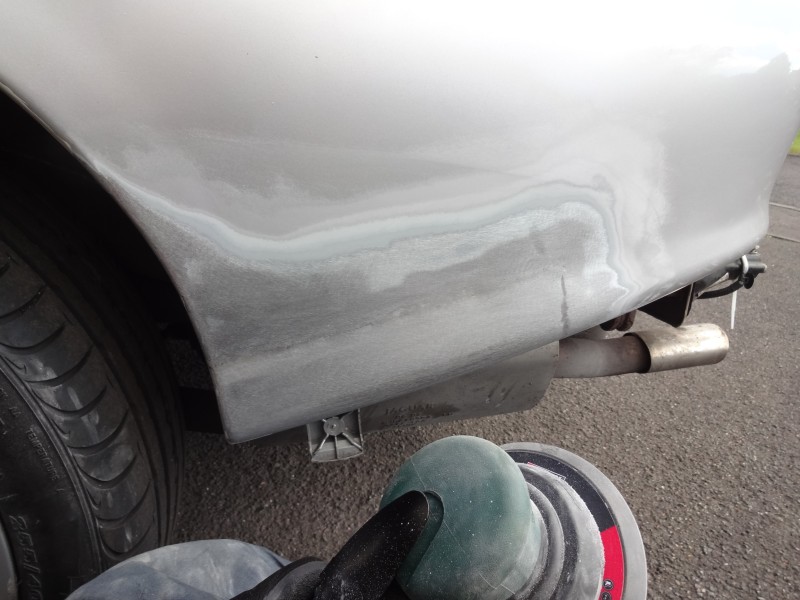
My neigbour came out and took this pic.
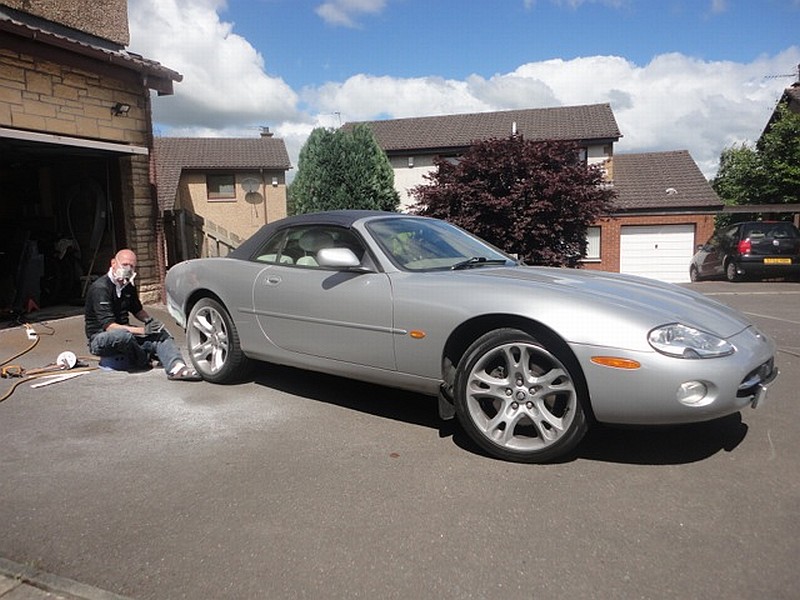
This was the sander I was using.
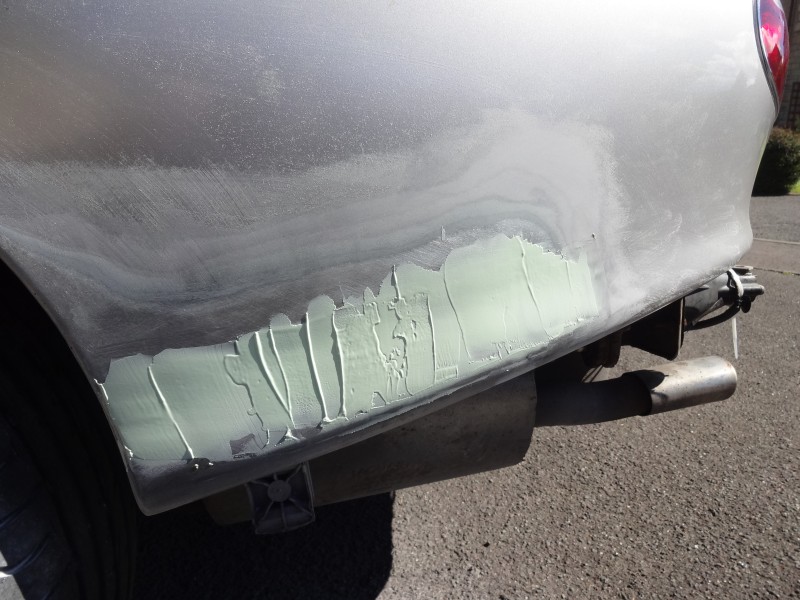
Then the Dolphin glaze.

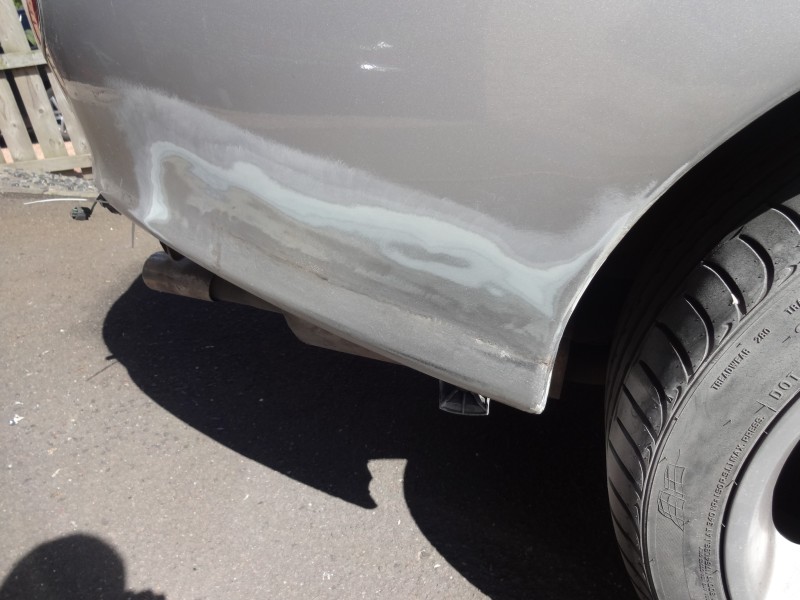
Once sanded I put on a few coat of Eastwood 2k epoxy primer from a rattle can, holding my breath for each pass.
Now from the pics below it looks pretty good, but it is not, in direct sun you can clearly see the areas of filler as it has not been feathered enough.
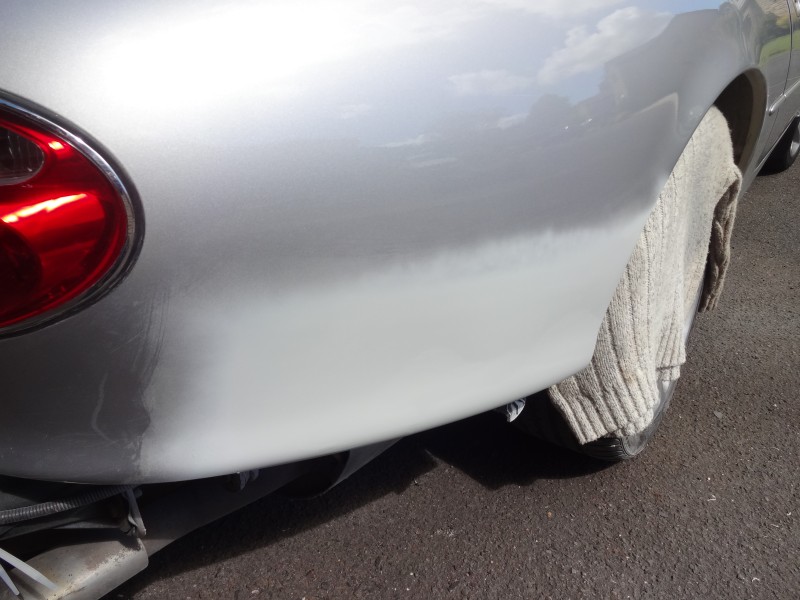
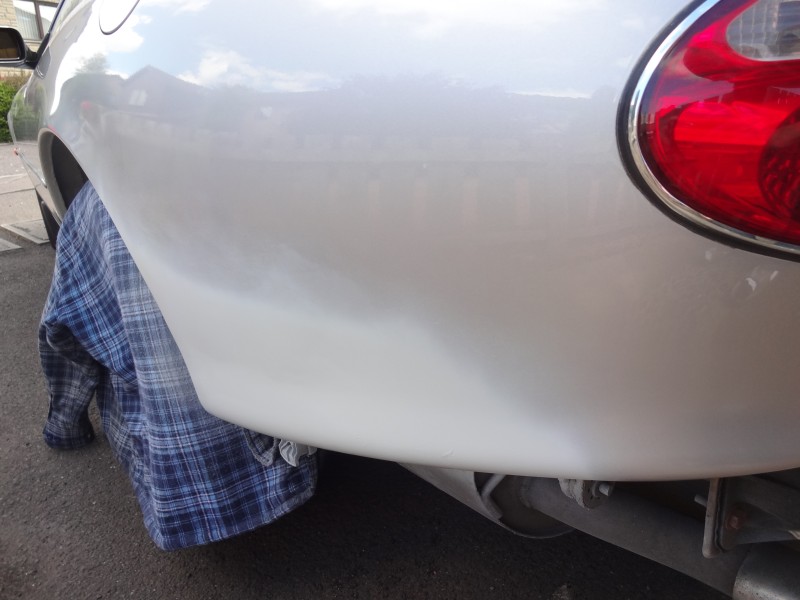
Now I could probably get it tright eventually but I am not sure how long it would take and as I plan to get both wings professionally painted I will also let them do the final coat of filler and sanding.
First I sanded back the paint from the repair.
Turns out that the P38 is junk, it went on very rough, this was after 5 mins of sanding.
Sanded with 40 and 80 grit.
Next the dolphin glaze, very smooth but it was going off fast in the heat today.
120 and 180 grit to get this.
On to the other side.
This shows how rough the P38 was going on.
.
My neigbour came out and took this pic.
This was the sander I was using.
Then the Dolphin glaze.
Once sanded I put on a few coat of Eastwood 2k epoxy primer from a rattle can, holding my breath for each pass.
Now from the pics below it looks pretty good, but it is not, in direct sun you can clearly see the areas of filler as it has not been feathered enough.
Now I could probably get it tright eventually but I am not sure how long it would take and as I plan to get both wings professionally painted I will also let them do the final coat of filler and sanding.

Senior Member
Joined: May 2013
Posts: 160
Likes: 17
From: Essex, UK
Regarding the vent flappy things,I suspect they are there to allow an inrush of air when the boot lid is opened or more likely a rapid escape of air when the lid is slammed shut. With them sealed up one will have to close the lid slowly to allow the pressure to equalise otherwise the lid will bounce open again.
Veteran Member
Joined: Sep 2012
Posts: 1,473
Likes: 655
From: Devon. U.K.
Mark. You may be right but .......... the photo in RaceDiagnostic's first post looks like the flap is on the inside so would allow air to get from outside in. In which case - if it's a sort-of one-way valve, opening the boot (trunk) would allow air from outside in, but shutting the boot (trunk) would not allow air inside the car to get out.
Perhaps RaceDiagnostics (or someone else who has been-there-done-that) could confirm which way the flappy bit operates. I would be happy to close the boot (trunk) lid gently, and I can't believe the suction would be strong enough to prevent the lid opening against the locking mechanism.
Most (modern) cars seem to have apertures at the rear to allow a proper flow of air through the car from front to back and I suspect this is the same but ............. that would also suggest a flap that let air out, not in, and that doesn't seem to be the case here.
Curiouser and curiouser .....................
Thread Starter
|
Veteran Member
Joined: Apr 2012
Posts: 1,854
Likes: 987
From: UK
I can confirm that they are in theory one way valves for letting air out of the trunk, the problem is that they fail in their duty of being one way and let water and dirt in.
I googled "why is there an air vent in the trunk" and the consensus seem to be to allow you to slam the trunk closed.
I tried closing the lid at different speeds tonight and found that it did bounce when closed quickly but closed no problem at "normal" speeds, although I still have some of the smaller vents (which are closed off with bungs) open.
I would rather have this slight inconvenience than have the water ingress.
Does anyone else have a theory behind their purpose.

Joined: Dec 2011
Posts: 120,439
Likes: 17,014
From: Durham, UK
I suspect (although I can't find anything in UK Construction & Use Regulations to confirm it) they also have something to do with the battery being in the luggage compartment. A detached battery vent pipe or leaking cap seal could lead to a build up of explosive gas. Not ideal and less so combined with heat and pressure.
Graham
Thread Starter
|
Veteran Member
Joined: Apr 2012
Posts: 1,854
Likes: 987
From: UK
I tried an experiment tonight, with the fan full on, I felt the grommet holes (close to the big trunk air vents) which are still open, you can see these openings in some of the pictures above.
Pretty much the full force of the heater fans was exiting from these holes, so clearly there is a ventilation path from the body to the trunk. Perhaps if I were to put a child into the trunk and close it they would be able to hear where the air enters the trunk from the cabin.
Anyway, I have now decided that I will need to improvise a new exit vent for the ventilation air. I may just fit a vertical length of large bore hose about 12 inches long to the bungs which fit the two existing holes. That would serve to ventilate and should not let water or dirt in.
Joined: Dec 2011
Posts: 120,439
Likes: 17,014
From: Durham, UK
Graham
Senior Member
Joined: May 2013
Posts: 160
Likes: 17
From: Essex, UK
It could be to prevent the hood (soft top) blowing up like a balloon when the fans are on and thinking a bit further, the vents could also be to allow air to exit when the doors are closed, again to protect the soft top.

Senior Member
Joined: May 2012
Posts: 142
Likes: 12
From: london
would you not recommend a product called kurust from hammerite we stock it at work and I'm thinking of giving it ago on my wheel arches before it gets to far. but realistically i need new donor wings but thats some serious work


Senior Member
Joined: Apr 2011
Posts: 234
Likes: 48
From: England
Kurust is fine for converting surface rust provided you remove as much rust as you can back to sound metal, but it will have no effect upon rust coming through from the back of a panel, indicated by bubbling in the paintwork. The only option here is to cut out the rusty metal and weld in new.
Interestingly, I need to sort out the rear of the sills on mine and the top of the wheelarches, but the bottom of the rear wings appears sound.
Interestingly, I need to sort out the rear of the sills on mine and the top of the wheelarches, but the bottom of the rear wings appears sound.