Secondary Timing Chain Tensioners vs. Complete Timing Overhaul
#22
https://www.jaguarforums.com/forum/x...ioners-214569/
This is my first time posting a link here so if I did it wrong, let me know.
This is my first time posting a link here so if I did it wrong, let me know.
The following users liked this post:
volkris (03-05-2019)
#23
I have the Crank pully tool kit coming from Chris. Again, thanks for the lead Greg. Now for the scary question - Yes, my pully/balancer did slide a bit under extreme pressure (2 foot breaker bar pulling against the 2 foot chain wrench). Is this piece toast or can I continue to use it?
Mark
Mark
#24
I have the Crank pully tool kit coming from Chris. Again, thanks for the lead Greg. Now for the scary question - Yes, my pully/balancer did slide a bit under extreme pressure (2 foot breaker bar pulling against the 2 foot chain wrench). Is this piece toast or can I continue to use it?
Mark
Mark
#27
Volkris,
Apparently not. I'm looking at the Engine Repair Course and it shows the parts including the cone and bolt, but no key. I believe they are relying on the massive 268 to 385 ft/lbs of bolt torque to hold the balancer in place. That's why I and others are suffering trying to get it off.
So now with the damper removal tool on the way, I figured it would be a smart thing to see if I can pre-position the engine correctly, or close to it (45 degrees ATDC) before the damper comes off, hopefully making the search for the proper position easier. I figured that the best way to do that and to evaluate a lot of what's going on in there would be to pull the valve covers and see if I can find the position by aligning the cam flat spots. Hopefully nothing skipped in the interim and there would be no piston/valve contact. So off came the valve covers. First impression is I was quite surprised and upset to see the amount of crud that was in there. OK, so the engine has 158000 miles on it and is 22 years old, but I always change the oil with Mobile 1 every 5000 miles. I would have expected it to be spotless. Guess not. Strike one against Mobile 1.
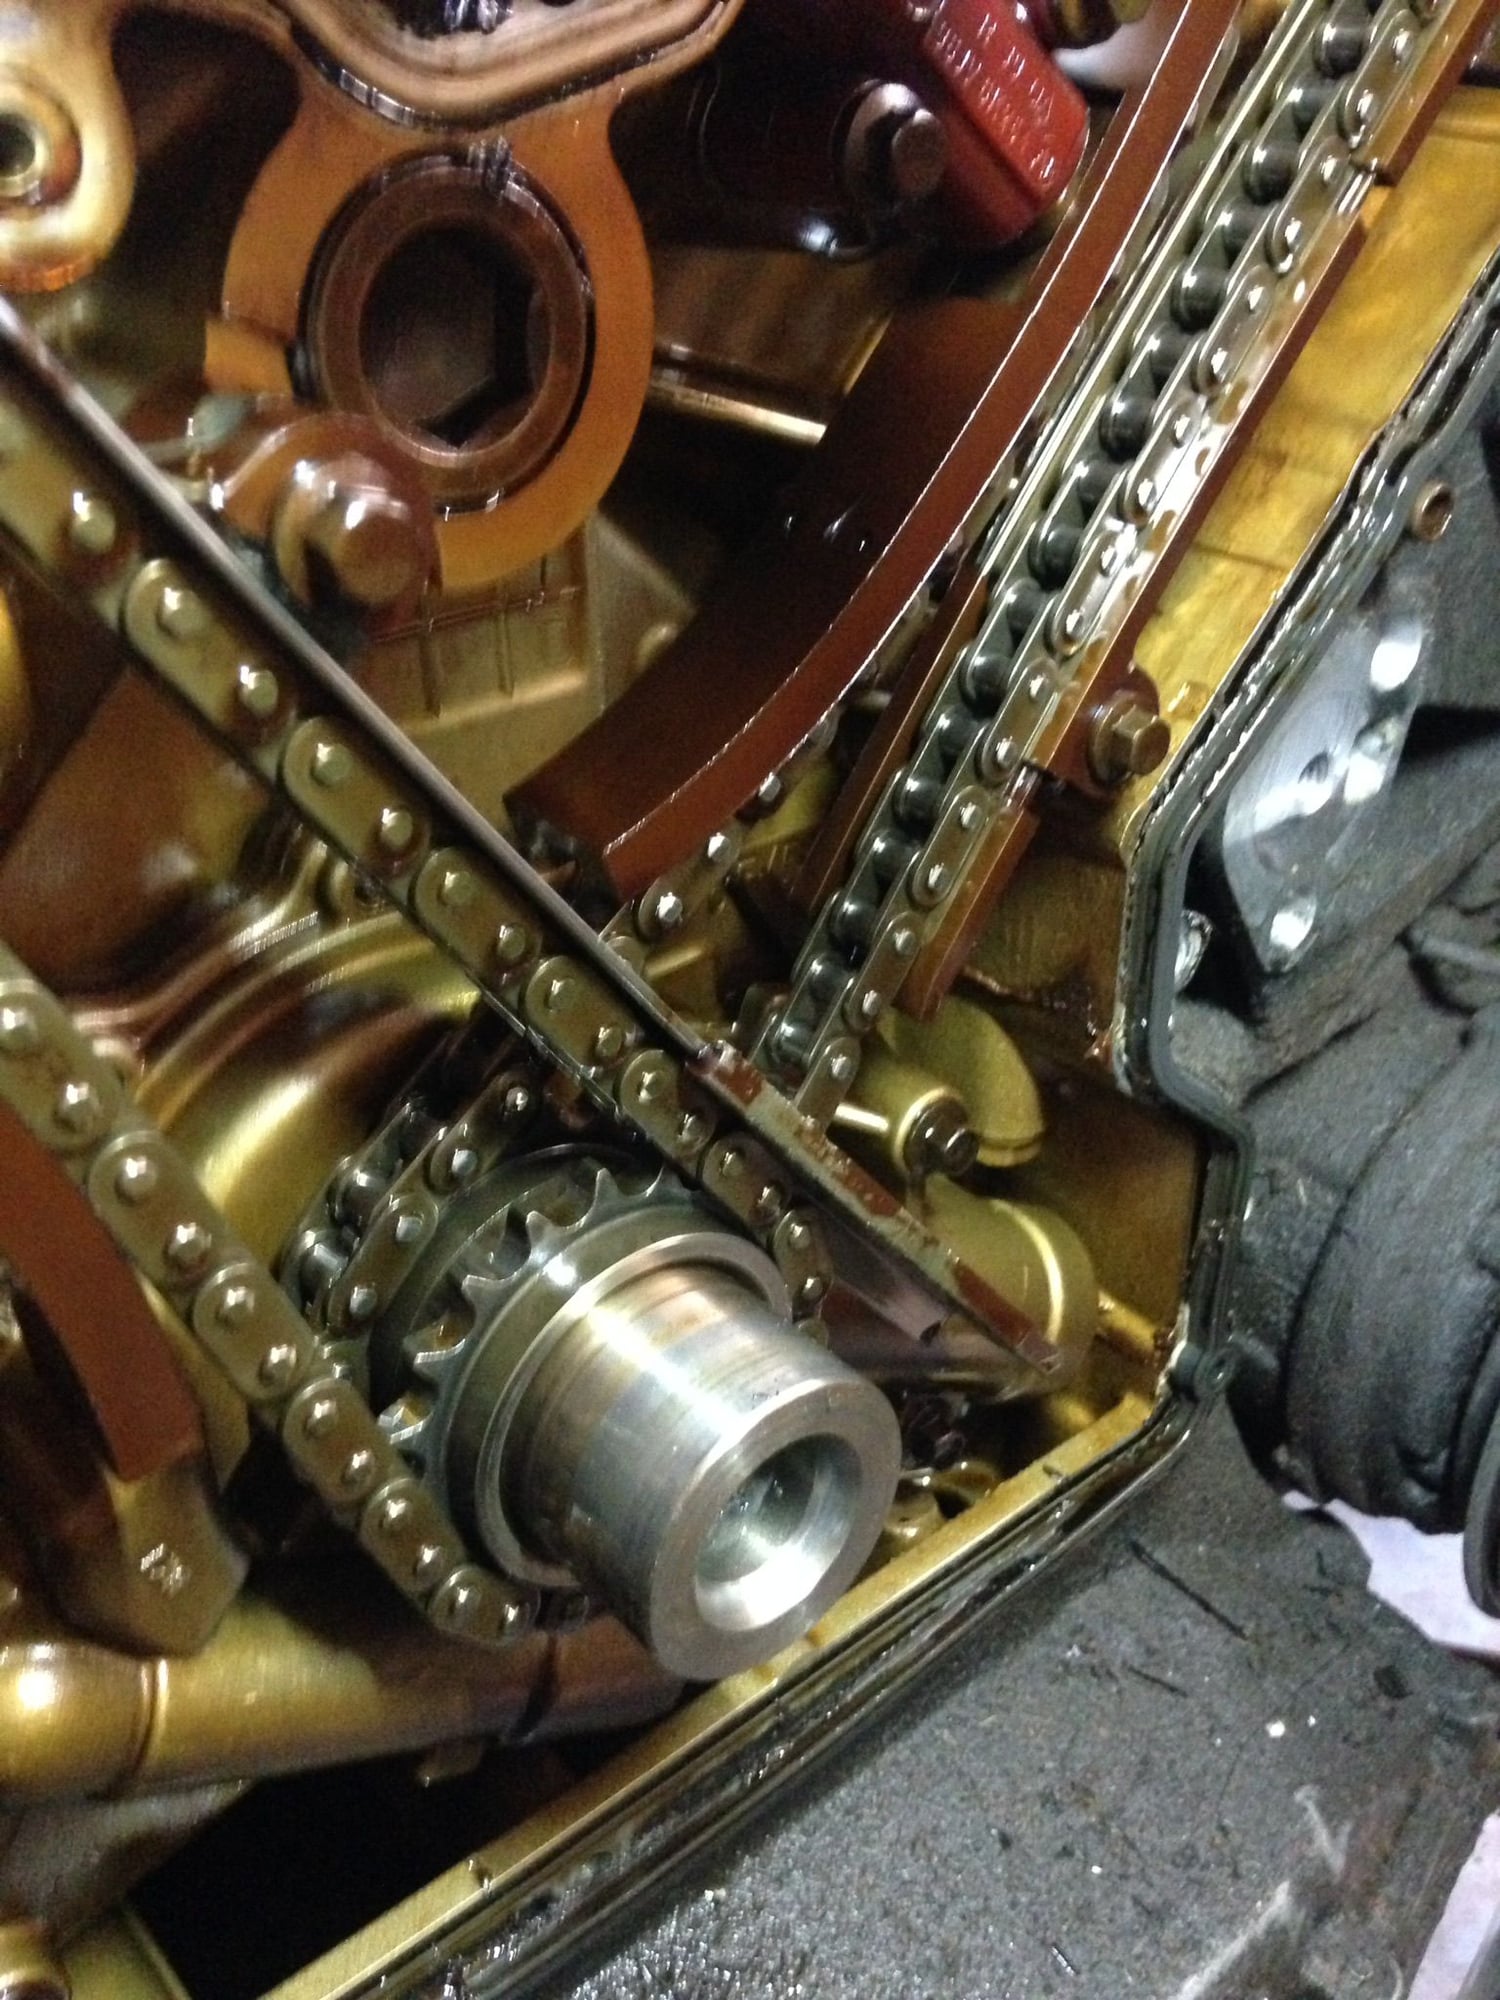
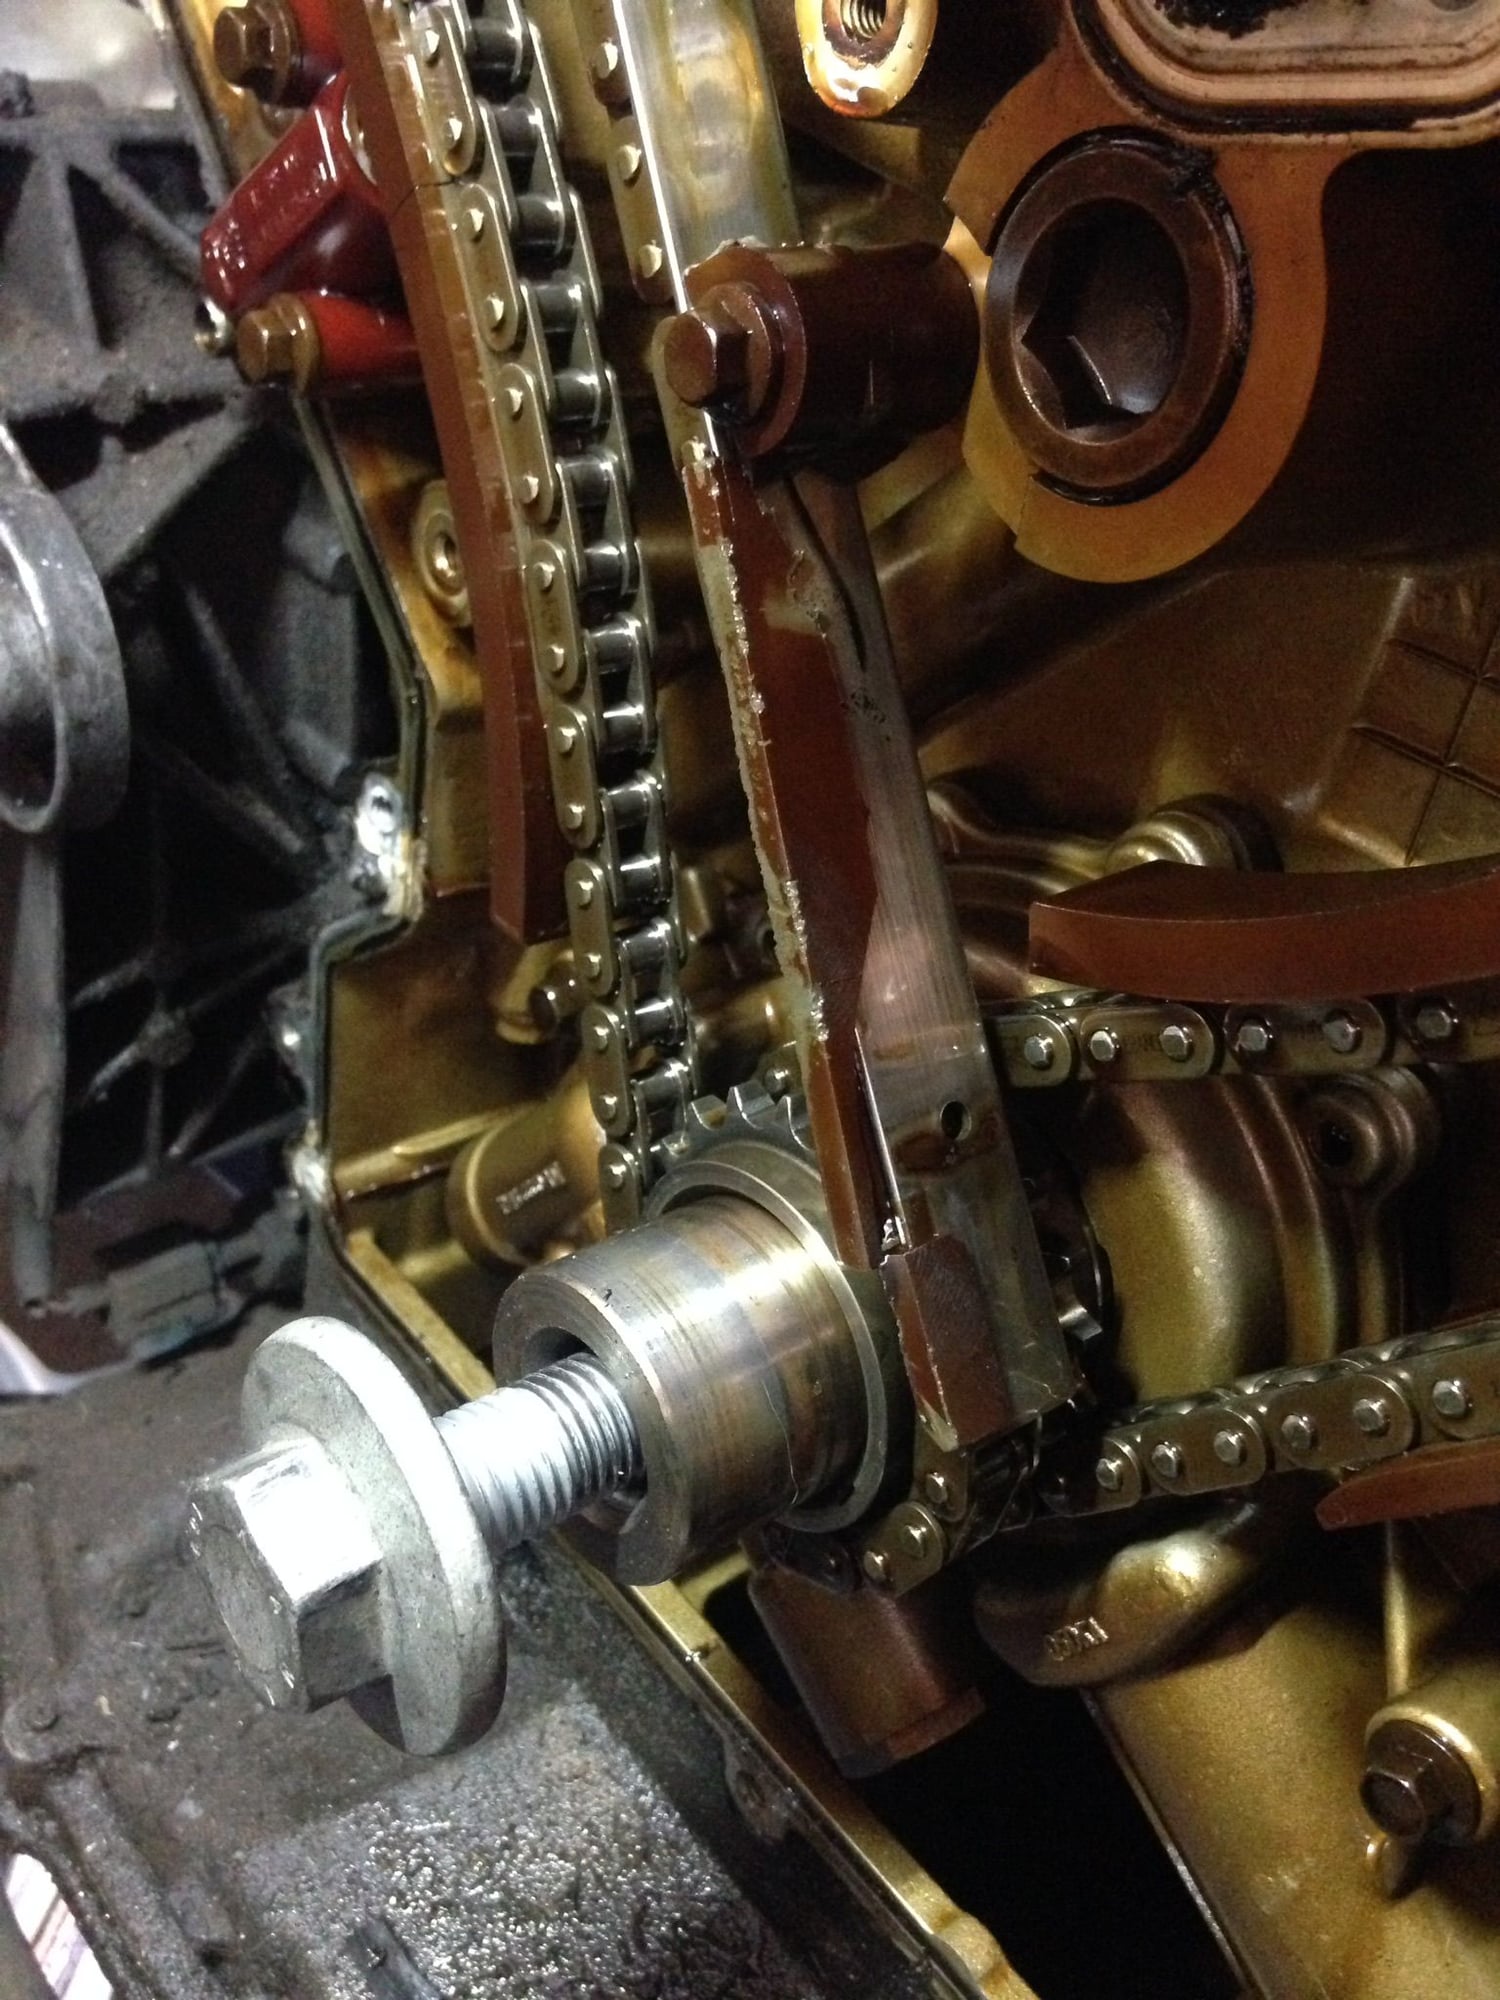
The left side (B bank) came off first. I probed around the chains seemed OK but there was some cracking and possibly missing material on the primary guides and flaps. Both chains were tight and looked good. Then A bank came off. Yikes! Both chains were flopping around like they were 2 sizes too big. The first good news is that the secondary tensioners that I put in 10 years and 40000 miles ago looked perfect. Even spotless clean. The second better news is that I rotated the engine (with the damper bolt) and all four flats on the cams lined up, kind of. Seems like the B bank flats are not quite parallel, Maybe that's the VVT effect. I forget, but will have to find out as I set up the new parts. But they are very close, convincing me that none of the chains skipped at any time. Pistons and valves are safe. The primary guide and flap on the B bank also looked questionable. While turning the engine, I heard a lot of complaining from the B bank chains, and I would have expected them to be taught on the pulling side as I turned the engine, but it seemed like the cams were turning themselves. Hardly any tension when turning. I could even flap the chains on the pull side as I was turning the crank. Very weird! And lots of complaining from the B bank when I turning it. Crunches, pops, etc. Not happy sounds. May be broken flap bits at the bottom. Yet they turned in time.
I then jacked the car up and crawled underneath looking for the 45 degree mark on the flywheel, or whatever I could find down there. Couldn't see anything like the triangle that I believe someone pointed out somewhere. Can't remember where or by who. Looked for it from the front and back bellhousing openings. So I finished by positioning everything back in place up top to keep things clean and am anticipating the arrival of the damper tool tomorrow.
Some questions - First, can anyone provide me with exactly what I am looking for as the 45 degree mark, and where to find it? I believe I should be able to see it since the cam flats are in position. Second, has anyone experienced having one side with both loose chains while the other side is OK?
Looking forward to your responses.
Mark
The following users liked this post:
volkris (03-08-2019)
#28
Join Date: Apr 2014
Location: Jersey, Channel Islands
Posts: 4,078
Received 2,291 Likes
on
1,503 Posts
https://www.jaguarforums.com/forum/x...2/#post1862093
motorcarman's post #23 has a picture showing what you seek.
No woodruff keys to be found either on the crank or on the cams. ISTR the XK straight six is the same.
#29
In a few days I expect to have the timing cover off and I'll be looking to align the cams to install the locking tool. Right now I think I'll try using the damper and locking tool to rotate the crankshaft to the proper position. The crankshaft was rotating a little when I removed the damper, and the cams were close to where they need to be, so I think I can get away with this.
#30
Originally Posted by Nemesis435 
Some questions - First, can anyone provide me with exactly what I am looking for as the 45 degree mark, and where to find it? I believe I should be able to see it since the cam flats are in position.
There isn't a timing mark on the damper or a key in the crank for the damper. You don't need to mark where the damper is positioned on the crankshaft. It doesn't matter.
To correctly time the camshafts to the crank you need to lock the flywheel with the proper tool at the crankshaft position sensor location. Then have the camshafts locked in the flats up position with the proper tool. Install the tensioners and chains as shown in the Engine Repair Course Code 168.
http://www.jagrepair.com/images/Auto...Code%20168.pdf
It was mentioned in this thread about turning the crankshaft.
Only turn the crankshaft in the clockwise direction. I have read from other members that this can cause damage to the bearings by turning the motor counterclockwise.
Last edited by BobRoy; 03-09-2019 at 09:18 AM.
#31
BobRoy x2! - The damper can be put back on the crankshaft at any "clock" position as there is no key way on the crank holding it in a particular position, hence there are no timing marks. The only way to time this engine correctly is using the cam flats and the flex plate locking pin.
Also, when you put the locking bars across the camshaft flats, you may still need to turn the flexplate slightly to get the locking pin in place through the sensor mounting hole. I needed to turn mine (clockwise) one or three degrees using a flat bladed screwdriver against the gear teeth.
Also, when you put the locking bars across the camshaft flats, you may still need to turn the flexplate slightly to get the locking pin in place through the sensor mounting hole. I needed to turn mine (clockwise) one or three degrees using a flat bladed screwdriver against the gear teeth.
#32
Join Date: Apr 2018
Location: Hampton Roads, eastern Virginia
Posts: 243
Received 88 Likes
on
52 Posts
This week I learned (and I stand to be corrected here) that these dampers aren't about actively countering some particular cyclic motion of the engine but rather dampening the overall motion of the crankshaft. They're not tuned so that mass is accelerating downwards while an engine mass accelerates upwards, but rather they sit there as a somewhat dumb elastic mass resisting any unwanted accelerations of the crankshaft.
Therefore, there's no need to align their orientation with respect to the rest of the engine.
That's why it doesn't matter how it's aligned.
Therefore, there's no need to align their orientation with respect to the rest of the engine.
That's why it doesn't matter how it's aligned.
#33
"So now with the damper removal tool on the way, I figured it would be a smart thing to see if I can pre-position the engine correctly, or close to it (45 degrees ATDC) before the damper comes off, hopefully making the search for the proper position easier. "
Mark,
The crankshaft will rotate a little when you remove the bolt at the front of the crankshaft. You can get the crankshaft in place, then restore its position after the damper is off but final crankshaft position will be after the damper is off.
Mark,
The crankshaft will rotate a little when you remove the bolt at the front of the crankshaft. You can get the crankshaft in place, then restore its position after the damper is off but final crankshaft position will be after the damper is off.
#34
"So now with the damper removal tool on the way, I figured it would be a smart thing to see if I can pre-position the engine correctly, or close to it (45 degrees ATDC) before the damper comes off, hopefully making the search for the proper position easier. "
Mark,
The crankshaft will rotate a little when you remove the bolt at the front of the crankshaft. You can get the crankshaft in place, then restore its position after the damper is off but final crankshaft position will be after the damper is off.
Mark,
The crankshaft will rotate a little when you remove the bolt at the front of the crankshaft. You can get the crankshaft in place, then restore its position after the damper is off but final crankshaft position will be after the damper is off.
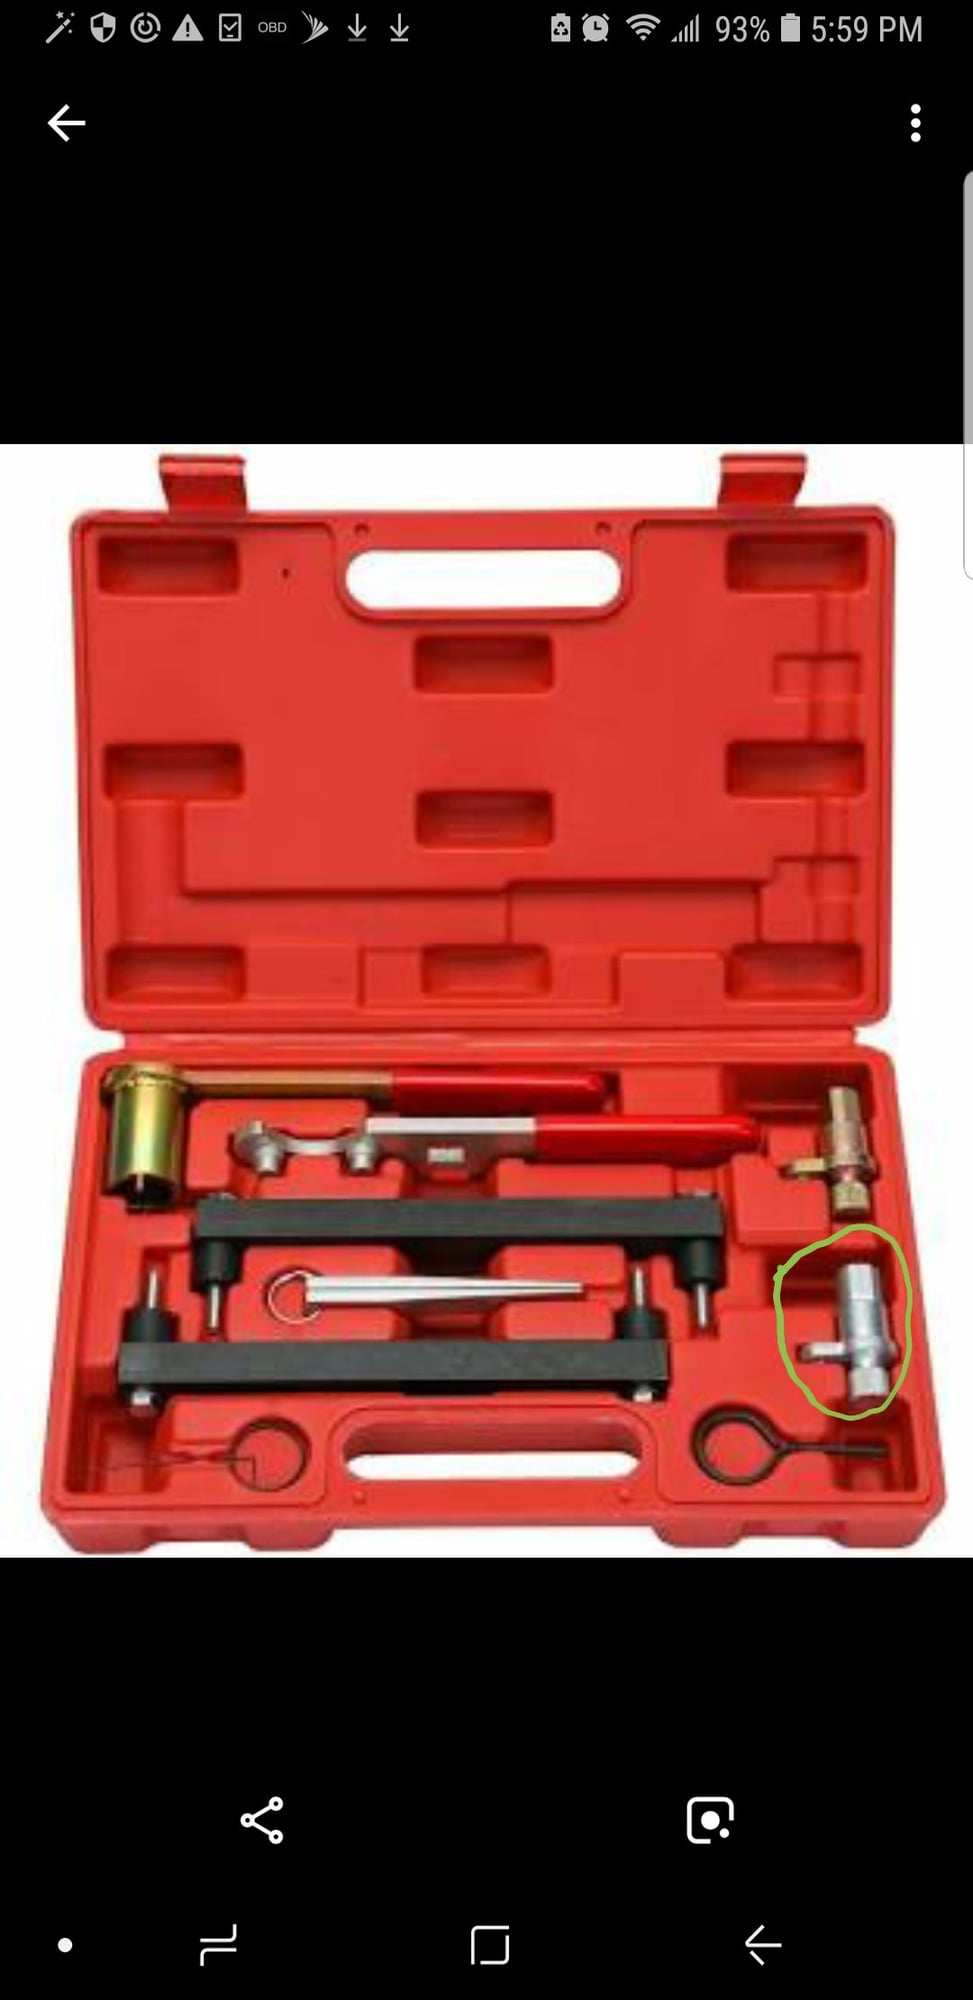
You get a timing kit similar to this. Use the locking tool circled.
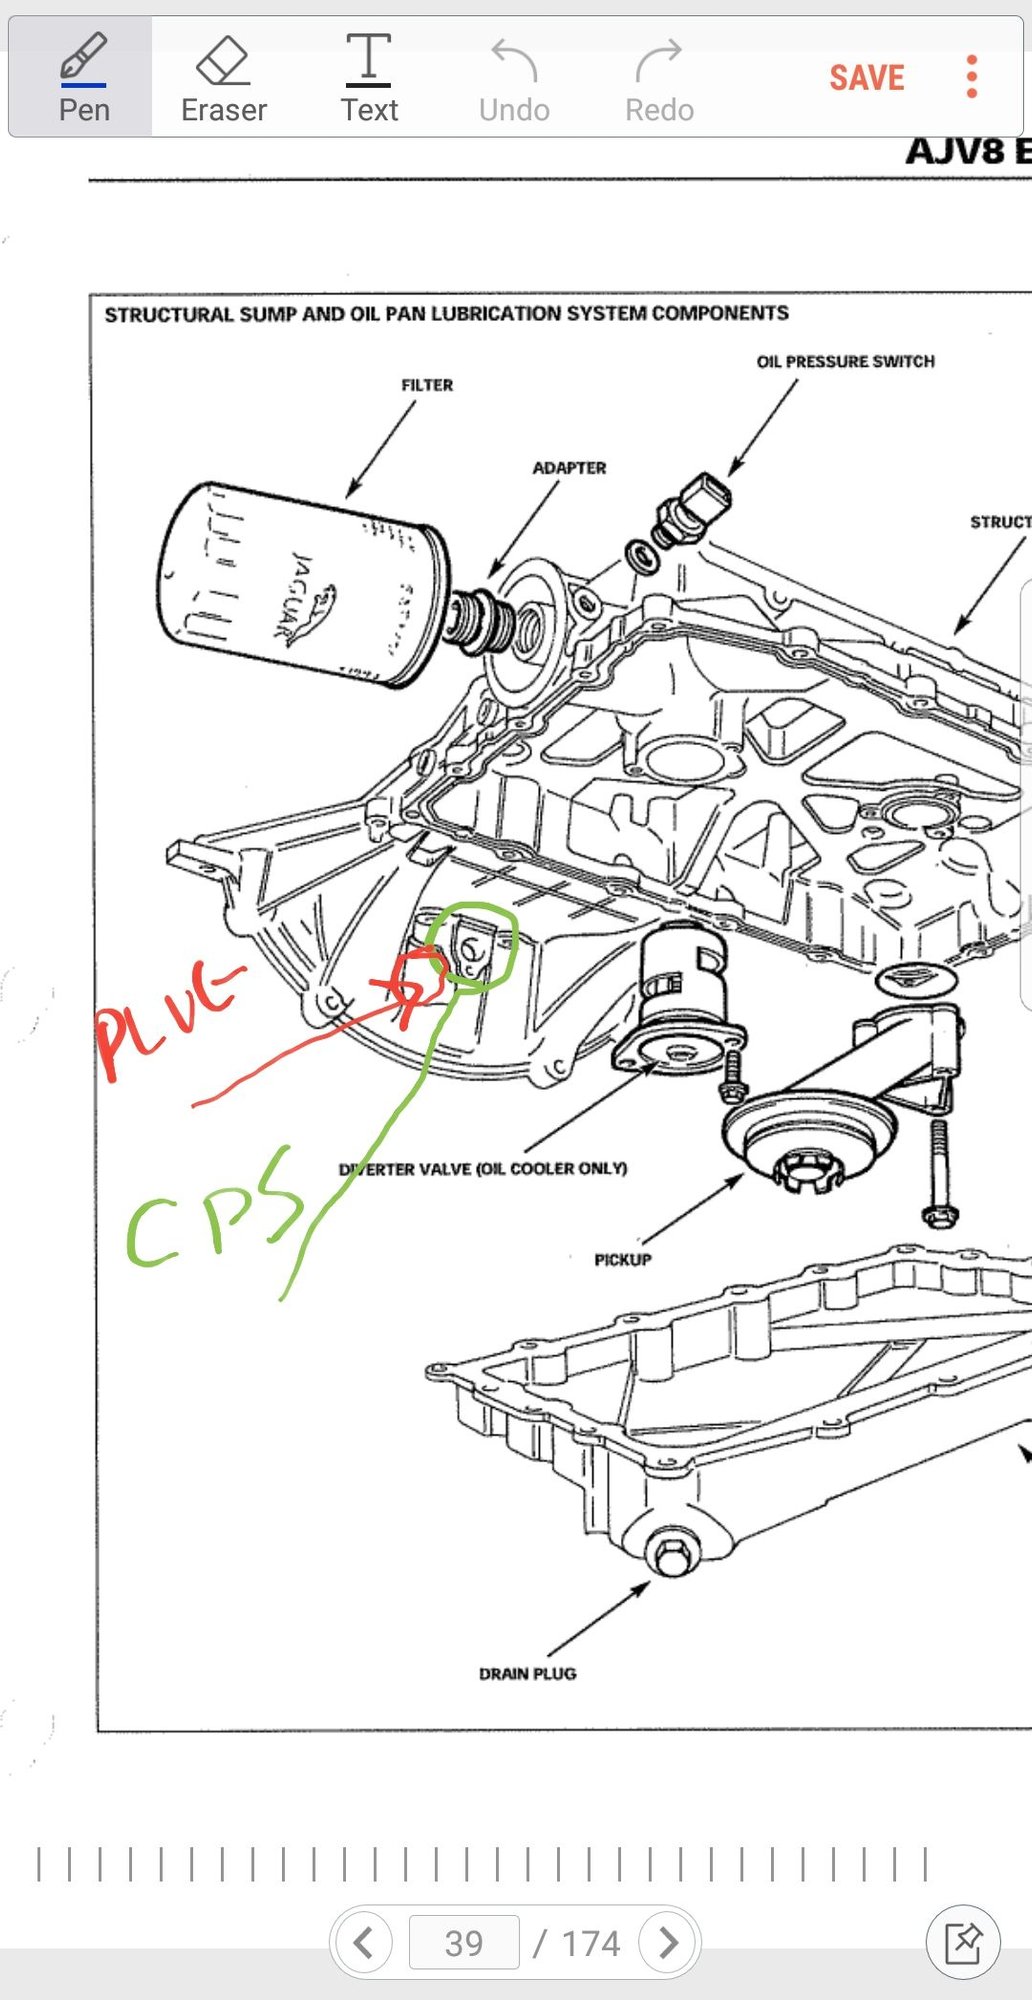
Under the car at the rear of the engine find the crank position sensor.
Remove the sensor. Turn the crankshaft to you see the cut that is in the next photo. If you set the cams to the flat up position, don't put the locking bars on yet because you might need to move the crank a little, it should be exactly there if the car is timed correctly.
Set the timing tool into the hole in the flywheel and put the bolt in .

The hole is circled in green
NOW YOUR CRANKSHAFT IS SET AT 45° ATDC.
The following users liked this post:
Terry Young (07-18-2019)
#36
OK Gents. Lots of progress on my part as well. I received the Damper removal tool kit from Christopher's and began prepping everything for extraction. It was a job to just get the Allen bolts worked into the two threaded holes in the center of the damper. Before I did anything else, I went under and found the timing tool segment and lined it up with the position sensor, and then pulled the sensor. Ready (Close enough) for the holding pin with the next tool set. I also gave it some paint to make locating it again easier if needed.
With the cam flats near the proper position, I mounted the tool and tried to turn the center bolt. No go. So I went to Home Depot and bought two 2 foot long pieces of scrap black piping to use as "Convincers". One piece 1 1/2 inches ID to go over Chris's tool, and another 1 inch ID to go over my breaker bar. That did the trick. The bolt started turning and I was in business. However, as Cabel indicated earlier, it's going to fight you all the way off. But I got there. Next the puller in Chris's kit made quick work of pulling the damper off. Awesome! Now, as you recall, I spun my damper. I figured out that when I heated up the bolt earlier to try to get it to give up, I overdid the heat and softened the damper material. (Duh!) If you haven't shopped for a new or used damper for these cars, it is quite a humbling experience. About $1700.00 new and $700 used/rebuilt. But rebuilt you say? Yes, there are rebuilders out there. I'm packing mine up now and sending it to Winslow Mfg in N.C. so they can rebuild it for me. They quoted $105.00 plus shipping and about a week to do it. Hopefully this is a good shop and I'll get a quality rebuild back. I'll report back when it comes in.
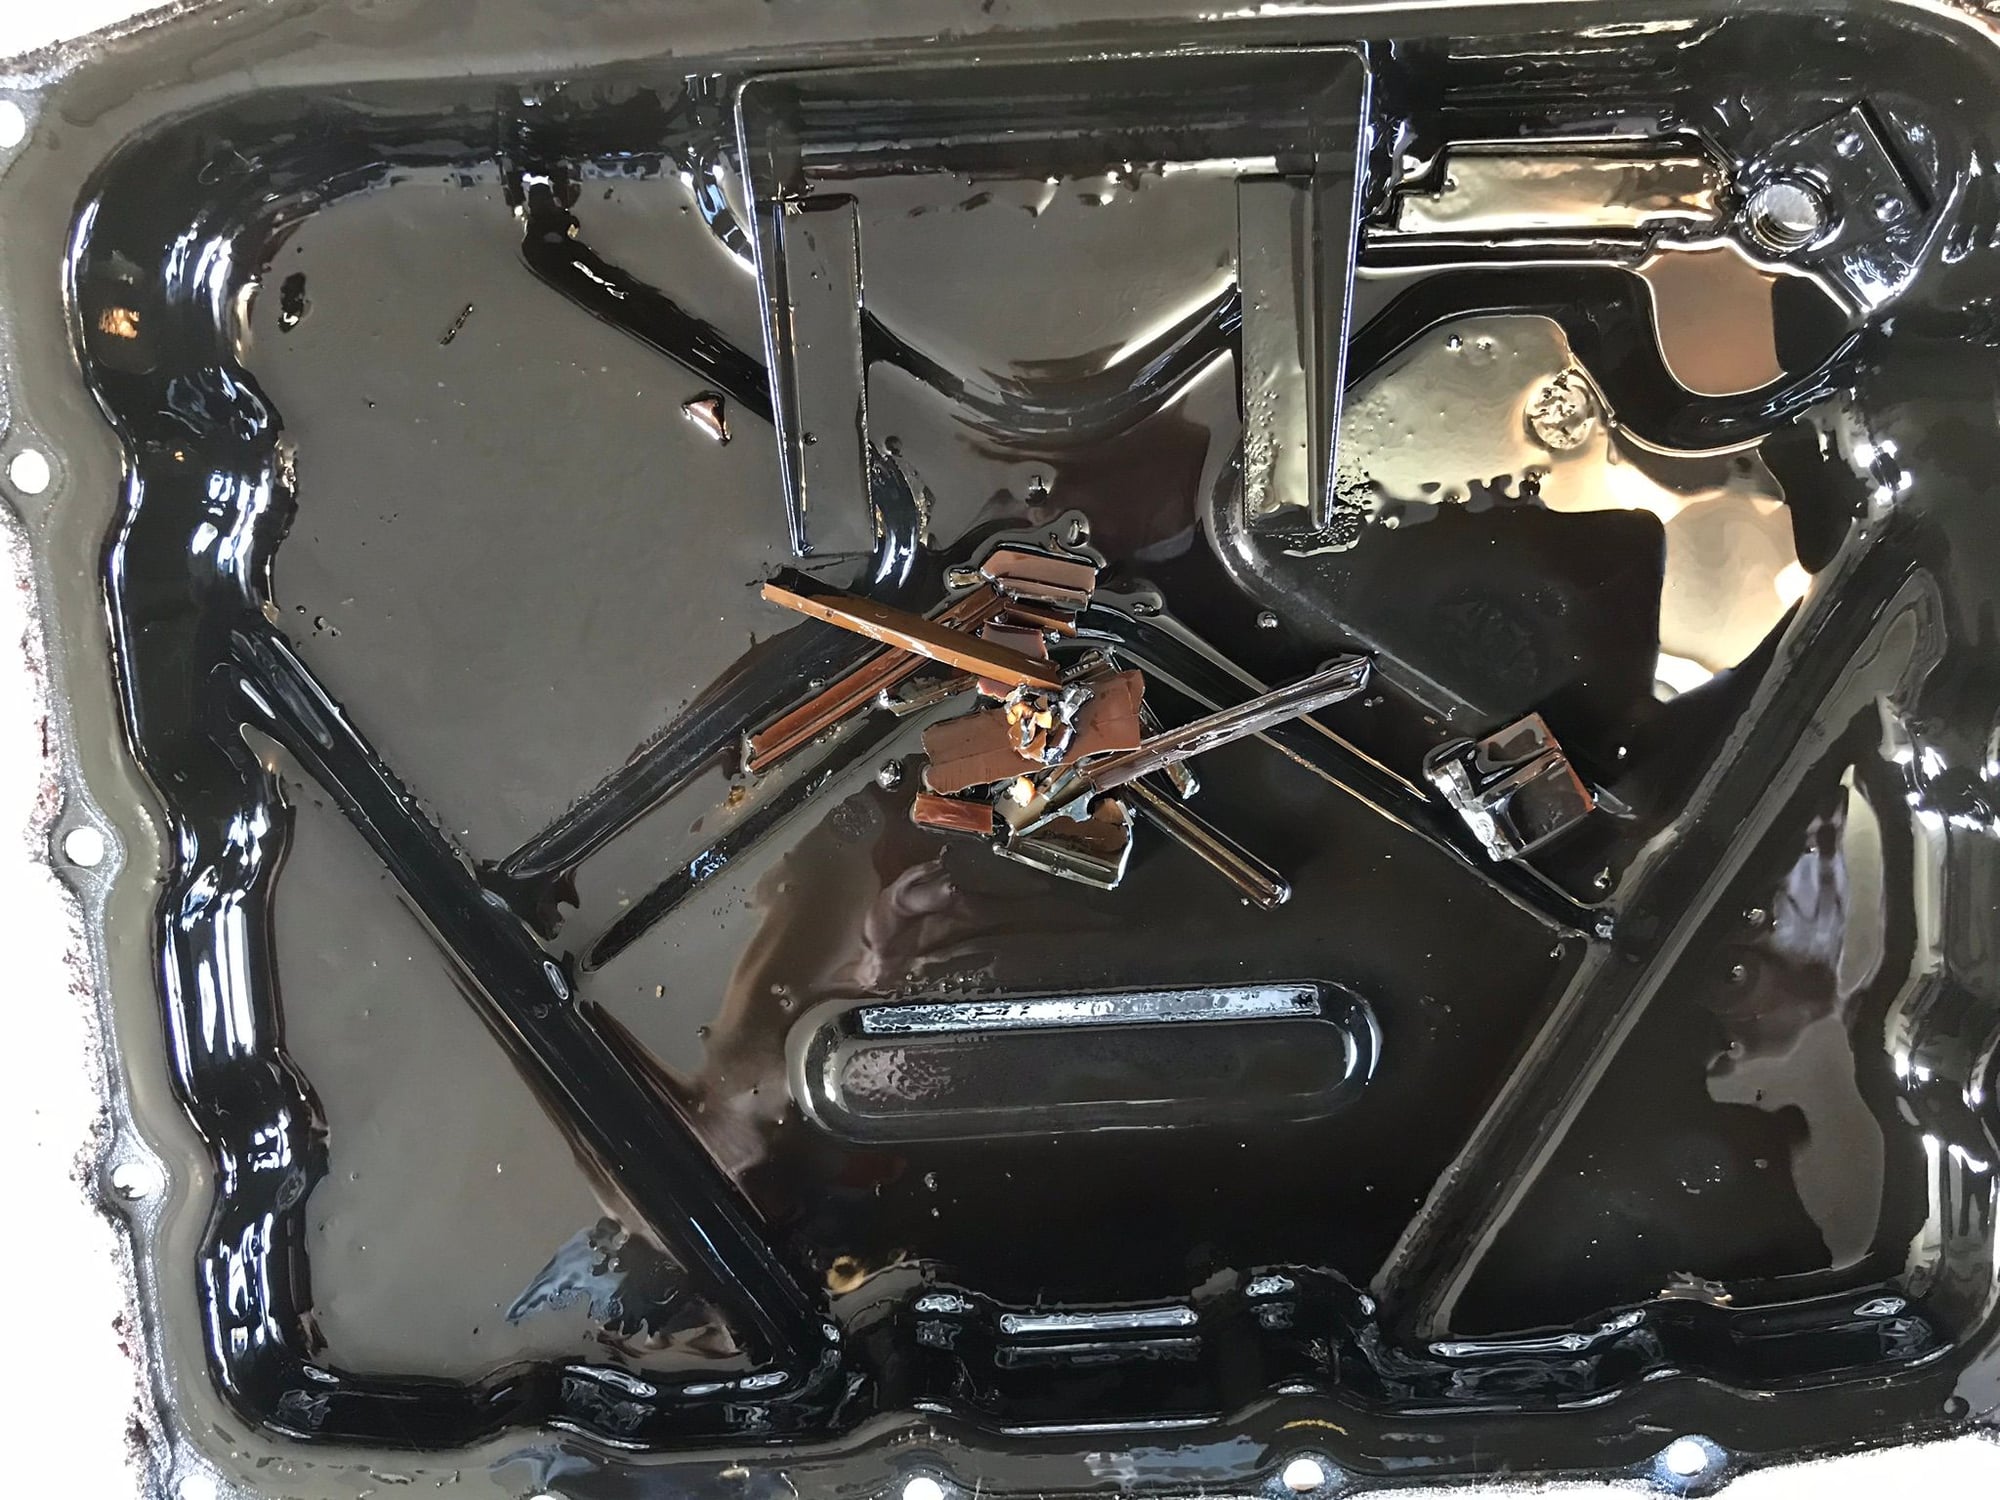
Now the fun part. Cracking open the front cover. I expected to find some issues with the primary tensioner and guide on the A bank since I found the chains to be lose. What I found was no guide at all, at least in position. I did actually find the guide below the crank shaft. I think that explains everything except how did that chain NOT jump a tooth or two?? So now I'm off to get my parts and tool order together, then drop the oil pan and fish out the rest of the broken parts, and start cleaning things up in anticipation of that parts and tool shipment.
Hopefully I'll have the similar experience as when I replaced the timing belt on my old Subaru years ago and it ran noticeably better afterwards with the valve timing being corrected with the proper length (New) belt. The Jag did vibrate just a bit at idle even before all the clamoring started so there is room for improvement.
To be continued,
Mark
#38
Join Date: Apr 2014
Location: Jersey, Channel Islands
Posts: 4,078
Received 2,291 Likes
on
1,503 Posts
Mark, I did a quick search and found used for around $50-100. You could almost pick up a complete motor for $1700. Is there a breaker within striking distance of you? One from an XJ8 will fit.
#40
Join Date: Apr 2018
Location: Hampton Roads, eastern Virginia
Posts: 243
Received 88 Likes
on
52 Posts
You didn't have anything across the flats or any tools going into the flywheel at this point, right?

