
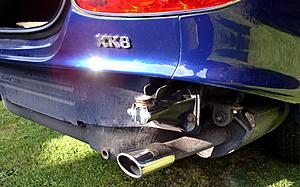
XK8 Rear badge over trunk key access

Greetings, i am finally ready to "install" the XK8 badge on my Jag. It positions over the key access for the trunk. It appears to have what must be a very strong PSA (Pressure Sensitive Adhesive) under a thin protective backing. I think I will only get one shot at getting this on the car in the correct position and alignment.
Does anyone who has experience with attaching this badge have suggestions regarding surface preparation and alignment? Is it most important to "true" the badge to the key opening or to make it parallel with some body line?
Thanks for any help and invested time.
Regards,
Ken
Does anyone who has experience with attaching this badge have suggestions regarding surface preparation and alignment? Is it most important to "true" the badge to the key opening or to make it parallel with some body line?
Thanks for any help and invested time.
Regards,
Ken

Senior Member


Joined: Nov 2012
Posts: 289
Likes: 105
From: Canton, Ga.
Having done custom paintwork for many years,I've found a little system that has worked for me. First, wipe surface with alchohol or equivalant to clean and prep surface, removing all wax and grease.
After determining proper placement, I'll take small pieces of masking tape to hold said part in position, then use strips of masking tape to outline the badge along it's border, placing them in strategic places to exactly outline its proper placement.
You can then remove the badge/emblem and peel the backing from the adhesive. Gently guide the badge into place using your outlined pieces of tape to position it again as you had mocked up. Once in place. press hard to allow adhesive to properly set. Then sit back and admire a job well done!

Joined: Dec 2011
Posts: 120,439
Likes: 17,014
From: Durham, UK
I like a combination of baxtor and Hdpartsman00XKR's techniques.
The critical considerations when fixing are:
1. level - parallel to the ground
2. aligned with the keyway - key can be easily inserted
There isn't a horizontal straight line on the bodywork to reference the parallel alignment so you need to temporarily fix it for checking before removing the backing. Easy way to do this is with the key through the hole and into the lock, tape the badge on then stand back and check it looks right. Finally make sure the key can be freely removed and inserted before doing the prep and stick.
Graham
Greetings, Thank you all so much for excellent suggestions. As Rothwell pointed out, I failed to mention that my XK8 is a 1997. I will make good use of your suggestions and give this a go. Again, Thank you all so very much! Warm regards, Ken
Senior Member

Joined: Oct 2010
Posts: 750
Likes: 308
From: Near Charlotte, NC
Maybe some tape around the key would keep it more concentric.
Trending Topics


Thread
Thread Starter
Forum
Replies
Last Post
Hex Type
X-Type ( X400 )
6
Apr 4, 2015 10:28 AM
Mccalist
XJS ( X27 )
11
Dec 14, 2009 09:05 AM
Currently Active Users Viewing This Thread: 1 (0 members and 1 guests)