LOG IN
REGISTER
Forums
General Jaguar Forums
New Member Area - Intro a MUST
Jaguar Forums Feedback & Suggestion Center
General Tech Help
Jaguar Models ( Current )
XF (X260)
F-Type ( X152 )
XE ( X760 )
E-Pace
F-Pace (X761) / C-X17
I-Pace EV
Jaguar Models ( Modern )
XF and XFR ( X250 )
XJ ( X351 )
X-Type ( X400 )
S-Type / S type R Supercharged V8 ( X200 )
XJ XJ6 / XJ8 / XJR ( X350 & X358 )
XJ XJ8 / XJR ( X308 )
XJ XJ12 ( X305 )
XJ XJ6 / XJR6 ( X300 )
XK8 / XKR ( X100 )
XK / XKR ( X150 )
Jaguar Models ( Classics )
Mark V - X 420G
MKI / MKII S type 240 340 & Daimler
XK120 XK140 XK150
E type ( XK-E )
XJ6 & XJ12 Series I, II & III
XJS ( X27 )
XJ40 ( XJ81 )
XKSS
XJ220
Other Jaguars
Other Jaguar Models / Concepts / Replicas
Diesel variants
Diesel variants - All models
Non Jaguar vehicles
Non-Jaguar Vehicles
Brand Review
Jaguar Press release
Jaguar Customer Relationship Centre
Jaguar Engines & transmissions
Wheels / Tires, Suspension & handling
Interior
Exterior
Audio/Visual Electronics
Detailing / Car care
Motorsports
Jaguar Classifieds
Marketplace
PRIVATE For Sale / Trade or Buy Classifieds
VENDOR 'For Sale' Classifieds
Regional
US Northeast
US Central
US Southwest
US Western
US Northwest
US Midwest
US Mid Atlantic
US Lower Atlantic
US Southern Midwest
Canada
Mexico, South America
UK & Eire
Europe
Australia - Queensland
Australia - New South Wales / ACT
Australia - Victoria / Tasmania
Australia - Western
Australia - South / NT
New Zealand
Other Areas
Official Site Sponsors
VENDOR Threads
General Interest / History
Sights N Sounds
Photography
Forum announcement archives / Forum History
Jaguarforums Merchandise
Memorial Section
News
Marketplace
Vendor Directory
Become a Vendor
Member Marketplace
Vendor Marketplace
Site Store
New Posts
Tools
Car Payment Calculator
Tire Rim Calculator
Vin Decoder
Recalls
Technical Service Bulletins (TSBs)
Members List
Live Feed
Gallery
View Dark Mode
Please register or login to enable Dark Mode.
Log In
Register
Threads
Google
Threads
Posts
Advanced
Dark Mode
Please register or login to enable Dark Mode.
Log In
Forgot your Password?
By logging into your account, you agree to our
Terms of Use
and
Privacy Policy
, and to the use of cookies as described therein.
or
Login with Google
Login with Facebook
Recent
Commented
Albums
My Pictures
My Post Pictures
Borbor
November 20, 2020
139
0
Sort:
Default
Default
Most Recent
0
2021/02/26 23:26:25
Borbor
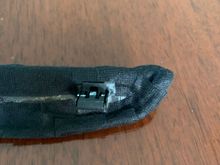
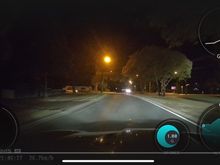
I don’t think this squeaks but did it anyway
0
2021/02/26 23:26:34
Borbor
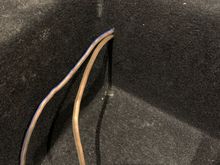
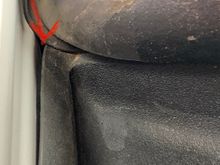
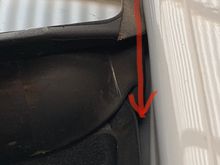
The rear side window drains can rattle against the plastic part as shown by the red arrow. One of my sides was clipped into a holder right at the very bottom and will be held taught and away from the contact point as shown in the photo. My other drain was just hanging loose which then lies in the path of the green dots and can rattle. It is hard to put the loose end back into the clip as it is right down the bottom and you are doing it blind and by feel only and you don’t want to create a kink.
0
2021/02/26 23:36:44
Borbor
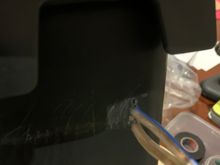
Carpeted rear panel can vibrate forward and backwards as the hole for the push in anchor is bigger than the width of the anchor pin. I put some self adhesive foam under it to tighten everything up
0
2021/02/26 23:36:49
Borbor
0
2021/04/10 21:32:00
Borbor
0
2021/04/10 21:32:05
Borbor
0
2021/04/23 21:42:29
Borbor
Routed the wiring through pre-existing hole in shell from elastic band. Then sealed the rest of the hole afterwards. Also needed to seal the other 3 holes I the shell from the other slots for the other inbuilt elastic bands
0
2021/05/03 06:03:25
Borbor
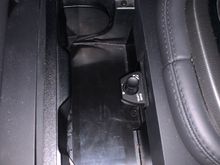
Outside view
0
2021/05/03 06:03:33
Borbor
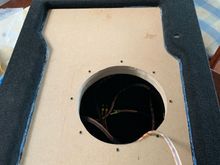
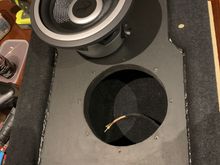
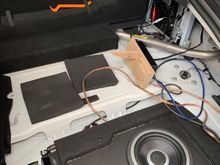
Face board is I set I to the shell to allow subwoofer to stick out a bit and still remain below floor level
0
2021/05/03 06:03:41
Borbor
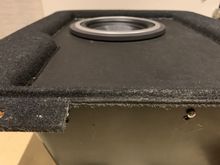
Mdf cut to size from cardboard template to get correct depth. Edges are all routed with 11.25 degree chamfer bit except one edge which is shallower so needed 15degree chamfer bit.
0
2021/05/03 06:03:48
Borbor
Another use for tyre black
0
2021/05/03 06:03:57
Borbor
0
2021/05/03 06:04:05
Borbor
0
2021/05/03 06:04:12
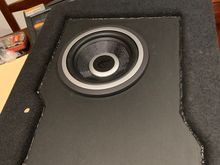
Borbor
Partially installed
0
2021/05/03 06:04:20
Borbor
0
2021/05/03 06:04:27
Borbor
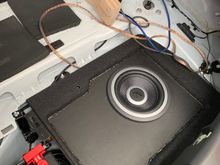
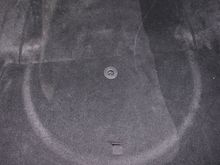
Completely stealth and usable
0
2021/05/03 06:04:33
Borbor
0
2021/05/03 06:04:41
Borbor
0
2021/05/10 23:08:06
Borbor
0
2021/05/28 07:01:44
Borbor
Water will drain off roof to this area. This side has a small gap between the seal and the body work
0
2021/10/30 17:07:18
Borbor
This side has an even bigger gap.
0
2021/10/30 17:07:22
Borbor
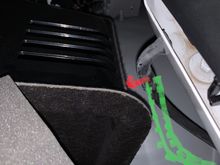
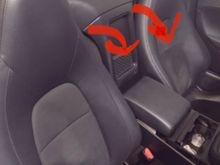
Since no one has answered yet …….Just pull forward from the top. Just non breakable clips here where the arrows are. Once top is loose just lift the entire panel upwards as sits on some vertically oriented pins at the base.
0
2022/01/01 21:32:01
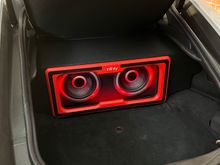
Borbor
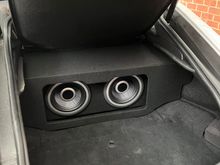
Finally finished my install
0
2022/01/19 01:57:44
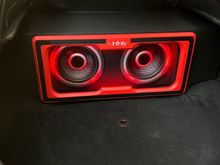
Borbor
Made a trim ring as well
0
2022/01/19 01:57:52
Borbor
0
2022/01/19 01:58:01
Borbor
0
2022/01/19 01:58:09
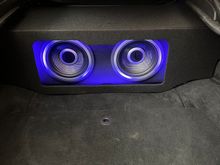
Borbor
With LEDs
0
2022/01/19 01:58:17
Borbor
0
2022/01/29 15:25:47
Borbor
0
2022/05/12 23:24:49
Borbor
0
2022/05/12 23:24:58
Borbor
0
2022/05/12 23:25:05
Borbor
0
2022/05/12 23:25:12
Borbor
0
2022/05/12 23:25:20
Borbor
This is the seller Shop name
0
2022/05/12 23:29:32
Borbor
0
2022/05/12 23:29:43
Borbor
0
2022/06/26 06:19:09
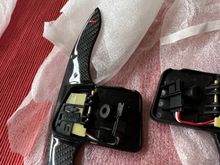
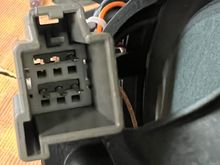
Borbor
The white plastic pin lock needs to be removed form the connector first
0
2022/07/01 21:10:30
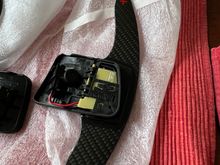
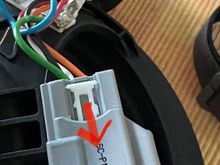
Borbor
Release by pushing forward the locking tabs on both side and remove white plastic bit completely. Remember to reinstall later
0
2022/07/01 21:10:45
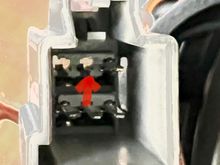
Borbor
There are small grey plastic tabs that are part of the connector that have to be gentle released before you can pull out the pins. You need to remove the ones shown , one for each voice coil of the subwoofer.
0
2022/07/01 21:10:51
Borbor
First
Page
2 of 4
Last
Go To
Page
1
2
3
4
2 of 4
Go To
GO
Go to page
of 4
pages
1
2
3
4