Jaguar Forums - Jaguar Enthusiasts Forum
  • LOG IN
  • REGISTER
  • Forums
    • General Jaguar Forums
      • New Member Area - Intro a MUST
      • Jaguar Forums Feedback & Suggestion Center
      • General Tech Help
    • Jaguar Models ( Current )
      • XF (X260)
      • F-Type ( X152 )
      • XE ( X760 )
      • E-Pace
      • F-Pace (X761) / C-X17
      • I-Pace EV
    • Jaguar Models ( Modern )
      • XF and XFR ( X250 )
      • XJ ( X351 )
      • X-Type ( X400 )
      • S-Type / S type R Supercharged V8 ( X200 )
      • XJ XJ6 / XJ8 / XJR ( X350 & X358 )
      • XJ XJ8 / XJR ( X308 )
      • XJ XJ12 ( X305 )
      • XJ XJ6 / XJR6 ( X300 )
      • XK8 / XKR ( X100 )
      • XK / XKR ( X150 )
    • Jaguar Models ( Classics )
      • Mark V - X 420G
      • MKI / MKII S type 240 340 & Daimler
      • XK120 XK140 XK150
      • E type ( XK-E )
      • XJ6 & XJ12 Series I, II & III
      • XJS ( X27 )
      • XJ40 ( XJ81 )
      • XKSS
      • XJ220
    • Other Jaguars
      • Other Jaguar Models / Concepts / Replicas
    • Diesel variants
      • Diesel variants - All models
    • Non Jaguar vehicles
      • Non-Jaguar Vehicles
    • Brand Review
      • Jaguar Press release
      • Jaguar Customer Relationship Centre
      • Jaguar Engines & transmissions
      • Wheels / Tires, Suspension & handling
      • Interior
      • Exterior
      • Audio/Visual Electronics
      • Detailing / Car care
      • Motorsports
    • Jaguar Classifieds
      • Marketplace
      • PRIVATE For Sale / Trade or Buy Classifieds
      • VENDOR 'For Sale' Classifieds
    • Regional
      • US Northeast
      • US Central
      • US Southwest
      • US Western
      • US Northwest
      • US Midwest
      • US Mid Atlantic
      • US Lower Atlantic
      • US Southern Midwest
      • Canada
      • Mexico, South America
      • UK & Eire
      • Europe
      • Australia - Queensland
      • Australia - New South Wales / ACT
      • Australia - Victoria / Tasmania
      • Australia - Western
      • Australia - South / NT
      • New Zealand
      • Other Areas
    • Official Site Sponsors
      • VENDOR Threads
    • General Interest / History
      • Sights N Sounds
      • Photography
      • Forum announcement archives / Forum History
      • Jaguarforums Merchandise
      • Memorial Section
  • News
  • Marketplace
    • Vendor Directory
    • Become a Vendor
    • Member Marketplace
    • Vendor Marketplace
    • Site Store
  • New Posts
  • Tools
    • Car Payment Calculator
    • Tire Rim Calculator
    • Vin Decoder
    • Recalls
    • Technical Service Bulletins (TSBs)
    • Members List
    • Live Feed
  • Gallery
  • View Dark Mode
    • Please register or login to enable Dark Mode.
  • Log In
  • Register
Jaguar Forums - Jaguar Enthusiasts Forum
    • Threads
      • Advanced
Dark Mode

Please register or login to enable Dark Mode.

Log In

Forgot your Password?

By logging into your account, you agree to our Terms of Use and Privacy Policy, and to the use of cookies as described therein.
or
 
  • Recent
  • Commented
  • Albums
  • My Pictures

My Post Pictures

Treozen
June 30, 2016
 93
 0
Sort:
Most Recent
  • Default
  • Most Recent
0 2016/06/30 14:58:28 Treozen
View from the other side. Nope, didn't take the front window out either. The headliner actually tucked up into the rubber well and with a little double fold of the extra material and of course the wood trim, held very firm. Its not accurate, but it works and you'd never know the difference (until you pull the windshield off).
0 2016/06/30 14:52:52 Treozen
OK, so getting close here. At this stage you will notice some small wrinkles here and there and some gathered "bunches" at the ends of the seams. It actually doesn't look quite so obvious in person and I believe with some water and heat, I can shrink some of it out.  The gathered bits at the end of the seams are ultimately hidden by the wood trim anyway. Not perfect, but well and good enough.
OK, so getting close here. At this stage you will notice some small wrinkles here and there and some gathered "bunches" at the ends of the seams. It actually doesn't look quite so obvious in person and I believe with some water and heat, I can shrink some of it out. The gathered bits at the end of the seams are ultimately hidden by the wood trim anyway. Not perfect, but well and good enough.
0 2016/06/30 14:48:37 Treozen
Note the extra piece of wood (thanks Lowes) I can't take credit for that idea, someone else did if first but I tapped a few holes into the metal panel just above the window and then used that wood ( its actually a plastic fiber board but SHHHH....don't tell anyone) to help secure the headliner. I also wrapped a length of wire down and around the window rubber to lock the headliner in place. Neither are required if you remove the window of course.
0 2016/06/30 14:44:39 Treozen
Since I wasn't removing the windows, I installed the lower headliner piece (just above the back seat there) as a separate part - once the rear shelf is in you can't tell.
0 2016/06/30 14:41:53 Treozen
Installation of the rear interior lights was a bit tricky only because it takes a bit of guesswork and guts to poke holes for wires and find the mounting screw holes. A long sharp probe worked well here to find the holes. You'll also notice I didn't take the windows out (you're supposed to) but I wasn't feeling lucky and glass is sort of fragile ;-). I also used a little spray glue on the vertical pieces  - may not be required if you remove windows.
Installation of the rear interior lights was a bit tricky only because it takes a bit of guesswork and guts to poke holes for wires and find the mounting screw holes. A long sharp probe worked well here to find the holes. You'll also notice I didn't take the windows out (you're supposed to) but I wasn't feeling lucky and glass is sort of fragile ;-). I also used a little spray glue on the vertical pieces - may not be required if you remove windows.
0 2016/06/30 14:37:39 Treozen
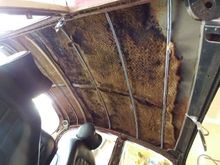
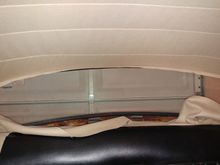
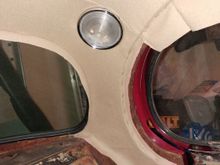
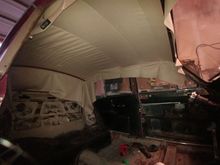
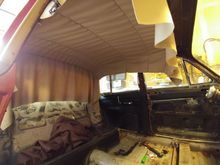
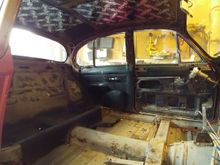
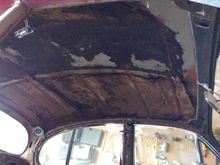
There's some debate on where to start, But I start in the middle, stretching ans smoothing both sides, working my way forward, then back. I probably removed most of the staples in place here for later adjustments - so expect to staple, adjust, stretch, staple-again.
0 2016/06/30 14:34:29 Treozen
0 2016/06/30 14:31:55 Treozen
Next, up went some Dynamat,
0 2016/06/30 14:30:24 Treozen
The tar-laden backing however was another story. What worked here was a semi-stiff putty knife with a 1.5-inch wide blade, elbow grease, and a few blisters. I found it good to sharpen the edge of the putty knife every so often. The roof metal is pretty thick but be careful not to make lines or dents - scrape with aggressive care.
0 2016/06/30 14:27:00 Treozen
In the beginning, there was a roof with nasty old underlay. I actually removed this by sticking my shop vac against the roof and running it back and forth - it was that rotten.
0 2016/06/30 14:25:46 Treozen
TEst to see what it says and looks like
0 2016/06/30 14:25:02 Treozen
0 2016/06/30 14:22:09 Treozen
 
 
First
Page
3 of 3
Last
Go To
Page
  • 1
  • 2
  • 3
3 of 3
Go To GO
Go to page of 3 pages
  • 1
  • 2
  • 3

Top
Jaguar Forums - Jaguar Enthusiasts Forum
  • Contact Us
  • FAQ
  • Archive
  • Advertising
  • Cookie Policy
  • Privacy Statement
  • Terms of Service
  • Your Privacy Choices
  • Manage Preferences

© 2026 MH Sub I, LLC dba Internet Brands

Follow Us        


When you click on links to various merchants on this site and make a purchase, this can result in this site earning a commission. Affiliate programs and affiliations include, but are not limited to, the eBay Partner Network.