LOG IN
REGISTER
Forums
General Jaguar Forums
New Member Area - Intro a MUST
Jaguar Forums Feedback & Suggestion Center
General Tech Help
Jaguar Models ( Current )
XF (X260)
F-Type ( X152 )
XE ( X760 )
E-Pace
F-Pace (X761) / C-X17
I-Pace EV
Jaguar Models ( Modern )
XF and XFR ( X250 )
XJ ( X351 )
X-Type ( X400 )
S-Type / S type R Supercharged V8 ( X200 )
XJ XJ6 / XJ8 / XJR ( X350 & X358 )
XJ XJ8 / XJR ( X308 )
XJ XJ12 ( X305 )
XJ XJ6 / XJR6 ( X300 )
XK8 / XKR ( X100 )
XK / XKR ( X150 )
Jaguar Models ( Classics )
Mark V - X 420G
MKI / MKII S type 240 340 & Daimler
XK120 XK140 XK150
E type ( XK-E )
XJ6 & XJ12 Series I, II & III
XJS ( X27 )
XJ40 ( XJ81 )
XKSS
XJ220
Other Jaguars
Other Jaguar Models / Concepts / Replicas
Diesel variants
Diesel variants - All models
Non Jaguar vehicles
Non-Jaguar Vehicles
Brand Review
Jaguar Press release
Jaguar Customer Relationship Centre
Jaguar Engines & transmissions
Wheels / Tires, Suspension & handling
Interior
Exterior
Audio/Visual Electronics
Detailing / Car care
Motorsports
Jaguar Classifieds
Marketplace
PRIVATE For Sale / Trade or Buy Classifieds
VENDOR 'For Sale' Classifieds
Regional
US Northeast
US Central
US Southwest
US Western
US Northwest
US Midwest
US Mid Atlantic
US Lower Atlantic
US Southern Midwest
Canada
Mexico, South America
UK & Eire
Europe
Australia - Queensland
Australia - New South Wales / ACT
Australia - Victoria / Tasmania
Australia - Western
Australia - South / NT
New Zealand
Other Areas
Official Site Sponsors
VENDOR Threads
General Interest / History
Sights N Sounds
Photography
Forum announcement archives / Forum History
Jaguarforums Merchandise
Memorial Section
News
Marketplace
Vendor Directory
Become a Vendor
Member Marketplace
Vendor Marketplace
Site Store
New Posts
Tools
Car Payment Calculator
Tire Rim Calculator
Vin Decoder
Recalls
Technical Service Bulletins (TSBs)
Members List
Live Feed
Gallery
View Dark Mode
Please register or login to enable Dark Mode.
Log In
Register
Threads
Google
Threads
Posts
Advanced
Dark Mode
Please register or login to enable Dark Mode.
Log In
Forgot your Password?
By logging into your account, you agree to our
Terms of Use
and
Privacy Policy
, and to the use of cookies as described therein.
or
Login with Google
Login with Facebook
Recent
Commented
Albums
My Pictures
My Post Pictures
Red
November 6, 2016
125
0
Sort:
Default
Default
Most Recent
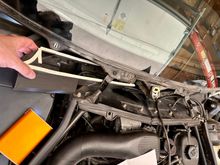
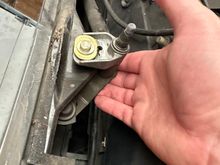
Clearance of the wiper linkage is about a half inch here when running. The housing can be shifted side to side a little before tightening and I shifted it a tad to the toward passenger side for better clearance.
0
2023/05/27 22:07:06
Red
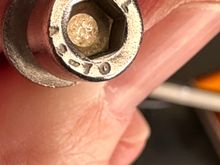
These screws they sent went right in but getting an Allen wrench on the other, very hard to see driver's side one was awkward, I ultimately used a passthrough ratchet and an Allen bit, a ball head Allen wrench would likely work too.
0
2023/05/27 22:07:11
Red
Inserting it face down and then tipping it back up once in there seemed to work best.
0
2023/05/27 22:07:16
Red
5 MM Allen head bolts they sent worked fine
0
2023/05/27 22:07:19
Red
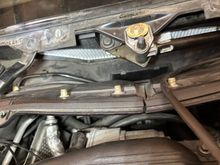
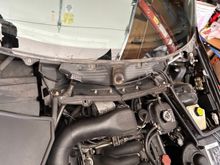
I loosened this bolt but did need remove it. Lifting up the linkage a little gets you just enough clearance.
0
2023/05/27 22:07:23
Red
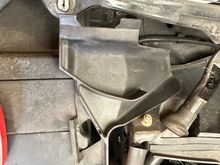
Removing the water shedder was only one bolt and helped a lot
0
2023/05/27 22:07:27
Red
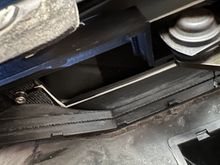
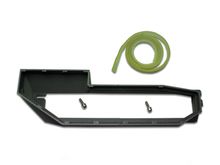
Plan on maybe replacing or touching up the double sided foam tape under this water shedder to keep it sealing well and keep your filter more dry-ish.
0
2023/05/27 22:07:31
Red
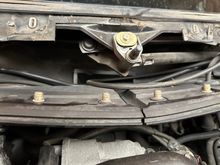
See that water rectangular drain down in the middle? That was popped up and wouldn't stay down in place (meant to snap in place with 2 little nibs but heat/age deformed enough to not stay in anymore) so I used 4 thin strips of double sided mounting tape to stick in down in there better. Once again thinking better drainage means drier filter.
0
2023/05/27 22:07:34
Red
You put the double sided foam tape on the back side to seal against the firewall. That surface and the housing are slightly curved rather than flat, btw.
0
2023/05/27 22:07:38
Red
0
2023/10/07 14:03:37
Red
Kinked Antenna Mast
0
2023/12/10 00:41:43
Red
0
2023/12/10 00:41:46
Red
0
2024/03/03 20:00:41
Red
0
2024/03/10 11:54:01
Red
0
2024/03/10 11:58:36
Red
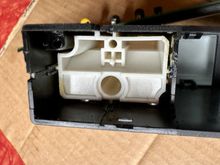
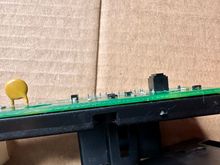
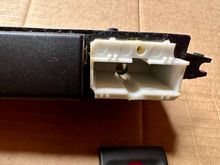
Rear view of hazard switch inner button.
0
2024/05/31 20:41:26
Red
The middle buttons are similar but smaller and tend not to stick.
0
2024/05/31 20:41:31
Red
The 4 channels it slides in should be clean and lubricated.
0
2024/05/31 20:41:36
Red
0
2024/05/31 20:41:40
Red
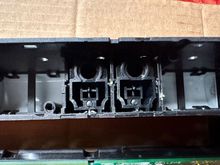
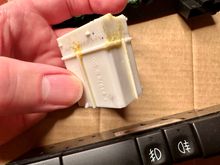
This is the actual underlying button. When pressed the top 2 layers are flush with the 3rd layer. The button is spring loaded and does not stat in when pressed
0
2024/05/31 20:41:45
Red
0
2024/05/31 20:41:50
Red
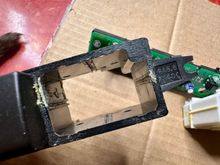
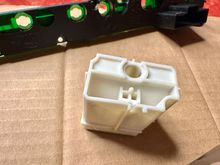
The nub between the 2 small squares is what presses the underlying button (rear view of inner button).
0
2024/05/31 20:41:53
Red
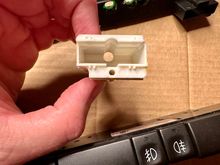
The bigger round hole is for the backlighting bulb, the smaller one is only used on the buttons that have an LED on indicator led like the seat heaters or Trac/ Off buttons
0
2024/05/31 20:41:58
Red
0
2024/05/31 20:42:02
Red
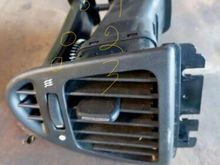
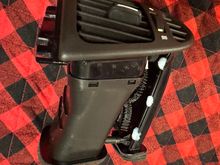
3 more holes in top of side de-mister duct
0
2024/08/12 08:26:46
Red
0
2024/08/12 08:26:53
Red
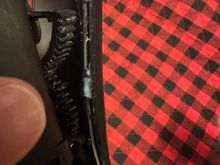
3 holes in bottom of side de-mister duct
0
2024/08/12 08:26:44
Red
I caulked mine shut with clear-drying silicone
0
2024/08/12 08:26:49
Red
0
2024/09/07 13:45:57
Red
0
2024/09/07 14:05:50
Red
0
2024/09/07 13:45:23
Red
0
2024/09/07 13:45:34
Red
0
2024/09/07 13:45:42
Red
0
2024/09/07 13:45:50
Red
0
2024/09/17 14:44:32
Red
0
2024/09/16 12:53:02
Red
0
2024/12/11 14:05:22
Red
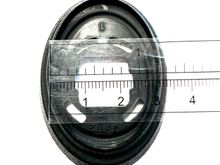
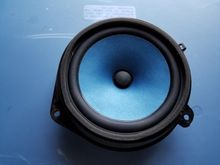
side bolster heaters. I think the measurements will fit
0
2025/01/24 15:16:53
Red
0
2025/01/24 15:16:56
Red
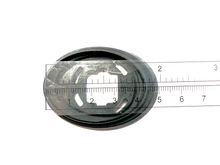
one of the 2-part main elements. The kit comes 2 of these, enough for 1 seat.
0
2025/01/24 15:16:57
Red
First
Page
2 of 4
Last
Go To
Page
1
2
3
4
2 of 4
Go To
GO
Go to page
of 4
pages
1
2
3
4