
3M Headlight Restoration Project w/ pics WOW
#21
 11-20-2012, 01:38 PM

Veteran Member
Join Date: Nov 2006
Location: Glasgow, Scotland UK
Posts: 47,302
Received 9,011 Likes
on
4,114 Posts

#22
11-21-2012, 10:32 AM

So I restored my headlights over the weekend, and the results were pretty much amazing, hard to believe actually. I have tried EVERYTHING, even other abrasive kits. I know there are plenty of threads about this, but it is a prevelent issue and as our vehicles get older, they only get worse. Anyways, I wanted to tell you guys that this is the REAL DEAL, and wanted to share some pics and tips. Please note, I was extremely skeptical and nervous about sanding my headlight lenses, but you cant be. Need to get right in there and sand them down. This took me about 3 hrs, I went a little over board but I wanted to make sure they were done right.
http://www.amazon.com/3M-Headlight-L.../dp/B001AIZ5HY
You can get this at your local auto parts store, but it will run you $20-$30 at least.
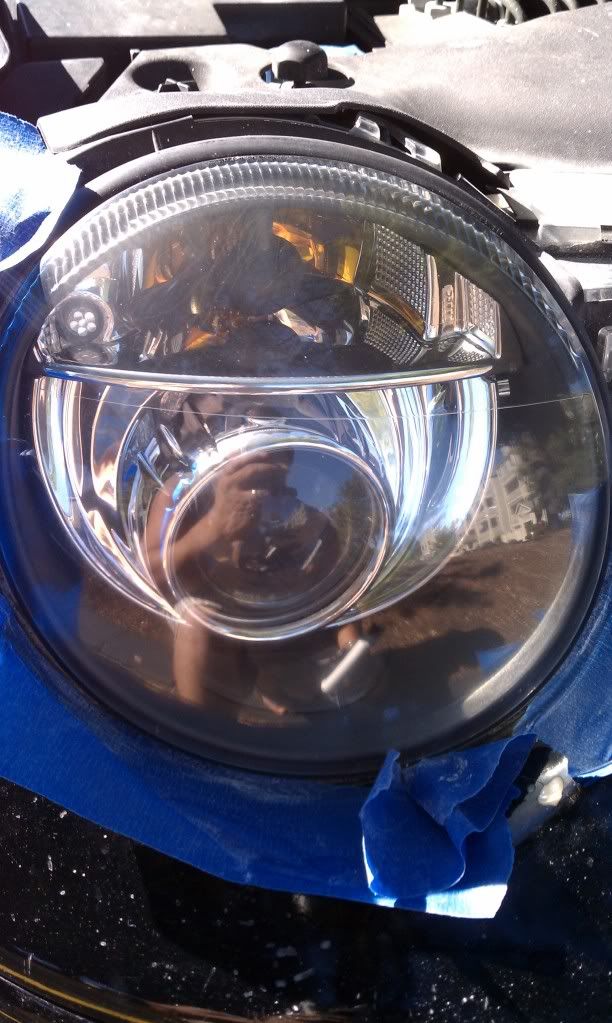
Step One: Use the low grit and sand your lenses with a household drill and attachment. MAKE SURE you do it evenly and dont be afraid to really sand them down, obviously avoidign burning the lenses from the heat the rotating disc creates. VERY IMPORTANT, and this is where I messed up last time. There IS a protective UV layer on top of our lenses, you absolutely need to remove this. You can tell if it is still on there by wiping down the lens with a microfiber during the dry sanding stage. It should look like the pic below, if there is any of that layer on there it will look uneven and almost clear. This layer needs to be completely removed and is the most time consuming.

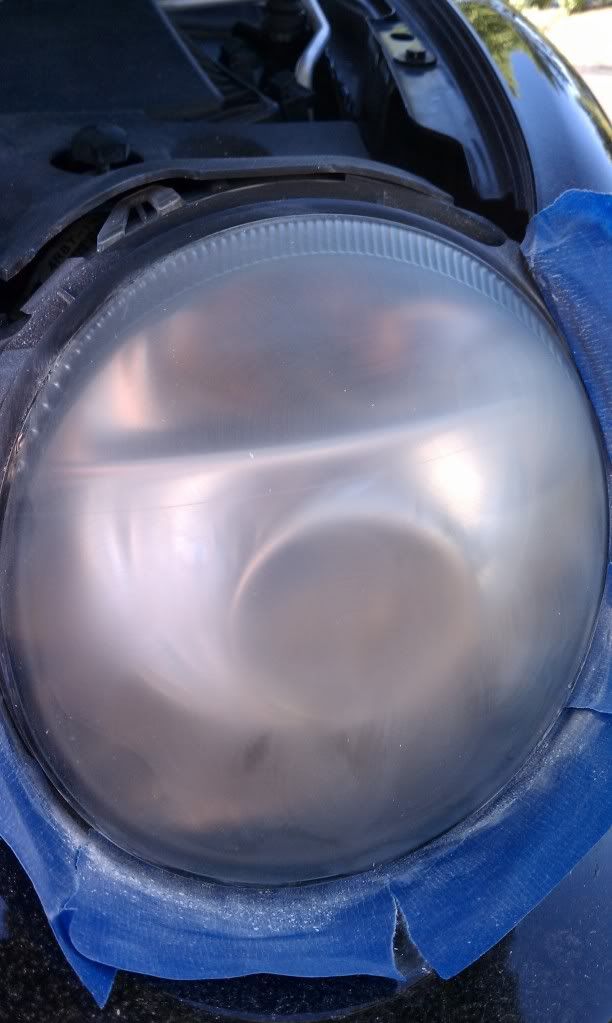
Above you can still see those "clearer" marks, that is the coating, needs to come off so the lens looks completely cloudy.
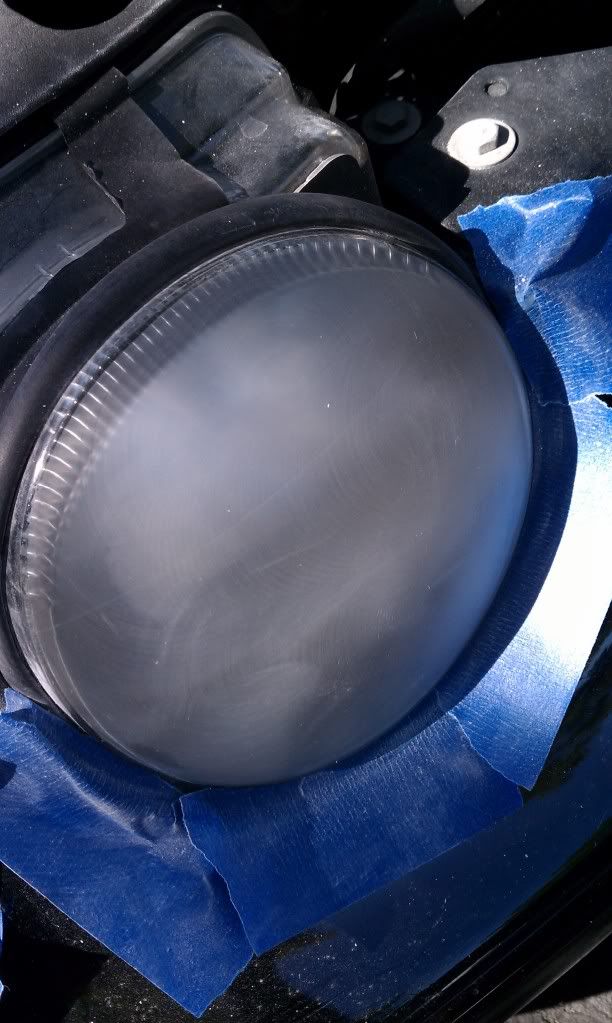
And again on the bottom left corner, I am emphasising this because it is the most important tip i can give. It will not look right if you do not remove this layer.
STEP 2: Dry sand with the supplied higher grit, again, keep wiping off dust so you can see that the deeper scratches are being becomming thinner. I made about 12 passes on each stage, maybe more.
STEP 3: Use the wet sanding pad, use a spray bottle and make sure both the lenses and pad is damp. This is also a very important step, use this pad until almost all scratches are removed or so microscopic that you cannot see them. The lense will begin to be "somewhat" clear, still cloudy though. Again, keep wiping the lense free of debris and spatter (there will be alot) to make sure you get it smooth.
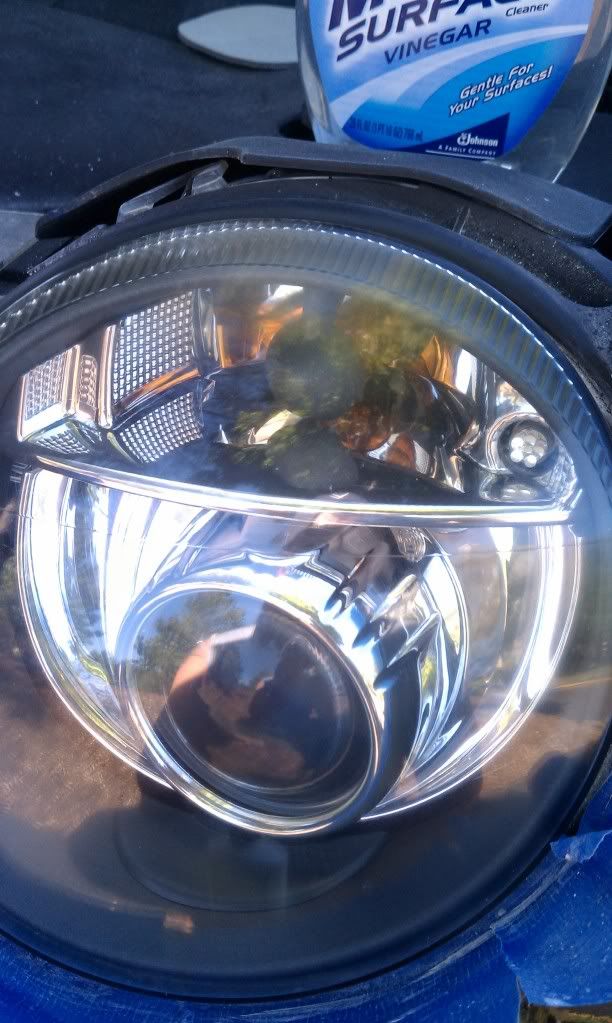
STEP 4: Use the polishing compound with the foam applicator attachment and polish the crap out of it, use the whole packet. apply, then polish with microfiber, then apply, polish etc. This should make your headlight CLEAR.
STEP 5: I also used MEGUIRES PLASTIX with the applicator after it was cleaned....again, apply, make 10-12 passes, then polish with microfiber towel.
STEP 6: Put some wax or clearcoat protectant over them, for added protection (optional)
STEP 7: Also optional, I am buying headlamp protective film so the elements do not cause this issue again. Have not found them yet, but they are out there. If anyone knows a good place to get them, let me know.
YOUR DONE!
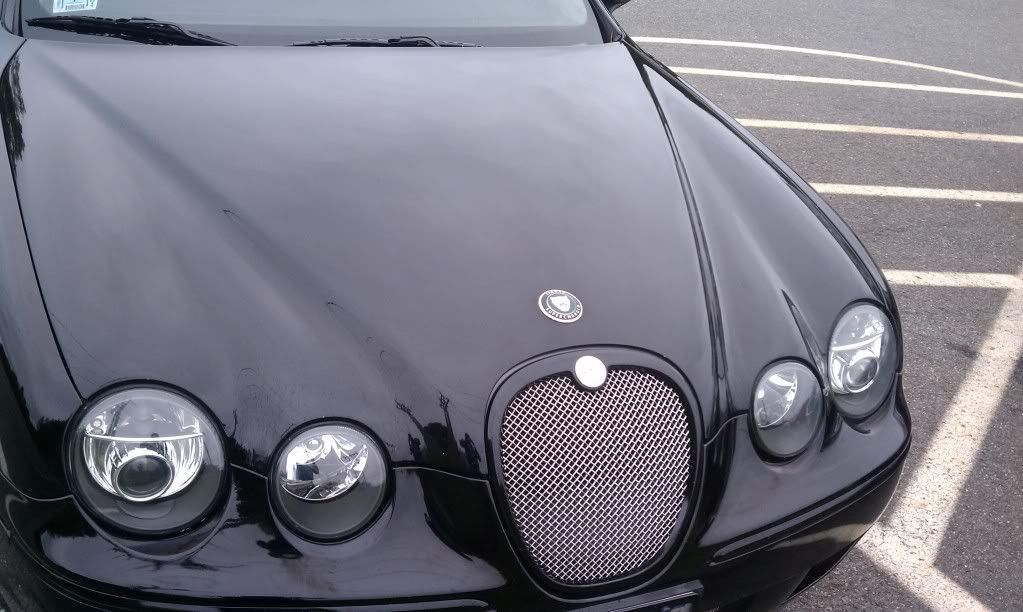
BEFORE
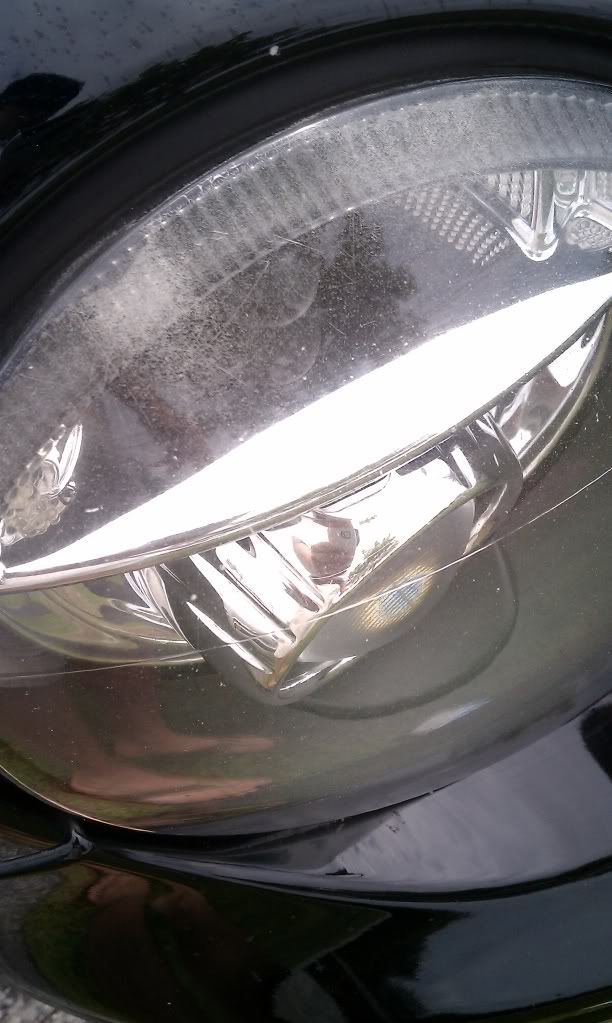
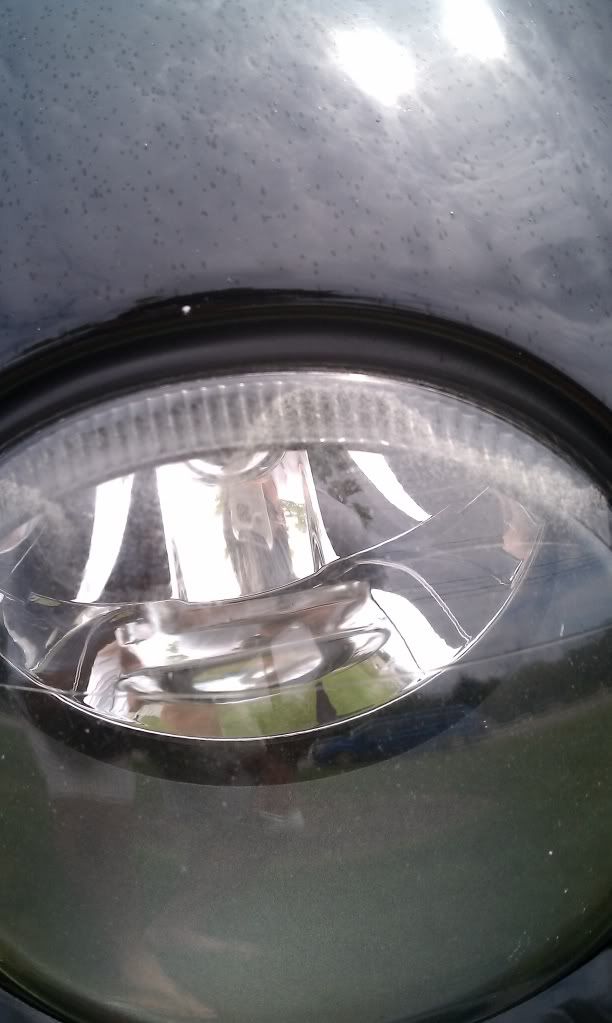
AFTER

Remember to keep your drill batteries charged, that was a PITA, had to switch batteries about 5 times.
Hope this helps, and good luck!
http://www.amazon.com/3M-Headlight-L.../dp/B001AIZ5HY
You can get this at your local auto parts store, but it will run you $20-$30 at least.
Step One: Use the low grit and sand your lenses with a household drill and attachment. MAKE SURE you do it evenly and dont be afraid to really sand them down, obviously avoidign burning the lenses from the heat the rotating disc creates. VERY IMPORTANT, and this is where I messed up last time. There IS a protective UV layer on top of our lenses, you absolutely need to remove this. You can tell if it is still on there by wiping down the lens with a microfiber during the dry sanding stage. It should look like the pic below, if there is any of that layer on there it will look uneven and almost clear. This layer needs to be completely removed and is the most time consuming.
Above you can still see those "clearer" marks, that is the coating, needs to come off so the lens looks completely cloudy.
And again on the bottom left corner, I am emphasising this because it is the most important tip i can give. It will not look right if you do not remove this layer.
STEP 2: Dry sand with the supplied higher grit, again, keep wiping off dust so you can see that the deeper scratches are being becomming thinner. I made about 12 passes on each stage, maybe more.
STEP 3: Use the wet sanding pad, use a spray bottle and make sure both the lenses and pad is damp. This is also a very important step, use this pad until almost all scratches are removed or so microscopic that you cannot see them. The lense will begin to be "somewhat" clear, still cloudy though. Again, keep wiping the lense free of debris and spatter (there will be alot) to make sure you get it smooth.
STEP 4: Use the polishing compound with the foam applicator attachment and polish the crap out of it, use the whole packet. apply, then polish with microfiber, then apply, polish etc. This should make your headlight CLEAR.
STEP 5: I also used MEGUIRES PLASTIX with the applicator after it was cleaned....again, apply, make 10-12 passes, then polish with microfiber towel.
STEP 6: Put some wax or clearcoat protectant over them, for added protection (optional)
STEP 7: Also optional, I am buying headlamp protective film so the elements do not cause this issue again. Have not found them yet, but they are out there. If anyone knows a good place to get them, let me know.
YOUR DONE!
BEFORE
AFTER
Remember to keep your drill batteries charged, that was a PITA, had to switch batteries about 5 times.
Hope this helps, and good luck!
#24
11-22-2012, 05:26 AM

#25
11-22-2012, 12:23 PM
Veteran Member
Join Date: Nov 2006
Location: Glasgow, Scotland UK
Posts: 47,302
Received 9,011 Likes
on
4,114 Posts

#26
12-28-2012, 04:07 AM
Senior Member
Join Date: Dec 2009
Location: That Rectangular Hole in the Consciousness of America
Posts: 502
Received 132 Likes
on
91 Posts
Here's a tip from a young fellow over in the X-Type section of the forum.
This recipe of his seems to be likely the very same stuff that is sold on the Television Infomercials for about $35 USD for 2 ounces to treat the plastic trim (interior and exterior) of up to two cars. (That stuff is warrantied to keep plastic shiny and bright for two years).
Don't forget to drop by his post and leave him a "Thank You for the Post" click if you like it!
I have an update on headlight restoration. The kits work well, but after a little bit, they get hazy again. I've actually started to do headlight restorations as a side job now because I have discovered a secret weapon to seal the headlights after you're done. It's kinda weird, but it works reaaaaaally well and lasts many years. So here it is... After you have wet sanded the headlight down, dip the side of a shop towel in a 1:1 mixture of helmsman spar glossy urethane and mineral spirits. Works like a freaking charm and took me a little bit to figure out, but I was blown away at how will this works!
Don't forget to drop by his post and leave him a "Thank You for the Post" click if you like it!
#27
01-08-2013, 03:36 PM

I would like to try this 3M kit, however, the instructions manual says that it can not be used for glass. How do I find out if weather my lenses are glass of plastic? It seems to me that they are made of glass (judging from the sound when knocking on them), but could it be some kind of special plastic?
2003 S-Type 6
2003 S-Type 6
#28
01-09-2013, 03:50 AM
It's almost certain the headlamp plastic is "optical plastic" used for compact discs and spectacle lenses. This is a very hard plastic, being scratch resistant, but not prohibitively expensive.
One of the ways to help the laser in a cd player stay on track (track-following is an analog process, only the audio is digitized) is to wax-polish the disc surface if you get track skipping (after examination of the disc surface for minute traces of foreign matter). It would follow that waxpolishing a plastic car headlamp lens could well be beneficial. But then there is the factor of heat from the lamp filament. Maybe that polish that "can stand the burning heat of the Arizona desert" might be appropriate.
Just a thought....
Leedsman.
#29
01-10-2013, 11:48 AM
It's almost certain the headlamp plastic is "optical plastic" used for compact discs and spectacle lenses. This is a very hard plastic, being scratch resistant, but not prohibitively expensive.
One of the ways to help the laser in a cd player stay on track (track-following is an analog process, only the audio is digitized) is to wax-polish the disc surface if you get track skipping (after examination of the disc surface for minute traces of foreign matter). It would follow that waxpolishing a plastic car headlamp lens could well be beneficial. But then there is the factor of heat from the lamp filament. Maybe that polish that "can stand the burning heat of the Arizona desert" might be appropriate.
Just a thought....
Leedsman.
One of the ways to help the laser in a cd player stay on track (track-following is an analog process, only the audio is digitized) is to wax-polish the disc surface if you get track skipping (after examination of the disc surface for minute traces of foreign matter). It would follow that waxpolishing a plastic car headlamp lens could well be beneficial. But then there is the factor of heat from the lamp filament. Maybe that polish that "can stand the burning heat of the Arizona desert" might be appropriate.
Just a thought....
Leedsman.
#30
01-10-2013, 11:52 AM
Veteran Member
Do a better job of masking than this guy did unless you want to spend a day with a clay bar taking off overspray....
Take care,
George

Thread
Thread Starter
Forum
Replies
Last Post
andyw
New Member Area - Intro a MUST
10
09-26-2015 01:59 PM
IndyNate
New Member Area - Intro a MUST
10
09-24-2015 08:37 PM
Ipc838
PRIVATE For Sale / Trade or Buy Classifieds
1
09-13-2015 03:27 PM
Currently Active Users Viewing This Thread: 1 (0 members and 1 guests)