
3M Headlight Restoration Project w/ pics WOW

Thread Starter
|
Senior Member
Joined: Mar 2009
Posts: 918
Likes: 27
From: Boston, USA
So I restored my headlights over the weekend, and the results were pretty much amazing, hard to believe actually. I have tried EVERYTHING, even other abrasive kits. I know there are plenty of threads about this, but it is a prevelent issue and as our vehicles get older, they only get worse. Anyways, I wanted to tell you guys that this is the REAL DEAL, and wanted to share some pics and tips. Please note, I was extremely skeptical and nervous about sanding my headlight lenses, but you cant be. Need to get right in there and sand them down. This took me about 3 hrs, I went a little over board but I wanted to make sure they were done right.
http://www.amazon.com/3M-Headlight-L.../dp/B001AIZ5HY
You can get this at your local auto parts store, but it will run you $20-$30 at least.
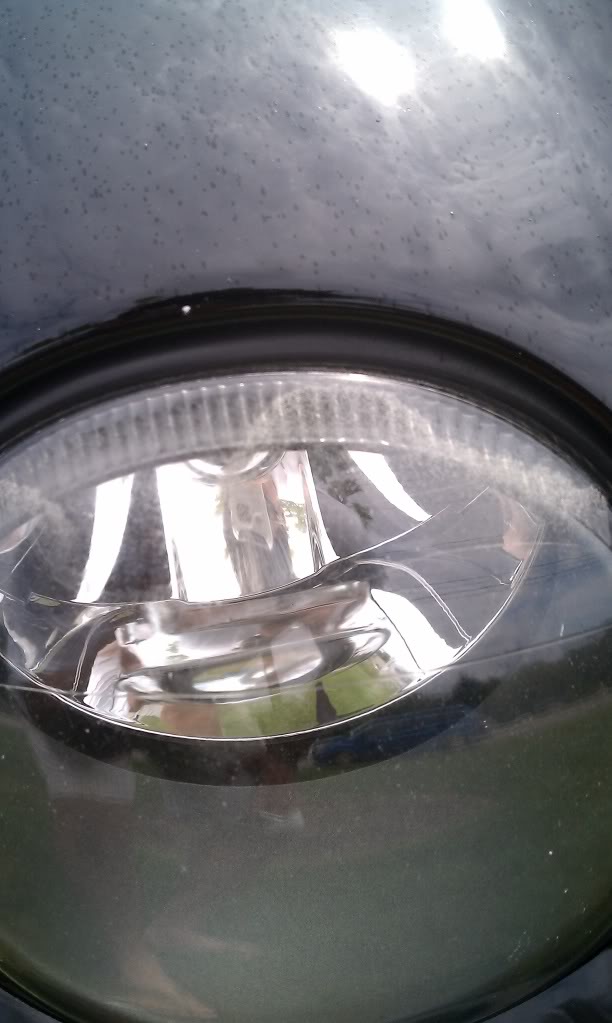
Step One: Use the low grit and sand your lenses with a household drill and attachment. MAKE SURE you do it evenly and dont be afraid to really sand them down, obviously avoidign burning the lenses from the heat the rotating disc creates. VERY IMPORTANT, and this is where I messed up last time. There IS a protective UV layer on top of our lenses, you absolutely need to remove this. You can tell if it is still on there by wiping down the lens with a microfiber during the dry sanding stage. It should look like the pic below, if there is any of that layer on there it will look uneven and almost clear. This layer needs to be completely removed and is the most time consuming.
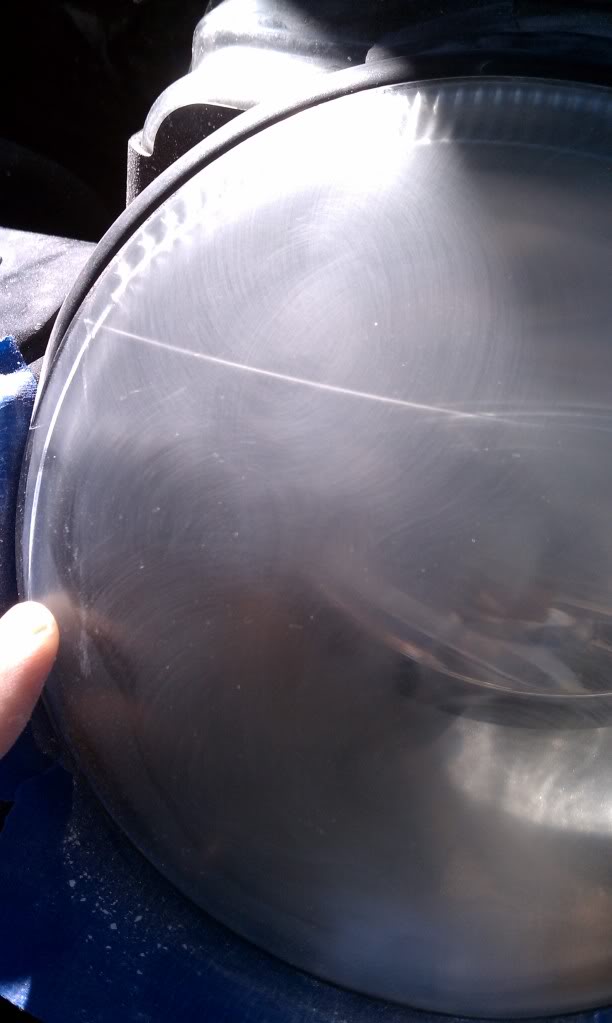
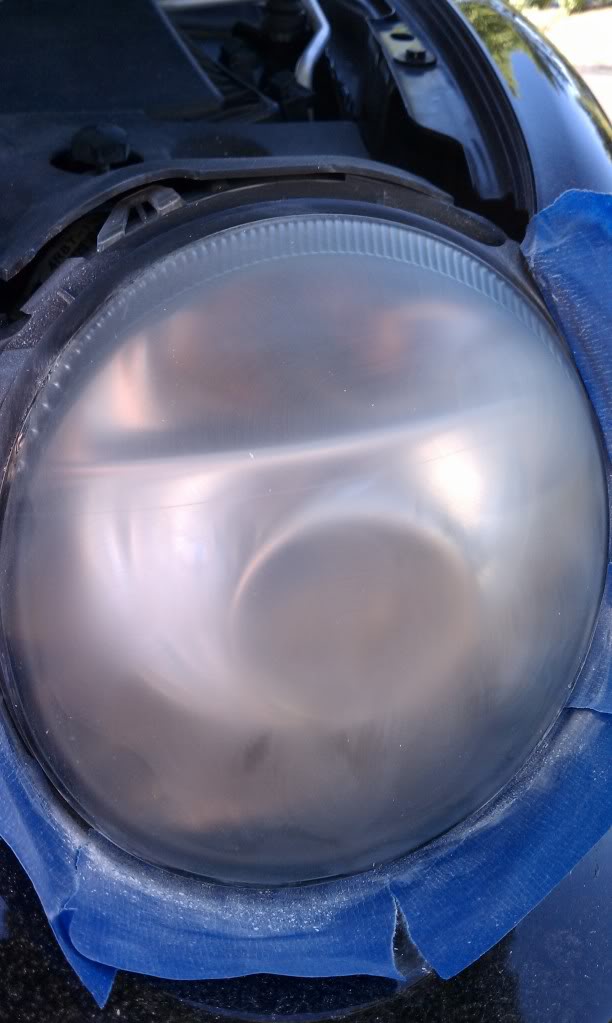
Above you can still see those "clearer" marks, that is the coating, needs to come off so the lens looks completely cloudy.
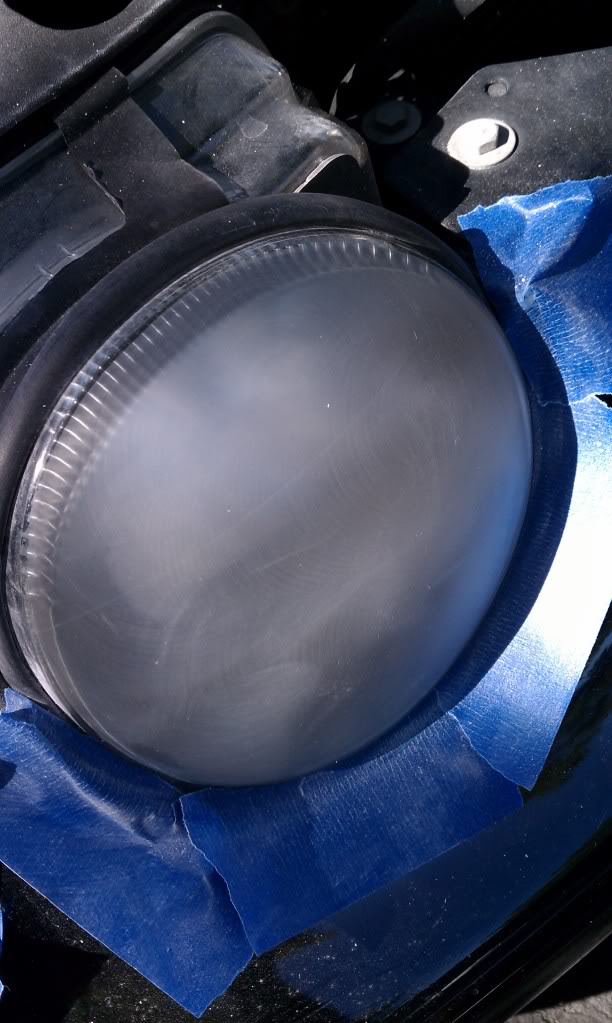
And again on the bottom left corner, I am emphasising this because it is the most important tip i can give. It will not look right if you do not remove this layer.
STEP 2: Dry sand with the supplied higher grit, again, keep wiping off dust so you can see that the deeper scratches are being becomming thinner. I made about 12 passes on each stage, maybe more.
STEP 3: Use the wet sanding pad, use a spray bottle and make sure both the lenses and pad is damp. This is also a very important step, use this pad until almost all scratches are removed or so microscopic that you cannot see them. The lense will begin to be "somewhat" clear, still cloudy though. Again, keep wiping the lense free of debris and spatter (there will be alot) to make sure you get it smooth.
STEP 4: Use the polishing compound with the foam applicator attachment and polish the crap out of it, use the whole packet. apply, then polish with microfiber, then apply, polish etc. This should make your headlight CLEAR.
STEP 5: I also used MEGUIRES PLASTIX with the applicator after it was cleaned....again, apply, make 10-12 passes, then polish with microfiber towel.
STEP 6: Put some wax or clearcoat protectant over them, for added protection (optional)
STEP 7: Also optional, I am buying headlamp protective film so the elements do not cause this issue again. Have not found them yet, but they are out there. If anyone knows a good place to get them, let me know.
YOUR DONE!
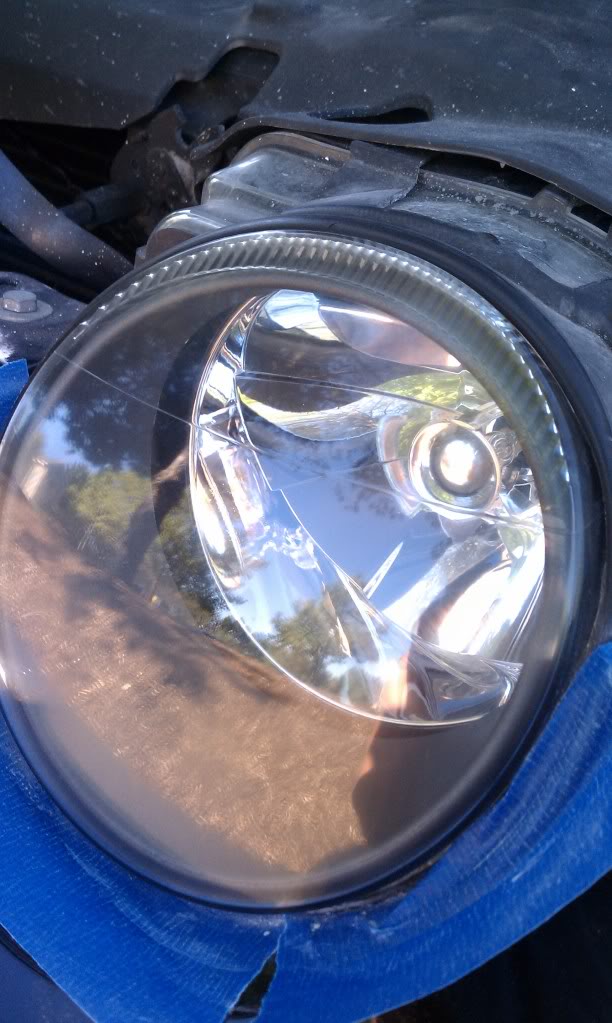
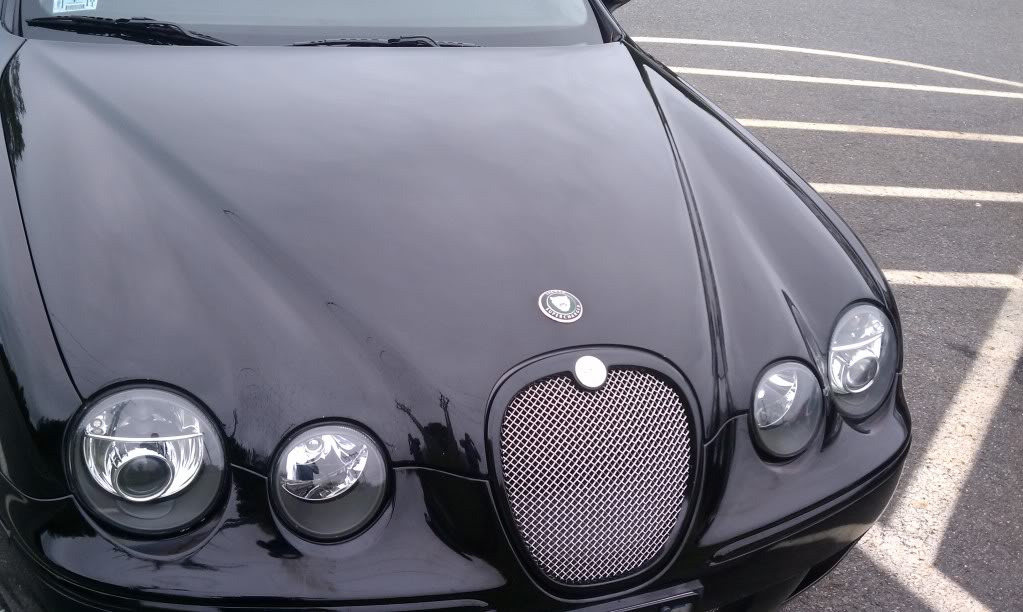
BEFORE
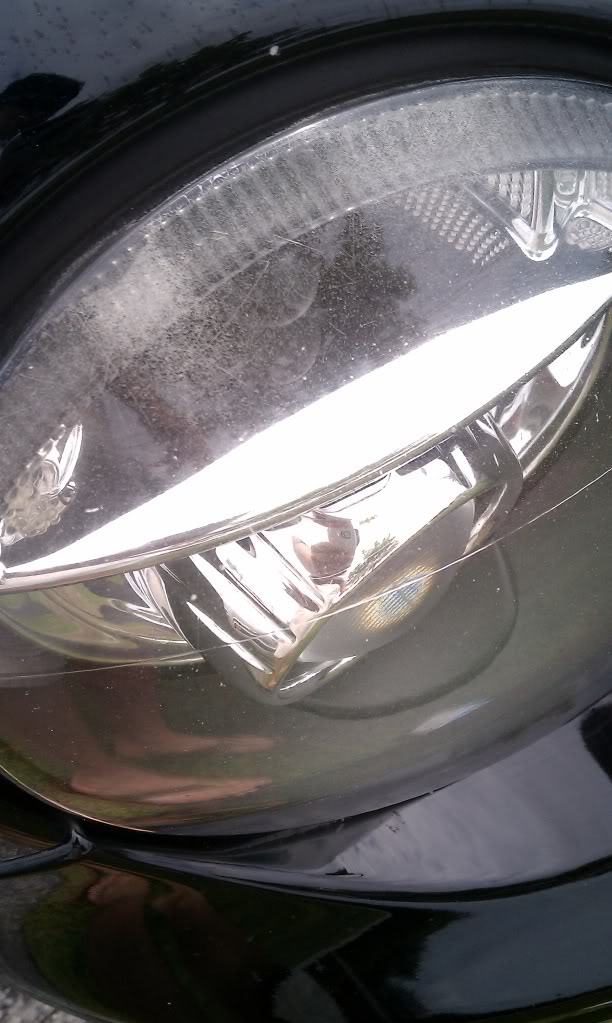
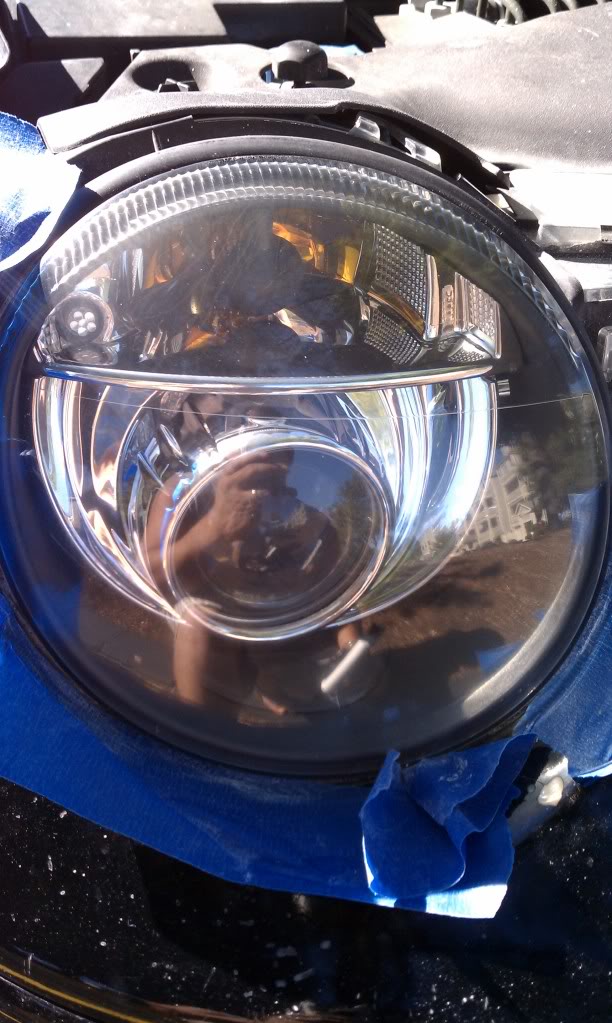
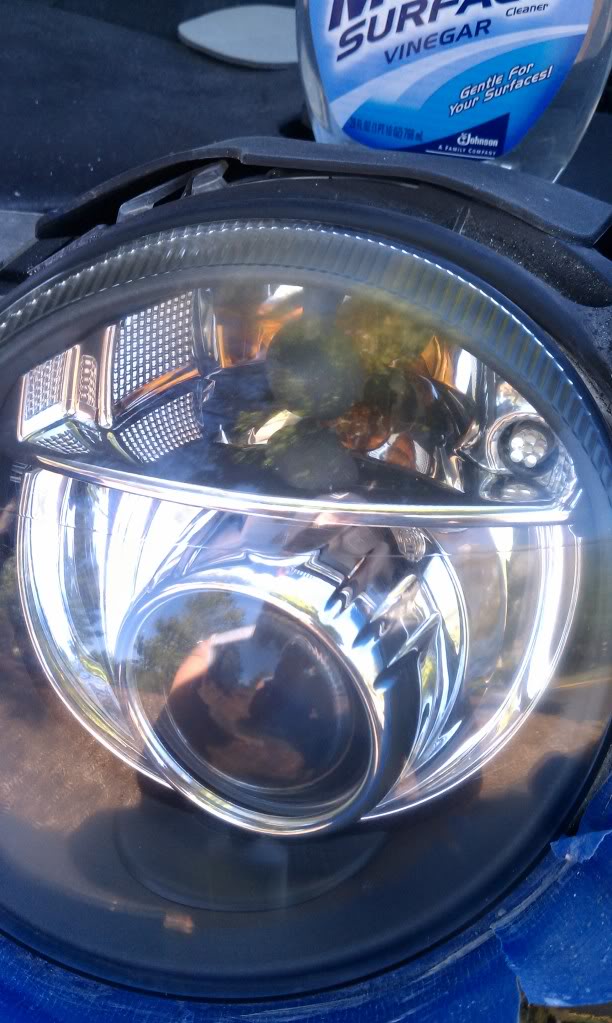
AFTER
Remember to keep your drill batteries charged, that was a PITA, had to switch batteries about 5 times.
Hope this helps, and good luck!
http://www.amazon.com/3M-Headlight-L.../dp/B001AIZ5HY
You can get this at your local auto parts store, but it will run you $20-$30 at least.
Step One: Use the low grit and sand your lenses with a household drill and attachment. MAKE SURE you do it evenly and dont be afraid to really sand them down, obviously avoidign burning the lenses from the heat the rotating disc creates. VERY IMPORTANT, and this is where I messed up last time. There IS a protective UV layer on top of our lenses, you absolutely need to remove this. You can tell if it is still on there by wiping down the lens with a microfiber during the dry sanding stage. It should look like the pic below, if there is any of that layer on there it will look uneven and almost clear. This layer needs to be completely removed and is the most time consuming.
Above you can still see those "clearer" marks, that is the coating, needs to come off so the lens looks completely cloudy.
And again on the bottom left corner, I am emphasising this because it is the most important tip i can give. It will not look right if you do not remove this layer.
STEP 2: Dry sand with the supplied higher grit, again, keep wiping off dust so you can see that the deeper scratches are being becomming thinner. I made about 12 passes on each stage, maybe more.
STEP 3: Use the wet sanding pad, use a spray bottle and make sure both the lenses and pad is damp. This is also a very important step, use this pad until almost all scratches are removed or so microscopic that you cannot see them. The lense will begin to be "somewhat" clear, still cloudy though. Again, keep wiping the lense free of debris and spatter (there will be alot) to make sure you get it smooth.
STEP 4: Use the polishing compound with the foam applicator attachment and polish the crap out of it, use the whole packet. apply, then polish with microfiber, then apply, polish etc. This should make your headlight CLEAR.
STEP 5: I also used MEGUIRES PLASTIX with the applicator after it was cleaned....again, apply, make 10-12 passes, then polish with microfiber towel.
STEP 6: Put some wax or clearcoat protectant over them, for added protection (optional)
STEP 7: Also optional, I am buying headlamp protective film so the elements do not cause this issue again. Have not found them yet, but they are out there. If anyone knows a good place to get them, let me know.
YOUR DONE!
BEFORE
AFTER
Remember to keep your drill batteries charged, that was a PITA, had to switch batteries about 5 times.
Hope this helps, and good luck!


Senior Member
Joined: Feb 2010
Posts: 976
Likes: 69
From: Leeds, UK.
An excellent piece by Bull27 if I may say so, and doesn't every picture tell a thousand words!
I've used jeweller's rouge for optical final polishing and it gives good results. It's fine for 'misting' of plastic lenses. I wonder what causes that?
Leedsman.
I've used jeweller's rouge for optical final polishing and it gives good results. It's fine for 'misting' of plastic lenses. I wonder what causes that?
Leedsman.

Veteran Member


Joined: Mar 2007
Posts: 11,393
Likes: 649
From: Planetarium

Trending Topics
Not sure but this may be the protective covers you're looking for?
http://www.autosportcatalog.com/vehi...protection.cfm
I've ordered two sets of Custom-fit S-type floor mats and a full set of custom-fit neoprene seat covers for an Excursion from this company and was very satisfied with their service.
http://www.autosportcatalog.com/vehi...protection.cfm
I've ordered two sets of Custom-fit S-type floor mats and a full set of custom-fit neoprene seat covers for an Excursion from this company and was very satisfied with their service.

Hi Bull, there is the write up c/w vids in the detailing section on this as you may know.
I've read through your post and the pics are great too, really helps to tell the story. Thanks so much for taking the time to do the write up as I'm sure it'll help a few more members feel more at ease about tackling the job themselves....nice one

Senior Member
Joined: Oct 2010
Posts: 168
Likes: 11
From: Michigan
Thanks for the write up. This definitely helps. My headlights have some small pits in them from gravel and other debris, but this kit should help shine up the headlights regardless making the car look much better and newer even.
Veteran Member
Joined: Dec 2006
Posts: 2,964
Likes: 507
From: Hamilton, NJ
Bull, do you have any idea what grits the papers are?
I'm sure this could be done with wet / dry sandpaper...
Also, besides windex, did you use anything to protect the new finish etc? Most of the detail shops that do this "professionally" spray a clearcoat over the freshly cleaned light.
George
I'm sure this could be done with wet / dry sandpaper...
Also, besides windex, did you use anything to protect the new finish etc? Most of the detail shops that do this "professionally" spray a clearcoat over the freshly cleaned light.
George

Senior Member
Joined: Dec 2010
Posts: 305
Likes: 19
From: Houston, TX
HI Bull
Nice Job,
i do have a question, (as i Have seen many Youtubes on how to clear the headlights) i was wondering if we need to add UV coating (it seems like a paste/ liquid then it will dry up over time under UV light / sun light)
thanks.
Nice Job,
i do have a question, (as i Have seen many Youtubes on how to clear the headlights) i was wondering if we need to add UV coating (it seems like a paste/ liquid then it will dry up over time under UV light / sun light)
thanks.
Thread Starter
|
Senior Member
Joined: Mar 2009
Posts: 918
Likes: 27
From: Boston, USA
Hey guys, will try to answer some of the questions:
-Not sure about the grit but you can most definately buy your own instead of the kit, however, I really liked the fact that it came with a base that fits in a household drill. I know the finishing 3M pad was something called Trizact. It was spongey and absorbed some of the water.
-I finished it off with "PlastiX" from Mcguires and a coat of wax. Nothing permenant. Just wanted to "seal" it as best I could. It dopesnt seem like the winter and salt has done anything to the finish. Still crystal clear but I would be interested in a permenant sealer if that is something that is necessary.
As I wrote in the post, to do this properly you need to sand off the "shiny layer" which I would presume to be a UV coating of some sorts. Not sure how these lenses are made, but one would think that since that needs to come off that it would be less resistent to yellowing or clouding, who knows.....
This WILL work for scratches, mine werent yellowed, they were just banged up with scratches, pitting etc. Also that "UV Layer" seemed to be coming off by itself. Just have to put a lot of elbow grease while sanding. Has anyone else done this after I posted the initial thread???
Veteran Member
Joined: Jun 2008
Posts: 2,015
Likes: 119
From: Sylvan Lake & Playa del Carmen Mexico
Used the 3M restorer on my son's car a few weeks ago. It worked waaaaay better than we expected. We did one light and then looked at the before and after and both said it at the same time "Holy ****". Didn't redo any UV coating just put wax on after we were done.
Nice Pics Joe, and the lights look great! There is another thread on the detailing forum. So there are others trying it.
https://www.jaguarforums.com/forum/s...ad.php?t=48284
I'll have to go the 3M route this summer when my daughter is home from school. I was very happy with the results of the Meguiar's kit I used for perhaps slightly less money and Waaaaayyyyy less work.....particularly since it was getting late and the ambient temp was so darn cold! I literally spent as much time or more lighting my shop heaters than I did polishing the lights.
Great job and thanks for posting,
Zane

Member
Joined: Jul 2012
Posts: 30
Likes: 5
From: Orlando
I read this thread and tried the kit as the lights on my 04 VPD were starting to haze. I did the first sanding and was really worried that I would need new headlights. I continued to the next sanding and then the wet sanding. Before I polished, my lights looked brand new. I polished with the rubbing compound included and my neighbor thought I had gotten a new front end. If you want clear headlights, try this kit. I used an electric drill and it took about 30 minutes for all 4 lights. I'm going to do my wife's Volvo XC90 this weekend. This product is amazing.