
Getting ready for Concours - Full detail with Paint Correction

Thread Starter
|
Veteran Member
Joined: May 2013
Posts: 1,147
Likes: 372
From: Hickory, NC
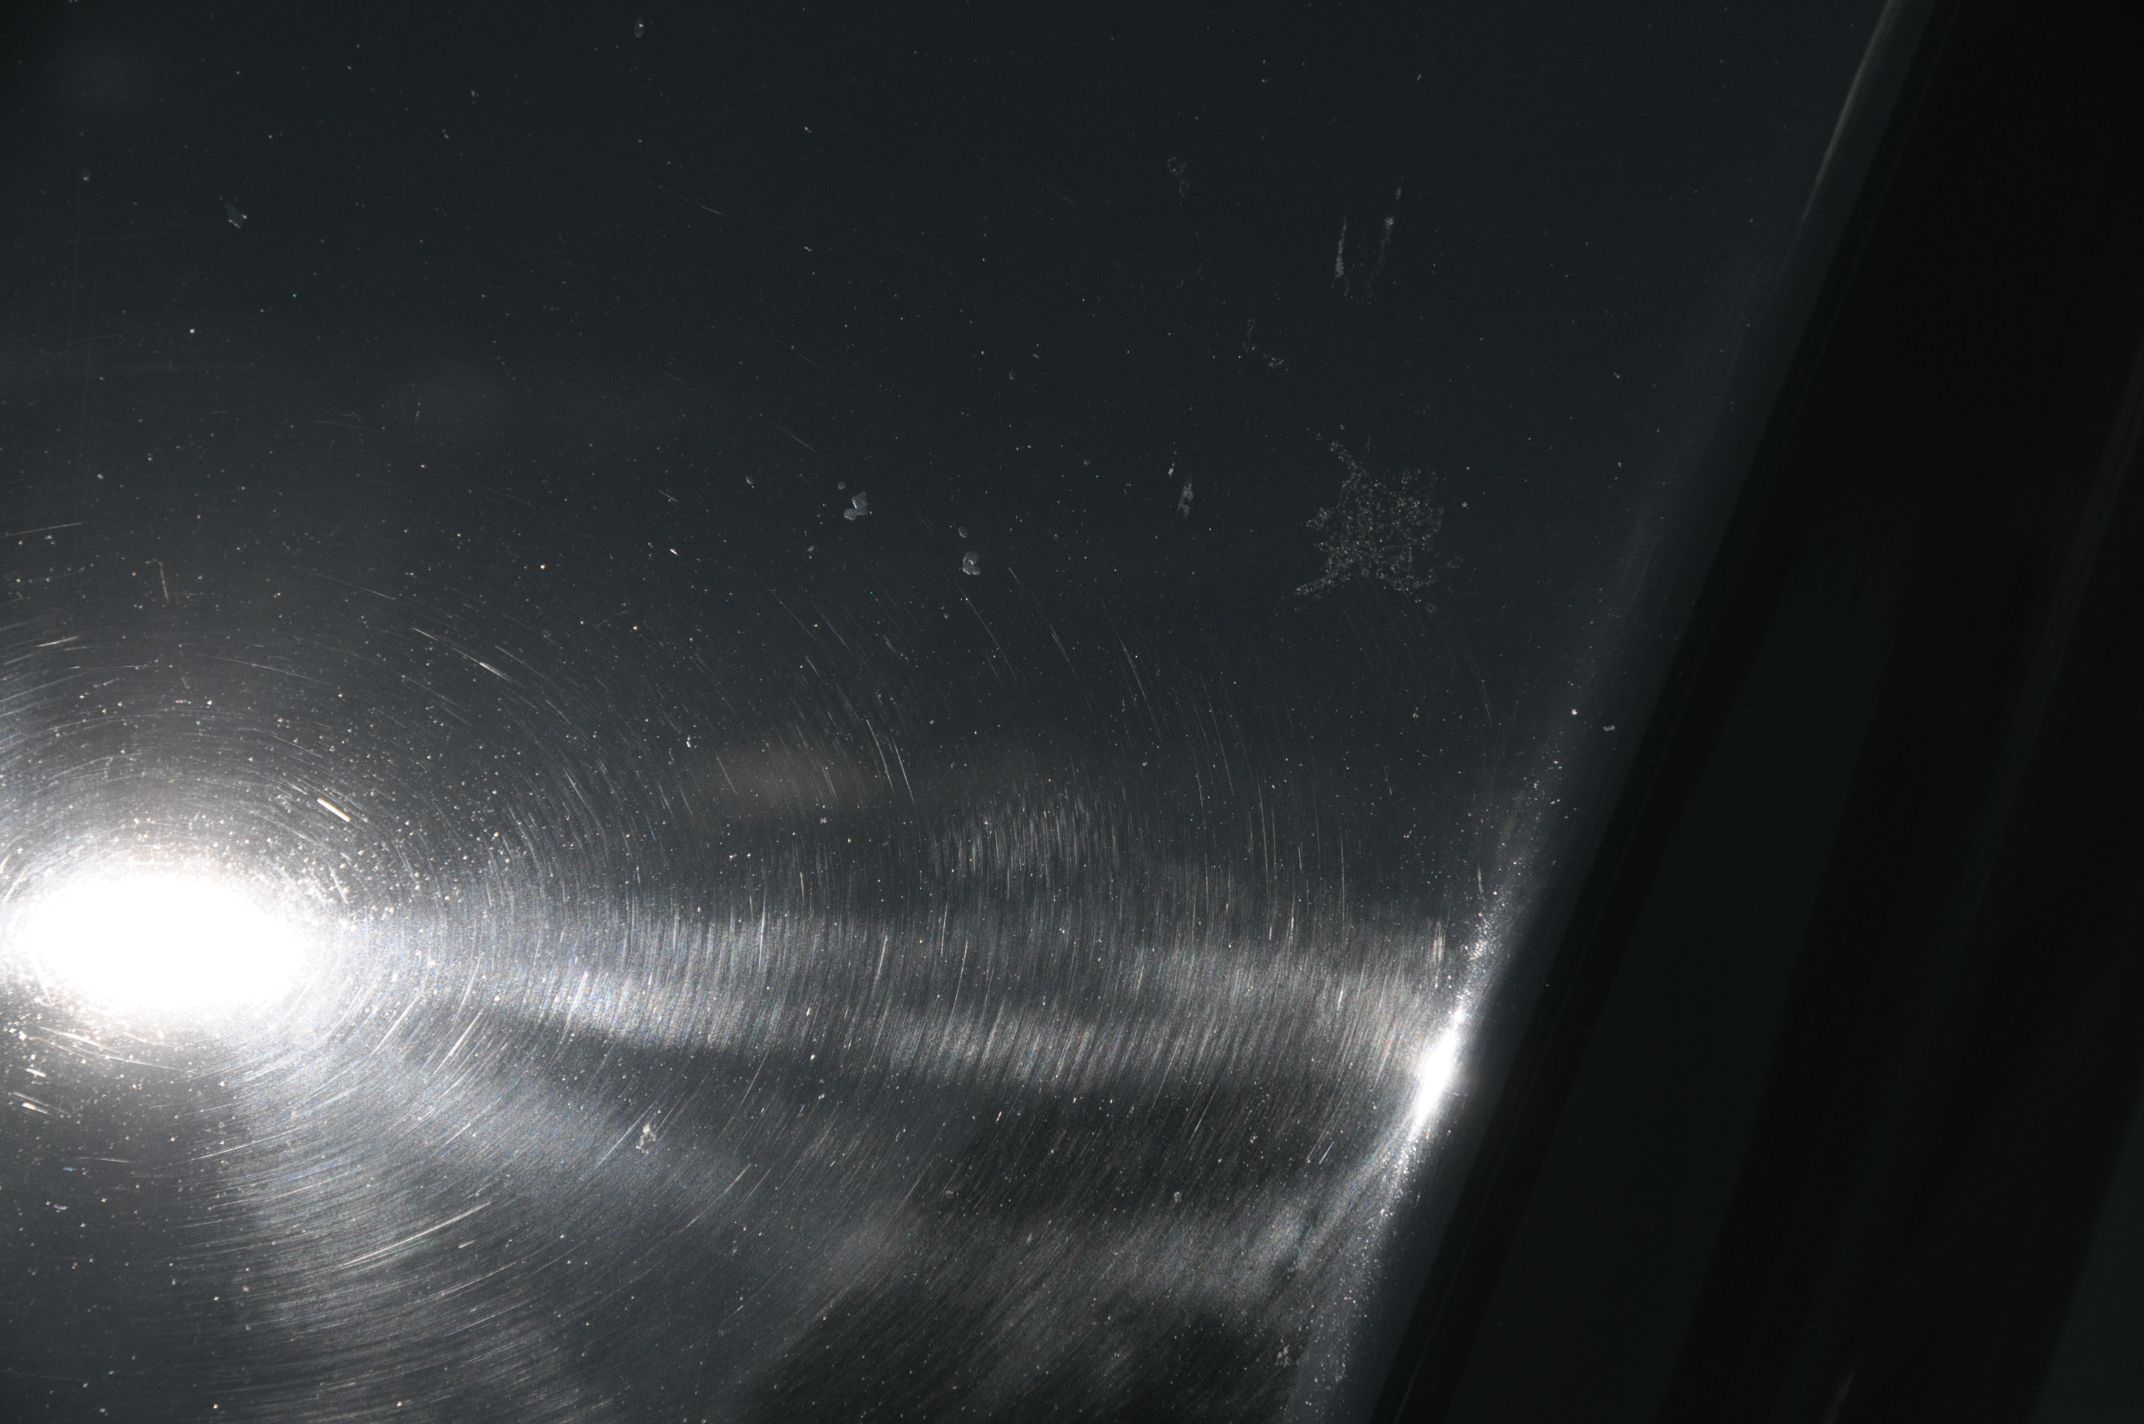
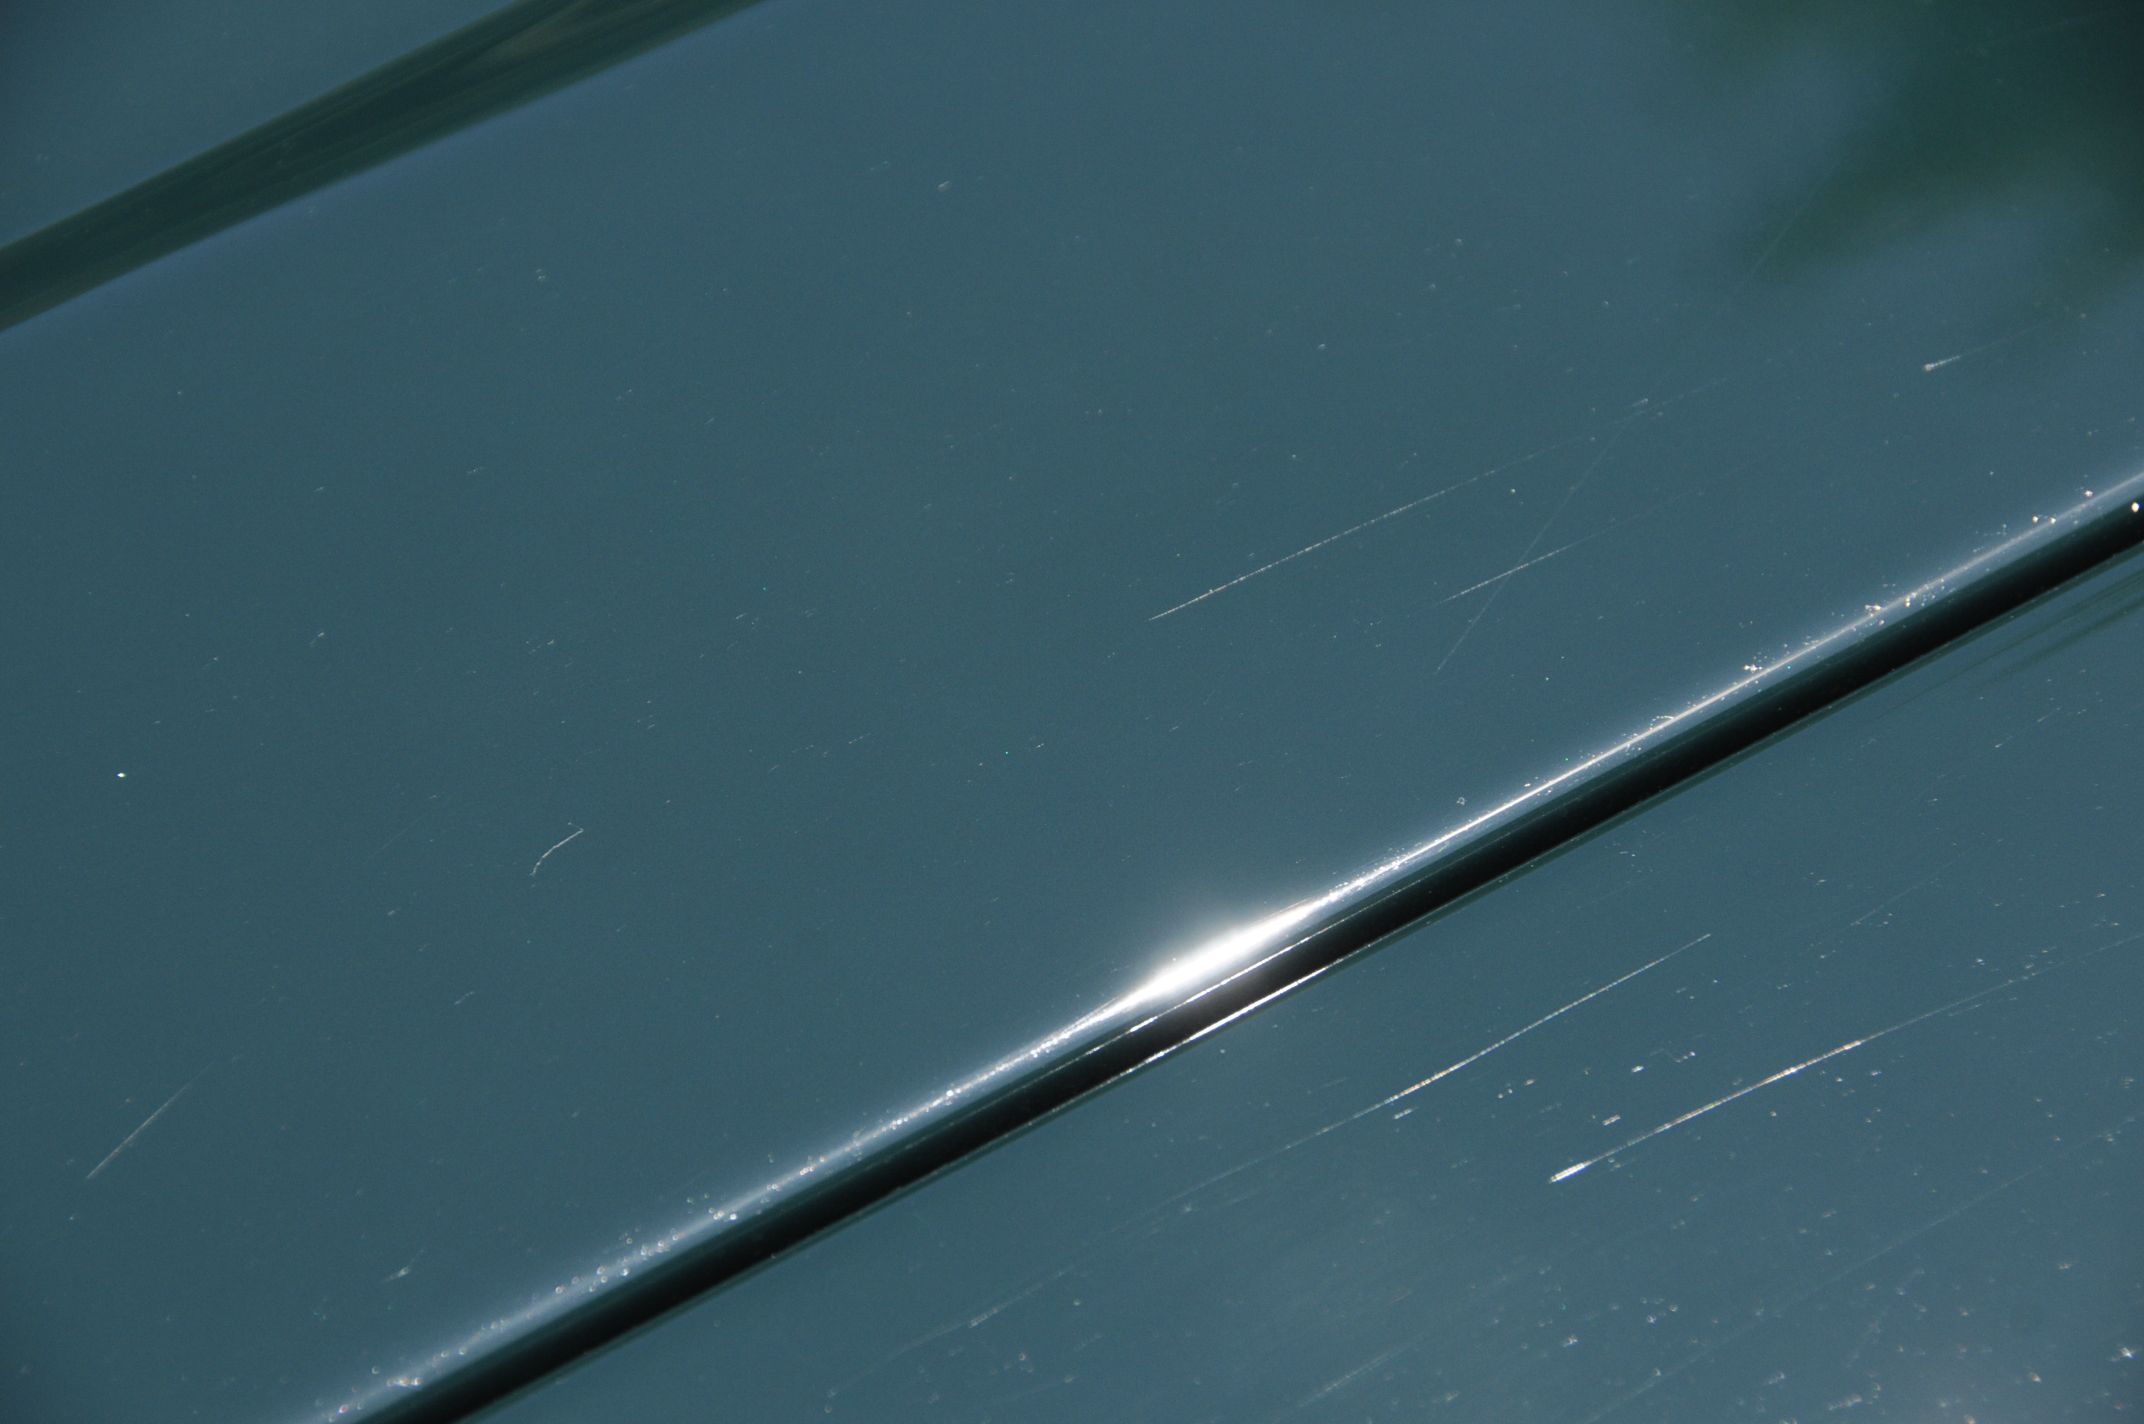
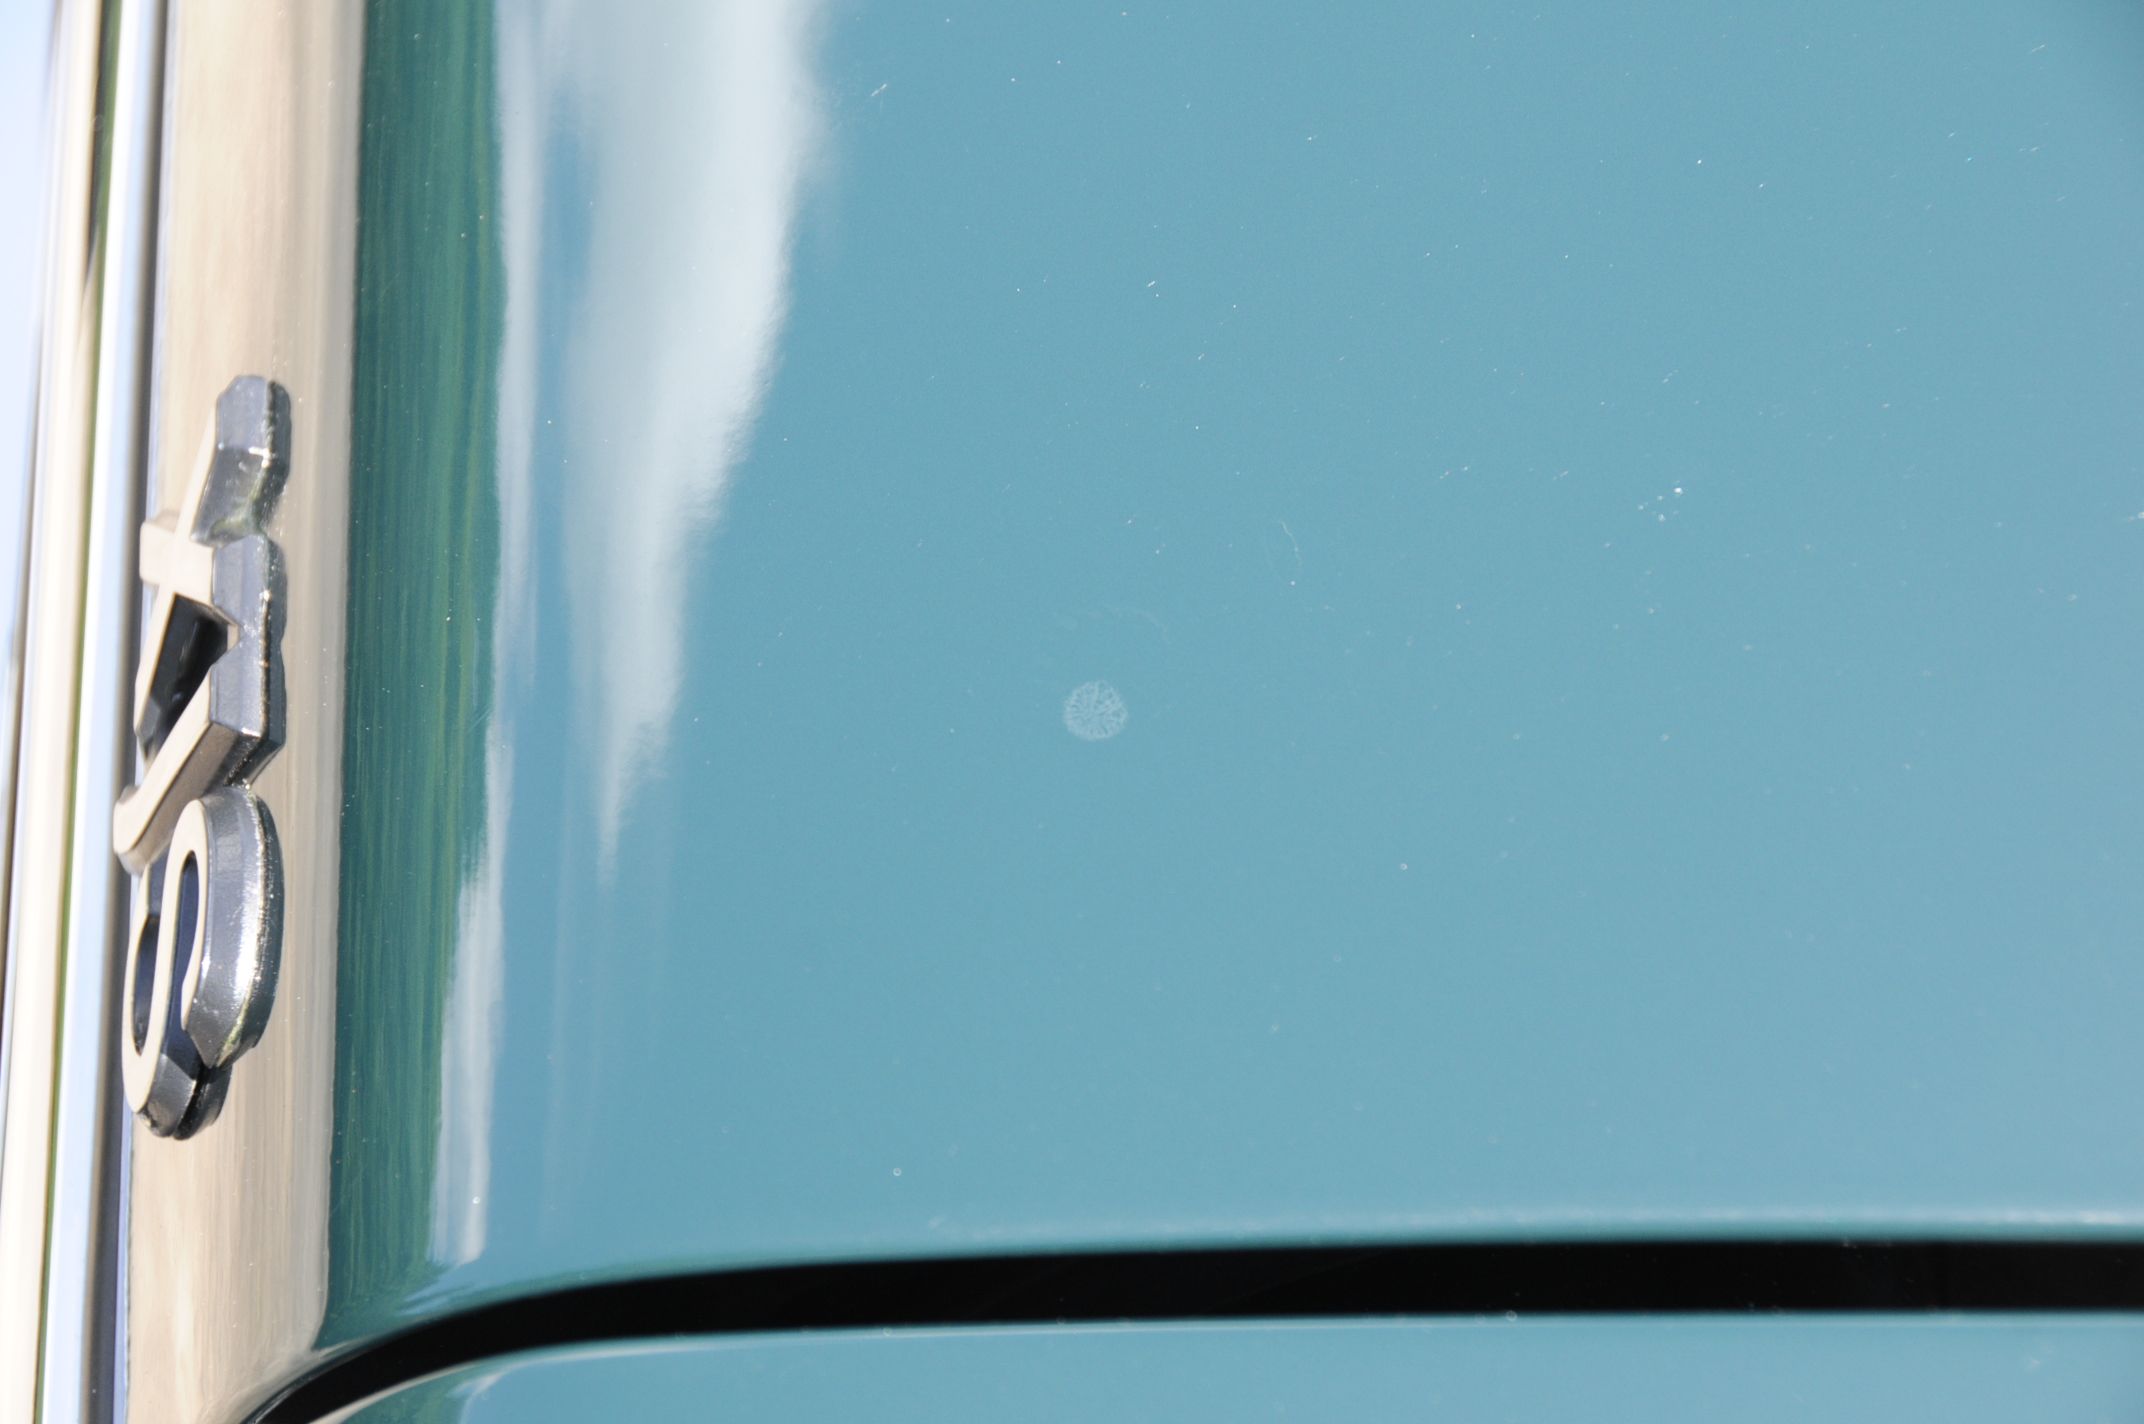
I have a 1994 XJS Conv which I have owned since new. The car is 100% original and is quite presentable but when you shine the light of truth on her and get up close, the last 19 years have taken a toll. There are a lot of swirls, some scratches and various water/tree sap stains that have etched into the clearcoat. I have a concours coming up in 3 weeks and decided I wanted to give the old girl a makeover 
She has never had anything more than a wash and wax so now I�m planning a full detail with paint correction for the blemishes. Fittingly perhaps I have never undertaken this kind of task so we are both paint correction virgins
I have purchased tools and supplies and swotted up on detailing techniques etc. so its� off to the races!! I plan to document the project in this thread. I hope you enjoy the ride (Sorry for the long post.)
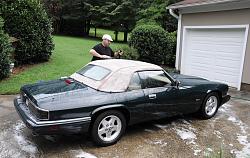
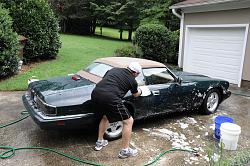
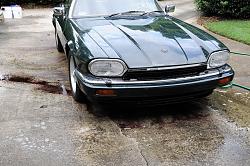
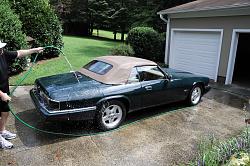
The patient

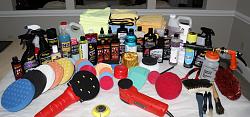
The medical kit
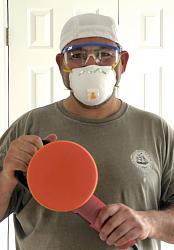
The doctor
Here is my workflow plan. I realize some of my steps might be overkill but I�m retired and have the time and the inclination to do as thorough a job as I can. Please let me know what you think, any suggestions or tips would be most welcome.
Phase One - Interior *Estimate 6-8 hours? (may decide to do this last)
Vacuum and brush headliner, spot clean if necessary.
Clean dash, vents, wheel, door panels etc. with APC+
Clean inside windshield and side windows with Invisible Glass
Remove front seats, clean and treat using Gliptone cleaner and conditioner.
Clean inside rear windows
Clean and treat rear seats and other leather trim.
Polish and seal all wood trim with Scratch-X 2.0 and M21
Polish all interior chrome
Dress interior trim
Treat carpets with Folex, agitate, tamp dry, then vacuum
Refit front seats
Clean and polish door jambs and treadplates
Phase Two - Exterior Wash and Prep * Estimate 8 hours?
Foam car with Chemical Guys Citrus Wash, let dwell for 5 mins then rinse.
Wash wheelwells and tires, 2 bucket method with CGCW then rinse
Clean convertible top with Raggtopp cleaner then rinse
Wash car body with 2 bucket method (new buckets) using CGCW then rinse and dry
Apply Iron-X to paint. Agitate and let dwell 5 mins then rinse and dry thoroughly
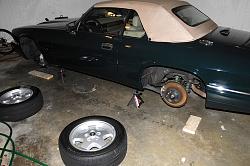
Move car inside, put car on jackstands and remove wheels
Spray wheels (both sides) with Rim 7 and let dwell 5 minutes then rinse
Spray wheels with Iron-X agitate then rinse
Wash wheels with CGCW completely clean then rinse
Clay wheels then wipe off with eraser.
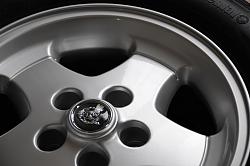
Polish wheels with Wolfgang Finishing Glaze 3.0
Wipe off polish and apply Wolfgang Deep Gloss Sealant let dry for one hour
Return to car and thoroughly clean wheelwells with APC+
Clay body paint and windshield with nano skin and QD as lubricant
Wipe car down with Eraser oil and polish remover
Inspect paint for smoothness with baggie test and repeat clay step if necessary.
Buff off wheels with Motherball and store to cure
Tape off all trim and badges and cover convertible top, wheelwells, windows and lights.
Select suitable area for test spot and tape off 2' x 2' section
Apply Wolfgang Total Swirl Remover to test spot with GG6 using white or orange pads
Wipe off and inspect, repeat if necessary until surface is satisfactory.
Apply WGFG 3.0 with GG6 using white or green pads
Wipe off then clean test spot with eraser and inspect.
Apply WGDGS with GG6 using blue or red pads
Let dry 1 hour
Buff off sealant using D/A with MF bonnet
Final wipe and Inspection
Phase three - Paint Correction and Sealer *Estimate 8-20 hours?
Wipe down with Eraser and baggie test
Perform same process as for test spot on the rest of the car
WGTSR 3.0
WGFG 3.0
Eraser
WGDGS
Let cure overnight
Phase four - LSP and Trim Finishing *Estimate 6-8 hours?
Wipe down car with QD to remove any dust
Apply Pinnacle Souveran Paste Wax using red pads
Buff off with microfiber cloth after each panel
Remove tape and covers
Polish head and tail lights with WGFG 3.0, wipe off and apply sealant, buff
Polish all chrome with Wolfgang Metalwerk, wipe off then apply WGDGS, buff
Dress rubber trim
Clean windows and windshield
Inspect car and remove any leftover wax deposits
Re-install wheels, dress tires with Megs Endurance Gel and lower car from stands
Final wipe
Go have a drink!!
What do you think?
Cheers,
Allan
She has never had anything more than a wash and wax so now I�m planning a full detail with paint correction for the blemishes. Fittingly perhaps I have never undertaken this kind of task so we are both paint correction virgins
I have purchased tools and supplies and swotted up on detailing techniques etc. so its� off to the races!! I plan to document the project in this thread. I hope you enjoy the ride
(Sorry for the long post.)The patient

The medical kit

The doctor

Here is my workflow plan. I realize some of my steps might be overkill but I�m retired and have the time and the inclination to do as thorough a job as I can. Please let me know what you think, any suggestions or tips would be most welcome.
Phase One - Interior *Estimate 6-8 hours? (may decide to do this last)
Vacuum and brush headliner, spot clean if necessary.
Clean dash, vents, wheel, door panels etc. with APC+
Clean inside windshield and side windows with Invisible Glass
Remove front seats, clean and treat using Gliptone cleaner and conditioner.
Clean inside rear windows
Clean and treat rear seats and other leather trim.
Polish and seal all wood trim with Scratch-X 2.0 and M21
Polish all interior chrome
Dress interior trim
Treat carpets with Folex, agitate, tamp dry, then vacuum
Refit front seats
Clean and polish door jambs and treadplates
Phase Two - Exterior Wash and Prep * Estimate 8 hours?
Foam car with Chemical Guys Citrus Wash, let dwell for 5 mins then rinse.
Wash wheelwells and tires, 2 bucket method with CGCW then rinse
Clean convertible top with Raggtopp cleaner then rinse
Wash car body with 2 bucket method (new buckets) using CGCW then rinse and dry
Apply Iron-X to paint. Agitate and let dwell 5 mins then rinse and dry thoroughly
Move car inside, put car on jackstands and remove wheels
Spray wheels (both sides) with Rim 7 and let dwell 5 minutes then rinse
Spray wheels with Iron-X agitate then rinse
Wash wheels with CGCW completely clean then rinse
Clay wheels then wipe off with eraser.
Polish wheels with Wolfgang Finishing Glaze 3.0
Wipe off polish and apply Wolfgang Deep Gloss Sealant let dry for one hour
Return to car and thoroughly clean wheelwells with APC+
Clay body paint and windshield with nano skin and QD as lubricant
Wipe car down with Eraser oil and polish remover
Inspect paint for smoothness with baggie test and repeat clay step if necessary.
Buff off wheels with Motherball and store to cure
Tape off all trim and badges and cover convertible top, wheelwells, windows and lights.
Select suitable area for test spot and tape off 2' x 2' section
Apply Wolfgang Total Swirl Remover to test spot with GG6 using white or orange pads
Wipe off and inspect, repeat if necessary until surface is satisfactory.
Apply WGFG 3.0 with GG6 using white or green pads
Wipe off then clean test spot with eraser and inspect.
Apply WGDGS with GG6 using blue or red pads
Let dry 1 hour
Buff off sealant using D/A with MF bonnet
Final wipe and Inspection
Phase three - Paint Correction and Sealer *Estimate 8-20 hours?
Wipe down with Eraser and baggie test
Perform same process as for test spot on the rest of the car
WGTSR 3.0
WGFG 3.0
Eraser
WGDGS
Let cure overnight
Phase four - LSP and Trim Finishing *Estimate 6-8 hours?
Wipe down car with QD to remove any dust
Apply Pinnacle Souveran Paste Wax using red pads
Buff off with microfiber cloth after each panel
Remove tape and covers
Polish head and tail lights with WGFG 3.0, wipe off and apply sealant, buff
Polish all chrome with Wolfgang Metalwerk, wipe off then apply WGDGS, buff
Dress rubber trim
Clean windows and windshield
Inspect car and remove any leftover wax deposits
Re-install wheels, dress tires with Megs Endurance Gel and lower car from stands
Final wipe
Go have a drink!!
What do you think?
Cheers,
Allan

Thread Starter
|
Veteran Member
Joined: May 2013
Posts: 1,147
Likes: 372
From: Hickory, NC
Thanks!! I'm up to 35,000 miles now, I put on 6,000 just this year!!! Retirement has it's perks
Cheers,
Allan
Cheers,
Allan


Senior Member
Joined: Dec 2011
Posts: 835
Likes: 143
From: Southern California, USA
Looks like you have done your homework. You have an outstanding work flow and supply of products. I'm looking forward to reading about your progress and seeing some photographs too.
Thread Starter
|
Veteran Member
Joined: May 2013
Posts: 1,147
Likes: 372
From: Hickory, NC
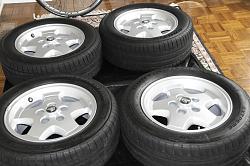
An we're off!! Got cracking on my little project today, though a bit later than I had planned. Managed to get through the cleaning process and clayed the car before calling it a day. Spent a LOT of time on the wheels. The brake dust, tar and grime was heavily baked on the inside surfaces and a real bear to get clean. Got them part way there and will finish tomorrow. here's how the day went.
First a nice foam bath

Then after a rinse, cleaned the top with Raggtop
Then a nice two bucket wash with CGCW
After another rinse it was time to spray on the Iron-X. Cool watching it do it's thing.
A final sheet rinse
And dab dry with the monster waffle weave towel.
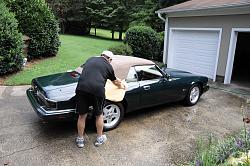
A little blow dry for all the nooks and crannies
Squeaky clean!!
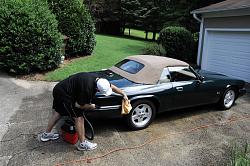
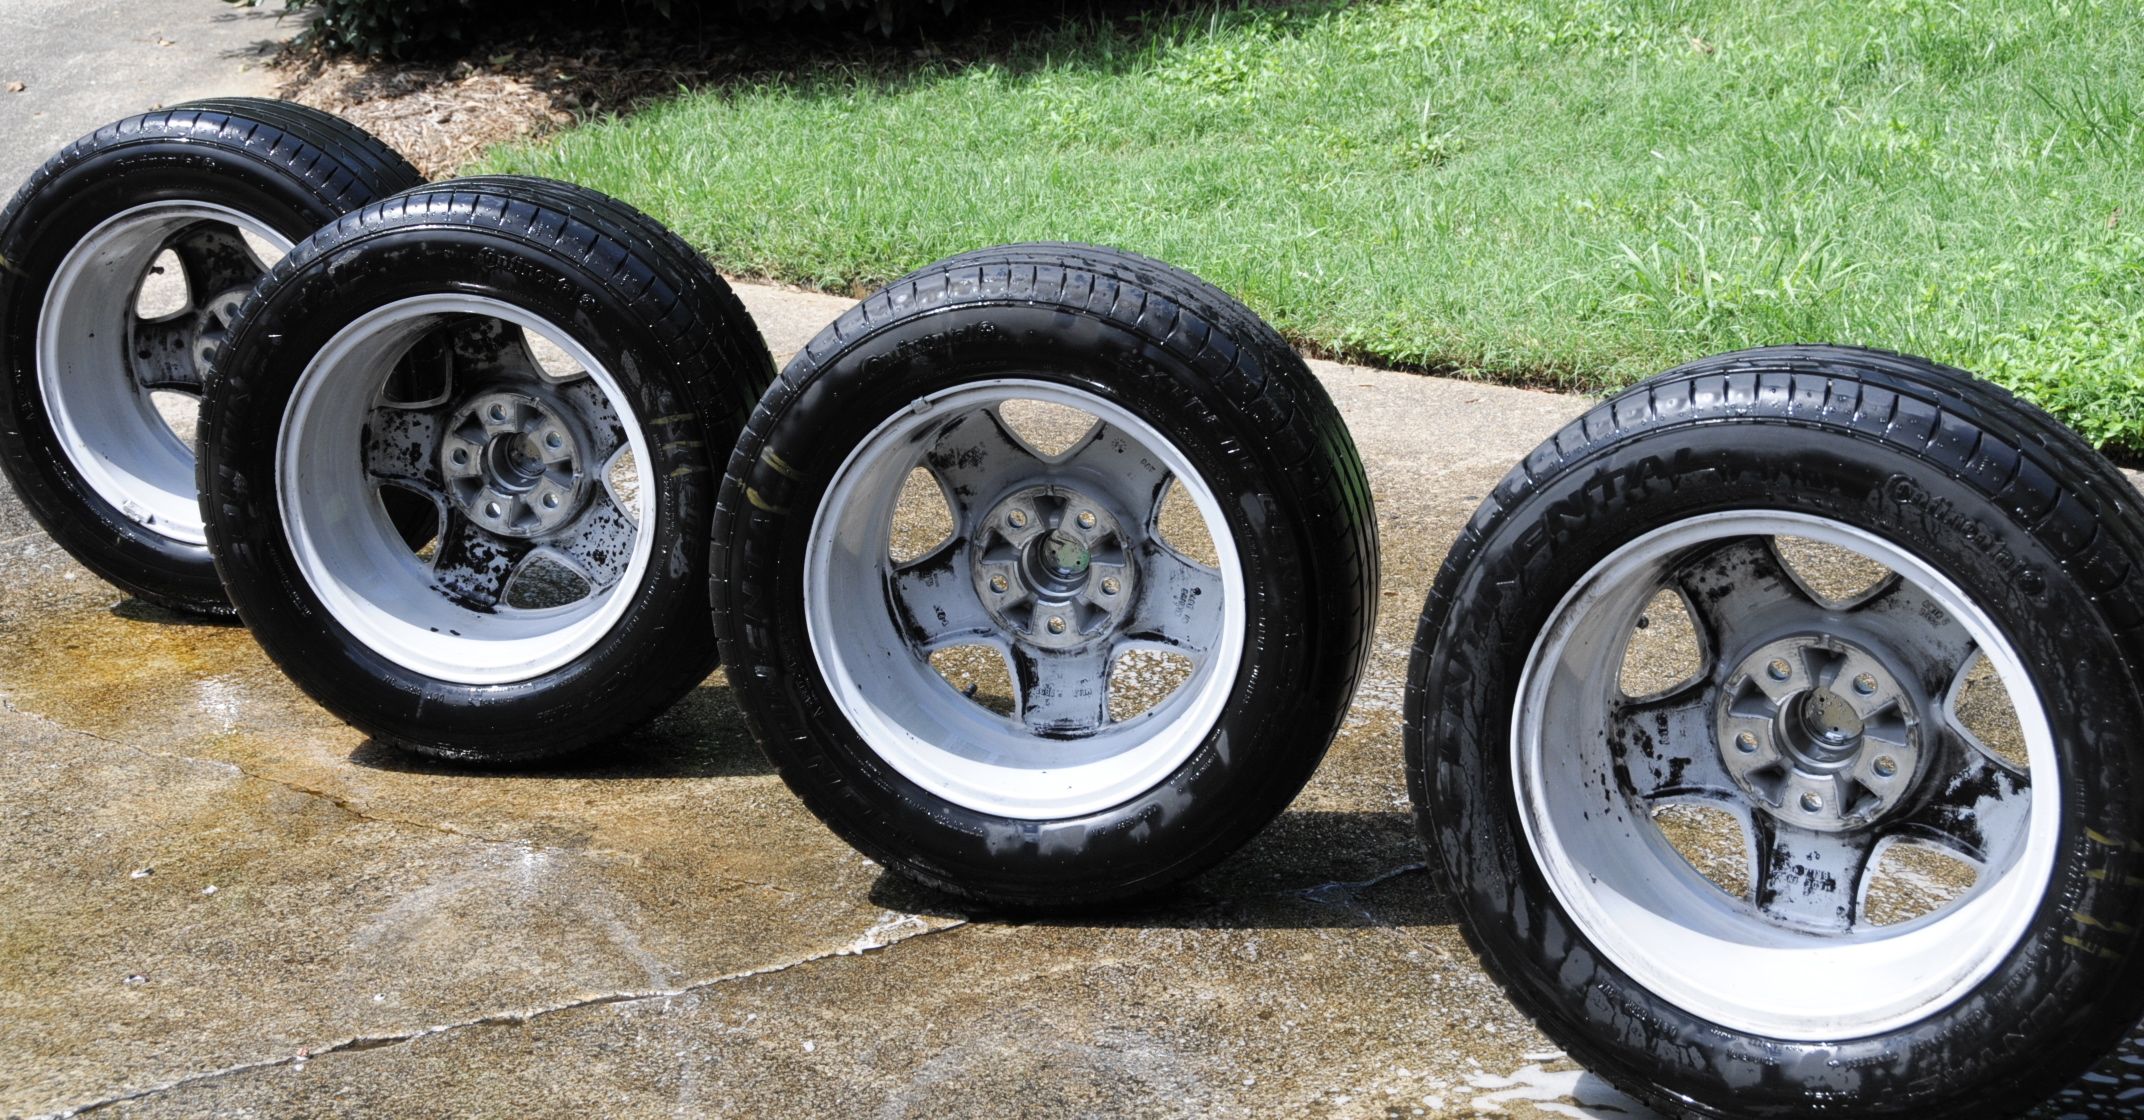
Time to attack these dirty wheels!!
Applying Rim7
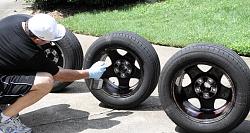
Let it sit
Some improvement but a ways to go.

After claying the body
Back at it tomorrow
Allan
First a nice foam bath

Then after a rinse, cleaned the top with Raggtop

Then a nice two bucket wash with CGCW

After another rinse it was time to spray on the Iron-X. Cool watching it do it's thing.

A final sheet rinse

And dab dry with the monster waffle weave towel.

A little blow dry for all the nooks and crannies

Squeaky clean!!

Time to attack these dirty wheels!!
Applying Rim7

Let it sit
Some improvement but a ways to go.
After claying the body

Back at it tomorrow
Allan
Thread Starter
|
Veteran Member
Joined: May 2013
Posts: 1,147
Likes: 372
From: Hickory, NC
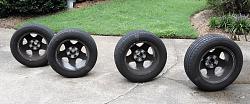
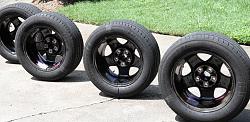
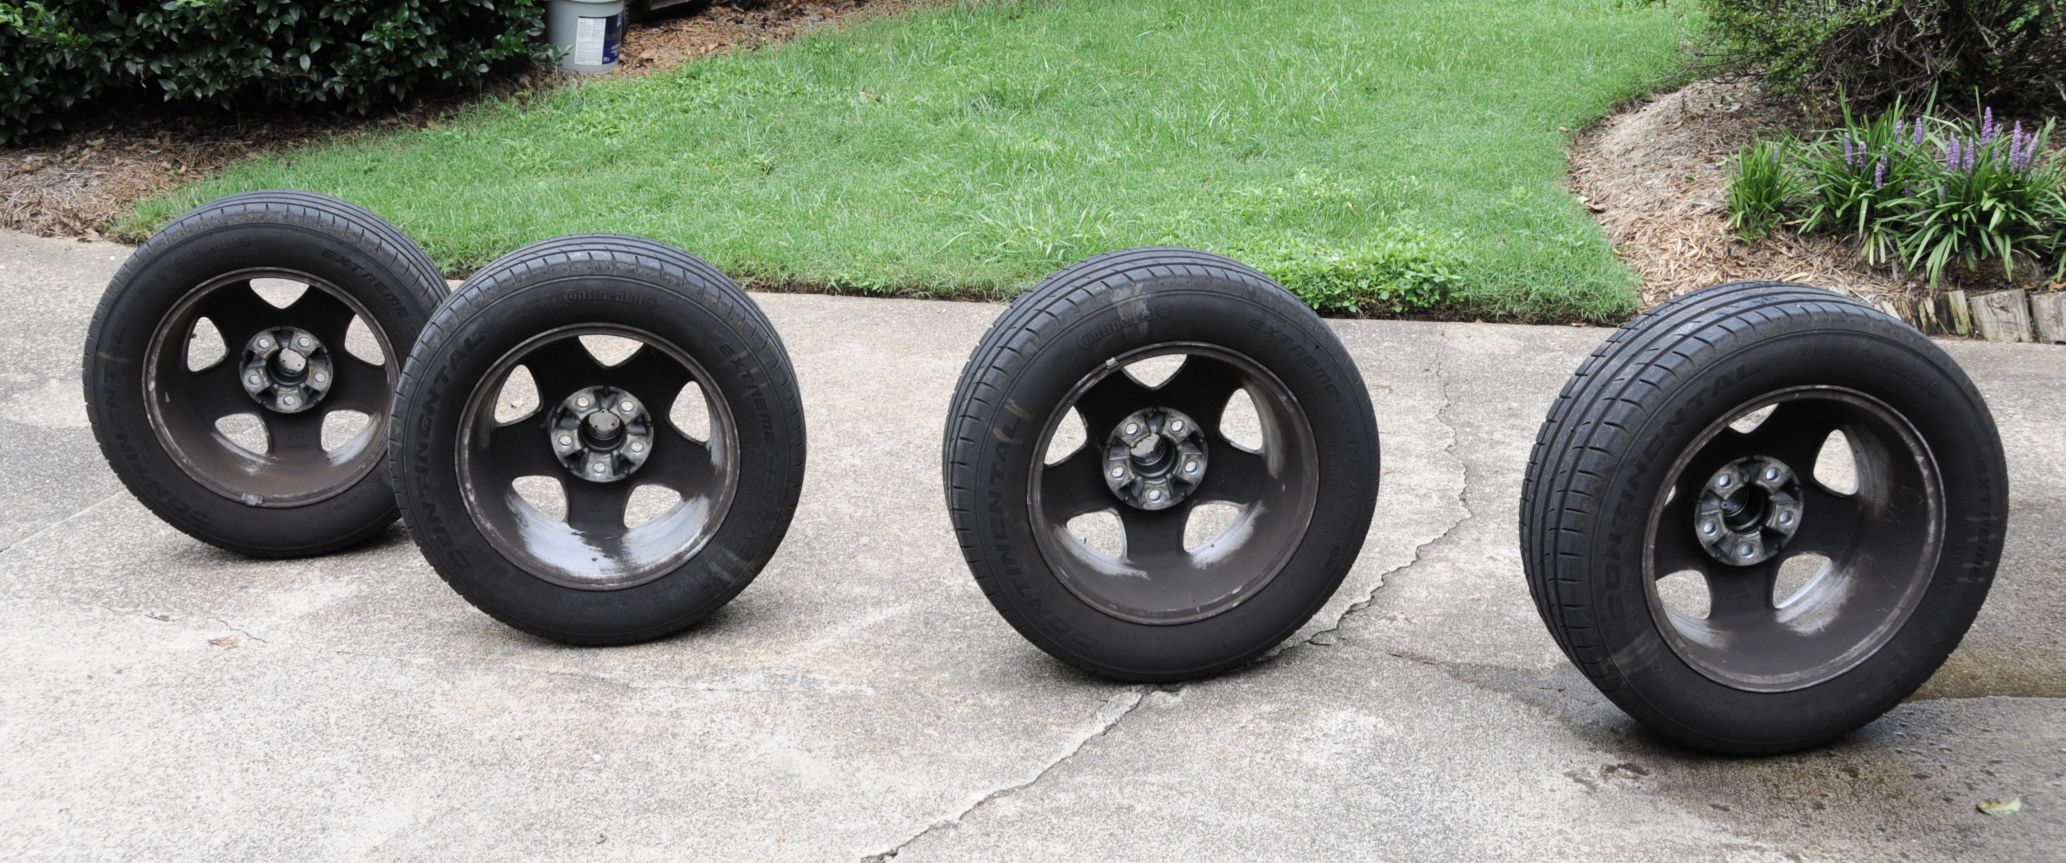
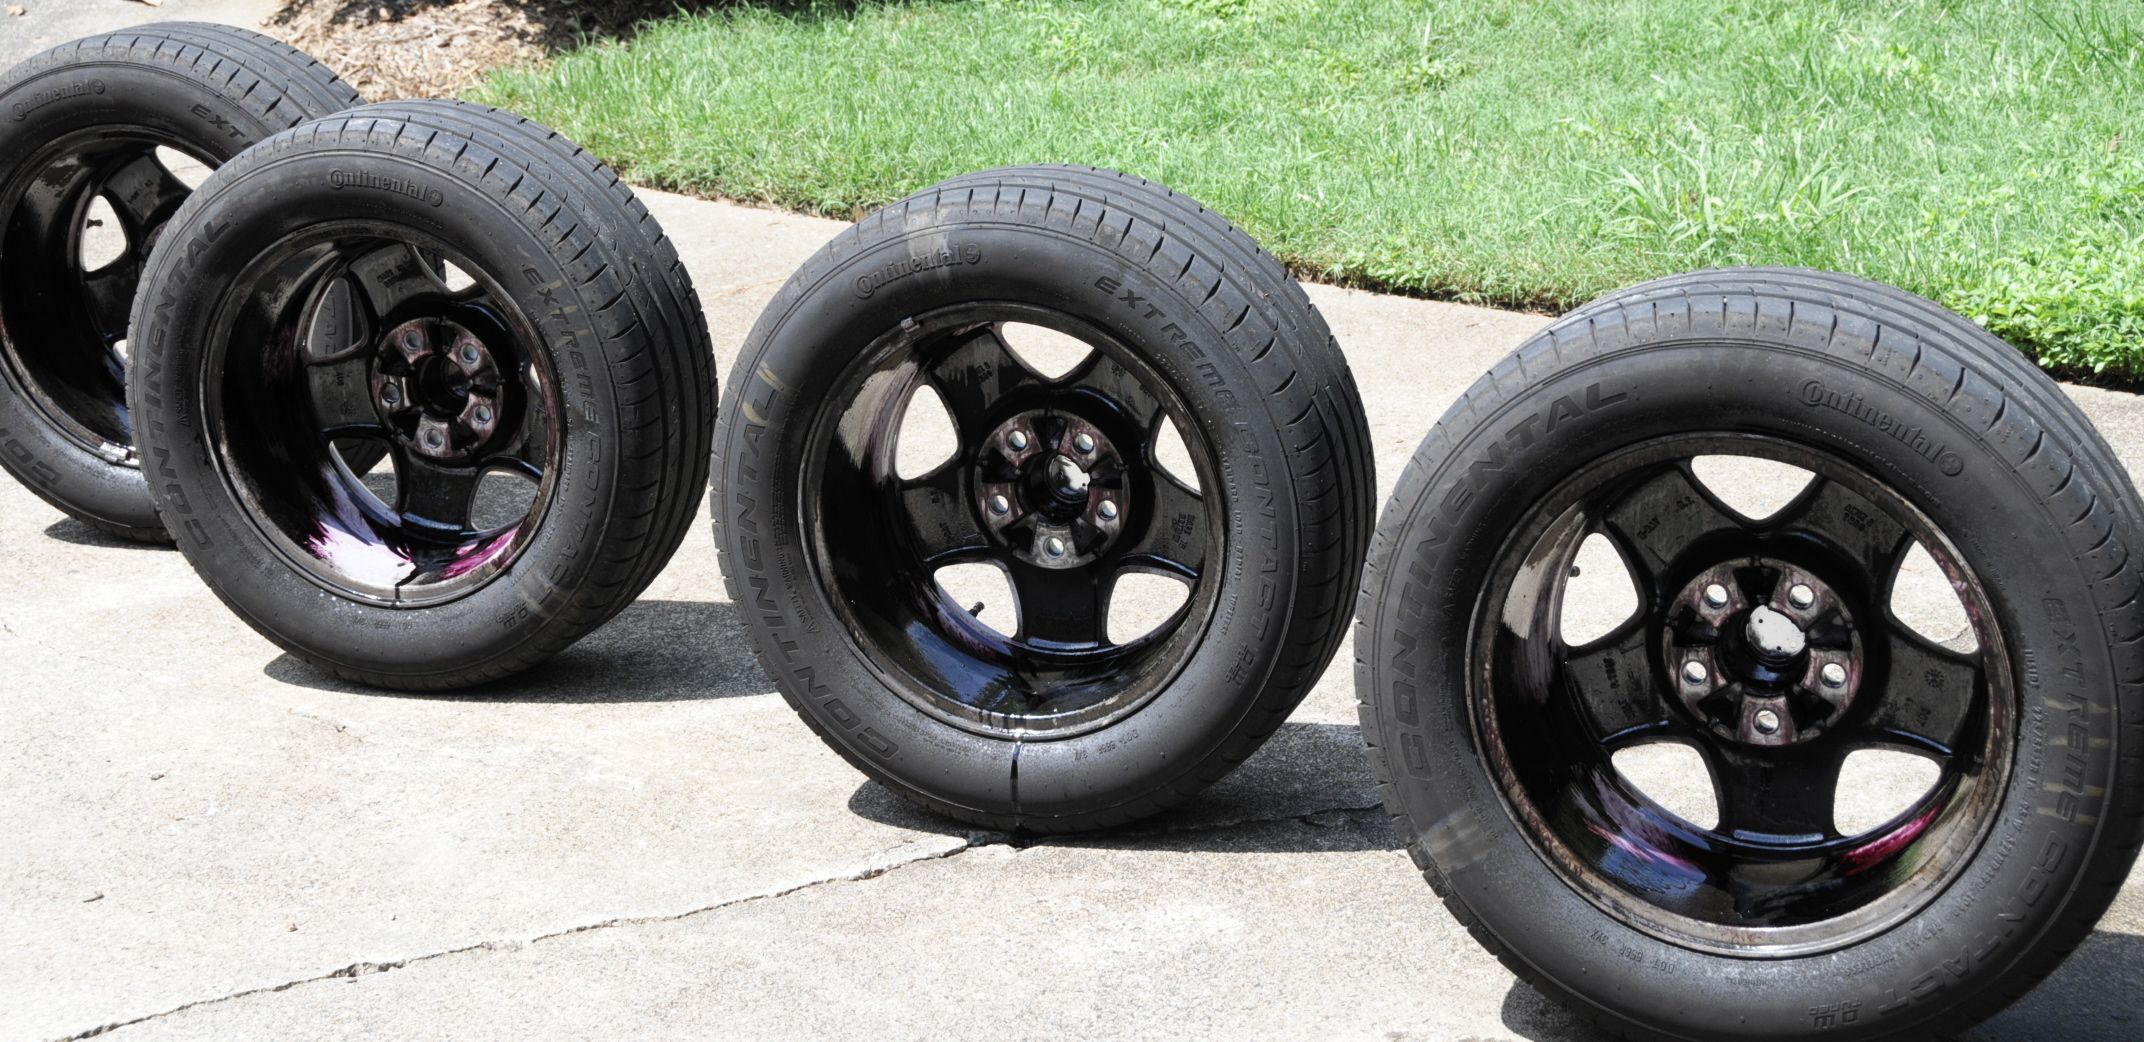
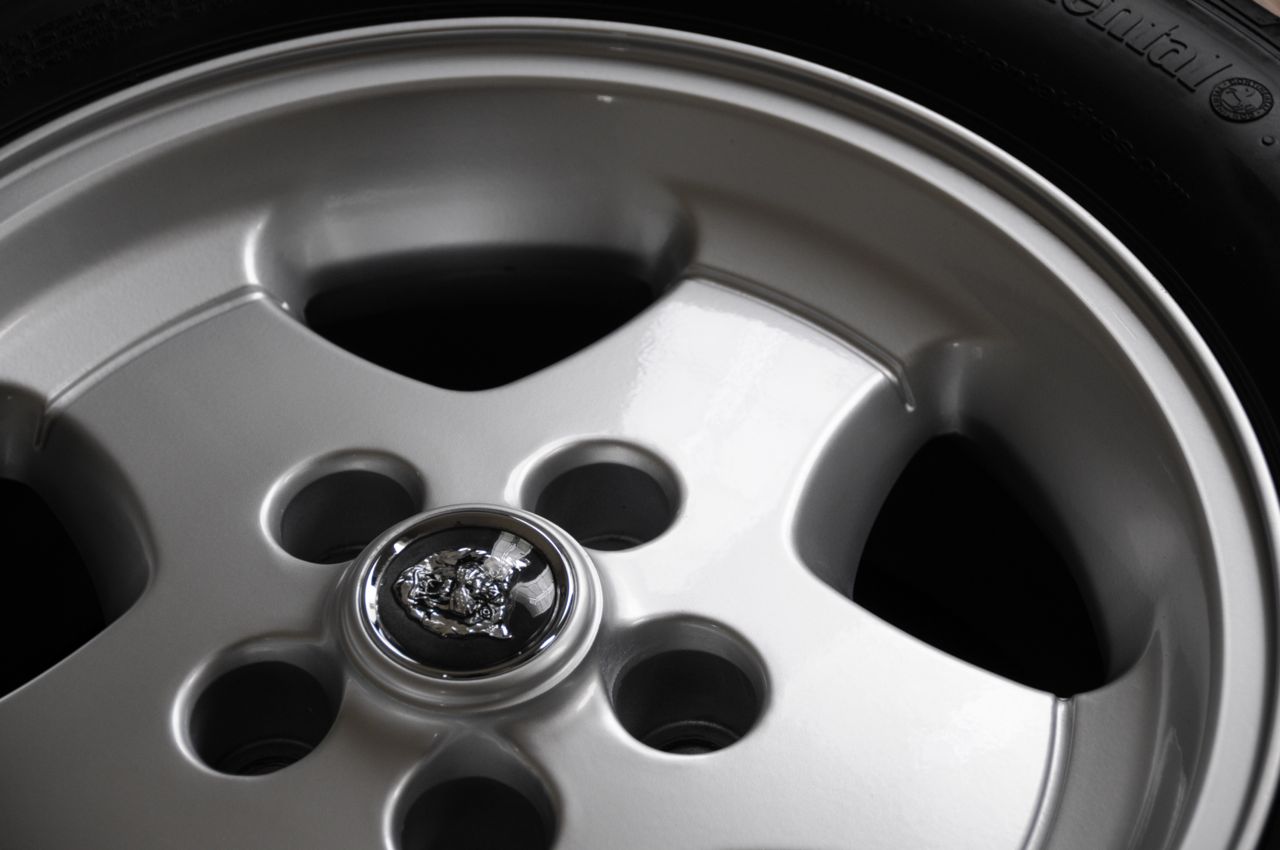
A little update. Sure and steady progress was made yesterday. The wheels were a real nightmare to get clean. Although the outsides were easy, 19 years of baked on tar, brake dust, grime etc inside the wheels were stuck like glue!! I applied Rim7 wheel cleaner three times, Iron-X once and literally hours of had scrubbing with APC+ 4:1. Still not perfect but much better.
Before
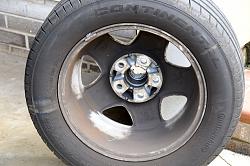
After
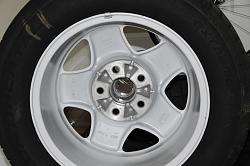
Nice and clean!
Then it was back to the car and the job of covering and taping up the top and trim. My first time at this and I probably went overboard but I got everything covered. Took ages!!!
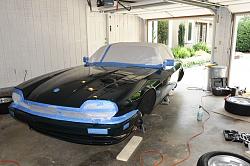
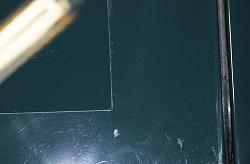
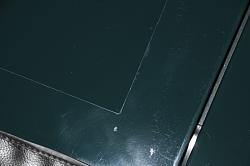
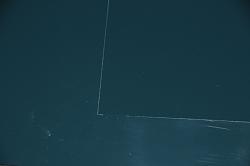
Marked out my test spot and got to work with GG6 D/A

After starting with less aggressive pads, I ended up using a CCS yellow pad with my swirl remover and then a white pad with my finishing polish. I then applied my sealant and buffed out. Pics below. Not too bad for my first ever crack at this, if I do say so myself. I'm sure I will improve as I work around the car
More anon,
Allan
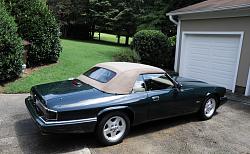
Before

After

Nice and clean!

Then it was back to the car and the job of covering and taping up the top and trim. My first time at this and I probably went overboard
but I got everything covered. Took ages!!!
Marked out my test spot and got to work with GG6 D/A

After starting with less aggressive pads, I ended up using a CCS yellow pad with my swirl remover and then a white pad with my finishing polish. I then applied my sealant and buffed out. Pics below. Not too bad for my first ever crack at this, if I do say so myself. I'm sure I will improve as I work around the car


More anon,
Allan
Trending Topics
Senior Member
Joined: Dec 2011
Posts: 835
Likes: 143
From: Southern California, USA
That looks fantastic! The test spot versus the untouched area is like night and day in the photos. I'm certain it's more dramatic in person. Jacking up the car was a great idea. Easier access to those lower panels and less bending and kneeing down too.
Perhaps you already thought of this but have you considered using a glaze to minimize the defects you could not correct?
Perhaps you already thought of this but have you considered using a glaze to minimize the defects you could not correct?
Thread Starter
|
Veteran Member
Joined: May 2013
Posts: 1,147
Likes: 372
From: Hickory, NC
That looks fantastic! The test spot versus the untouched area is like night and day in the photos. I'm certain it's more dramatic in person. Jacking up the car was a great idea. Easier access to those lower panels and less bending and kneeing down too.
Perhaps you already thought of this but have you considered using a glaze to minimize the defects you could not correct?
Perhaps you already thought of this but have you considered using a glaze to minimize the defects you could not correct?
my fine polish is called a finishing glaze but I think it's really a polish. I might use a paint cleaner which has a little filler after polishing and before I put on the sealant. It's Pinnacle Paint Cleaning lotion. Or might try applying the finishing glaze again but using a gray pad?
Yes having the car on stands does make it easier. I can get to the lower panels by just rolling along on my stool or on the creeper for the sills etc.
It's actually a lot easier than I thought. Having never used a D/A before I was a bit nervous but it's really very simple.
Cheers,
Allan
Last edited by AllanG; Aug 15, 2013 at 05:11 PM.

Senior Member
Joined: Jun 2012
Posts: 138
Likes: 15
From: MI
Total side note, the wife and I just celebrated our 5yr anniversary in Asheville and loved it! Very nice area.

Thread Starter
|
Veteran Member
Joined: May 2013
Posts: 1,147
Likes: 372
From: Hickory, NC
Almost finished the compounding step today, will get cracking on the polishing tomorrow and will post some more pics.
Cheers,
Allan
Thread Starter
|
Veteran Member
Joined: May 2013
Posts: 1,147
Likes: 372
From: Hickory, NC
It's the Smoky Mountain Jaguar Club Concours in Greeneville, TN. It is the weekend of Sept 7th. Come on up!!
Cheers,
Allan


Joined: Dec 2011
Posts: 120,439
Likes: 17,014
From: Durham, UK
Allan,
It'll be interesting to see the final 'actual' times against your 'estimates' for the four phases detailed in post #1. Also if the experience would make you change the order of work for any reason.
Graham
It'll be interesting to see the final 'actual' times against your 'estimates' for the four phases detailed in post #1. Also if the experience would make you change the order of work for any reason.
Graham