When you click on links to various merchants on this site and make a purchase, this can result in this site earning a commission. Affiliate programs and affiliations include, but are not limited to, the eBay Partner Network.
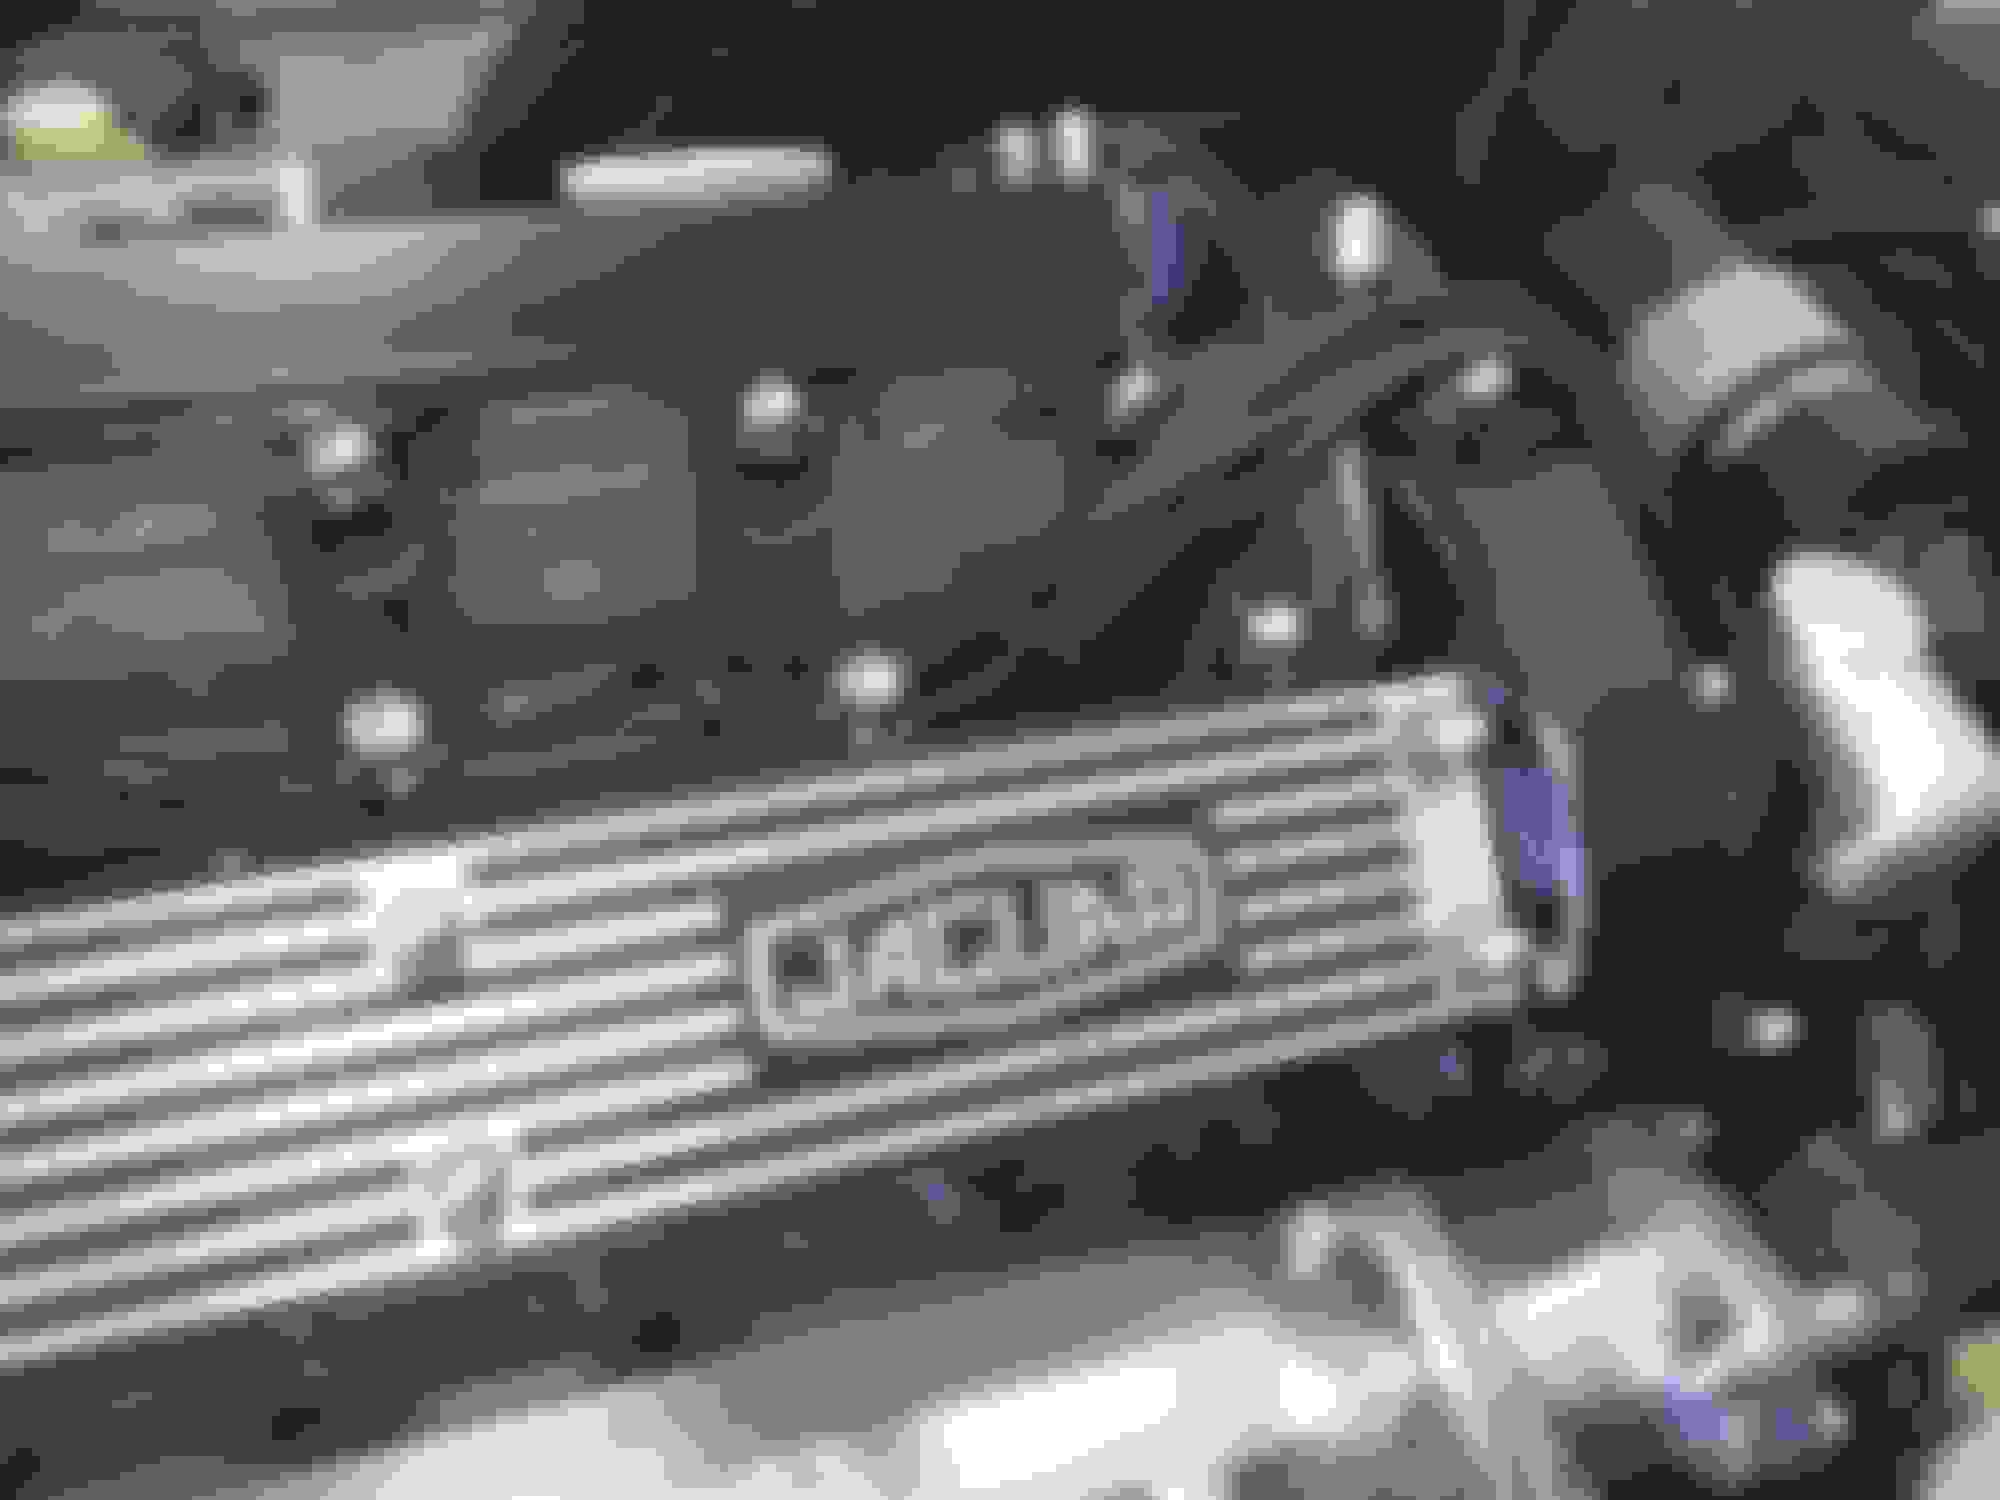
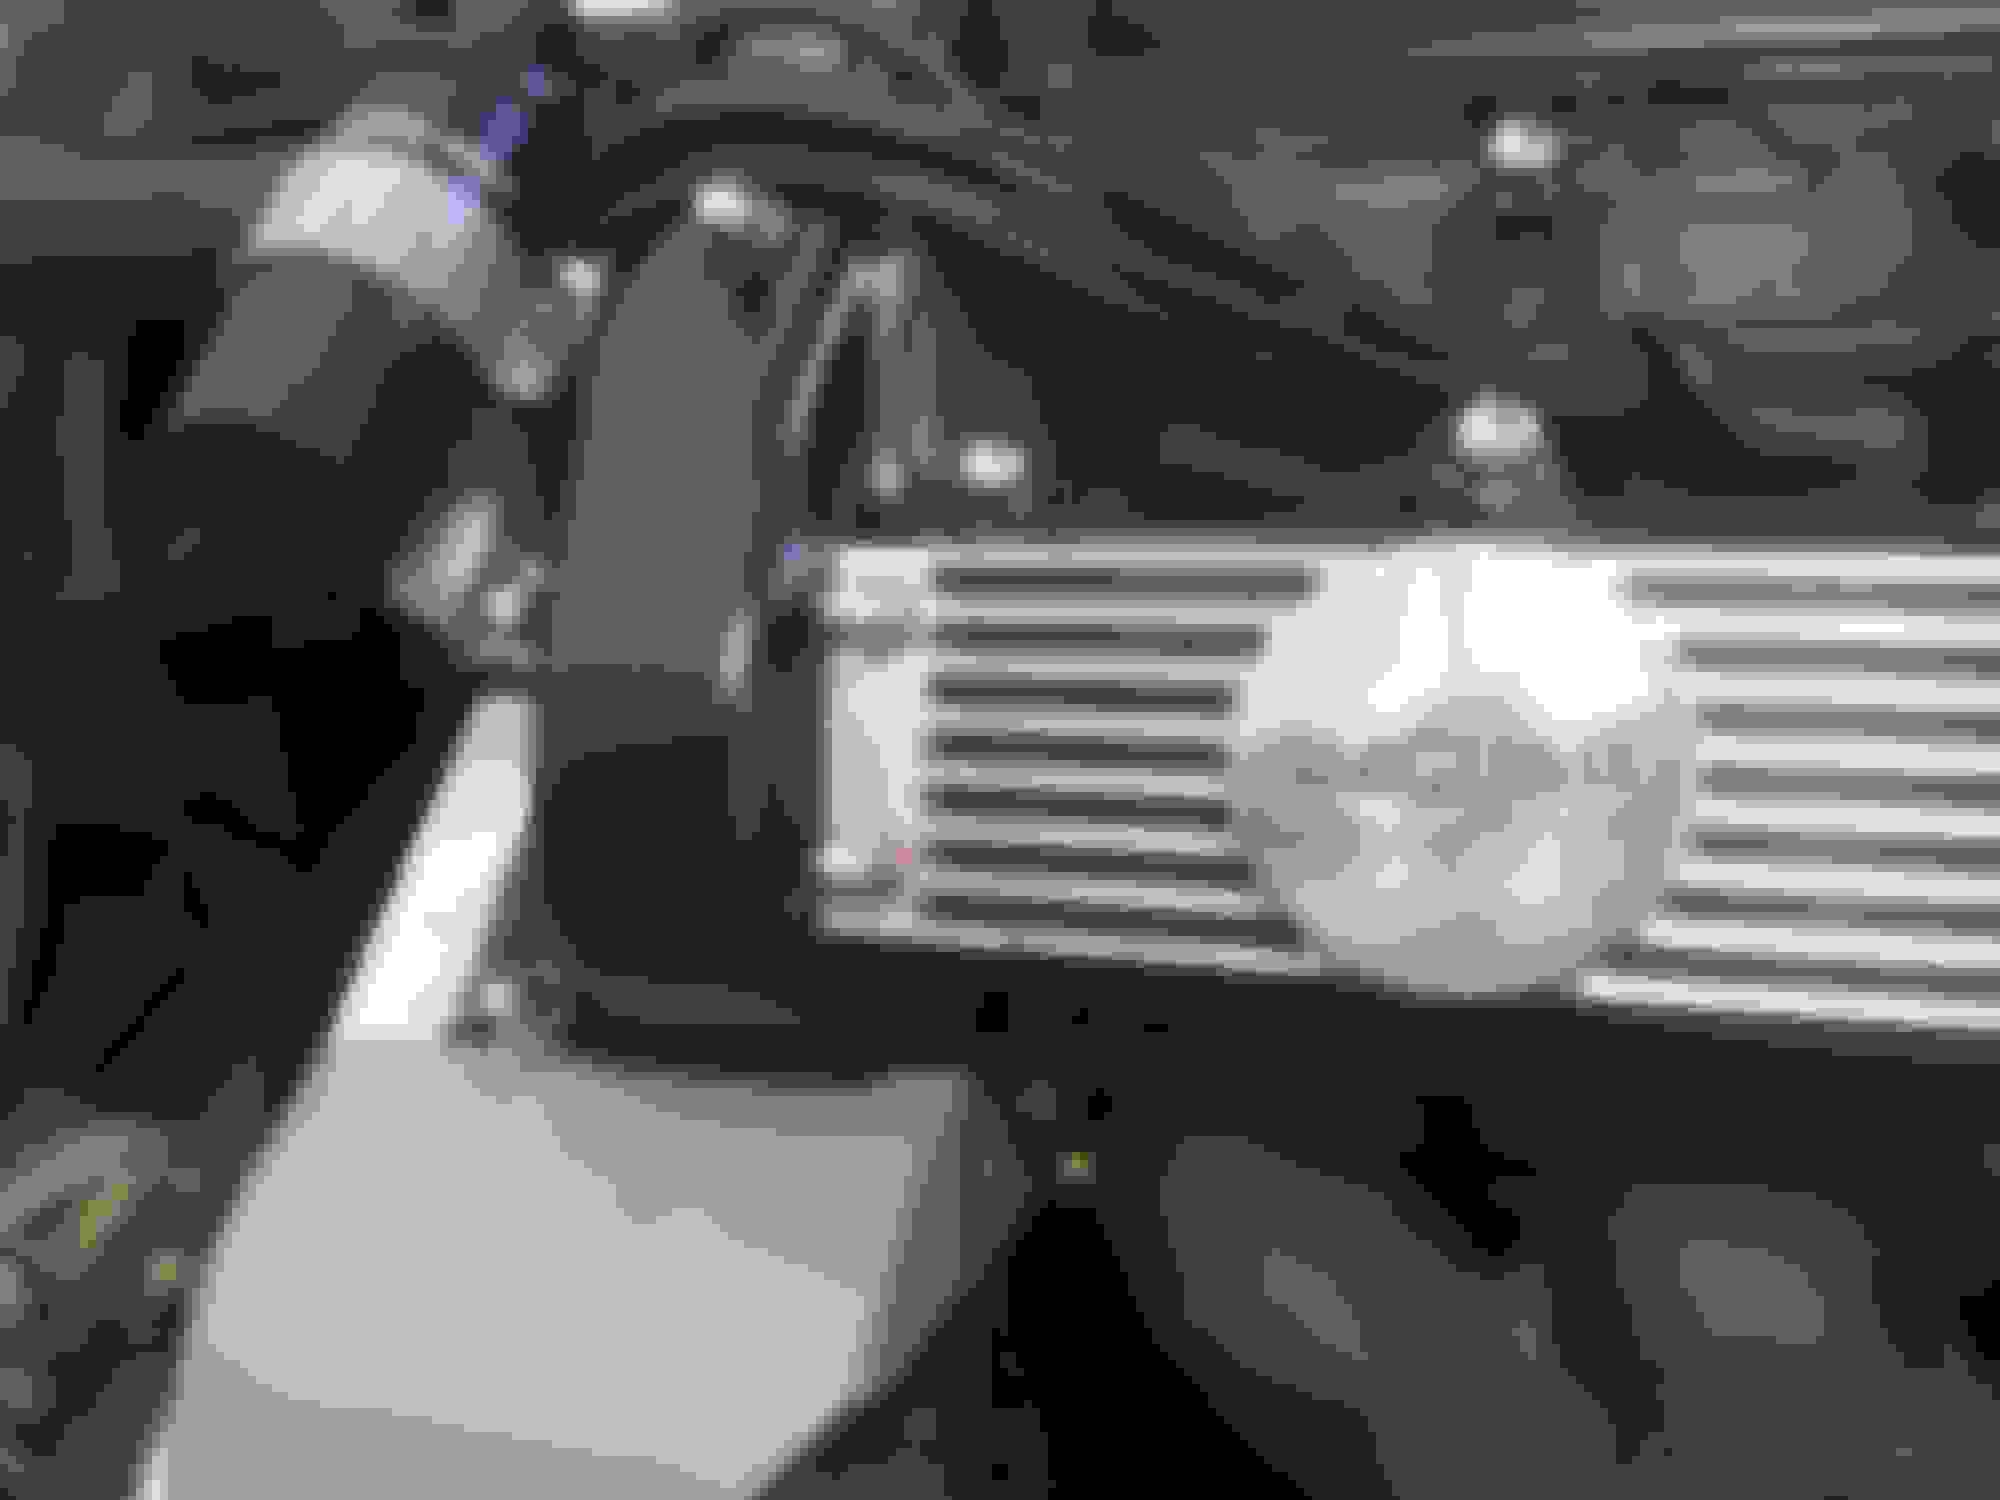
My aluminum cam covers have seen better days. But no cracks and just need some refinishing. These are off a 68 that have the raised fins that were machined after they were painted. After sanding and cleaning all the grooves with household green cleaner and a toothbrush, I wiped all surfaces down with acetone and masked areas with tape that I didn't want paint to adhere to. The sanding and cleaning took 2 hours to do both covers 3 light coats of high temp semi gloss black enamel later. Let them dry for 24 hours. I started off with 150 grit sandpaper and worked my way to 600, 2000 & 3000 grit. Always sanding in the same direction-lengthways with the fins. love the and style and font of this logo...Sand deep on the areas where there are marks and gouges. wow. love the way this turned out. This project only cost me $11 for the can of paint.
Nice job racerxf.
Nicely finished cam covers can mane an engine look really good. Post some photos of the engine once the covers are back on. Post photos of the car too.
Bill.
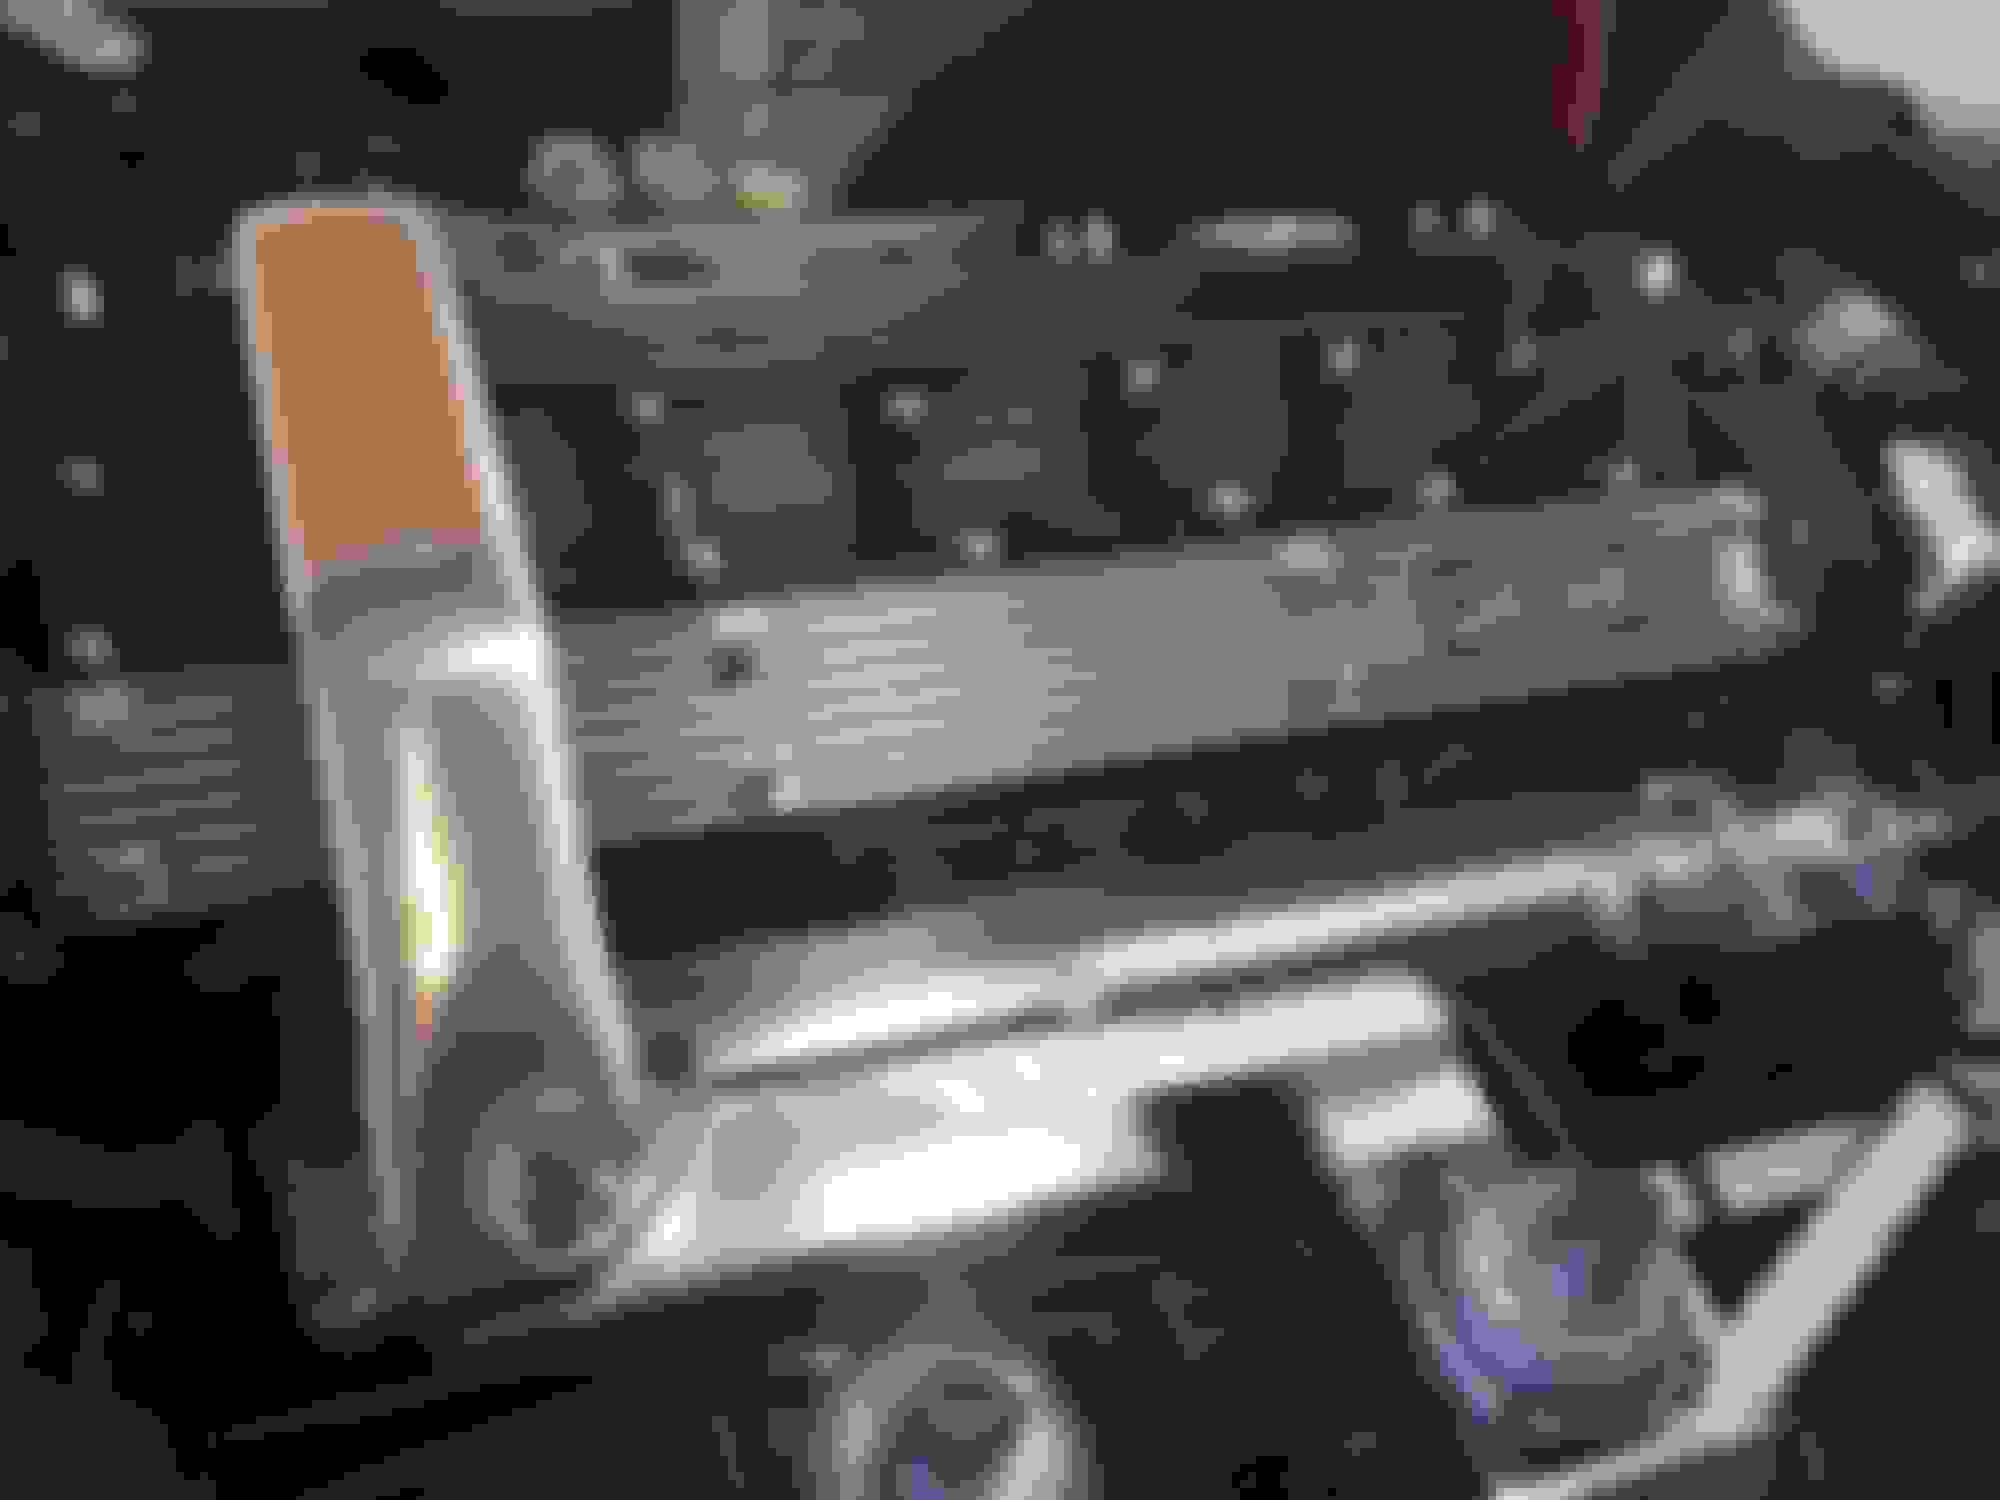
Finally got them installed. Cleaned all the surfaces and wiped them down with acetone. I used paper gaskets with Indian Head shellac adhesive. Ive had problems with them leaking a small amount of oil in the past. See how it goes...
My aluminum cam covers have seen better days. But no cracks and just need some refinishing. These are off a 68 that have the raised fins that were machined after they were painted. After sanding and cleaning all the grooves with household green cleaner and a toothbrush, I wiped all surfaces down with acetone and masked areas with tape that I didn't want paint to adhere to. The sanding and cleaning took 2 hours to do both covers 3 light coats of high temp semi gloss black enamel later. Let them dry for 24 hours. I started off with 150 grit sandpaper and worked my way to 600, 2000 & 3000 grit. Always sanding in the same direction-lengthways with the fins. love the and style and font of this logo...Sand deep on the areas where there are marks and gouges. wow. love the way this turned out. This project only cost me $11 for the can of paint.
You’ve done a superb job, they look the business, really fabulous and great photos of the various stages of the job. Will you do mi e if I send them over?
lol. It was actually a simple weekend project. Taking the covers off is quick. Removing all the old gasket material and not gouging the aluminum took some time. Got to remember not to overtighten them when reinstalling them. I probably spent 4 hours total. These covers are so beautiful from the factory its worthwhile to make them look there best. Its the first thing people notice when opening the bonnet.