When you click on links to various merchants on this site and make a purchase, this can result in this site earning a commission. Affiliate programs and affiliations include, but are not limited to, the eBay Partner Network.
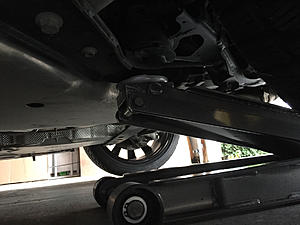
Just checking the jacking points on my new to me F-Type S coupe, and this picture is incorrect for the F-Type.
It is a picture of the XF V8 (S or R) axle stand points, you can tell it is an XF and not an F-Type by the shape of the rear mufflers.
Also, these are the XF axle stand points and not the jacking points, the jacking points are outboard of these on metal ridges.
The picture is correct for an F-Type, for the axle stand points, but if you look at the earlier pics in this thread, there are photos (with arrow marks/highlights) to indicate jacking points. So all bases should be covered in this thread for axle stands and jacking points!
Only thing missing is a single point at front or rear to jack either end up from a single central point.
My question, Captain, is where to lift both front (or both rear) corners off the ground at the same time rather than lifting one corner at a time. Lifted thusly, a jack stand can be safely placed at each of the two front (or rear) pinch moldings (lips), as you suggest. IOW, I'm interested in lifting the entire car off the ground, not just one corner.
Lifting and placing a jack stand one corner at a time can be risky if the intent is to lift the entire car. I say this fully admitting that in my distant past, I did just that. While it can be done depending greatly on the capacity and height of the jack stand, I would caution against it. So, if I'm unable to identify safe front and rear lifting points, I'll likely go with a couple trolley jacks positioned on each corner (front or rear). This I've done before though it takes longer.
Anyone else try lifting their car from the center? I've done it on all of my past cars but this car seems to be a little tricky.
Time to chime in again.
See posts 28, 40 and 41.
The schematic showing the so-called jacking points in post 28 is dead wrong, it as 100% definitely for the XF and not the F-Type, and it is 100% definitely the XF axle stand points and not the XF jacking points.
However, and this is where it gets silly, that IS the exact same schematic shown in my copy of the F-Type Workshop Manual, and it gets even sillier, the same schematic is shown for both the jacking points and the axle stand points! For some reason JLR got very lazy and plonked the XF schematic in the F-Type manual, not just once but twice.
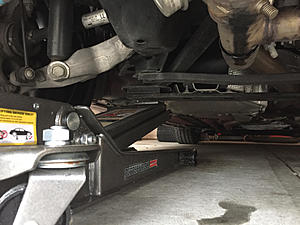
However, having jacked up the front end of my F-Type a few times now, both sides at the same time using two trolley jacks one on each side, and having placed axle stands underneath as well, there are places to put axle stands fairly near to the jacking points, just not where shown in that schematic. IIRC I could only just fit the axle stands next to the trolley jacks, slightly to the rear of and inboard of the trolley jacks.
I'm fairly sure there is no central jacking point or axle stand point for the front of the F-Type, and even if there was you would need to remove the under tray first to access it, which sort of defeats the purpose as you would still need to jack both side up at once to remove the under tray. There may be a central axle stand point for the rear of the F-Type, I know I was able to do that on the XFs, but I suspect there isn't.
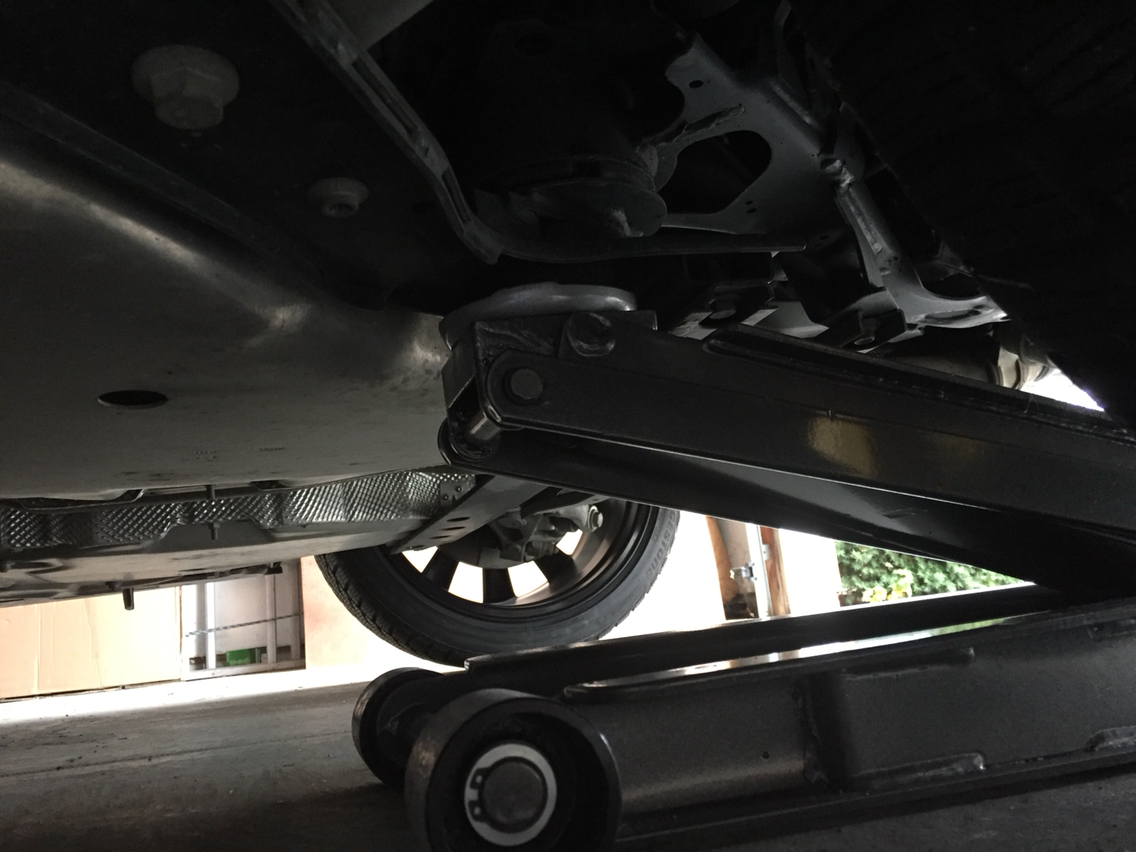
Here's the same pic as Foosh's, but from a slightly different angle.
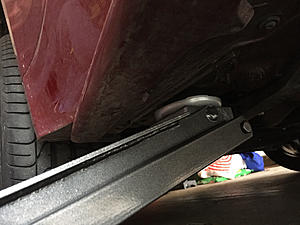
Yellow arrow marks the "lip" that you'd slot into with a portable jack (they probably have a better name than that), the red rectangle marks the area you can use a trolley jack on (on the black support in between the 2 exposed bolts).
OK...dumb question perhaps...but the head of my floor jack is too big to fit in this area between the 3 bolts and the black metal ridges. How exactly is this accomplished?
My MY2105 doesn't have that black lip piece front or back, and the scissor jack which comes with the car doesn't have a slot in it for going around such a piece, instead it just has a flat face. Maybe it's a later model and/or AWD change? I use hydraulic "low entry" jacks with small heads which fit nicely under both front and rear jacking points.
I've found that the puck sits nicely between the bolts that the jack never gets near the ridges and still won't slip off. I also once used a small piece of maple that brought the level up to the bolts and the ridges and the jack then used the entire assembly to push on. I like the puck better because it doesn't want to slip. I forget which thread and forum member I learned that from.
I've found that the puck sits nicely between the bolts that the jack never gets near the ridges and still won't slip off. I also once used a small piece of maple that brought the level up to the bolts and the ridges and the jack then used the entire assembly to push on. I like the puck better because it doesn't want to slip. I forget which thread and forum member I learned that from.
Thanks Marko. I'll get under there and give it a look.
OK, so I don't know if the AWD frame is a little different or what, but there is no fitting any type of jack pad in that area by the "three bolts" pictured above. There simply isn't enough flat space. I wound up using a flat area further under the car and toward the rear. From the yellow arrow in the photo above, it's about at the 7 o-clock position near the wrapped electrical wire you can see in the photo. Now this area is very difficult to reach. My floor jack is about as low and long as they come and the placement was difficult. Raising the jack was partially interfered with by the tire itself. I got it to work with some luck. I think for the other rear I'm just going to use the scissor jack in the trunk because it will slide right onto the black metal rail near the bolts.
I'm going to bed. My car now has 3 summer wheels and 1 winter.
I really doubt that crossmember is different on the AWD compared to the RWD, as it's at the rear of the car.
I have no trouble at all fitting the head of my jack on the flat plate in the middle of those three bolts, but the jack head is quite small.
My jacks are very similar (but different brand) to this one: https://www.ebay.com/p/Sealey-Car-Tr....c100005.m1851
Maybe you just need a different jack, one with a small head?
OK, so I don't know if the AWD frame is a little different or what, but there is no fitting any type of jack pad in that area by the "three bolts" pictured above. There simply isn't enough flat space. I wound up using a flat area further under the car and toward the rear. From the yellow arrow in the photo above, it's about at the 7 o-clock position near the wrapped electrical wire you can see in the photo. Now this area is very difficult to reach. My floor jack is about as low and long as they come and the placement was difficult. Raising the jack was partially interfered with by the tire itself. I got it to work with some luck. I think for the other rear I'm just going to use the scissor jack in the trunk because it will slide right onto the black metal rail near the bolts.
I'm going to bed. My car now has 3 summer wheels and 1 winter.
If you can, show us some pics as you install the other rear wheel (and front actually, as I'd be curious). My jack head is pretty large also. And like I mentioned earlier, I'll be changing out my own wheels in a few weeks and don't want to run into any surprises. BTW, how were the condition of your lug nuts? Some have reported the cheap chrome covering JLR uses prematurely rusts/corrodes.
Thx
I really doubt that crossmember is different on the AWD compared to the RWD, as it's at the rear of the car.
I have no trouble at all fitting the head of my jack on the flat plate in the middle of those three bolts, but the jack head is quite small.
My jacks are very similar (but different brand) to this one: https://www.ebay.com/p/Sealey-Car-Tr....c100005.m1851
Maybe you just need a different jack, one with a small head?
What's confusing to me is that several others have mentioned using a hockey puck. 3 inches in diameter. Without putting my head under the car, I estimate that is at least 0.5 inches too wide to fit.
Oz, what's the diameter of your jack head? And how do you go about getting the jack you just linked under the car with as tall as it is? Do you drive up on a ramp first?
It doesn't need to fit. Notice that the hockey pucks sold for this purpose have a recessed hole drilled in them. You place that right underneath one of the bolts.
Well lance I don't know where you get your hockey pucks but in Ohio they don't have holes in them! ;-) If I could have found something like that I would've used it and it probably would've worked well. Just finding a regular hockey puck was a bit of a task.
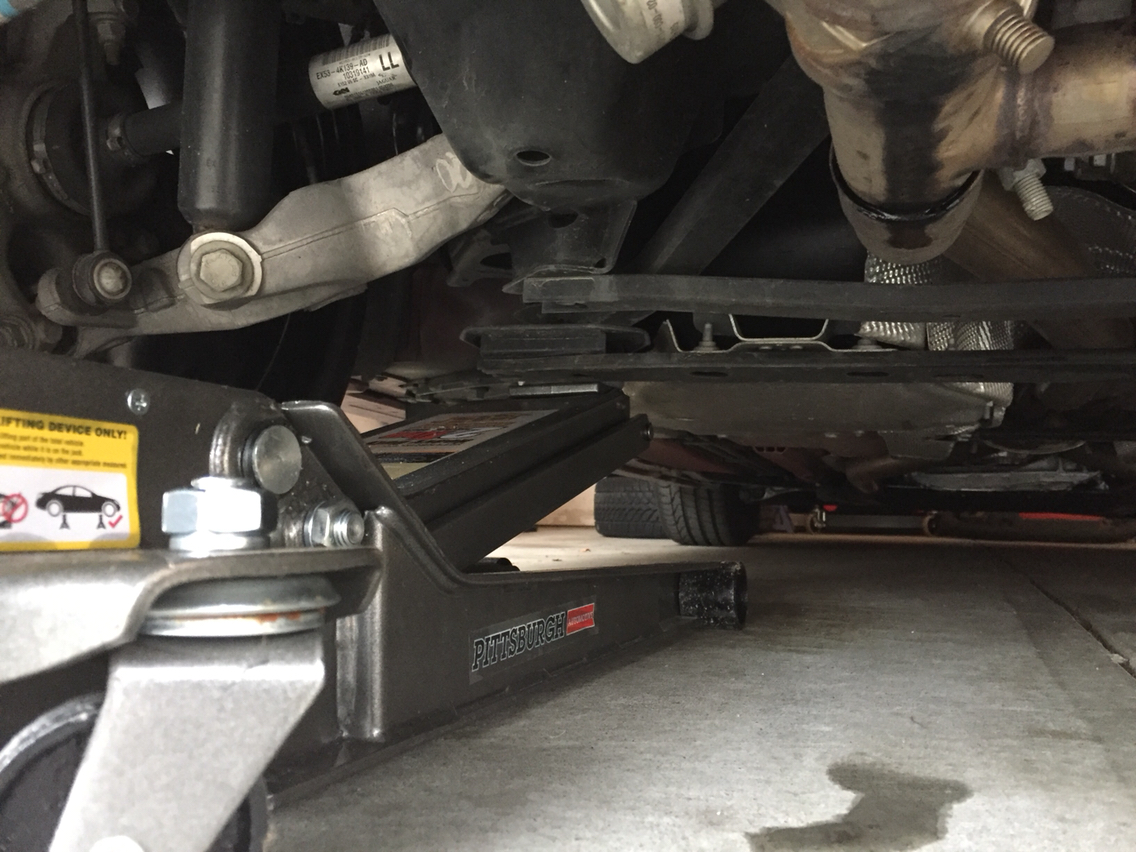
Luckily with my floor jack I was able to access a good spot from the rear of the car. Identical location to what I used on the other side of the car, but previously I had gone in from the side and the fit was extremely tight. Here it is from the back. This approach was very easy with the Pittsburgh 2.0 ton ultra low long reach.
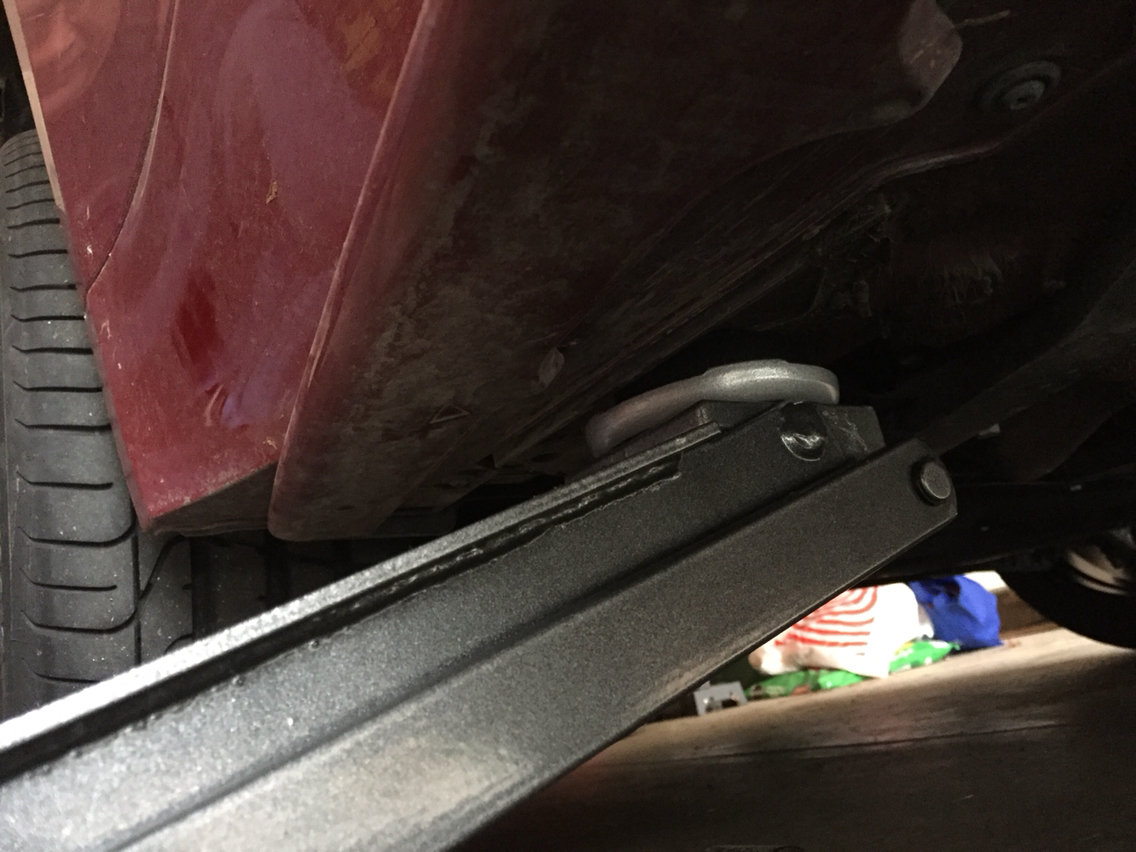
The fronts were easy. Hockey puck just inside the metal ridge that the scissor jack would use.
I hope this helps someone in the future. Now that I know where to go this will be much easier next time.
Someone asked about lugs. Yeah. About 1/5 on every wheel are not in great shape, and a few of them looked brand new. The range was kind of weird. By not great I mean showing some rust. The studs were all fine. I'm going to replace the lugs.