When you click on links to various merchants on this site and make a purchase, this can result in this site earning a commission. Affiliate programs and affiliations include, but are not limited to, the eBay Partner Network.
Hello everyone,
I joined this forum at the beginning of 2024. I greatly appreciate the available information and helpful guidance from the members.
I finally got by project car in June 2024, an abandoned car left in an apartment building underground parking, and then spend 3 years outside in a driveway.
Since that time it has been an exploratory adventure. Frist parts purchase a battery! Then some tune up parts which I have yet to use as many of the basic parts seem oddly in good condition. Like the air filter appears to be new. (did not buy one)
I have been giving the car a look over in many areas, but try to stay focused on the mission of getting the engine going.
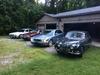
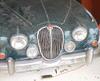
The carbs were seized shut, so the first order of business is to get them going. What a job to remove those, whose hands are small enough to get in and under to those 8 little nuts. The top side ones are a no brainer, the lower ones take patience and time to turn each nut a 1/8 of a turn at time. With rust and all, your need monkey fingers if you think you can turn them by hand! Does it roll, or yes it does! Time to go You need a bath Looking better
Last edited by JimmyKat; Sep 1, 2024 at 06:55 AM.
Reason: add photos
Looks great and welcome to your new acquisition! I really like the paint and the colour.
You may need a stock of band aids while diving into a Jag motor. Lots of sharp bits and edges. I am sporting one from today from a MK2
I suggest you get some SAE AF dies to run down studs such as on the carby mountings if they are showing any signs of rust or corrosion.
That makes it easier to put it all back together while you turn the nuts one flat at a time.
Hello everyone,
I joined this forum at the beginning of 2024. I greatly appreciate the available information and helpful guidance from the members.
I finally got by project car in June 2024, an abandoned car left in an apartment building underground parking, and then spend 3 years outside in a driveway.
Since that time it has been an exploratory adventure. Frist parts purchase a battery! Then some tune up parts which I have yet to use as many of the basic parts seem oddly in good condition. Like the air filter appears to be new. (did not buy one)
I have been giving the car a look over in many areas, but try to stay focused on the mission of getting the engine going.
The carbs were seized shut, so the first order of business is to get them going. What a job to remove those, whose hands are small enough to get in and under to those 8 little nuts. The top side ones are a no brainer, the lower ones take patience and time to turn each nut a 1/8 of a turn at time. With rust and all, your need monkey fingers if you think you can turn them by hand! Does it roll, or yes it does!
Hi Jimmy,
Nice looking car! I'm Jealous!
There is plenty of help here if you need it. Please let us know how things are going and if you need anything.
The battery install, looks easy enough, until the fastener nut behind the firewall falls out of sight! I know it is a Costco battery, but good bang for the buck! And the warranty is amazing!! This is the spot Time for new cables The before dark look. in, but not locked down, that part is being cleaned and painted Lights, camera, action.....
i've learned, much to my chagrin, that unlike other engine compartments i've worked in over the years, when i drop something into my MK2 engine compartment, i don't have the expected 90% chance of hearing it hit something and then finding it on the ground, but rather a 90% of a deathly silence, and never seeing it again!
Last edited by hueyhoolihan; Sep 2, 2024 at 10:45 AM.
Sure did clean up nicely! I think that is the opalescent gun metal gray. I have seen that color on a Mk2 and it looks great.
Looks like a really nice project.
Yes, red it is! Looks ok but needs rework as some leather is brittle and tearing.
Does anyone have the name of the paint color, I think it is call Warwick grey, but there is not color code on the inside door of the car. So really not sure what color it is.
Rear is better than the front Looks better than it actually is. Very dried out
It is not Warwick grey as this is a more dull sort of battle ship grey. Yours looks more like Gun Metal grey.
My S Type was originally Warwick grey and it looked like this. One of the reasons I changed the colour to Old English White is that Warwick grey looks like it has been painted with an under coat and then someone forgot to finish it with the over coat of colour. This sort of grey is becoming vogue now with many manufacturers using a similar colour. Volvo, Hyundai, Mercedes and Porsche to name a few.
Re the old hard leather seats.
These can be refurbished and brought back into use.
I have done this on a number of occasions.
I don't know what is available in Canada but there should be products similar to what we use in Australia.
Basically, the leather needs lubrication and time for it to penetrate and happen. In Australia Lydells saddle soap is one product which will penetrate and soften old leather.
I suggest approaching harness and saddle retailers to find a similar product in Canada.
It can take a couple of months with frequent applications of whatever you are using in warm temperatures to get the softening process going. As you are in a cold climate you may need the application of heat to hasten the process.
After that there are lots of products available to refinish the seat colours. I suggest checking this forum for local advice.
In Aus. I have used a local company called LOUNGEGUARD to supply recolouring products for a number of leather seats ranging from MK2 to X300
Agree with everything Bill wrote. I've also used neatsfoot oil. It's a component in some of the proprietary mixtures. It's cheap and easily available. I think it's made from cows' feet. The price is an advantage as the leather will take a huge amount of lubricant/moisturiser.
Hello Again,
This time is a call for help. I have completed the carbs and reinstalled them.
However there is no spark.
I took apart the inside of the distributor and cleaned everything. Replaced wires that had corroded away. Replaced the points, condenser , and the rotor piece.
I have not replaced the Dist cap yet. Replaced the coil, plugs and spark plug wires.
Question: does the distributor need a wire to ground it? Or is it grounded since it is attached to the engine?
I did not yet adjust the points gap. But it does open and close. I have tested from a no6 lead, and there is no spark.
I have connected the positive of the coil directly to the battery as there is an issue with the ignition switch. Actually we have bypassed the switch for now.
The wire from the ignition switch, goes directly to the coil appears to have been added, goes from the switch, and directly through the firewall to the coil. Not sure why that was done.
When trying to start the car, the new coil got rather hot. Not sure why?
The wiring diagram does not tell that much to me about what can be the problem.
If you have some trouble shooting ideas, let me know please.
Cleaned Up with new wires The before cleaning it up The mess of wires behind the dash board, switch added to by pass ignition.
Last edited by JimmyKat; Sep 15, 2024 at 07:52 PM.



 Still in Honeymoon phase Jaguar 420 1966