

2002 S Type sagging headliner removal HOW TO


Thread Starter
|
Junior Member
Joined: Jun 2014
Posts: 8
Likes: 22
From: Dallas
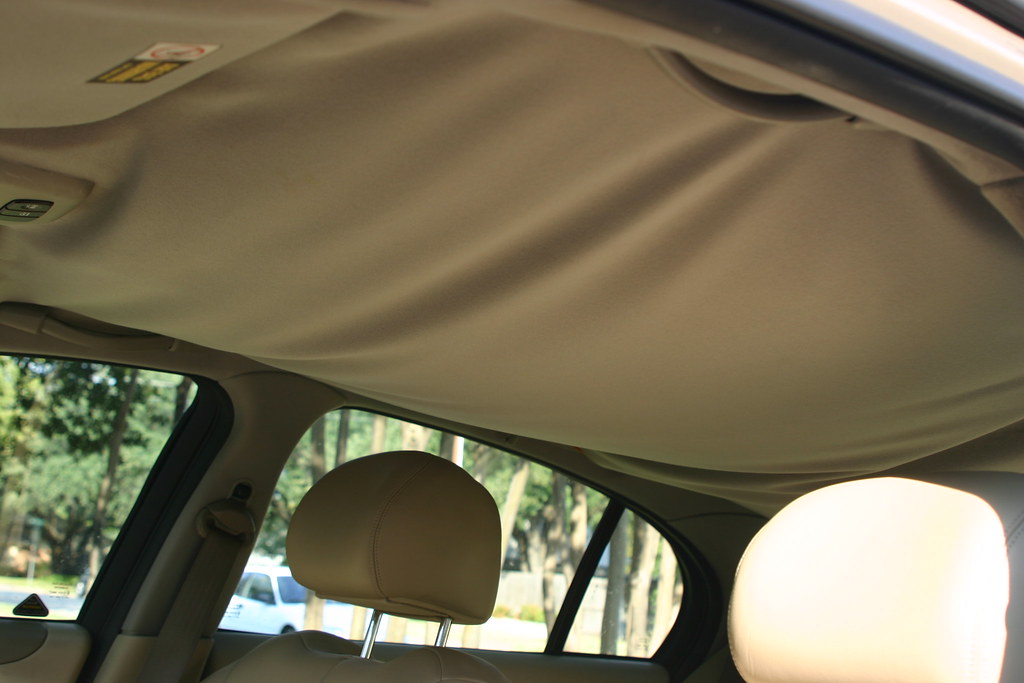
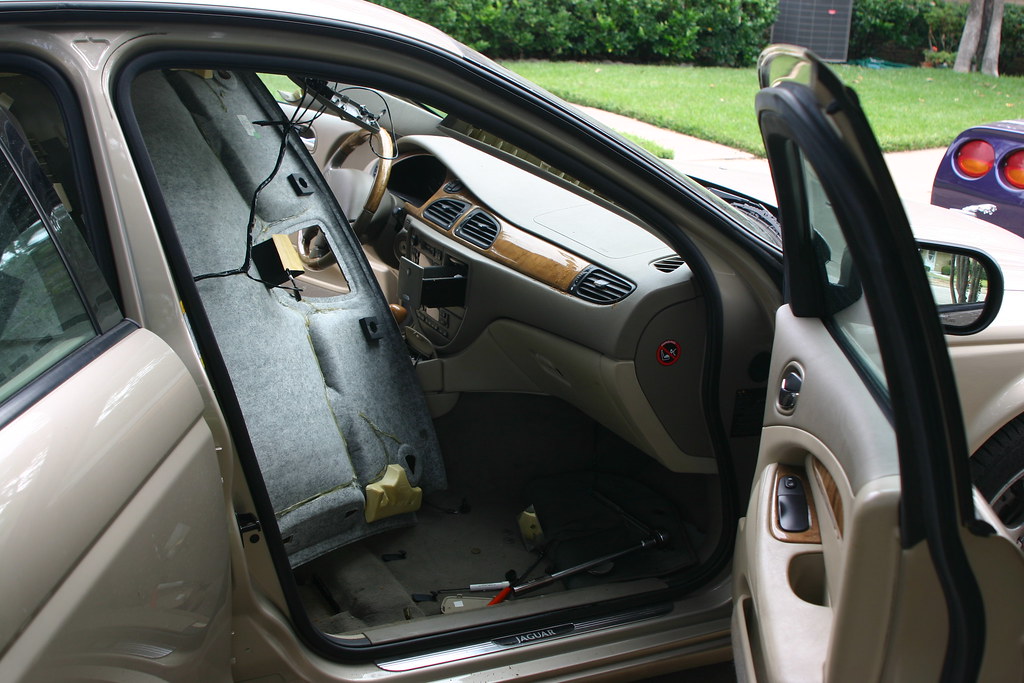
I started with this:
Using some cheap panel tools from Northern Tool, started removing various pieces.
The A pillar covers
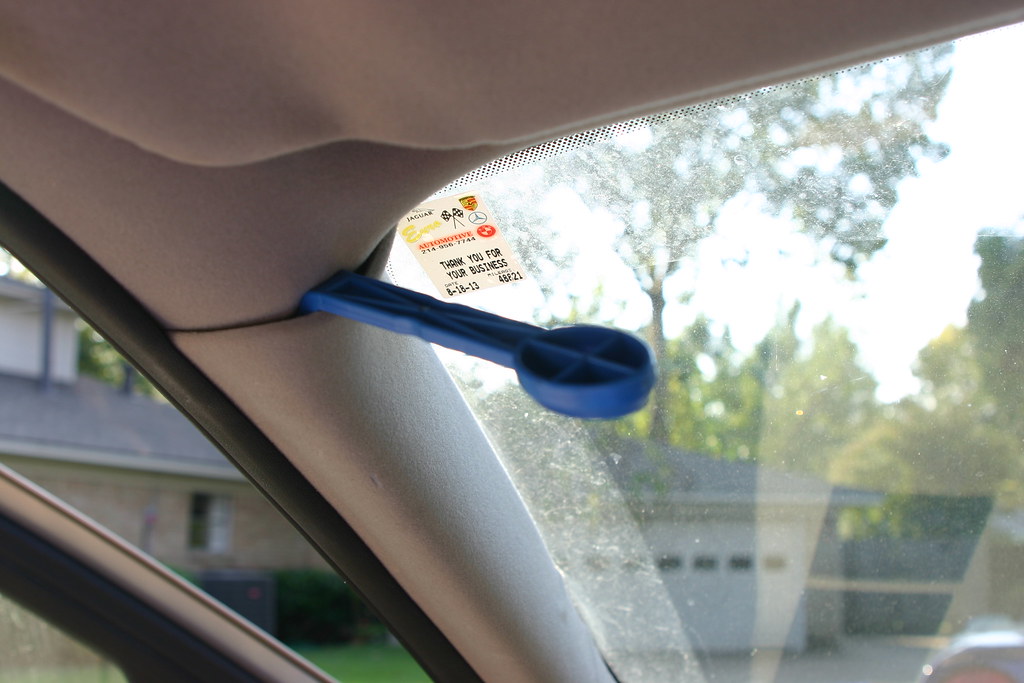

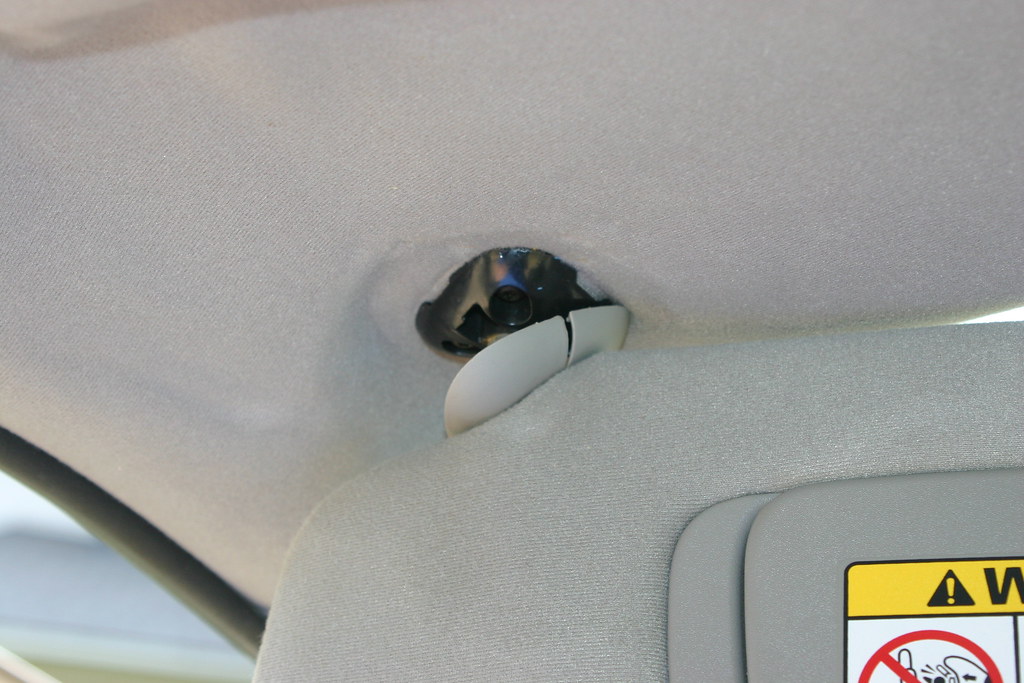
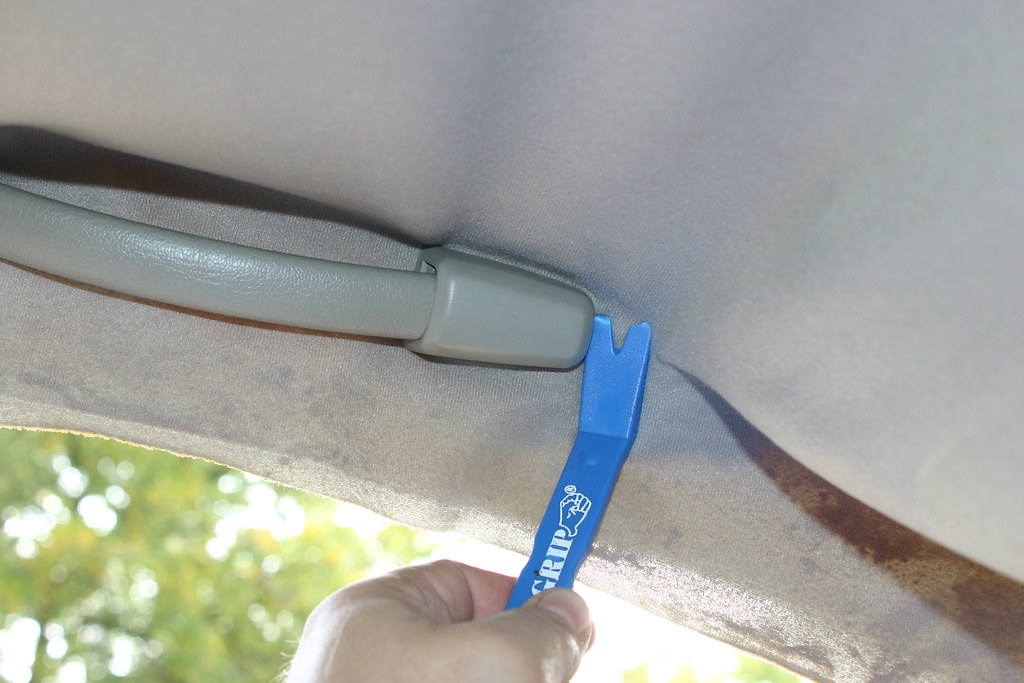
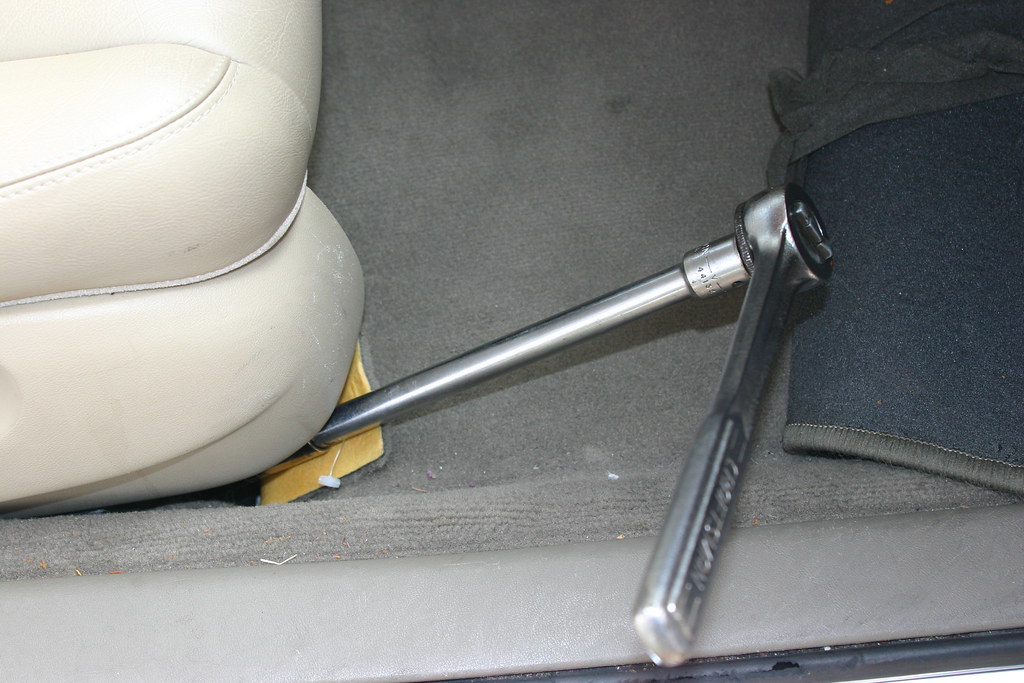
Then the visor clips using a 7/64" hex wrench. I'll need to buy the metric versions I guess.
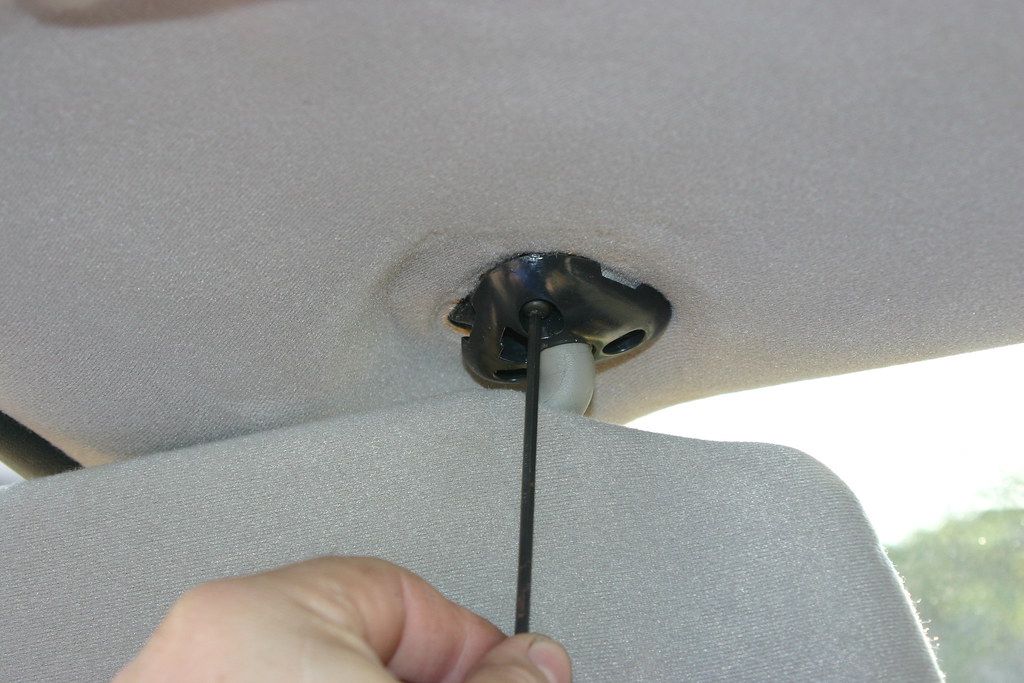
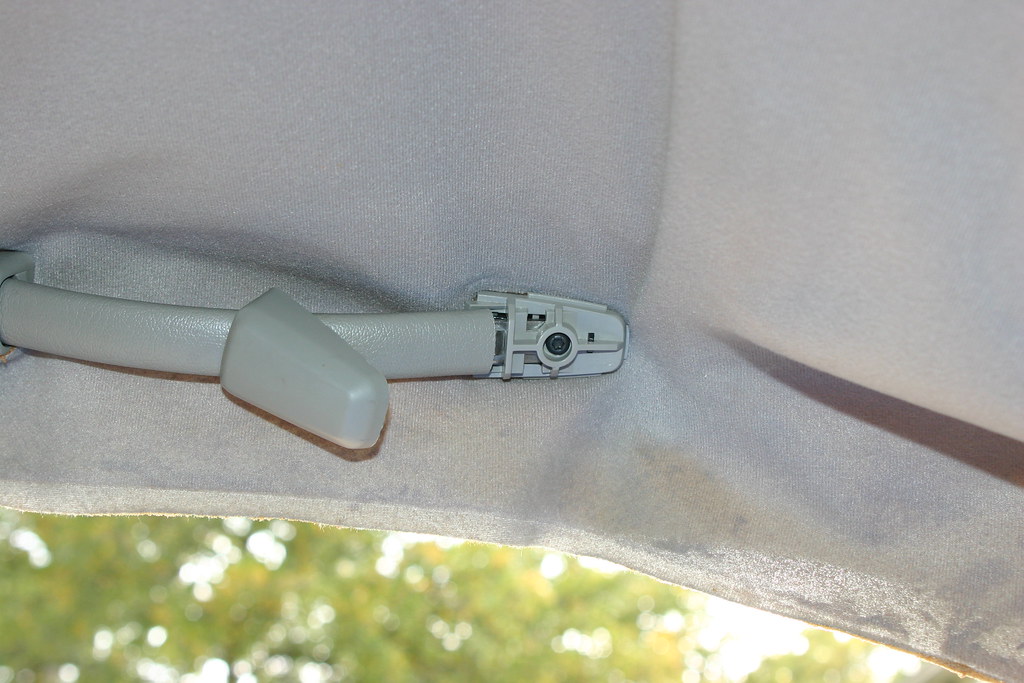
Then the visor itself, which had to be left hanging by the electrical wires. Used same hex wrench.

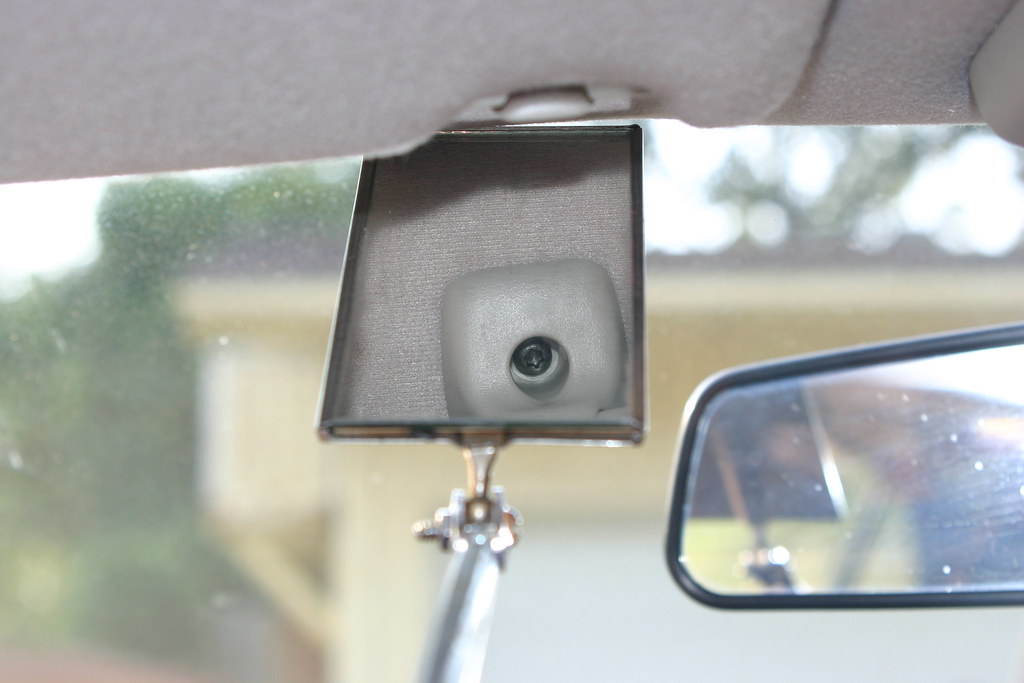
Then the overhead console. Note it should be popped out closed to the windshield then working your way back. The back does not pop out. The unit slides towards the windshield. See clip in second picture.
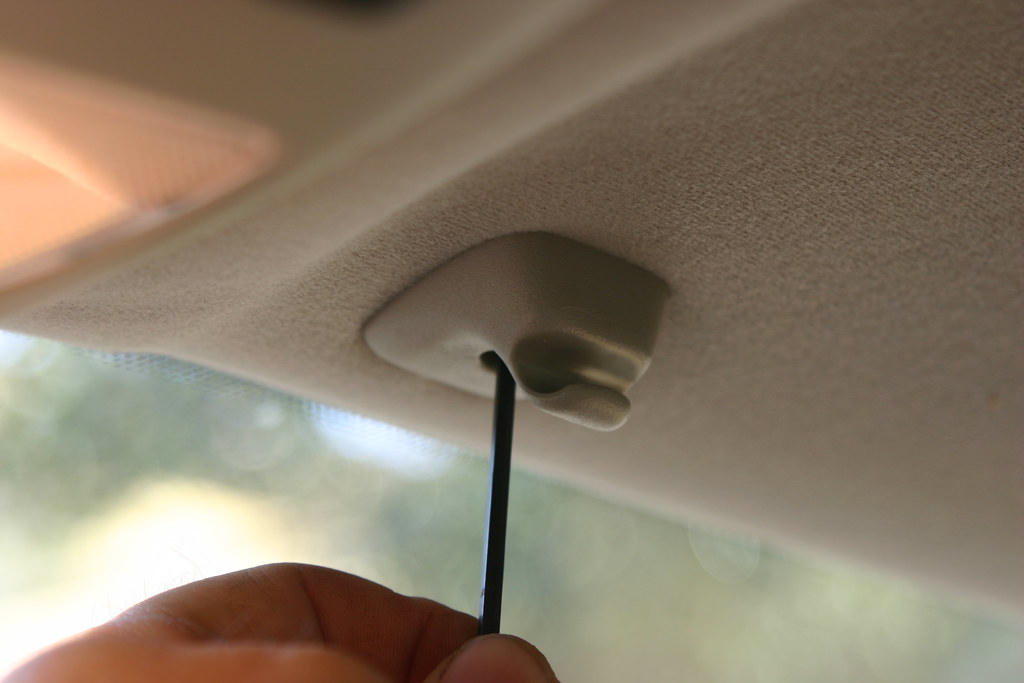
Then the grab handles using same hex wrench.
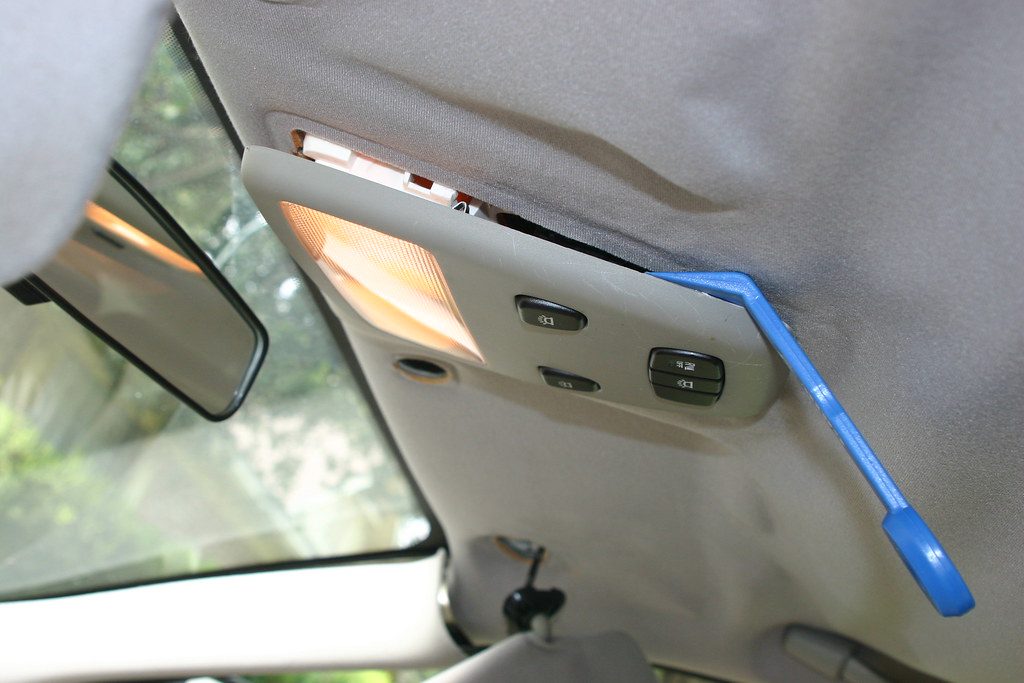
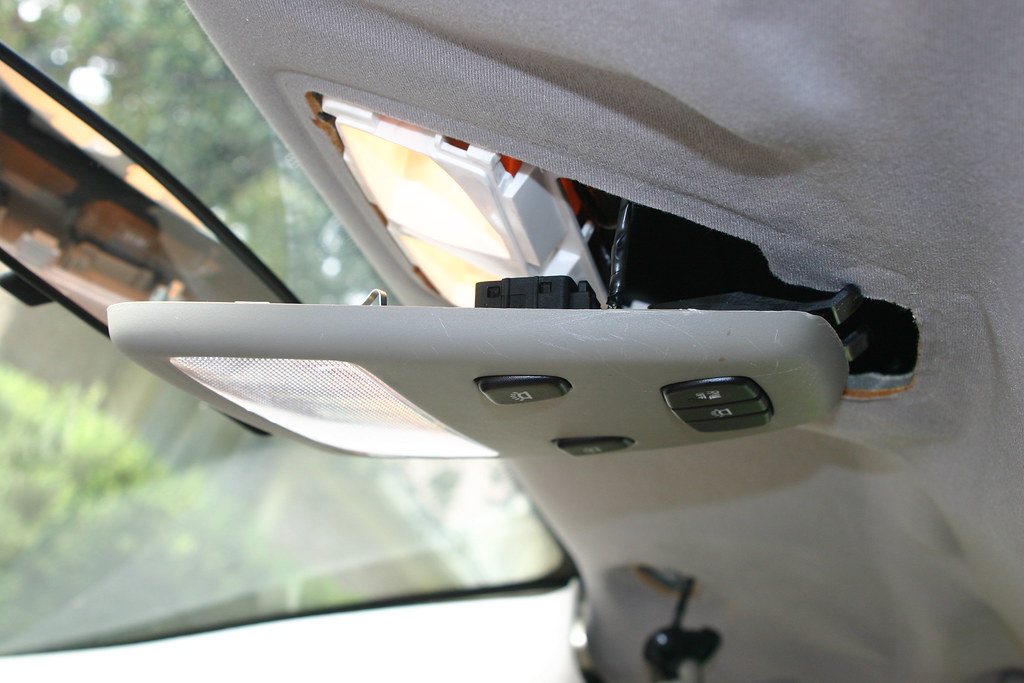
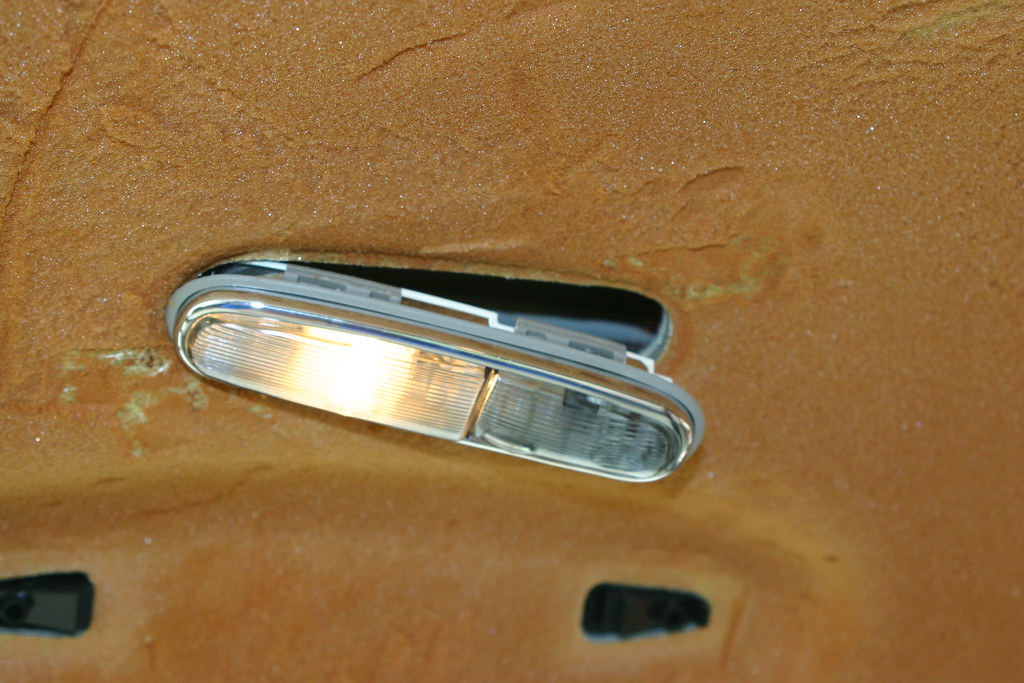
Then the rear interior lights and then turned and pushed them back up through the headliner.

Then I pulled the C pillar cover down but didn't remove, like the A pillar.
The B pillar cover was pulled down but didn't get removed, but had to use a 17mm socket to remove the seat belt retaining nut. Sorry no pictures.
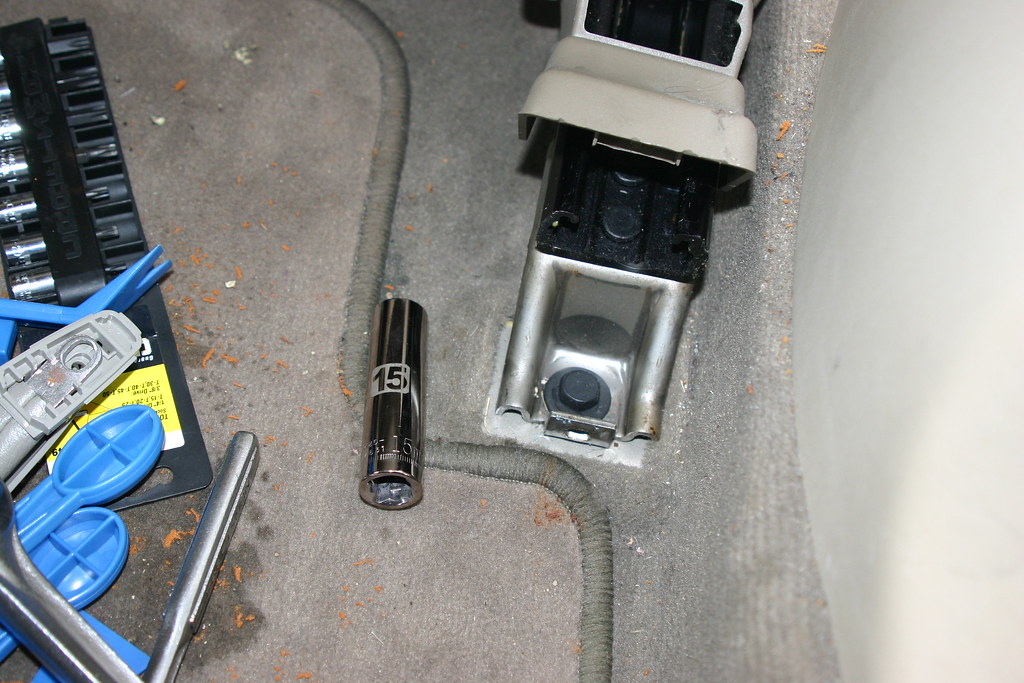
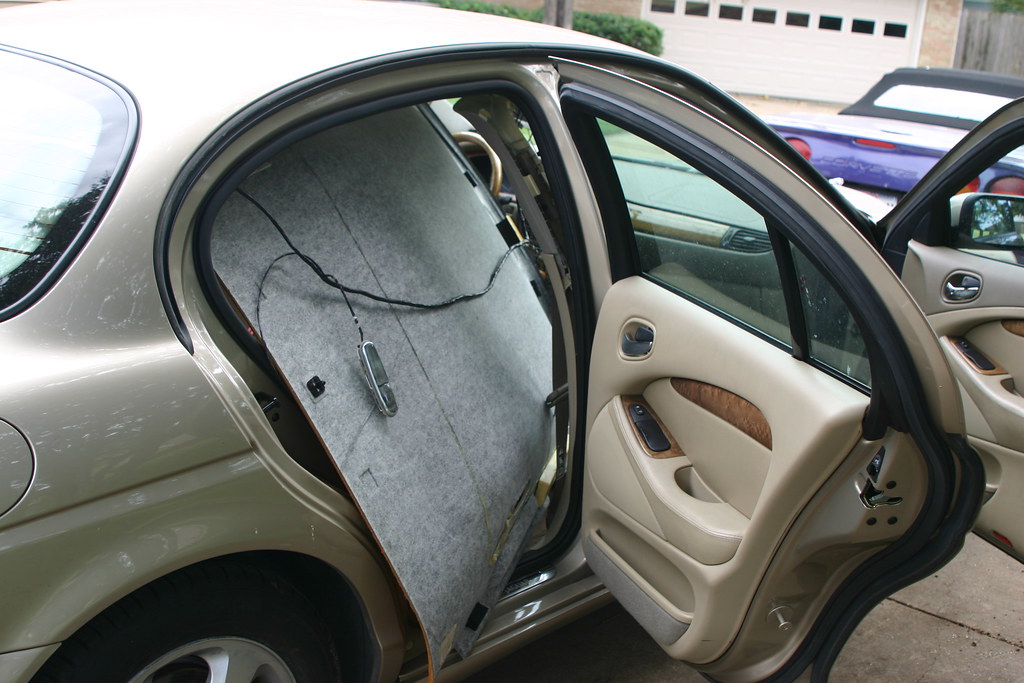
Removed the front passenger seat. Moved seat all the way forward and removed covers at the back and used a 15mm socket to remove the bolt on each side.
Then moved the seat all the way back and removed the front retaining bolts. The front two are hidden under the carpet, but it was cut to allow easy access.
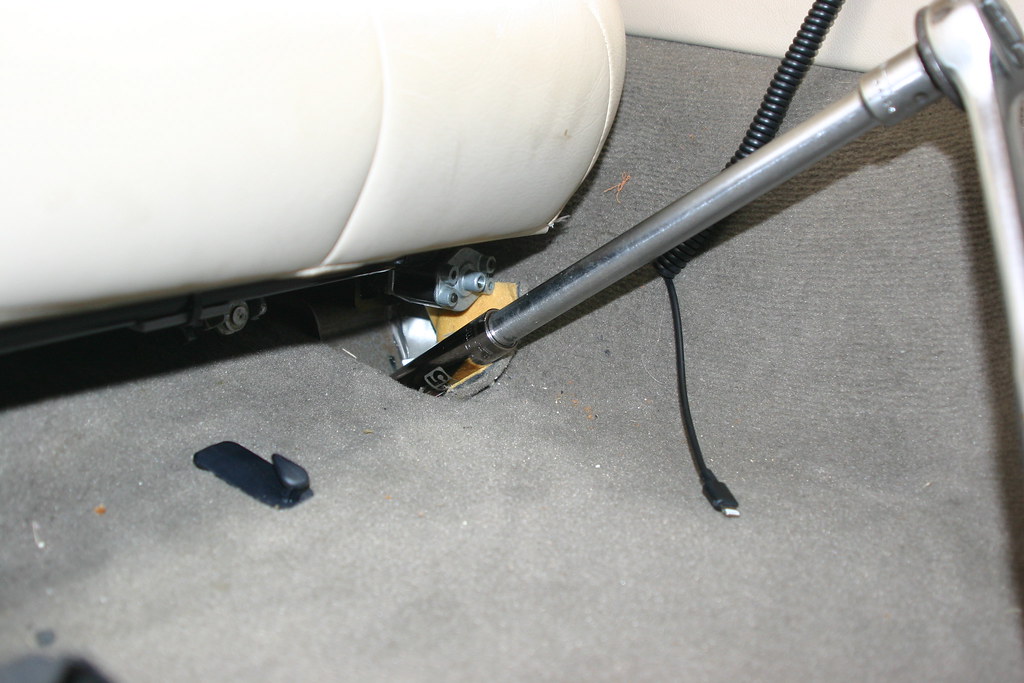
At this point I disconnected the battery negative cable and had lunch. I'd read to disconnect the battery for at least 2 minutes before removing the cables going to the bottom of the seat. Had to remove the nut holding the end of the seat belt to the seat. The cables were disconnected and the seat pulled out through the door.

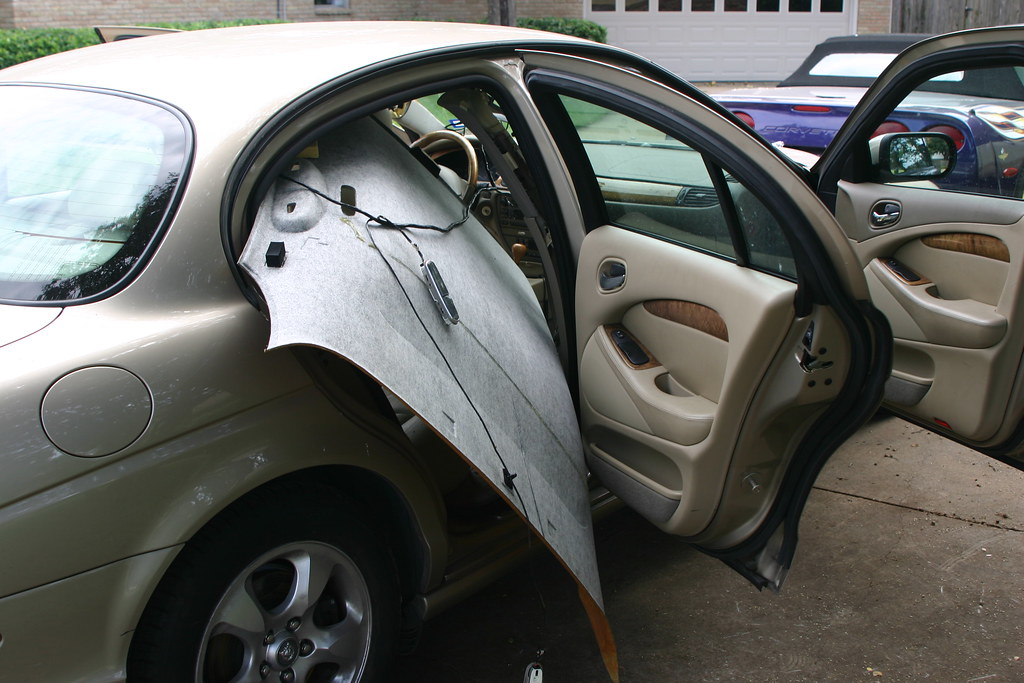
Then carefully working all the away around, I gently pulled the headliner "board" out of the weather seal.
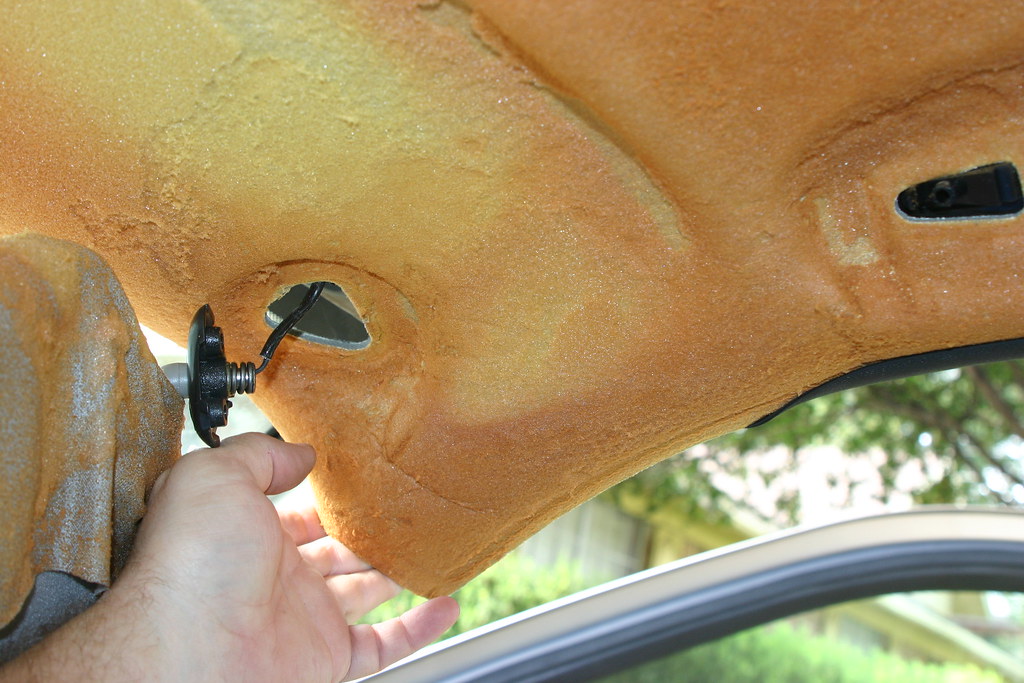
Finally the visor electrical connections were exposed and then disconnected.
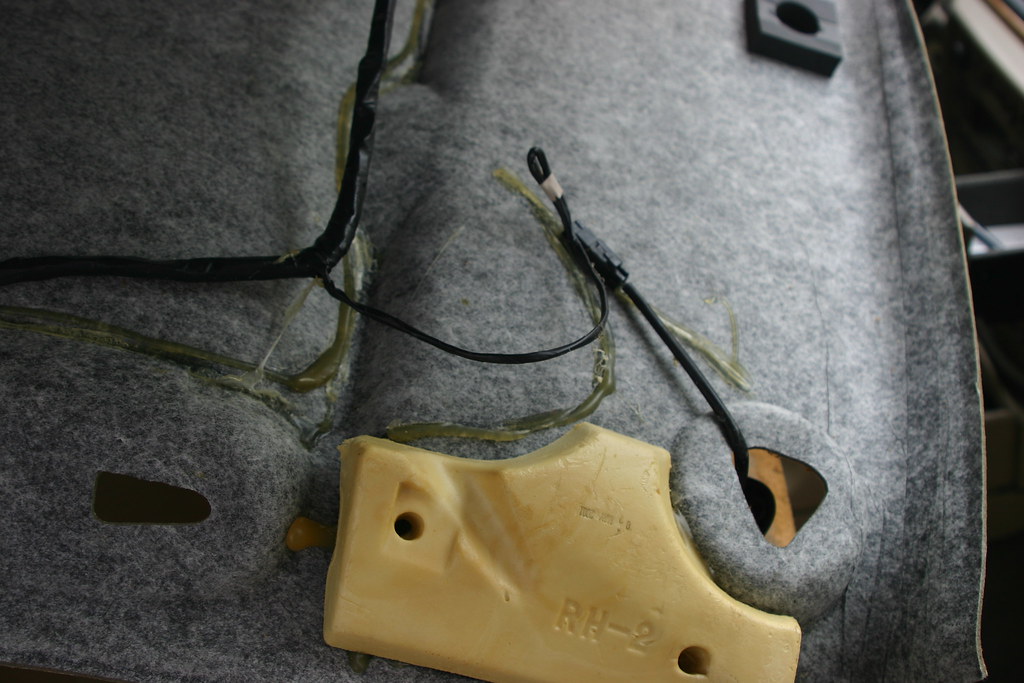
Then I dropped the headliner down into the space where the front passenger seat was and angled the back towards the rear passenger door.
Then I lifted the corner on the floor in the front passenger section and pushed it us some. Then in the rear door area, bowed the board enough to clear what would be the back driver side passenger corner. Then it was a simple matter of sliding it on out.
Then I put the seat back and zip tied the loose wiring up and out of the way. Also reinstalled the visors.
Now to figure out how to clean the board, replace the headliner material and reinstall.
Brett
Using some cheap panel tools from Northern Tool, started removing various pieces.
The A pillar covers
Then the visor clips using a 7/64" hex wrench. I'll need to buy the metric versions I guess.
Then the visor itself, which had to be left hanging by the electrical wires. Used same hex wrench.
Then the overhead console. Note it should be popped out closed to the windshield then working your way back. The back does not pop out. The unit slides towards the windshield. See clip in second picture.
Then the grab handles using same hex wrench.
Then the rear interior lights and then turned and pushed them back up through the headliner.
Then I pulled the C pillar cover down but didn't remove, like the A pillar.
The B pillar cover was pulled down but didn't get removed, but had to use a 17mm socket to remove the seat belt retaining nut. Sorry no pictures.
Removed the front passenger seat. Moved seat all the way forward and removed covers at the back and used a 15mm socket to remove the bolt on each side.
Then moved the seat all the way back and removed the front retaining bolts. The front two are hidden under the carpet, but it was cut to allow easy access.
At this point I disconnected the battery negative cable and had lunch. I'd read to disconnect the battery for at least 2 minutes before removing the cables going to the bottom of the seat. Had to remove the nut holding the end of the seat belt to the seat. The cables were disconnected and the seat pulled out through the door.
Then carefully working all the away around, I gently pulled the headliner "board" out of the weather seal.
Finally the visor electrical connections were exposed and then disconnected.
Then I dropped the headliner down into the space where the front passenger seat was and angled the back towards the rear passenger door.
Then I lifted the corner on the floor in the front passenger section and pushed it us some. Then in the rear door area, bowed the board enough to clear what would be the back driver side passenger corner. Then it was a simple matter of sliding it on out.
Then I put the seat back and zip tied the loose wiring up and out of the way. Also reinstalled the visors.
Now to figure out how to clean the board, replace the headliner material and reinstall.
Brett


Veteran Member
Joined: Mar 2013
Posts: 3,018
Likes: 182
From: Pawleys Island, SC USA (formerly from Tabernacle, NJ USA)
Very well done. Good luck with the re-install. Can't wait to see how it turns out. Thanks, Brett.
Veteran Member


Joined: Feb 2009
Posts: 8,020
Likes: 1,731
From: Sunny South Carolina
Trending Topics


Senior Member
Joined: Jan 2010
Posts: 125
Likes: 16
From: Auckland New Zealand
I can see this on my horizon too. Telltale signs of mine starting to drop.
I have already gone through the same on my '99 XKR. I must say the gluing of the new fabric on is the easy bit. You have overcome the most difficult part already.
Thanks for posting. You make it very easy for those who follow.
If you look at 'Headliner" posts over on the XK8 XKR forum, there are a couple of very good , clear threads on sources of fabric, and glues, and methods for the next stage if you need that info.
I think there are a couple of threads in the X300 forum too!
Can't do too much research!
Good luck with the next phase.
I look forward to following your progress.
Phil
Thread Starter
|
Junior Member
Joined: Jun 2014
Posts: 8
Likes: 22
From: Dallas
Brett
Veteran Member
Joined: Mar 2013
Posts: 3,018
Likes: 182
From: Pawleys Island, SC USA (formerly from Tabernacle, NJ USA)
This is probably not the right thread to ask about repairing your sunroof, as there are other threads in the forum that have already covered sunroof repairs in detail. Please use the search tool to find those threads. If you find it is necessary to remove the headliner, refer back to this thread for instructions on how to do it.

Senior Member
Joined: Apr 2013
Posts: 149
Likes: 15
From: Lismore NSW Australia
Thanks for the photos. What is the reason for disconnecting the battery when removing the passenger seat? Is it the airbags ? and if I don't have airbags then I still have electric seats to disconnect ?
Paul
Paul
Thread Starter
|
Junior Member
Joined: Jun 2014
Posts: 8
Likes: 22
From: Dallas
Yes. My understanding is that it was to prevent deployment of the air bags. There are two electrical connectors under the seat which I failed to take a picture of. There is one black and one yellow. I believe the yellow one is related to the air bags/supplemental retrain systems. It seemed to be the standard yellow used in the industry to indicate its use.
To remove the seat it will be necessary to remove both electrical connectors.
I'll add those pictures when I put the headliner back in.
Brett
To remove the seat it will be necessary to remove both electrical connectors.
I'll add those pictures when I put the headliner back in.
Brett


Junior Member
Joined: May 2018
Posts: 4
Likes: 0
From: scottsdale arizona
Question : with a sagging cloth headliner condition . Is the following possible : use a spray can glue applicator ( with a small hose like that of a WD40 can sprayer ). insert the spray hose ( approx. 3/32 diameter ) into the cloth ( with tiny hole in the cloth ) , then spray the glue onto the headliner backing , then press the headliner cloth back onto the headliner backing in position ?