

2003 S Type Rear Window Regulator Change With Pics FAQ

Thread Starter
|


Joined: Oct 2007
Posts: 121,160
Likes: 6,657
From: PHX some of the time
I've seen a lot of discussion on regulator changing but very few pictures and the pics I have seen are of the pre-facelift cars.
As was changing mine today I thought I'd post up some pictures and info that may help someone. the pictures have not come out as well as I would have liked but you will get the idea.
First job is to remove the door card, there are two phillips screws below the rubber mat in the grab well for door closing.
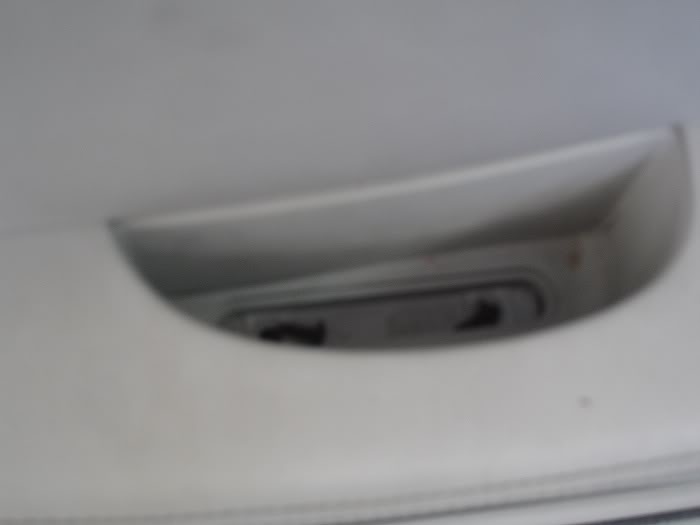
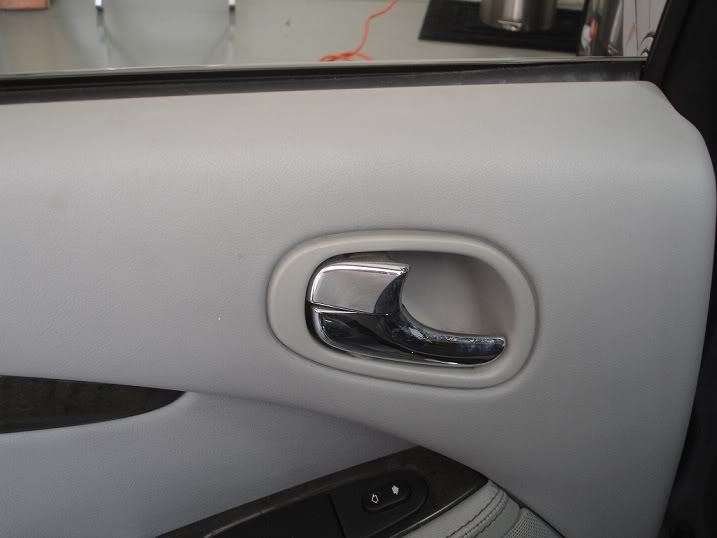
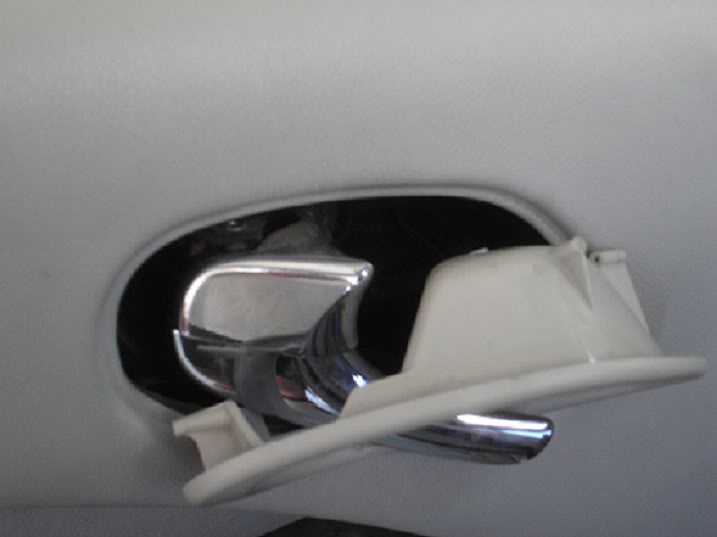
the surround behind the door handle needs to come out if you work around it with a small scredriver or something similar it will come out quite easily, take care not to damage the panel.
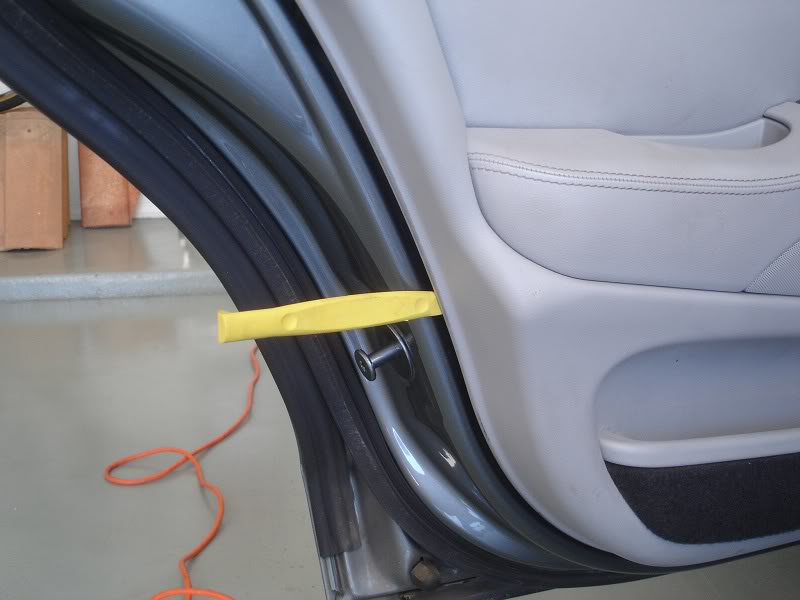
Then pry around the door card again taking care of the paint and trim, I used a plastic trim removal tool.
Here is the back of the card, you need to unclip the cable from the switchpack to remove it completely.
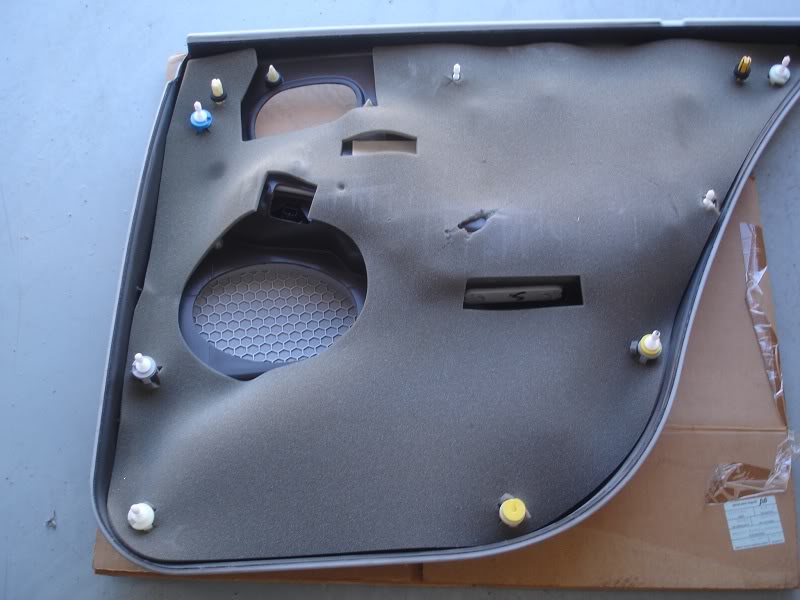
There is a small oval opening in the center of the door covered with a round piece of tape, remove the cover and align the plastic gripper section of the regulator until the locating pin can be seen.
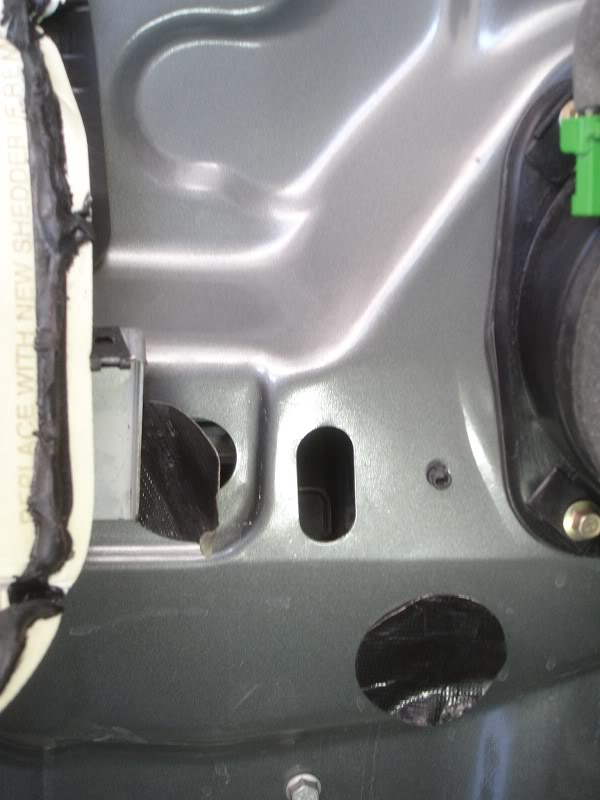
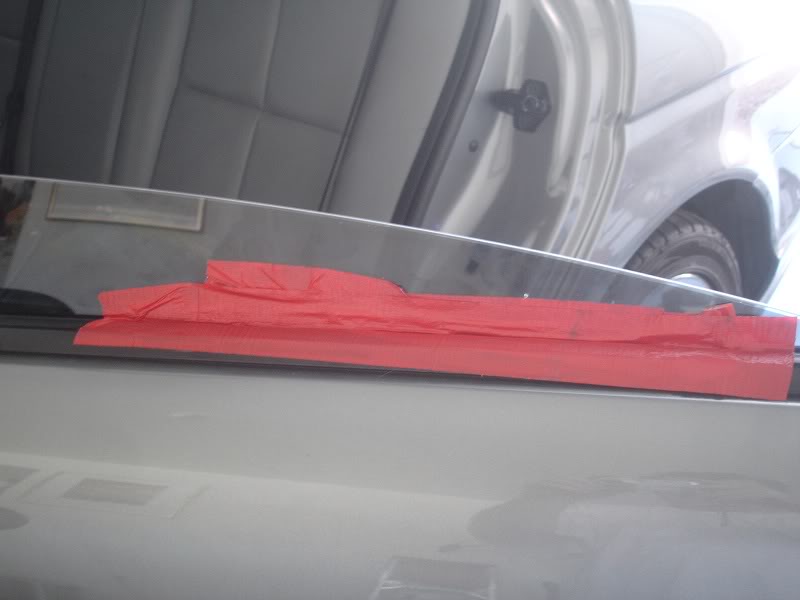
It is useful to have another pair of hands at this point, I didn't so used tape to hold the window in the correct position.
You will see the plastic pin that goes through the plastic part of the regulator and the window with a smaller pin in the center, using a suitable punch drive the center pin out, take care not to hit the glass! Then drive out the outer part both of these will fall into the bottom of the door and will need to be fished out later.
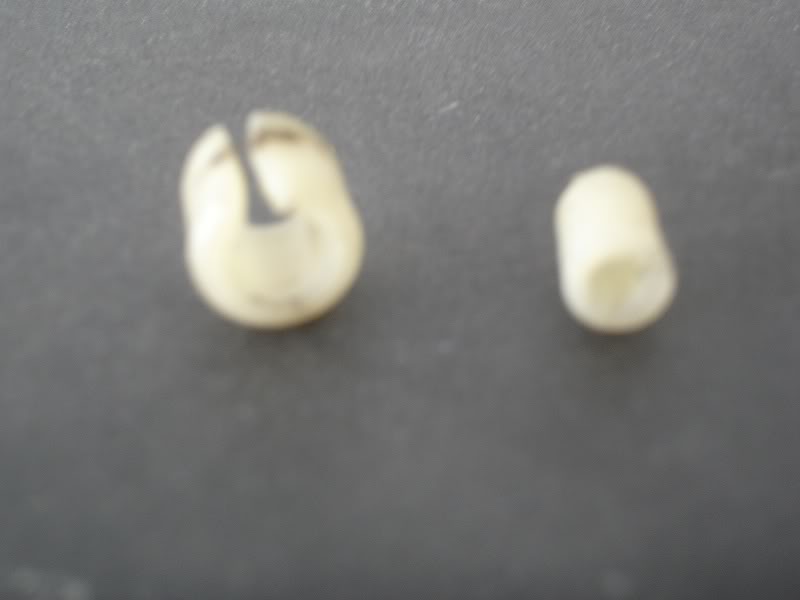
These are the pins, sorry about the picture quality.
When the pins are out pull the window all the way up and secure it again.
I removed the speaker to get more access and to reach the pins in the bottom of the door.
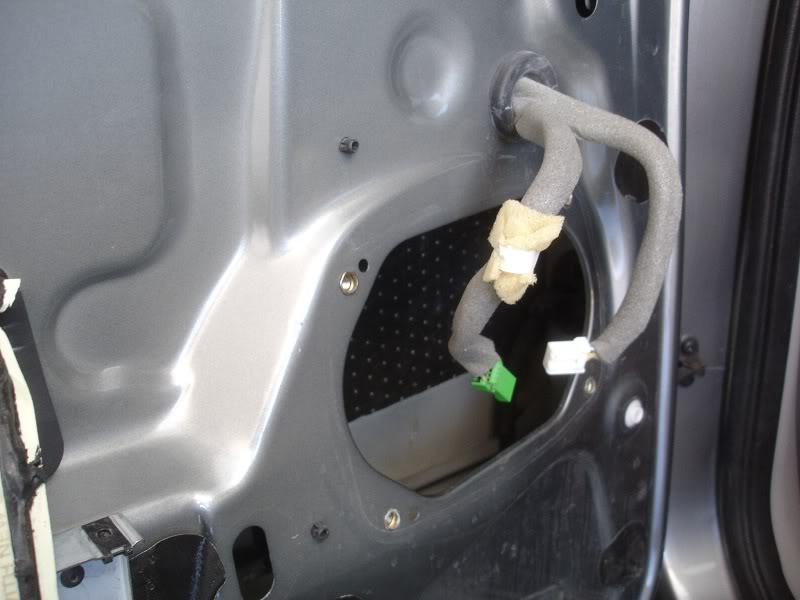
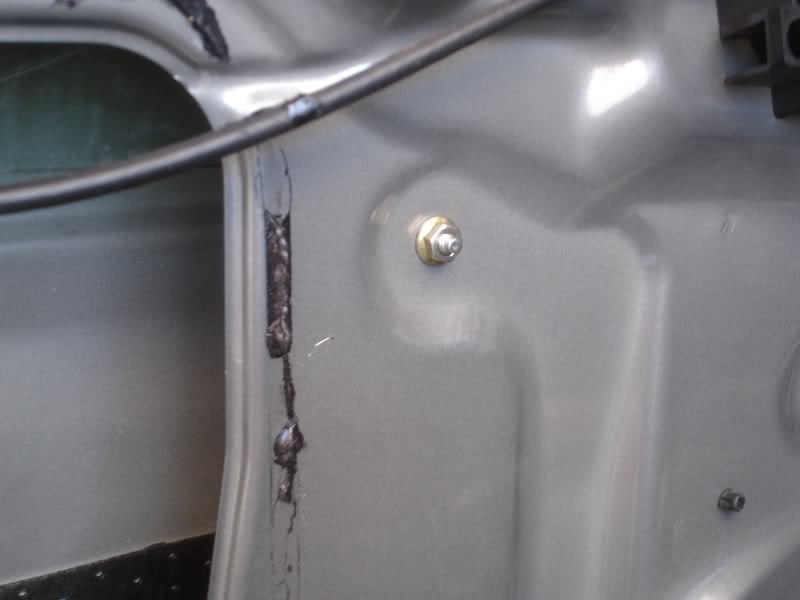
The regulator is secured by one stud at the top
And three bolts at the bottom, the third bolt is above and to the left of these.
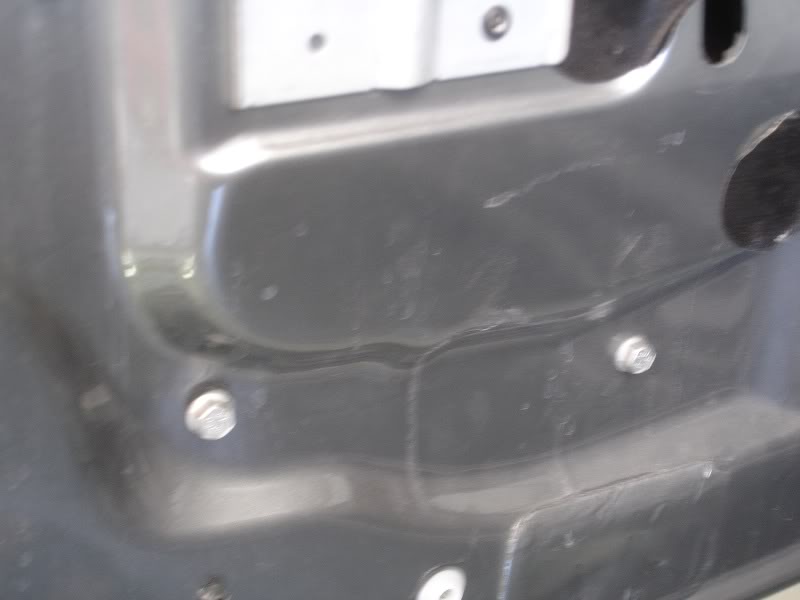
When these are removed it is possible to wriggle the regulator around enough to disconnect the motor electrical plug and then remove the unit entirely.
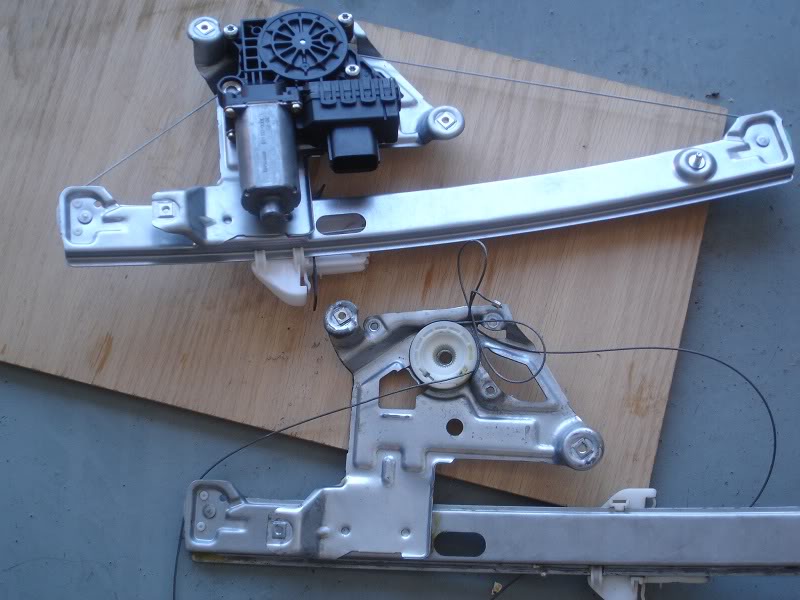
The motor needs to be switched over to the new regulator, it is fixed with 3 torx screws and is a simple switch, unless the ***** who made it forgot to tap the holes.
After a quick trip to Harbor freight the holes were tapped and the motor was on.
Installation is the reverse procedure except you should put the plastic pins into the glass before the regulator is installed then push the window down into the holder until it clicks into place.
The window is working fine now and completing the reset procedure got the one touch closing back in operation.
The whole thing took me a couple of hours including the trip to Harbor Freight and it was bloody hot - 110deg.
I'd guess if I did the other side tomorrow it would be well under an hour.
As was changing mine today I thought I'd post up some pictures and info that may help someone. the pictures have not come out as well as I would have liked but you will get the idea.
First job is to remove the door card, there are two phillips screws below the rubber mat in the grab well for door closing.
the surround behind the door handle needs to come out if you work around it with a small scredriver or something similar it will come out quite easily, take care not to damage the panel.
Then pry around the door card again taking care of the paint and trim, I used a plastic trim removal tool.
Here is the back of the card, you need to unclip the cable from the switchpack to remove it completely.
There is a small oval opening in the center of the door covered with a round piece of tape, remove the cover and align the plastic gripper section of the regulator until the locating pin can be seen.
It is useful to have another pair of hands at this point, I didn't so used tape to hold the window in the correct position.
You will see the plastic pin that goes through the plastic part of the regulator and the window with a smaller pin in the center, using a suitable punch drive the center pin out, take care not to hit the glass! Then drive out the outer part both of these will fall into the bottom of the door and will need to be fished out later.
These are the pins, sorry about the picture quality.
When the pins are out pull the window all the way up and secure it again.
I removed the speaker to get more access and to reach the pins in the bottom of the door.
The regulator is secured by one stud at the top
And three bolts at the bottom, the third bolt is above and to the left of these.
When these are removed it is possible to wriggle the regulator around enough to disconnect the motor electrical plug and then remove the unit entirely.
The motor needs to be switched over to the new regulator, it is fixed with 3 torx screws and is a simple switch, unless the ***** who made it forgot to tap the holes.
After a quick trip to Harbor freight the holes were tapped and the motor was on.
Installation is the reverse procedure except you should put the plastic pins into the glass before the regulator is installed then push the window down into the holder until it clicks into place.
The window is working fine now and completing the reset procedure got the one touch closing back in operation.
The whole thing took me a couple of hours including the trip to Harbor Freight and it was bloody hot - 110deg.
I'd guess if I did the other side tomorrow it would be well under an hour.
Last edited by Norri; Jul 1, 2011 at 08:33 PM.
Veteran Member


Joined: Feb 2009
Posts: 8,020
Likes: 1,731
From: Sunny South Carolina
Nice write up norri! Thanks for taking the time to take pictures along the way.
hee hee damn "*****"!
BTW am I seeing your exterior window trim as black and not chrome (where you have the red tape)?
hee hee damn "*****"!
BTW am I seeing your exterior window trim as black and not chrome (where you have the red tape)?

Veteran Member

Joined: Jan 2009
Posts: 13,081
Likes: 4,736
From: Raleigh, NC
Nice job, norri. Hope your other side holds up indefinitely. Plastic parts in these window regulators will never make any sense other than cost reduction at the factory. Just another parts failure waiting to happen for all of us....
Thread Starter
|
Joined: Oct 2007
Posts: 121,160
Likes: 6,657
From: PHX some of the time
I assume it was part of the sports package as they took all the other chrome parts off.
Todays project is the thermostat hose assy, I put the car outside and I can't touch the damn thing now, forecast is 118deg.


Junior Member
Joined: Sep 2012
Posts: 1
Likes: 1
From: Victoria, BC, Canada
Thanks Norri, made my job much, much easier. Left side now both replaced...crossing fingers for the passenger's side, but will probably order the parts anyway. As you all have all said...these plastic parts are indeed planned obsolence...a repair in the making.
Steve
Steve
Trending Topics

Junior Member
Joined: Dec 2011
Posts: 29
Likes: 4
Hi All,
Just finished doing this repair on my '05 S-Type.
Couple of lessons learned:
1. Very gently pry the release clip on the window regulator motor power connection and it will slide right off. Don't gently pry the release clip and it just isn't going to come off.
2. The regulator I got from Amazon also did not have threads to mount the motor. Be prepared for this.
3. I used a long hemostat to insert the outer plastic ring into the regulator slide and window glass. It made the job way easier as it is really difficult to get your hand behind the glass when it's that far down.
4. When you insert the inner expanding sleeve, tap very gently on it with an appropriate length punch until it is seated. Otherwise you'll just pop the whole inner and outer sleeve assembly out the back and have to dig it out from the bottom of the door.
5. Take the opportunity to lubricate the inner door mechanism while you have the panel off. Might as well do some maintenance when you've got it open.
Have a great day!
Scott

Junior Member
Joined: Sep 2011
Posts: 19
Likes: 1
From: Brighton, MI, USA
I am stocking the plastic window regulator clips for the S-Type.
In 90% of all regulator malfunctions, it is those plastic clips (become brittle with age, as on virtually ALL cars) that fail.
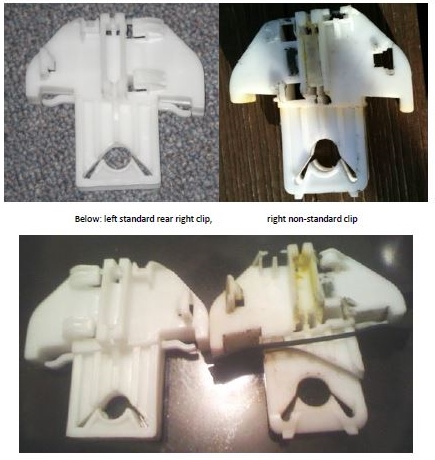
Every once in a while, I come across an S-Type were the clips do NOT fit, since the rear regulator is using a 'non standard' clip design (mirror image of the R and L clips I have).
I have NOT been able to figure out which years/versions/models/VIN range may be using those 'non standard' regulators (for which btw NO manufacturer in Europe that I know of makes the clips).
At first glance, it is not that obvious how the 'standard' differ from the 'non standard'. I created this sheet to illustrate and identify 'non standard'.
I am 'collecting' car info for for standard and non-standard in a database to try to narrow down the 'identifiers', to help users to determine if their car can use the standard clips (for inexpensive DIY repair) or if they need to replace the entire regulator.
Can you post your car's characteristic (year/make/model/build date/VIN (?)) and identify 'standard' or 'non standard' rear clips?
Post, PM please
In 90% of all regulator malfunctions, it is those plastic clips (become brittle with age, as on virtually ALL cars) that fail.
Every once in a while, I come across an S-Type were the clips do NOT fit, since the rear regulator is using a 'non standard' clip design (mirror image of the R and L clips I have).
I have NOT been able to figure out which years/versions/models/VIN range may be using those 'non standard' regulators (for which btw NO manufacturer in Europe that I know of makes the clips).
At first glance, it is not that obvious how the 'standard' differ from the 'non standard'. I created this sheet to illustrate and identify 'non standard'.
I am 'collecting' car info for for standard and non-standard in a database to try to narrow down the 'identifiers', to help users to determine if their car can use the standard clips (for inexpensive DIY repair) or if they need to replace the entire regulator.
Can you post your car's characteristic (year/make/model/build date/VIN (?)) and identify 'standard' or 'non standard' rear clips?
Post, PM please
Last edited by Norri; Apr 11, 2014 at 09:25 PM. Reason: Removed commercial links

Veteran Member
Joined: Jun 2009
Posts: 3,899
Likes: 803
From: Home
Be sure to check the back of the door panel to see if any of the push pins are broken. It looks like you are missing one at the bottom. You get rattles and squeaks if one or more push pins are missing.
These push pins are identical to the Lincoln LS part so they are easy to find. I did note Jaguar adds a small foam collar to the pin. I guess for added noise control. These foam collars can be swapped over if you new pin does not have them.
Usually changing just the plastic part that breaks is not a good idea. Look at the picture of the bad regulator posted above. The cables get kinked and all twisted up. I have attempted to restring the regulator but have never got it back correctly. The LAST thing I want to do is go back in to a repair I just did!
Do yourself a favor and just buy the entire regulator.
Another tip. You must clock the motor to your new regulator or your window might not go all the way up or all the way down. There is a range that the automatic adjustment can handle but it's not huge. I hook up just the motor to the window switch and run it all the way up several times. Then I put the window all the way up and assemble. Sometimes there is not enough room and you will need to move the window position a bit.
The Gen 1 cars do not have this problem because they don't have the "Bounce Back" feature on the power windows that stops the window from pinching your hand or finger.
For this reason I now replace the regulator and the motor together even though the motor almost never fails. Just quicker and easier!
.
.
.
Junior Member
Joined: Sep 2011
Posts: 19
Likes: 1
From: Brighton, MI, USA
Usually changing just the plastic part that breaks is not a good idea. Look at the picture of the bad regulator posted above. The cables get kinked and all twisted up.
I have attempted to restring the regulator but have never got it back correctly. The LAST thing I want to do is go back in to a repair I just did!
Do yourself a favor and just buy the entire regulator.[/FONT][/COLOR]
I have attempted to restring the regulator but have never got it back correctly. The LAST thing I want to do is go back in to a repair I just did!
Do yourself a favor and just buy the entire regulator.[/FONT][/COLOR]
a) a 'crunchy' sound when moving windows up down can be a sign of bad cables. In this case: cables might be compromised. In most cases, the cables lost their tension when they jumped off the guide pulleys. If not willing to take the door panels off for a more detailed analysis (and then get what you need) and planning a 'fix in one stop' (and not minding the cost): get a complete regulator on hand. Even then: I would take the needed parts off the aftermarket (Dorman for example is EXCLUSIVELY made in China) regulator and keep the OEM parts (metal guides, etc)
b) if glass moves down and up (with help of hands), the clips are the likely cause.
In 90% of all cases, the plastic clip fails. The plastic (POM, selected for its superior wear resistance and low coefficient of friction) naturally ages, and becomes brittle over time. It is not so much a question IF they break, just WHEN. This applies to ALL models I know of (Audi, VW, BMW, Jaguar, Ford, GM/Opel, Chrysler, Mercedes, Dodge).
The labor to change the clips is equivalent to the labor for changing the regulator (on most cars; on some, replacement the entire regulator requires additional drilling out of rivets, and putting new rivets in).
My recommendation: where there are 2 clips (front doors), replace them BOTH when 'in there.
Thread Starter
|
Joined: Oct 2007
Posts: 121,160
Likes: 6,657
From: PHX some of the time
Volker, I've deleted your commercial links as per forum rules.
Haven't we been down this road before?
https://www.jaguarforums.com/forum/x...52/#post409042
Haven't we been down this road before?
https://www.jaguarforums.com/forum/x...52/#post409042
Veteran Member
Joined: Jun 2009
Posts: 3,899
Likes: 803
From: Home
Good point but it's not that easy to catch it BEFORE it all springs apart and fouls the cable. I also don't repair things until they break so I might not even have the car when it finally lets go.
I do agree to change all the plastic parts if you go that way. It's very common to have one plastic clip break and then if you look closely at the other they will have cracks in them. In fact I have even found that bits of white plastic start breaking off and falling to the bottom of the door. I could not figure out what the heck those little bits were until the regulator gave up the ghost.
One BIG point I wanted to make and forgot.
DON'T slam any door unless the window is all the way up or all the way down. I prefer to have them all the way up.
.
.
.
Thread Starter
|
Joined: Oct 2007
Posts: 121,160
Likes: 6,657
From: PHX some of the time
We are probably going to disagree on that one!
You are welcome to post to help others and I'm sure a discreet link in your signature will be fine, but posts containing email addresses and large links to websites aren't going to fly.
I'm going to move these two posts to the S Type thread for the sake of continuity.
You are welcome to post to help others and I'm sure a discreet link in your signature will be fine, but posts containing email addresses and large links to websites aren't going to fly.
I'm going to move these two posts to the S Type thread for the sake of continuity.
Junior Member
Joined: Sep 2011
Posts: 19
Likes: 1
From: Brighton, MI, USA
But leave the comparison photo ('standard' vs. 'non standard' regulator) in there?
Its still a mystery; and remains 'trial and error' for users to PRE determine what they need. Currently: need to remove door panel, get to the clips. Check if 'standard' or 'non standard' (and/or complete regulator change required or DIY clip (available from several aftermarket source (i.e. ebay) for little money).