

How To: S-Type Clock Spring Removal FAQ

Thread Starter
|
Senior Member
Joined: Apr 2011
Posts: 200
Likes: 43
From: Orlando
DANGER: Do NOT attempt if you have any doubt in your mind about dealing with the airbag and it's related system!!!! This is my guide and you proceed at your own risk!
I have a 2003 S-Type R (STR) but it should be the same as the S-Type and X-Type part numbers: 2W93-14A664-AE. I removed the clock spring (spiral cassette) to clean it as a test to see if that is all it needs when you get the infamous code 19. I'll update after tomorrow with a test drive.
Tools:
Phillips Head Screwdriver
T27 long torx screwdriver
T25 torx screwdriver
13/16 socket and wrench
small, flat tip screw driver
Remove 2 phillips head screw drivers from lower steering rack column:
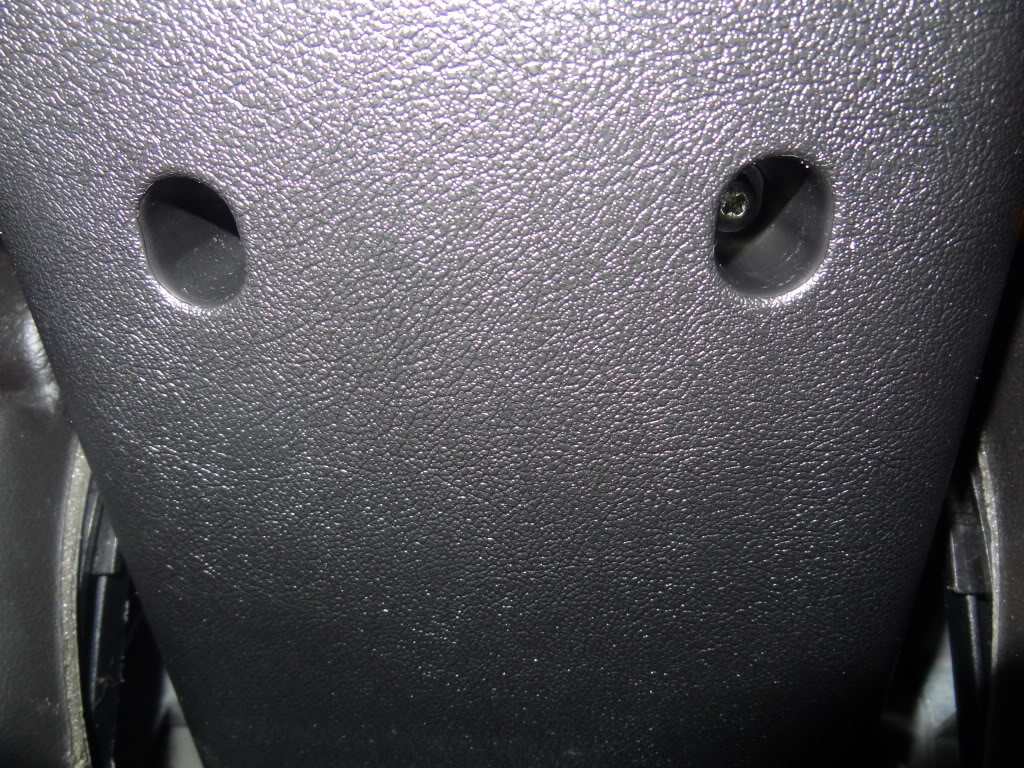
Move column all the way down and forward so the end position is furthest out and down. Now disconnect steering column adjustment knob and remove panel:
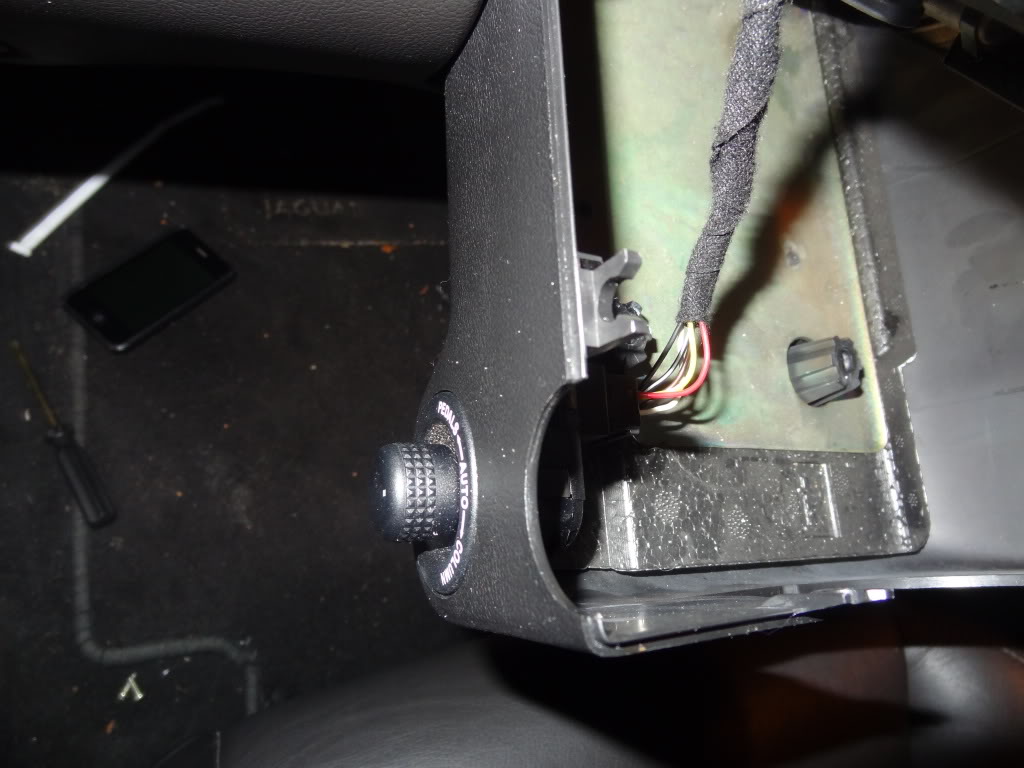
Now remove steering wheel column top panel by removing 2 phillips head screw drivers underneath the panel:
Disconnect both battery terminals.
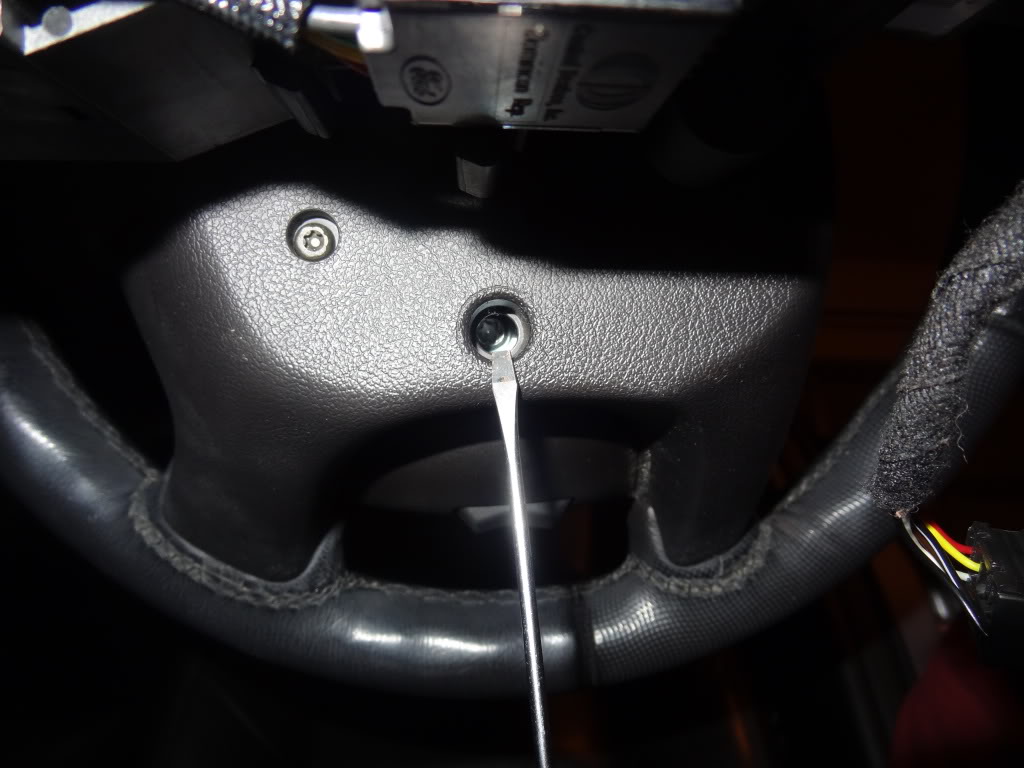
Next remove two T27 torx screws by rotating the steering wheel left 90degrees from center and then 90degrees right of center to gain access to each of the screws. You will see other torx screws in a smaller size but do not remove them as the T27 are the deepest set in the panel:
Now you can uplug the airbag connectors from the steering wheel horn cover as well as the plug for the steering wheel controls:
Close-up of plugs:
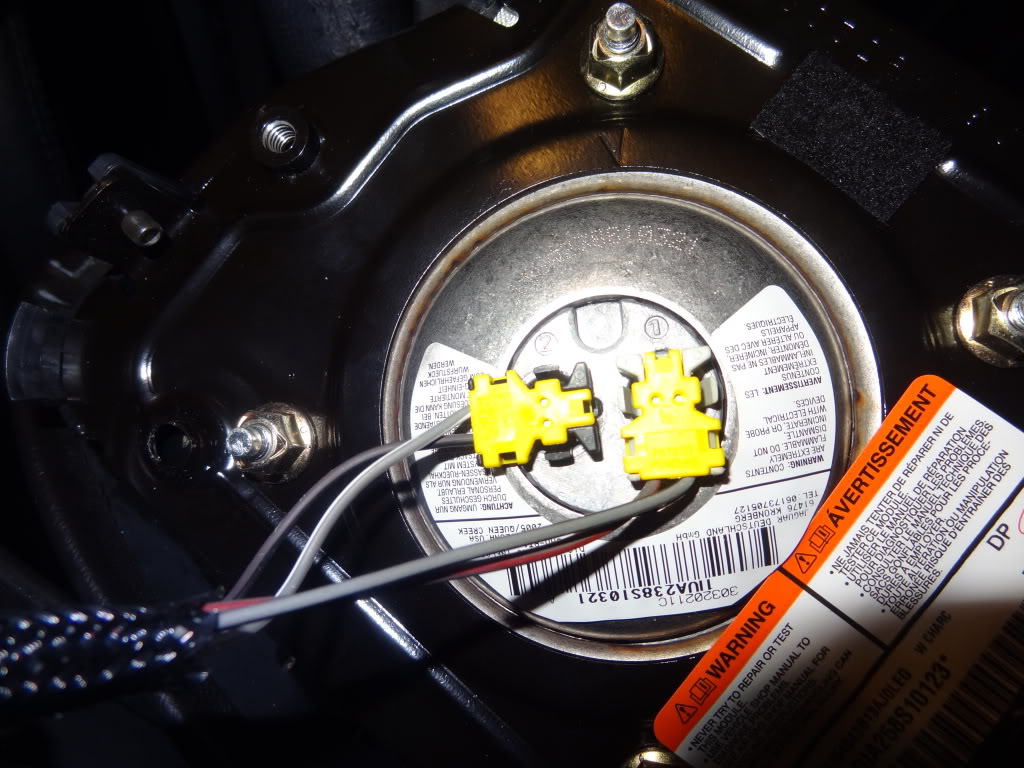
Do not worry about mixing the plugs as one is grey and one is black. They can only go into their respective holes.
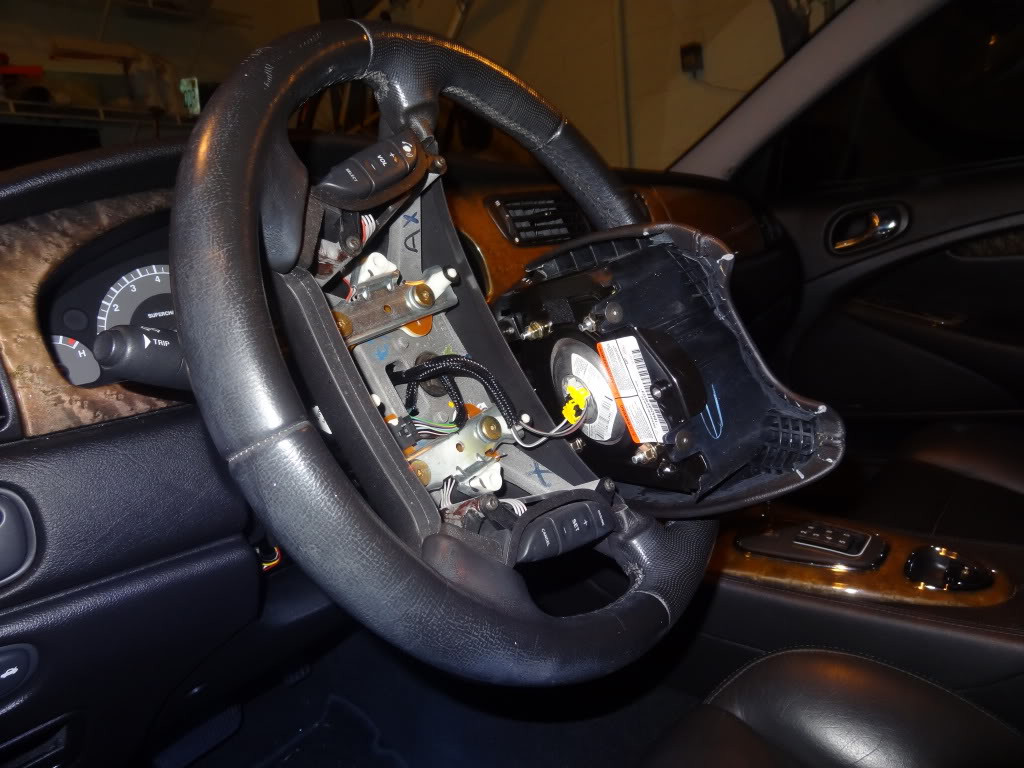
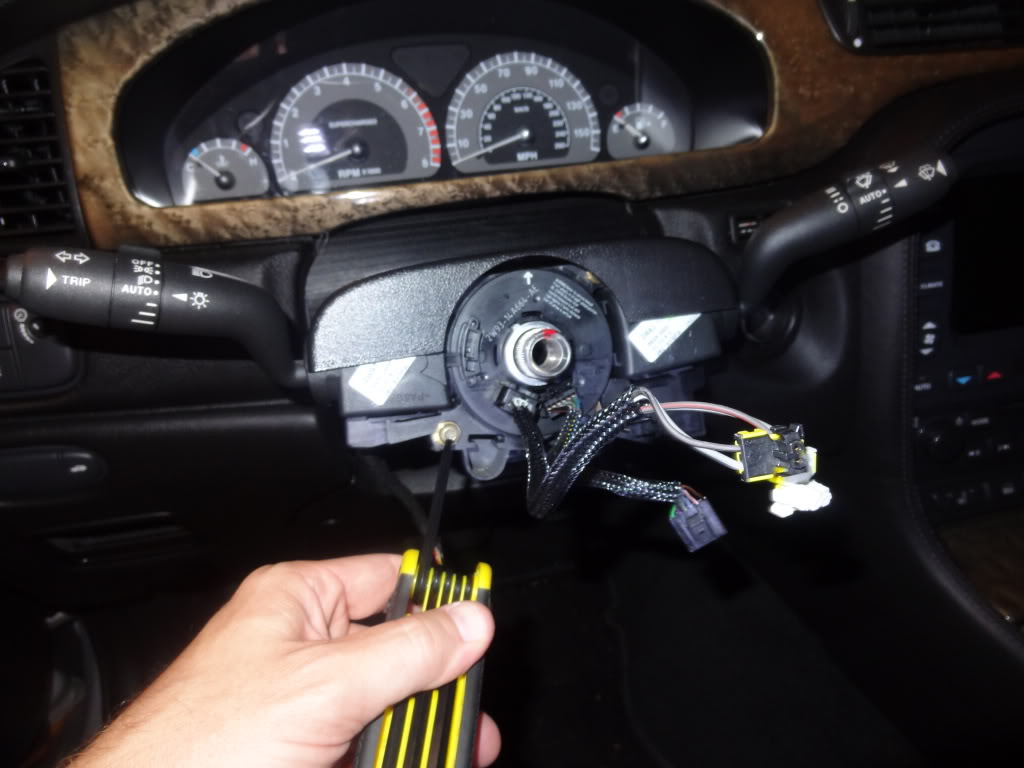
Using the 13/16 socket and wrench remove the bolt to remove the steering wheel. There is red markings to make sure that you re-align the steering wheel when you put it back on so have no fear there. Becareful of the plugs as they are routed through the steering wheel and you don't want to break them.
Now remove the four T25 torx bolts from the clock spring. The picture only shows two because I have the top panel resting on the column:
Now remove the 3 plugs on the back of the clock spring and you are done! Follow the directions in reverse and you are finished! Make sure you only connect the battery after you have completed the reinstallation.
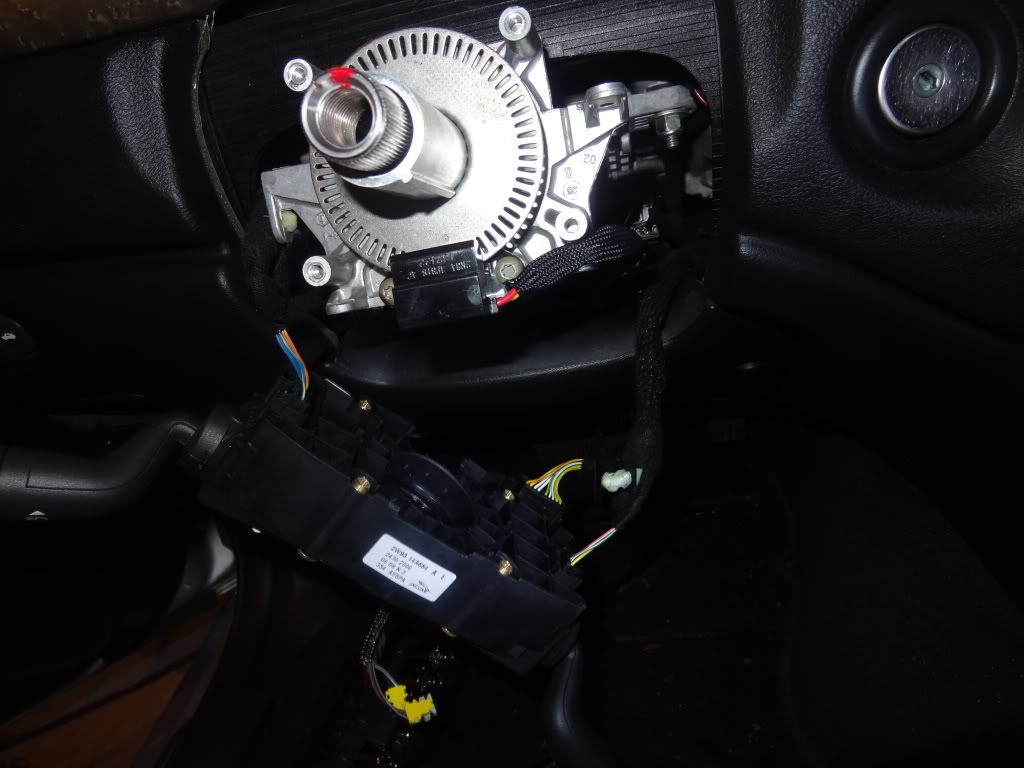
This is all that will be left of the steering wheel:
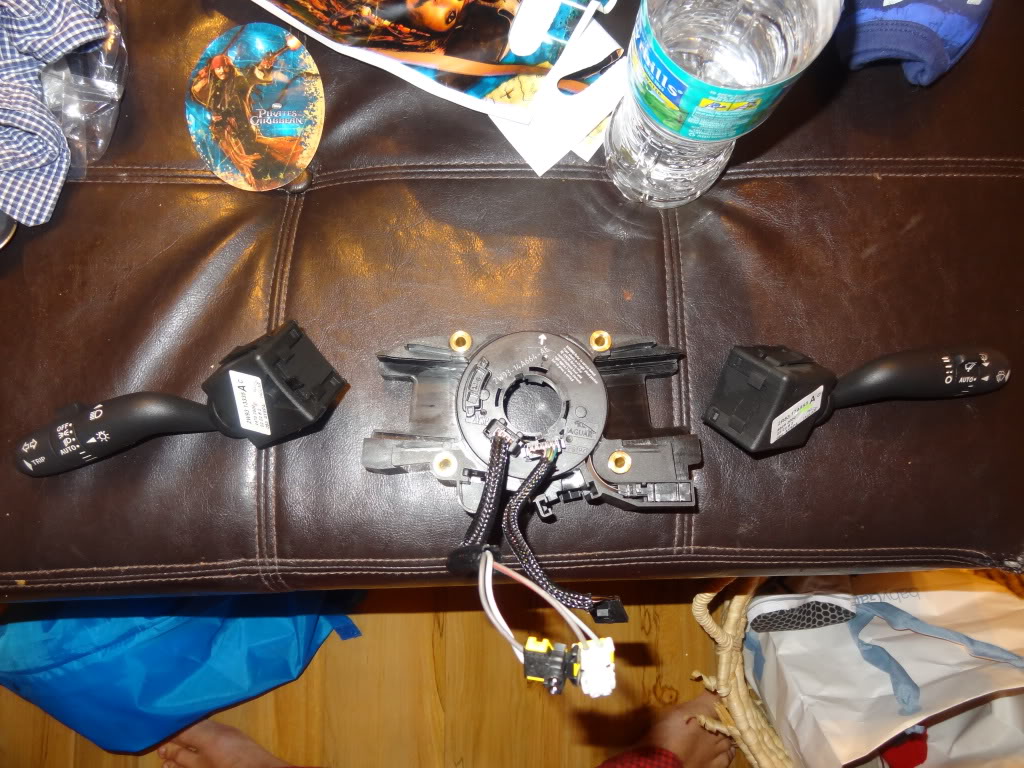
Here is a picture of the clock spring:
I have a 2003 S-Type R (STR) but it should be the same as the S-Type and X-Type part numbers: 2W93-14A664-AE. I removed the clock spring (spiral cassette) to clean it as a test to see if that is all it needs when you get the infamous code 19. I'll update after tomorrow with a test drive.
Tools:
Phillips Head Screwdriver
T27 long torx screwdriver
T25 torx screwdriver
13/16 socket and wrench
small, flat tip screw driver
Remove 2 phillips head screw drivers from lower steering rack column:
Move column all the way down and forward so the end position is furthest out and down. Now disconnect steering column adjustment knob and remove panel:
Now remove steering wheel column top panel by removing 2 phillips head screw drivers underneath the panel:
Disconnect both battery terminals.
Next remove two T27 torx screws by rotating the steering wheel left 90degrees from center and then 90degrees right of center to gain access to each of the screws. You will see other torx screws in a smaller size but do not remove them as the T27 are the deepest set in the panel:
Now you can uplug the airbag connectors from the steering wheel horn cover as well as the plug for the steering wheel controls:
Close-up of plugs:
Do not worry about mixing the plugs as one is grey and one is black. They can only go into their respective holes.
Using the 13/16 socket and wrench remove the bolt to remove the steering wheel. There is red markings to make sure that you re-align the steering wheel when you put it back on so have no fear there. Becareful of the plugs as they are routed through the steering wheel and you don't want to break them.
Now remove the four T25 torx bolts from the clock spring. The picture only shows two because I have the top panel resting on the column:
Now remove the 3 plugs on the back of the clock spring and you are done! Follow the directions in reverse and you are finished! Make sure you only connect the battery after you have completed the reinstallation.
This is all that will be left of the steering wheel:
Here is a picture of the clock spring:
Last edited by eds123; Oct 21, 2011 at 12:02 AM.
Thread Starter
|
Senior Member
Joined: Apr 2011
Posts: 200
Likes: 43
From: Orlando
Cleaning with WD40 did NOT work on my clock spring. I did have to replace the part and got a good, used one on eBay for $40 including shipping. This also corrected the steering wheel noise that I had which was not the infamous pump squeak.
Clock spring (spiral cassette) part #: 2W93-14A664-AE
Clock spring (spiral cassette) part #: 2W93-14A664-AE
Last edited by eds123; Oct 21, 2011 at 12:02 AM.

Eds - an excellent write up c/w pics mkaes this an outstanding how to, thanks so much for taking the time to share.
One of the mods will be along shortly to make this FAQ I'm sure, as I believe this can be useful to many others in future.
Guest
Posts: n/a
Hi Ed, your clock spring removal article is great.. My horn wont activate at the wheel....what broke or is worn to create the problem. I got a new clock spring,, about to change it,,,as mechanic said it was the C S.. would appreciate your thoughts.. Shelly (ccbeitel@msn.com )
Thread Starter
|
Senior Member
Joined: Apr 2011
Posts: 200
Likes: 43
From: Orlando
Sounds about right with the horn being inoperative. It's pretty easy. Take a look at the clock spring now and you will see the instructions listed on the front on how to set the spring so that your turn signals will deactivate after turning corners when they are on.
Trending Topics


Junior Member
Joined: Dec 2012
Posts: 9
Likes: 0
From: Phoenix,AZ
Thanks for the great article. My 2005 s type has a noise when the wheel is turned. It sounds very much like winding a clock. There are no trouble codes reported and everything works normally. Do you know of anything else that would cause this noise. Any tips would be helpful.
Junior Member
Joined: Feb 2017
Posts: 16
Likes: 4
From: SoCal
Excellent and helpful FAQ for removing steering wheel and clock spring. Thank you!
I followed it today as I replaced my clock spring, due to supplementary restraint system 1-9 fault and non-functioning steering wheel radio controls.
The two Torx bolts holding the air bag in on mine were T-30, maybe they changed the sizes from 2003 to 2005? Small matter. All seems better now.
I replaced with a used clock spring from eBay, under $100, new clock springs are over $200.
My old clock spring had a manufactured date code later than my 2005 S-Type manufactured date, indicating prior owners had replaced and this is at least the second replacement. Are other owners finding they are replacing clock springs multiple times over the years?
Interesting side note, the air bag, with a nice Ford logo, seems to be from TRW, not Takata, so hopefully will not be recalled.
My S-Type odometer is at 115,000 miles.

Thread
Thread Starter
Forum
Replies
Last Post
aholbro1
XJ XJ6 / XJR6 ( X300 )
18
Dec 29, 2024 06:46 PM
Tar
XJ6 & XJ12 Series I, II & III
13
Sep 6, 2015 11:24 AM
Currently Active Users Viewing This Thread: 1 (0 members and 1 guests)