When you click on links to various merchants on this site and make a purchase, this can result in this site earning a commission. Affiliate programs and affiliations include, but are not limited to, the eBay Partner Network.
Hi,
the plastic is failing pretty badly and I thought I might try to 'rebuild' part of it before buying a replacement unit...this raises a question.
How do I remove the shaft (in order to remove the plastic surround)..or at least the wider section attached to the shaft?
and then...my radio vol knob does not work properly unless I spray through the front housing almost daily, since it is out , how do I go about removing the radio from the housing?
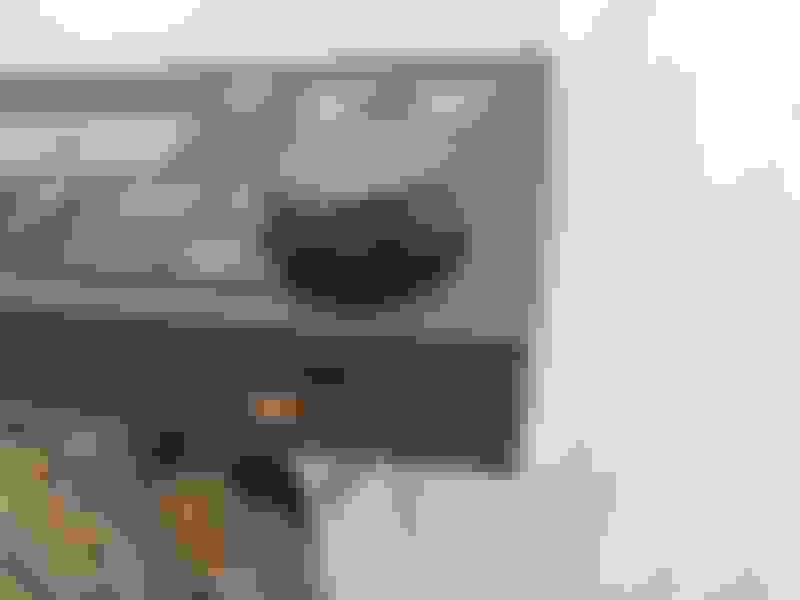
You need to remove the lower portion of the knob. In the photo you can see the set screw loosen it and it will unscrew off. As for the radio I am unable to help.
Gus, thanks.
I think the previous owner really buggered it up as the set screws have not 'slots' or allen flats...they are totally rounded out (notice the rust? in that area?)
wj
and then...my radio vol knob does not work properly unless I spray through the front housing almost daily, since it is out , how do I go about removing the radio from the housing?
thanks to all
wj
2005 xk8 conv
Depress the spring clips on top surface of radio that are visible in your pic. Radio then slides forward out of housing.
Gus, thanks.
I think the previous owner really buggered it up as the set screws have not 'slots' or allen flats...they are totally rounded out (notice the rust? in that area?)
wj
That's an Alpine head unit which may, or may not, be the same design as the earlier Harmon Karden model.
If it is the same :
Remove the radio from the frame as per Baxtor.
Prise up the "lid" rom the rear - there may be a couple of small screws.
There's a small screw on each side just behind the plastic front which secures both the plastic AND the front panel to the rest of the radio.
With these out, you can separate the front of the radio from the base and rear - there's a connector which just unplugs from the PCB
Then - remove the plastic front panel carefully - no screws but lots of clips. The volume control knob just pulls off but - it's in two pieces so lever from the base.
You can then see that to get at the volume control, you need to separate the PCB from the metal frame which means unsoldering and straightening two (or three) metal "lugs".
Easier to do than to explain. If you are confident with a soldering iron, and take your time - it isn't difficult.
But - whether or not you would be able to find an identical "new" volume potentiometer is a different matter.
Last edited by DevonDavid; Feb 1, 2017 at 10:27 AM.
Thanks DevonDavid,
Since spraying contact cleaner into the general vicinity of the vol pot will allow the vol to operate properly for several days I believe the pot is fine, just dirty. If I could spray directly on the pot I think I might be good to go...but I can't see any access to that area. These photos show what I'm up against...any other ideas?
wj
This is the earlier Harmon Karden head unit, but assuming the same construction, if you carefully "prise away" the front plastic panel, you have access to the PCB and the volume pot.
DevonDavid, I appreciate your efforts here.
I tried removing the front face but there is something holding it on the vol control side...much more effort and I would have pieces in my hands. I hope someone with an alpine unit + experience will chime in.
wj