When you click on links to various merchants on this site and make a purchase, this can result in this site earning a commission. Affiliate programs and affiliations include, but are not limited to, the eBay Partner Network.
Tried starting the replacement today. 2 hours in with 1 last bolt to remove on the sub frame (the large one) got stalled. It would not spin out! The post of the Mondeo replacement video turned out not exact to our Jaguars. There is no access to the nut holding the large carriage/frame bolt. It was turning as if the "captive" nut was turning. This nut is encased within the body of the car with no access to it. So.....decided no alternative but to cut into the body location. After several hours, trying various box end wrenches that would not grab it, we enlarged the hole, looked inside and the "nut" was rounded. After more hours of frustrating work with various tools we got a pipe wrench (monkey wrench) to sufficiently grab the nut to back out the remaining 1 inch of bolt using a 3 foot breaker bar. The nut is welded onto a "washer" which sits under an oblong slot (assuming the washer is oblong as well) so that contrary to the standard welded nuts we see, the oblong nut within an oblong slot (it does slide side to side about an inch) is "supposed" to not let the nut spin. Well mine did.
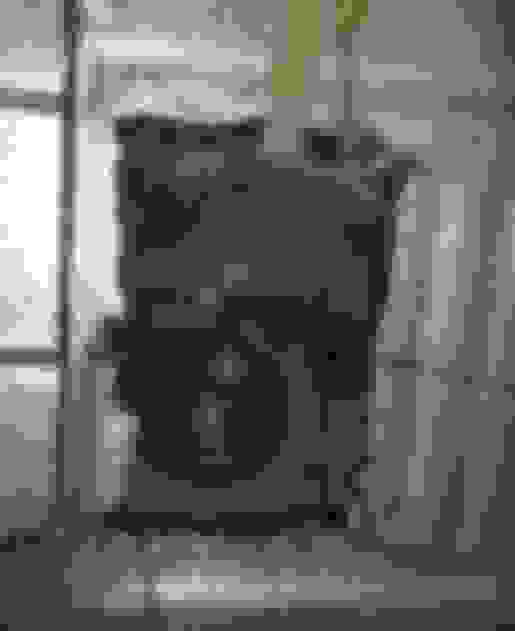
5 1/2 hours of working on the 1 remaining nut to drop the sub frame and we got it out (the bolt). First pic is the (lhd) passenger area with the control arm still in place. The second pic is the driver's side with control arm removed and the hole and nut shown. We re-tapped the bolt, it had a swell right at the end where it hung and 3-4 threads showing above the nut. Will restart the job tomorrow and post updates. We're crossing our fingers that tightening the bolt back up will work without maneuvering the pipe wrench to hold it in place.
Also I'm following the admonition of another forum member when installing the rearward bolt on the control arm (where the big round oil filled bushing is), I will install the bolt from the bottom up and nut on the top so if this ever needs to be replaced again (hope the HELL not), that there will be no reason to drop the sub frame (this is only necessitated because the factory installation is the bolt on top, nut on
bottom and not enough clearance from top of bolt to body undercarriage to get the longer length of bolt than clearance out).
When I see posts of the brave guys doing this job themselves, I always wonder if it would not be easier to buy new bolts and just destroy the existing bolt with a dremel tool instead of dropping the suspension.
Last edited by Spikepaga; Aug 5, 2017 at 08:06 AM.
@Spike = therin lies the problem. As you will note in my OP, the "nut" is welded to an (I "assume" oblong washer which in underneath the small slot that allows the nut to move driver's to passenger side maybe 1 inch. The nut should not be able to rotate because the oblong washer "SHOULD" hit the wall of the enclosed slotted channel to keep nut from rotating in either direction during removal or replacement of the chassis bolt. As you can see in the second pic, after cutting out the enclosed body to access/see the nut, there is no way to replace that component (nut), bolt sure, but not the nut.
So update, driver's side control arm and stabilizer bar went on smooth. The screwed up and nice worn down nut (the pretty bright silver one, lol) WOULD NOT let us reinstall the carriage bolt. Had to resort to putting a pipe wrench through the cut out access to hold the nut to tighten up. BUT.....the rearward bushing (the large oil filled one) has now been installed per Motorcarman's suggestion of bolt bottom upwards with nut on top. This installation means never dropping the subframe to change control arm.
Here's the dandy, the passenger control arm we fought for another 2 1/2 hours trying to get the lateral bolt (the one to front of car) to line up and tighten. After hours of prying, cussing, undoing everything several times, the shop forman said it looks like it's manufactured just a little little tiny bit off. Not allowing the bolt to slide through and capture the captive nut. So pull the new part out, install the old one and see if that's the problem. OH HELL YEAH, that's what you want to hear. Pulled the replacement, installed the old part and slid together like butter.
So much for OEM part (yes OEM, not OEM like, etc.) As some others have demeaned. Now have to return, get refund, reorder, tear it all apart again (but no subframe drop) after getting new replacement part.
One other TINY thing when doing this = I could not for the life of me turn the wheels (rotors) left or right as shown in the above video. Was frustrating me badly. Mind you this is day 2 of the saga. Finally the shop forman came over to help try putting the (defective as it turned out) passenger side front side lateral bolt through the metal sleeve inside the bushing to grab the captive nut. I said I couldn't figure out why I couldn't move my wheels.
Ummm.....did you put key in ignition and take the steering wheel lock off? You mean the key fob still in my front pocket?
Another dandy! In searching for the "fixer" part numbers listed in the TSB, there is NOTHING I gather this is a ream your wallet dealer only available part(s). :~(
Got replacement right side OEM control arm (explained before, couldn't get the bolt if front side laterally to grab the captive nut). Figured it would be easy peasy to pop out old one (big bushing bolt now installed with nut on top, no sub frame drop). The fraking front lateral bolt still would not slide through and grab the captive nut. So, we tore it out again, put the front in first , then ball joint (yes, I know this is a ss backwards, then tried putting bolt in rear bushing from bottom w/nut on top. The mother was cocked to the outboard side. So we took off the stabilizer bars (both sides to get a clear prying angle), put an adjustable height A frame lifting mechanism just rear of the ball joint on the rivets, lowered the car off lift just @ a "sweet spot" where balance of weight was off bottom off the large bushing, but not enough to bind the top portion. Took a medium pry bar from front of vehicle over the control arm onto the metal sleeve, prying from the body behind sleeve in the large bushing and pried it far enough to the driver's side to slide the bolt through the top of the assembly. DONE!!
Never want to replace the thus mother bear again! Only thing we can all figure is wear and tear on the rear of the control arm has cocked the bracket just enough to not allow the front side lateral bushing bolt to slide through parallel to the captive nut.
This
saga has been no fun, but the great thing is, that having the rear bushing bolt from bottom and nut on top now eliminates dropping the subframe.
Right side control arm, not loose, no squeak, but boot shot.
Just did a control arm change put the Car way up on stands. Using a jack remove tension with the jack under the subframe mount. remove bolts loosen larger one. I lowered the jack to apply tension so the oblong nut would resit moving. Loosen the larger subframe bolt slightly. Cut the bolt heads off and reinstall them upside down with same grade or higher bolt hardness.
also when installing ball joint is last, Garage install use your hands to point the tip of the joint forword grab the the control arm with bothe hands on both sides push the arm down and use your Chest to move the arm forword. Sorry Beer is my Mentor. The Joint Will slide in. Mechanics Said $750. per side Unaccepectable
+1 for the ball joint goes in last. I tried the ball joint last and had such a hard time with that I didn�t think it was possible so I spent half a day trying each of the other two bolts last. Then I watched the Autodoc mechanic do it on a Ford Mondeo in this YouTube video. After I wrestled with it a little it popped in. The other side was done in minutes.
I don�t know how to edit a post but the credit for the Autodoc YouTube video goes to Dell Gailey back in post #2 in this thread. I had it saved on my phone but had to look up who posted it first. I was hoping to just add that in to my other post but I�m not really sure how.
I have done this job multiple times on my Saab's in the past. It is recommended you preload the suspension before you tighten down the control arms. Surprised this isn't recommended or suggested.
Linked this today for another member looking on how to do this. So some additional information that another member shared in another thread about the sub frame bolt (big one) spinning and not coming out. As seen above I cut into my car body to get at the fraked up nut.
THE BEST WAY = is under (lhd) carpet is a corrugated looking plate. If you cut open this plate the nut for the subframe bolt is right under the plate.
WAY EASIER access and remedy if you're unfortunate enough to have the bolt keep spinning in place when trying to remove. Btw, the passenger (lhd) has the plate also.
If you re-arrange a 21mm ring spanner like this, it will fit the captive nut through the grommeted aperture in the chassis rail just behind the sub-frame mounting bracket
You may have to open the aperture in a couple of places, depending on the exact diameter of the ring, but nothing so drastic as cutting holes


 Move over photo to zoom Have one to sell? Sell now - Have one to sell?