

polished the X-Type headlights


Thread Starter
|
Senior Member


Joined: Mar 2008
Posts: 821
Likes: 502
From: Gloucester UK
as with most , if not all of the X-types around the headlights suffer from UV degradation and discolouration of the lenses
this can be a problem come MOT time, but it also looks terrible on an otherwise decent car
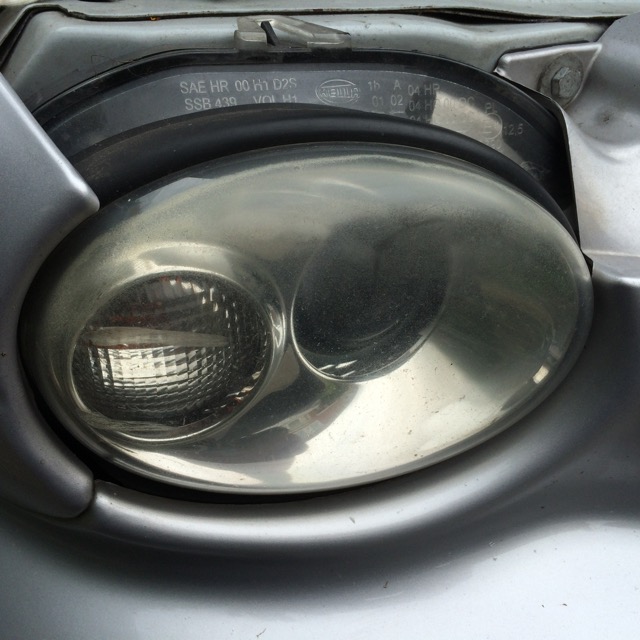
my headlights were this bad, drivers side
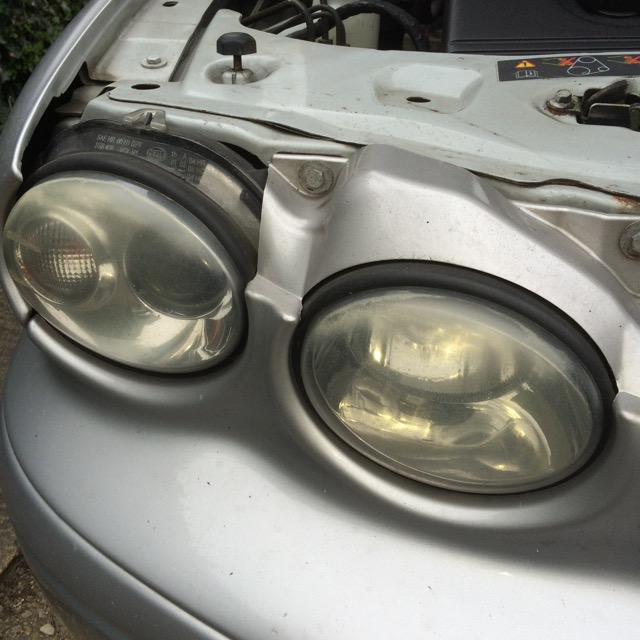
IMG_2409 by MyPix on Talk Photography
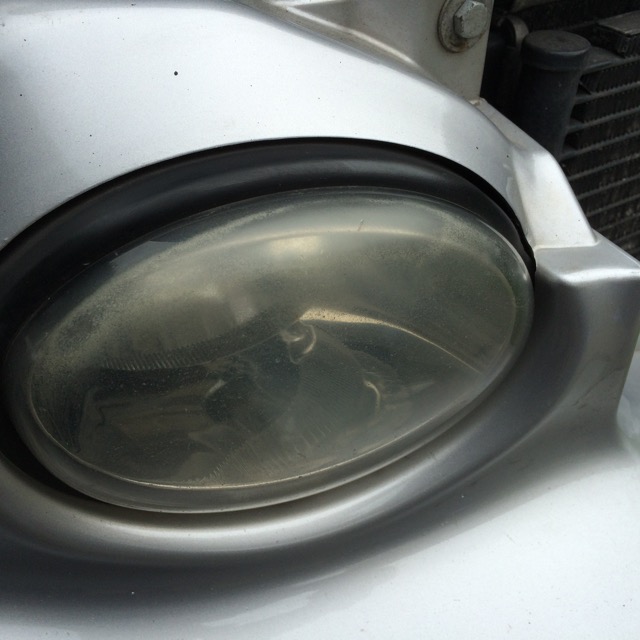
passenger side , i had already tried hand polishing the outer headlight some months back but it was too labour intensive and the right amount of force and pressure couldn't be maintained
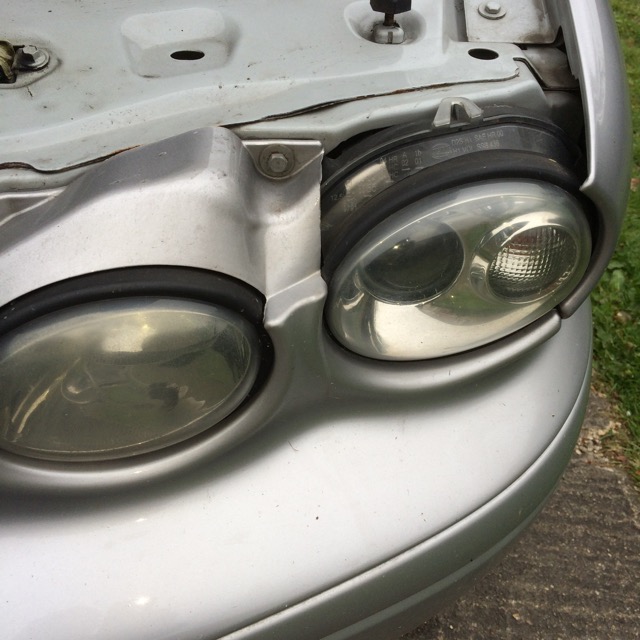
IMG_2410 by MyPix on Talk Photography
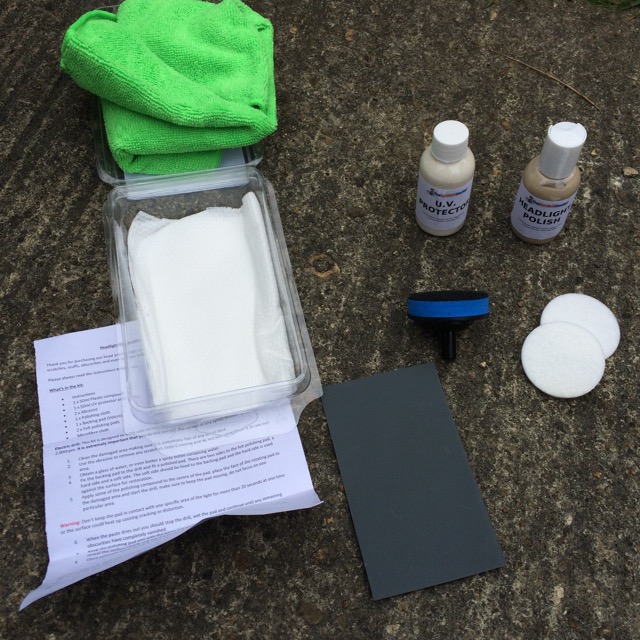
so i bought this kit on ebay for �13 to be used in a drill
IMG_2413 by MyPix on Talk Photography
the polishing bit fits like this , with a removable soft pad to apply the polishing agent
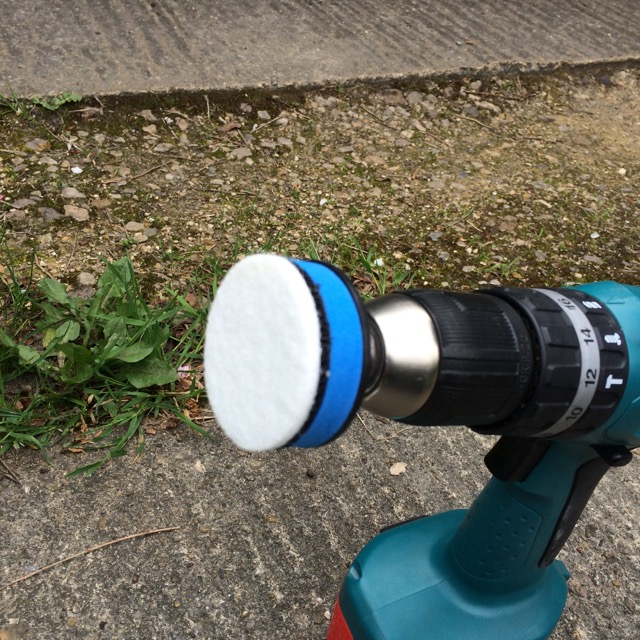
IMG_2414 by MyPix on Talk Photography
but first, you have to remove as much as the crusty surface as you can with some 2000 wet and dry paper using some water to help things along , a hand spray bottle is perfect for this
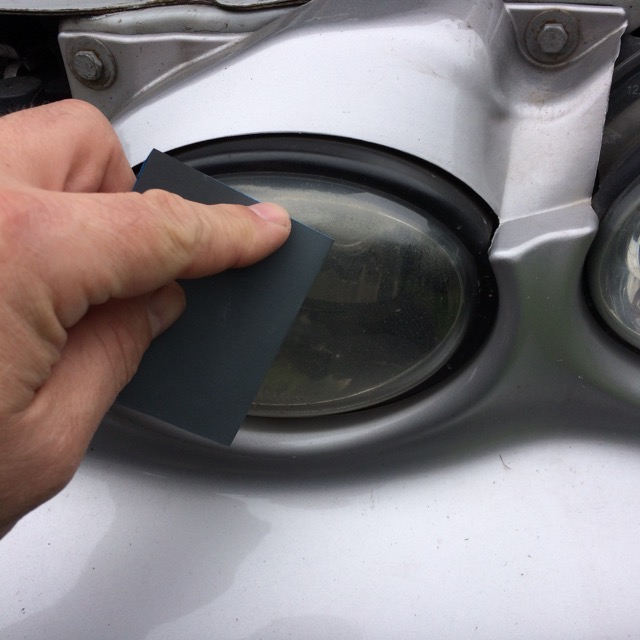
IMG_2416 by MyPix on Talk Photography
once finished with the 2000 paper the headlight will look like this, but feel smooth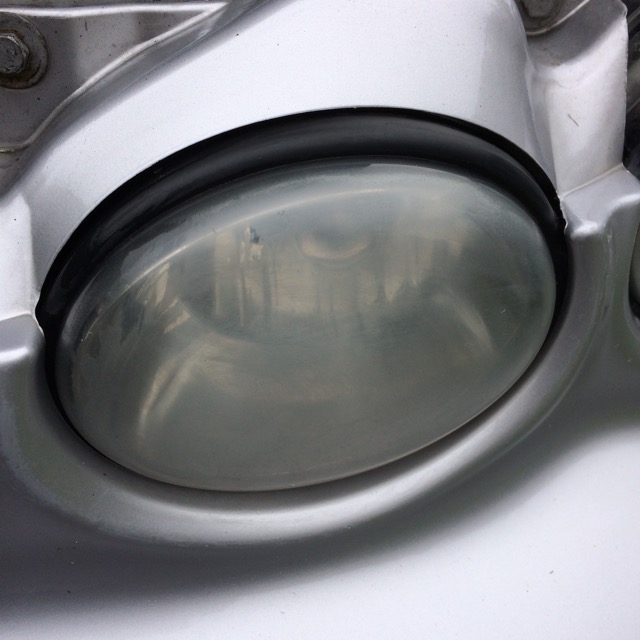
IMG_2417 by MyPix on Talk Photography
then mask up the surrounding paint to stop any damage , and use the drill with the polishing agent and some spray water,
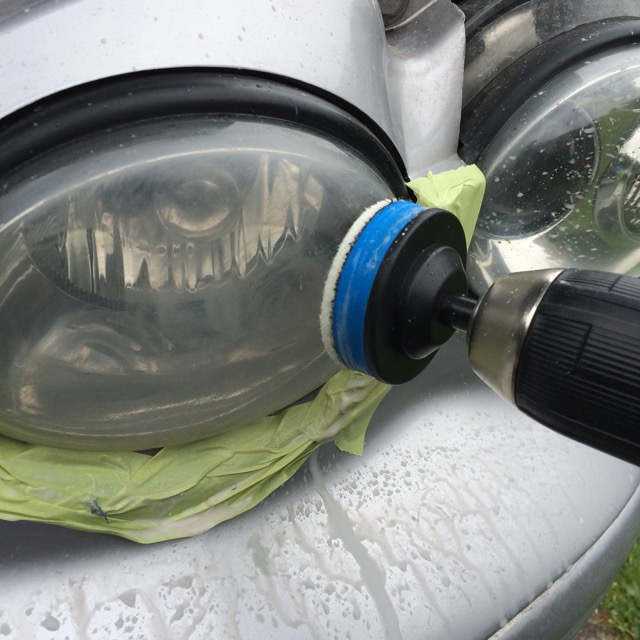
IMG_2418 by MyPix on Talk Photography
take your time, and make sure the headlight stays cool, as this process will warm it up rapidly and could damage the lense if not careful
this is the one side compared to the other side shot......
IMG_2420 by MyPix on Talk Photography
so , onto the drivers side, these were worse condition wise , and the one headlight had a double ' scar ' from a PO ( probably some idiot in a carpark :roll: )
IMG_2421 by MyPix on Talk Photography
IMG_2422 by MyPix on Talk Photography
same process all over again , and with some patience you can improve the look of the car immensely
IMG_2423 by MyPix on Talk Photography
IMG_2425 by MyPix on Talk Photography
once finished, there is some UV protection paste ( like sun cream ) to add , let it dry then buff it off with the supplied cloths
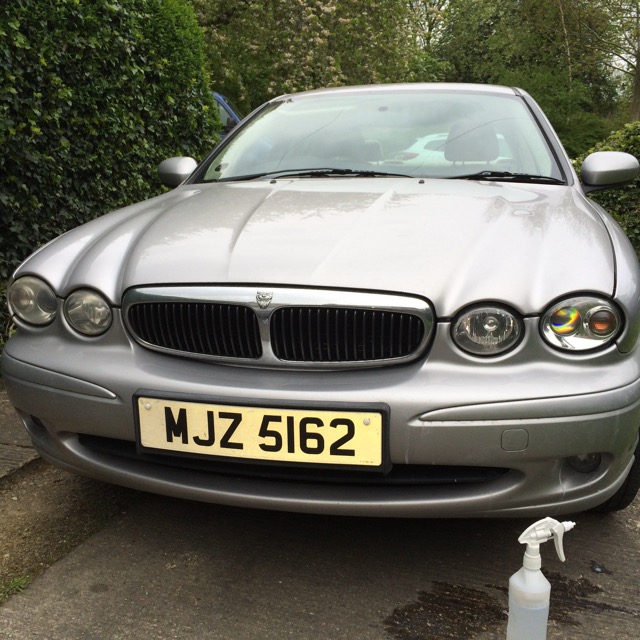
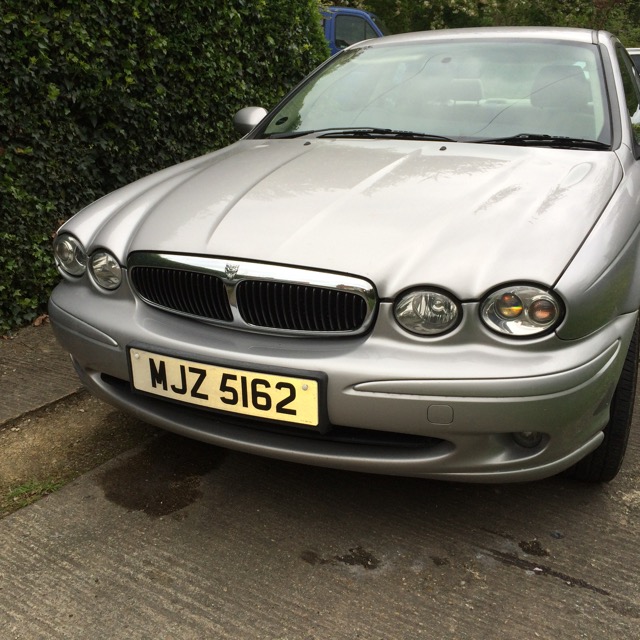
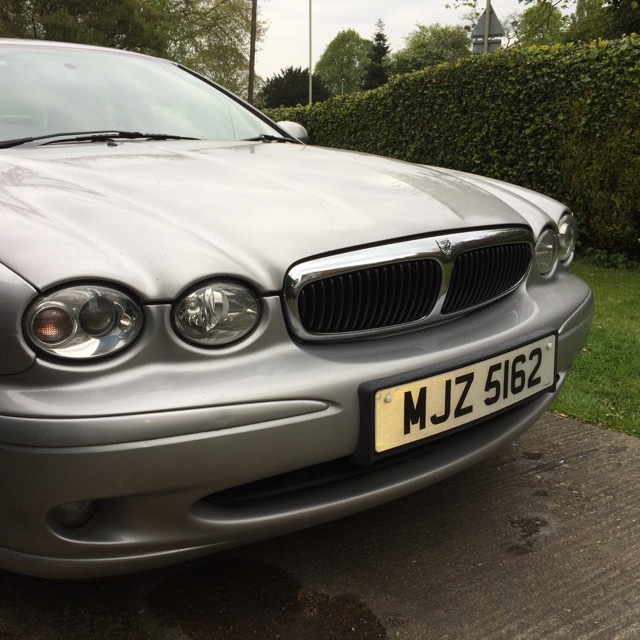
took me about two hours in total , a full job would involve removing the bumper and headlights and strip them down and polish the lenses , but i am more than happy with this process and happy to do it once a year if required to maintain the healthy look of the car
BB
this can be a problem come MOT time, but it also looks terrible on an otherwise decent car
my headlights were this bad, drivers side
IMG_2409 by MyPix on Talk Photography
passenger side , i had already tried hand polishing the outer headlight some months back but it was too labour intensive and the right amount of force and pressure couldn't be maintained
IMG_2410 by MyPix on Talk Photography
so i bought this kit on ebay for �13 to be used in a drill
IMG_2413 by MyPix on Talk Photography
the polishing bit fits like this , with a removable soft pad to apply the polishing agent
IMG_2414 by MyPix on Talk Photography
but first, you have to remove as much as the crusty surface as you can with some 2000 wet and dry paper using some water to help things along , a hand spray bottle is perfect for this
IMG_2416 by MyPix on Talk Photography
once finished with the 2000 paper the headlight will look like this, but feel smooth
IMG_2417 by MyPix on Talk Photography
then mask up the surrounding paint to stop any damage , and use the drill with the polishing agent and some spray water,
IMG_2418 by MyPix on Talk Photography
take your time, and make sure the headlight stays cool, as this process will warm it up rapidly and could damage the lense if not careful
this is the one side compared to the other side shot......
IMG_2420 by MyPix on Talk Photography
so , onto the drivers side, these were worse condition wise , and the one headlight had a double ' scar ' from a PO ( probably some idiot in a carpark :roll: )
IMG_2421 by MyPix on Talk Photography
IMG_2422 by MyPix on Talk Photography
same process all over again , and with some patience you can improve the look of the car immensely
IMG_2423 by MyPix on Talk Photography
IMG_2425 by MyPix on Talk Photography
once finished, there is some UV protection paste ( like sun cream ) to add , let it dry then buff it off with the supplied cloths
took me about two hours in total , a full job would involve removing the bumper and headlights and strip them down and polish the lenses , but i am more than happy with this process and happy to do it once a year if required to maintain the healthy look of the car
BB
Member
Joined: Feb 2015
Posts: 58
Likes: 17
From: Virginia Beach, VA USA
Good job! I did that recently using the Mother's kit. It took about 1.5 hours to do all 4, but the results were well worth the time. I can't stand looking at a pretty car only to see the yellowy headlights, not to mention the degradation of the light hitting the road surface.


Joined: Dec 2011
Posts: 120,439
Likes: 17,014
From: Durham, UK
as with most , if not all of the X-types around the headlights suffer from UV degradation and discolouration of the lenses ...... so i bought this kit on ebay for �13 to be used in a drill ...... but first, you have to remove as much as the crusty surface as you can with some 2000 wet and dry paper ......
How long did you sit down and think about using Wet & Dry Paper on the headlights before starting?
Graham

Thread Starter
|
Senior Member
Joined: Mar 2008
Posts: 821
Likes: 502
From: Gloucester UK
lol, cool
two gloucester boys with better looking headlights then
BB
Trending Topics


Thread
Thread Starter
Forum
Replies
Last Post
Currently Active Users Viewing This Thread: 1 (0 members and 1 guests)