
Rear door lock actuator


Thread Starter
|
Veteran Member


Joined: May 2012
Posts: 2,558
Likes: 503
From: Boston, MA USA
I have an intermittent issue with the rear right hand side door lock actuator on my 2010 XF SC. I know it has been well covered as an issue but this is the first of mine to go. I pulled the codes and I can see B110B rear passenger door central locking motor fault. (Left hand drive so that's the right side)
Anyone know the part number - I can find the part for the left door both with and without passive opening, but can only find it for the right hand door without it
I plan to do it myself - looks a bit fiddly but not too hard. Anyone done it recently? Any guidance?
Anyone know the part number - I can find the part for the left door both with and without passive opening, but can only find it for the right hand door without it
I plan to do it myself - looks a bit fiddly but not too hard. Anyone done it recently? Any guidance?
Senior Member
Joined: Mar 2016
Posts: 859
Likes: 322
From: Auckland NZ/ Houston, TX
Yep, done a few of these.
Window and regulator need to come out.
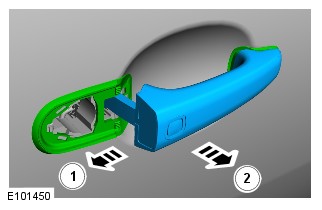
The exterior door handle also needs to come out as well.
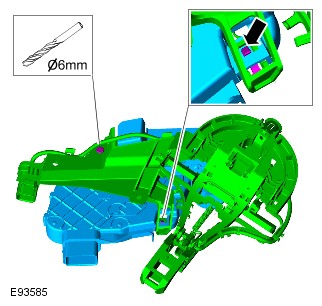
Once out, there is a plastic cage/bracket that is connected to the latch. There is a rivet that you'll need to drill out and replace.
I suggest getting some body shop tape ( Green ) to tape off areas around the exterior door latch to prevent scratches.
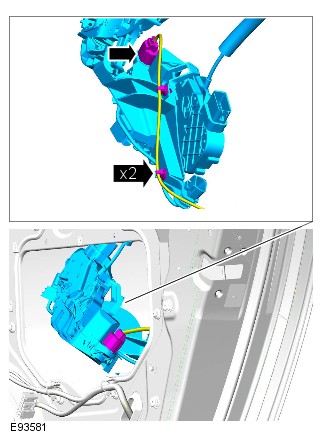
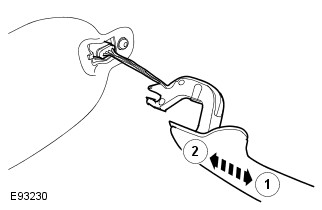
NOTE:
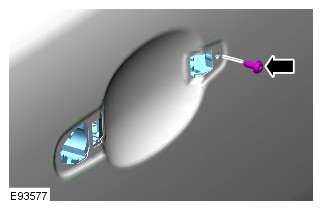
Remove the screw sufficiently, only to release the component.
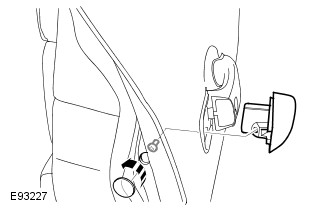
Torque: 4 Nm
NOTE:
Some variation in the illustrations may occur, but the essential information is always correct.
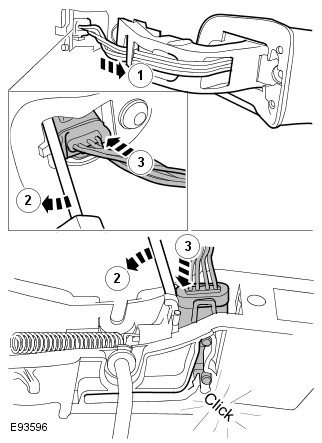
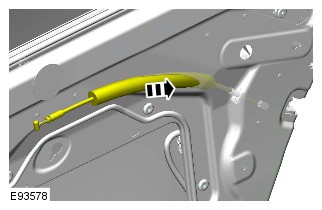
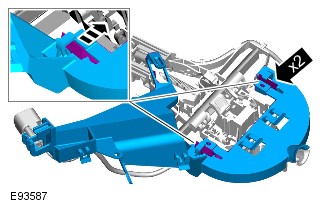
CAUTION:
Take extra care not to damage the wiring harnesses.
NOTE:
Secure the connection in the service position.
Installation
Torque: 3 Nm
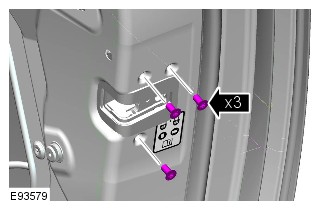
Torque: 7 Nm
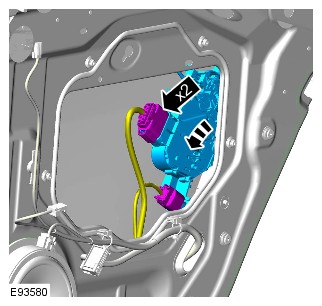
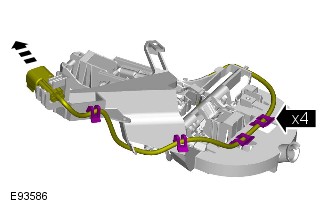
CAUTION:
Note of the routing of the wiring harnesses.
NOTE:
Do not disassemble further if the component is removed for access only.
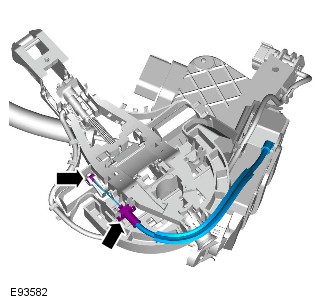
Note of the routing of the wiring harnesses.
Window and regulator need to come out.
The exterior door handle also needs to come out as well.
Once out, there is a plastic cage/bracket that is connected to the latch. There is a rivet that you'll need to drill out and replace.
I suggest getting some body shop tape ( Green ) to tape off areas around the exterior door latch to prevent scratches.
NOTE:
Remove the screw sufficiently, only to release the component.
Torque: 4 Nm
NOTE:
Some variation in the illustrations may occur, but the essential information is always correct.
CAUTION:
Take extra care not to damage the wiring harnesses.
NOTE:
Secure the connection in the service position.
Installation
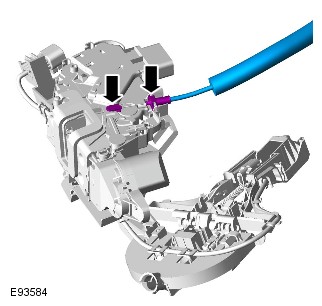
- CAUTION:
Make sure that the wiring harnesses are correctly located.
To install, reverse the removal procedure.
Torque: 3 Nm
Torque: 7 Nm
CAUTION:
Note of the routing of the wiring harnesses.
NOTE:
Do not disassemble further if the component is removed for access only.
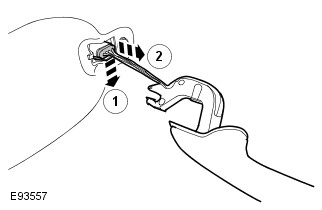
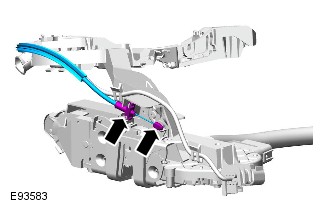
- Drill out the rivet.
- Release the clip.
Note of the routing of the wiring harnesses.
Last edited by JBzXJ40; Apr 8, 2018 at 08:22 PM.


Thread
Thread Starter
Forum
Replies
Last Post
Currently Active Users Viewing This Thread: 1 (0 members and 1 guests)