When you click on links to various merchants on this site and make a purchase, this can result in this site earning a commission. Affiliate programs and affiliations include, but are not limited to, the eBay Partner Network.
Exhaust seal at manifold, down pipe fitting question
Spent a while wrestling with my right side down pipe yesterday trying to get it back on. I'd previously extracted it with the steering rack heat shield loosened by removing the lower T20 bolt but leaving the upper one in place, and with one of the studs out (it came out when I was loosening the four down pipe to manifold bolts).
Having completed my starter motor replacement saga I realized to get the pipe back in I would have to remove the steering rack heat shield, had to drill out the upper T20 bolt, broke off extractor in bolt, swearing etc. Got that done, but still having issues successfully inserting the down pipe around the four studs. I put a new stud in to replace the one that came out, which in hindsight would have been better to install after I got the down pipe in.
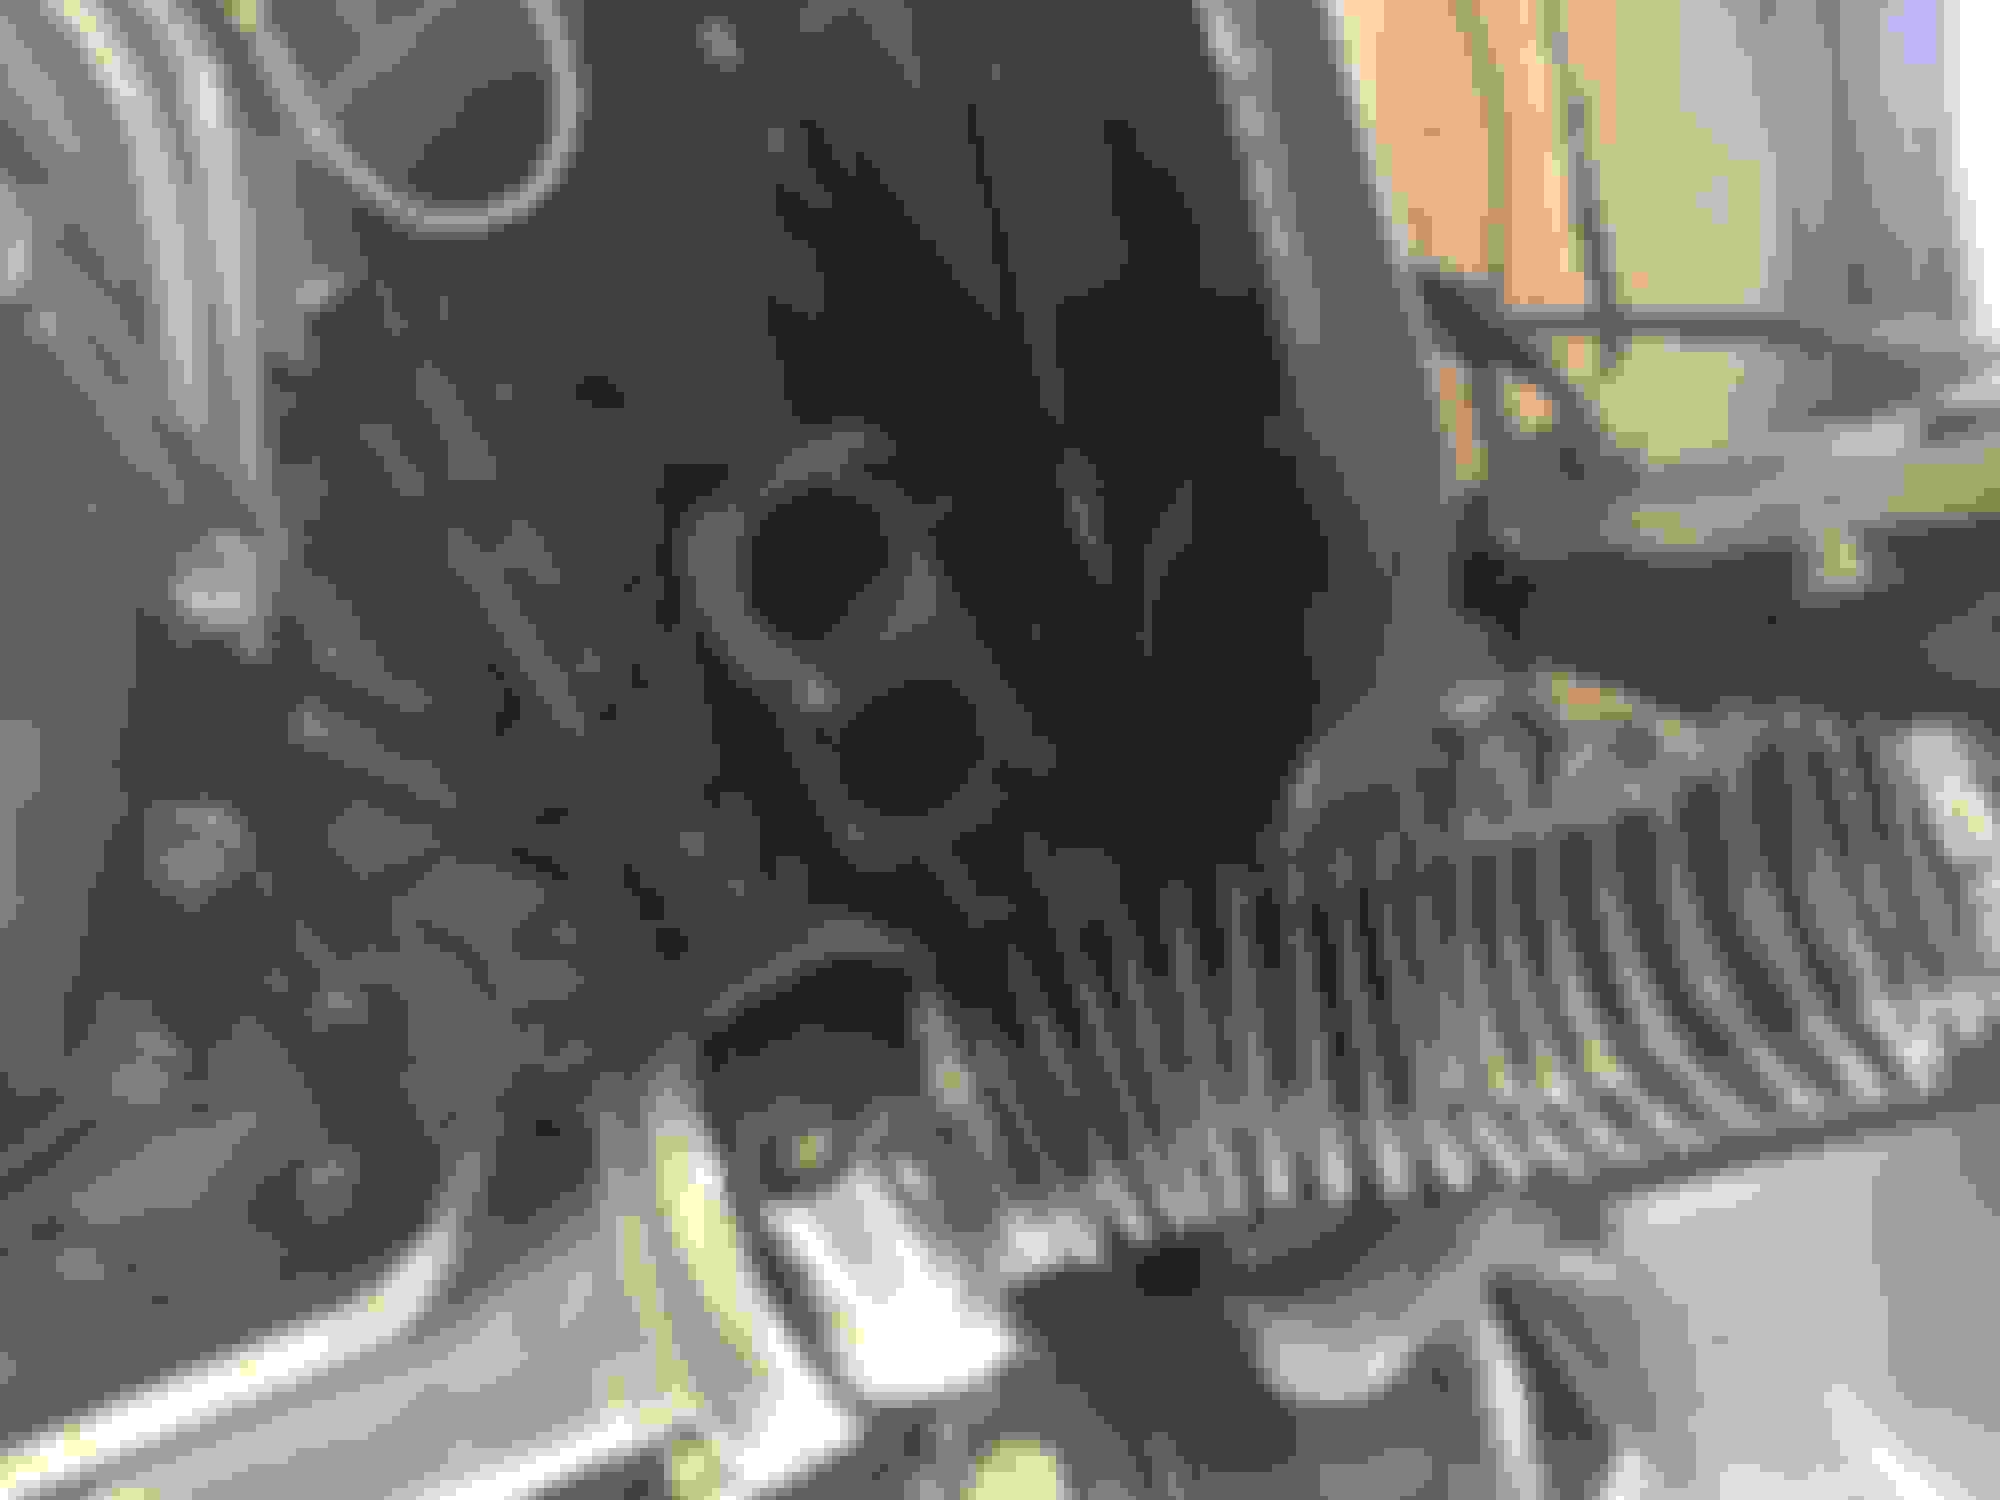
A separate down pipe issue/question: I just ordered 6 exhaust seals (SKU: EBC9388) from moss motors.( I had busily made two flat gaskets you can see in picture without thinking through the gasket situation, complete waste of time and materials, thinking of wrong vehicle, brain fade etc).
My plan is to remove the new stud, (do I need to do this?) lightly polish the exhaust manifold at seal point and apply muffler cement before install. I'm assuming I can get the old seals off the down pipe with penetrant and coaxing?
A useful link from our great resource I had previously perused:
While up on the rack there is a aftermarket shim to insert into the gap between the steering rack mounting bracket and the assembly end caps .
A gap is not so evident in your picture but may change with the weight on wheels
On the inline 6 you can place a light under the area on the ground and see the gap from the top side on each side of the opens sides of the inline 6 installation .
Now that I have mentioned it you may now notice if the steering walks back and forth on your drive
The one size fits all shims are split in half so they slip in without removing the rack .
Part # SPC - 1059 from some vendor may be SPC1059 ( no space )
Maybe helpful infprmation :
champaign777 and others,
I just saw something interesting in the Volvo forum and I thought I would share.
Most steering rack leaks occur at the outer O-ring/seal, thus fluid coming out of the protective boot ---> on the garage floor. It virtually never leaks at the pinion end.
Of course the proper way is to remove the Steering Rack and rebuild it from scratch or pay big bucks for a quality Steering Rack. But removing the steering rack from any car is a pain in the rear, not to mention the number of labor hours involved!
This Volvo person replaced ONLY the Outer O-rings/Seals using the rebuild kit ($47) without removing the Steering Rack from the car.
My plan is to remove the new stud, (do I need to do this?) lightly polish the exhaust manifold at seal point and apply muffler cement before install. I'm assuming I can get the old seals off the down pipe with penetrant and coaxing?
FWIW I've never removed any studs to refit the downpipes although I've done a bit of cussing to get everything jiggled into place. A third hand would help but, of course, there's really no room for it :-). Sometimes things fall into place easier the next morning.
Use muffler cement of you want but it really shouldn't be needed.
Good thinking to clean up the surfaces where the donut seals against
I've just had another wrestling match with the downpipe but it just wont allow me to get the two exhaust sections up into the manifold so I can put a bolt on and get the other three on the studs and clamped up. I've taken one of the studs out to try to make it easier to locate the two exhausts but made no difference.
The exhaust is bottoming out on the body above the steering rack, I'm wondering whether changing my jacking points would help? I currently have the car secured on the two A arms at the front where it's been sitting for months.
I'm thinking of bringing two more jack stands from my workspace and putting them on the two body jack points so the suspension can drop a bit, not sure if that will help but worth a try?
I have the bottom heat shield off and even loosened the top motor mount shield to see if that would help. (It didn't).
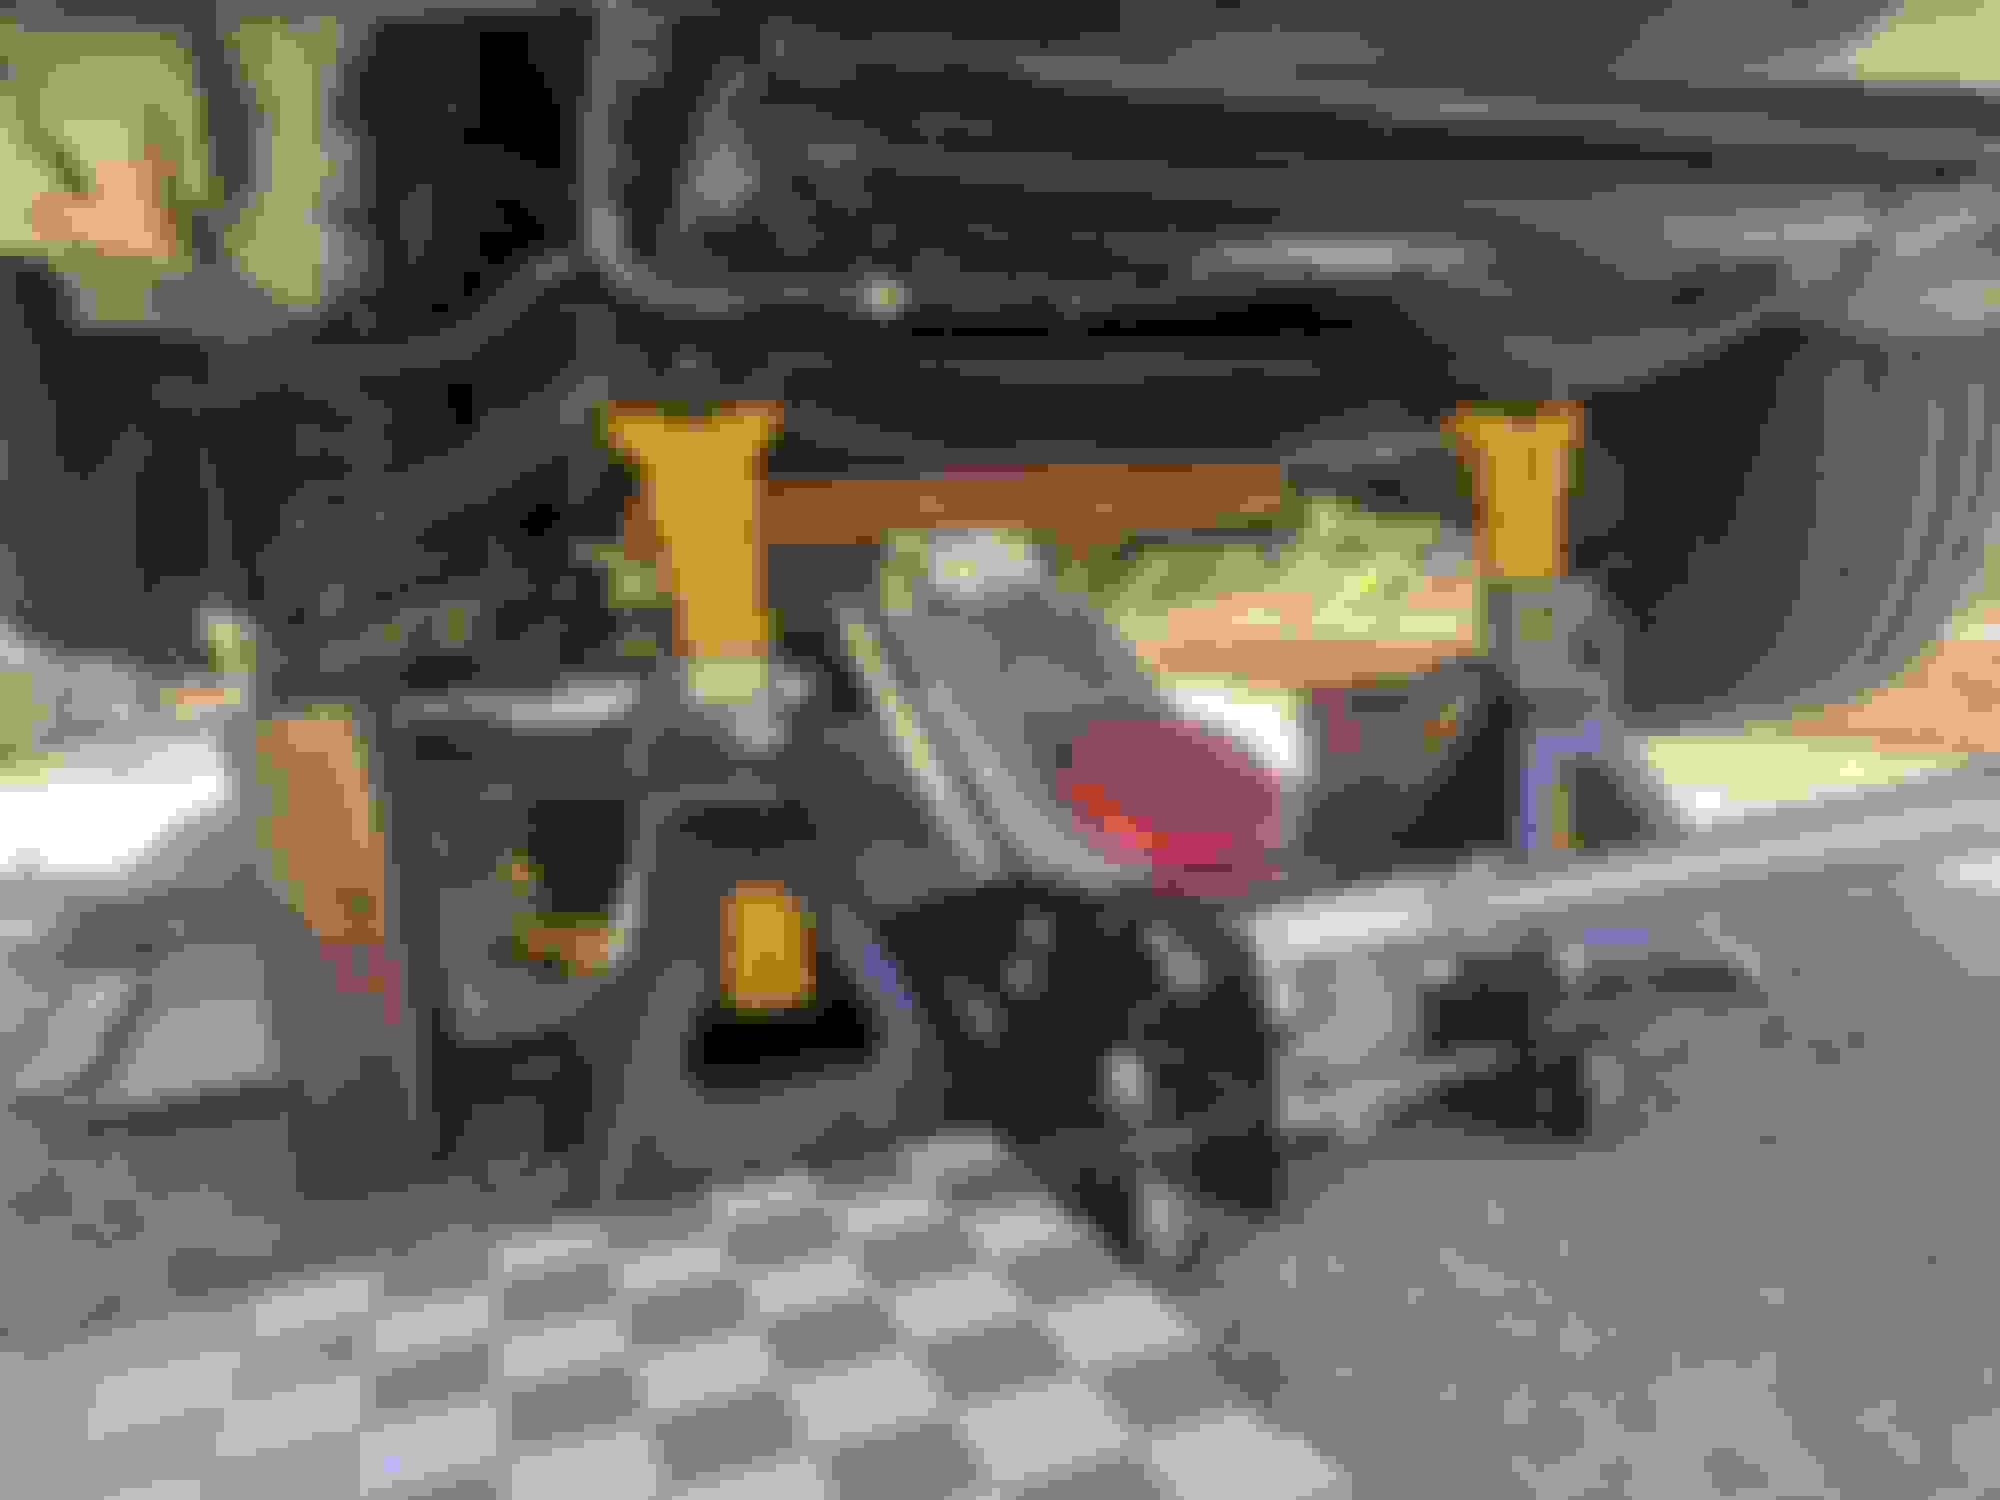
The cross member in front of the steering rack in the X300 pic ?
I'm months behind on dropping my front assembly so it looks like this, got all the bushings, bilstein shocks, new rotors etc ready!
there are heat shields to protect the motor mounts not shown here as the down pipe runs really close to them, the issue I'm having is not enough clearance where the downpipe tucks into the area marked with a red line, I suspect if I let that assembly drop down a bit by not having the car propped up on it I'll get the clearance I need.My tired suspension mounts to the body might be worn out and compressed a bit, which could also be contributing to this problem...I've been told not good as it stresses the expensive to replace engine mounts.
In hindsight definitely better to tackle starter motor, alternator while front suspension assembly is removed, although doesn't improve access to the dreaded upper starter motor bolt I've had so much fun with.
Last edited by olivermarks; Mar 25, 2021 at 10:11 PM.
The upper starter bolt on the inline 6 was gotten to by lowering the transmission cross member
Then you have a 4 foot tunnel above the transmission to get on the bolt with a swivel universal wrapped in tape so it doesn't drop down too much
This does nothing for your red line area of interest as it's too close to the motor pivot point
Maybe someone has idea with the picture guide and your markings
Off to the salvage yard in the morning for some stuff , anything not V -- 12 ?
I did previously contemplate lowering the transmission to squeeze an extension onto the starter upper bolt but the V12's are a lot more densely packaged than the 6's and there's a lot of wiring and hoses that could get stressed, narrow gaps so I decided to do it the hard way.
I'll write up when I've changed the jack position tomorrow pm, happy hunting at the breakers, I'm ok for now, keeping close tabs on all the local yards. Cheers
Using the jacking points and not the subframe is worth a try. I think it will re-position the entire engine and subframe, hopefully enough to make a difference. You're in a tough spot with this. I'm not of much help, but I hope I never have to do what you've done! After all, most jobs with the XJ12 are in the "just barely" accessible and doable category. It can get tiring. I suppose it is no different underneath the car.
An exception would be the air conditioning compressor, right up top and easily accessible. I just finished replacing mine today and it is humming along very nicely and putting out super cold so far. It was a pleasure. And we don't have those Coil on Plug problems to worry about either!
After trying different jack stand points behind the front wheel arches, leaving the front suspension unsupported and hopefully dropping down a little I had no new clearance to get the exhaust downpipe in position. I then flooded the area with light from multiple angles and tried all sorts of weird and wonderful angles.
Suddenly I had the two downpipes past the studs and got a fastener on before prizing the donut into place at the other end. It's a very counter intuitive rubic's cube move to get the seam of the downpipe to clear the narrow area it sits in: I had the rear of the DP pointing towards the other side rear wheel at an acute angle and it suddenly found a path to get the two downpipes directly under the manifold, at which point I could twist it back into position. Tomorrow I'll get everything tightened up and get it back on four wheels
I came close to getting pulled over for speeding yesterday, I rely quite heavily on the old chap in a big heavy car look when I whoosh past the hidden speeding cops. I was lucky yesterday, my heavy foot had me at about 95 going past a hidden chp car, but I assume fortunately the cop was busy with his coffee and donuts...thrilling exhaust sound might be an attractor, the bureaucrats need the penalty money ...