When you click on links to various merchants on this site and make a purchase, this can result in this site earning a commission. Affiliate programs and affiliations include, but are not limited to, the eBay Partner Network.
I can't remember if you have a hydraulic press. For the past 15+ years I've been using one from Harbor Freight that cost only $70, and they still sell one for about that price. This press has paid for itself many, many times over on our two XJ40s. Below is a link to pix of how I used it to replace the front subframe pivot bushes:
I do have a Harbor Freight press. I was able to separate the hub from the hub carrier but the bearing, evidently, comes in two pieces. I will be posting pictures later but my main problem, right now, is getting out the inner bearing race out of the hub shaft. I tried to use a bearing separator jig but there just isn't enough meat to grab on. I need to improvise.
I do have a Harbor Freight press. I was able to separate the hub from the hub carrier but the bearing, evidently, comes in two pieces. I will be posting pictures later but my main problem, right now, is getting out the inner bearing race out of the hub shaft. I tried to use a bearing separator jig but there just isn't enough meat to grab on. I need to improvise.
Are there no holes or notches to allow you to get a drift punch onto the back edge of the race to tap it out with alternating taps at two diametrically-opposed points?
Are there no holes or notches to allow you to get a drift punch onto the back edge of the race to tap it out with alternating taps at two diametrically-opposed points?
Looking forward to the photos.
Cheers,
Don
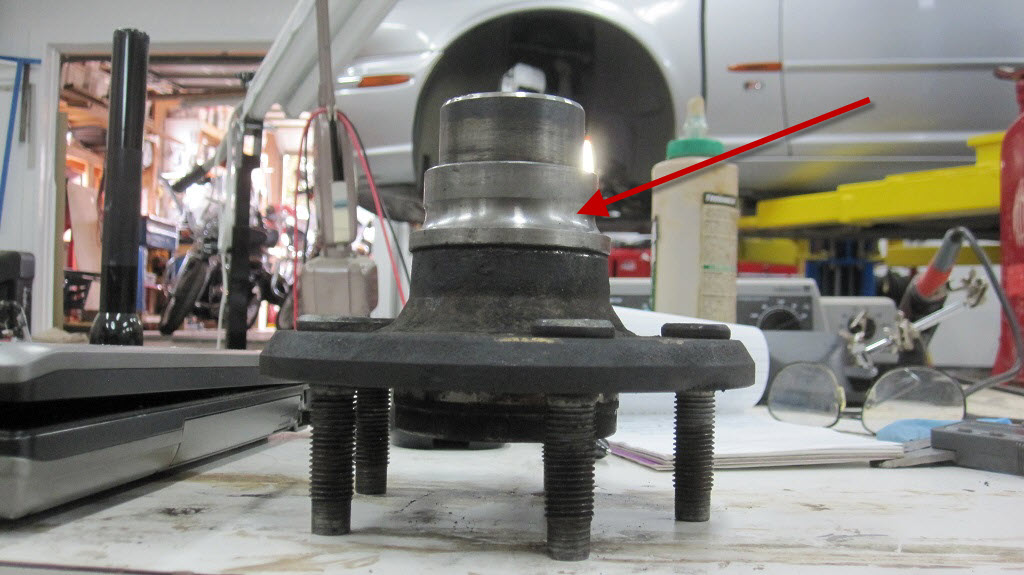
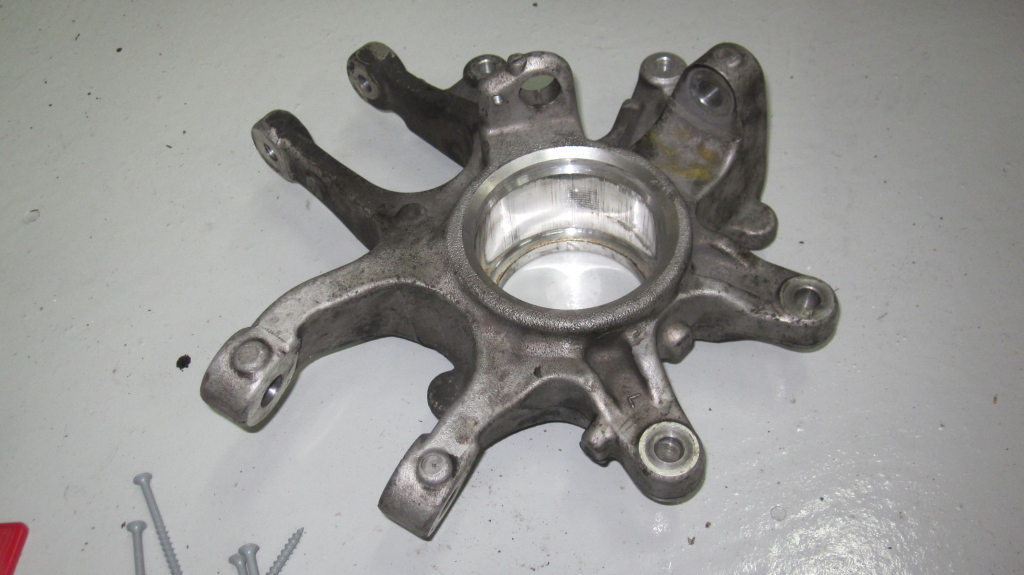
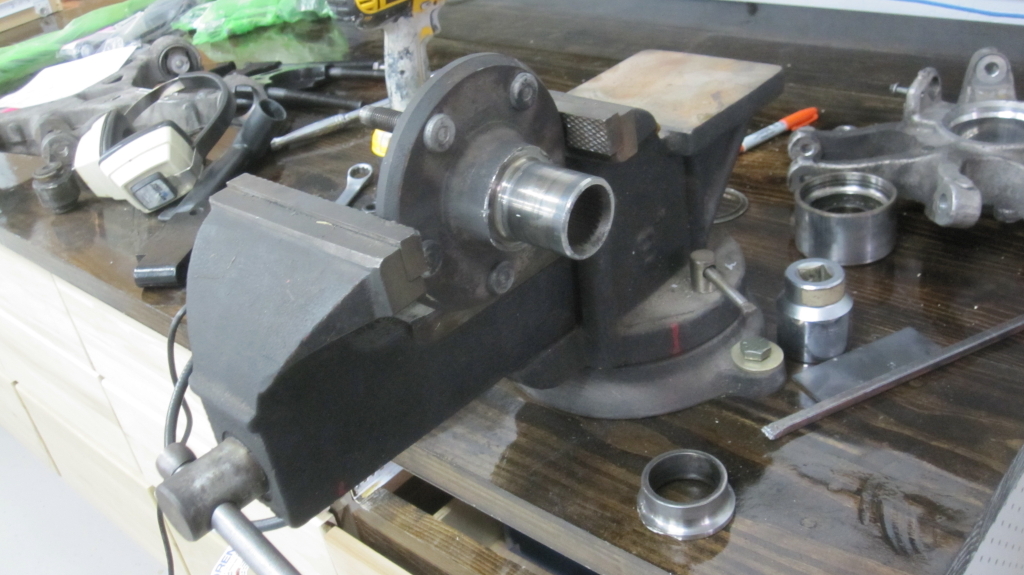
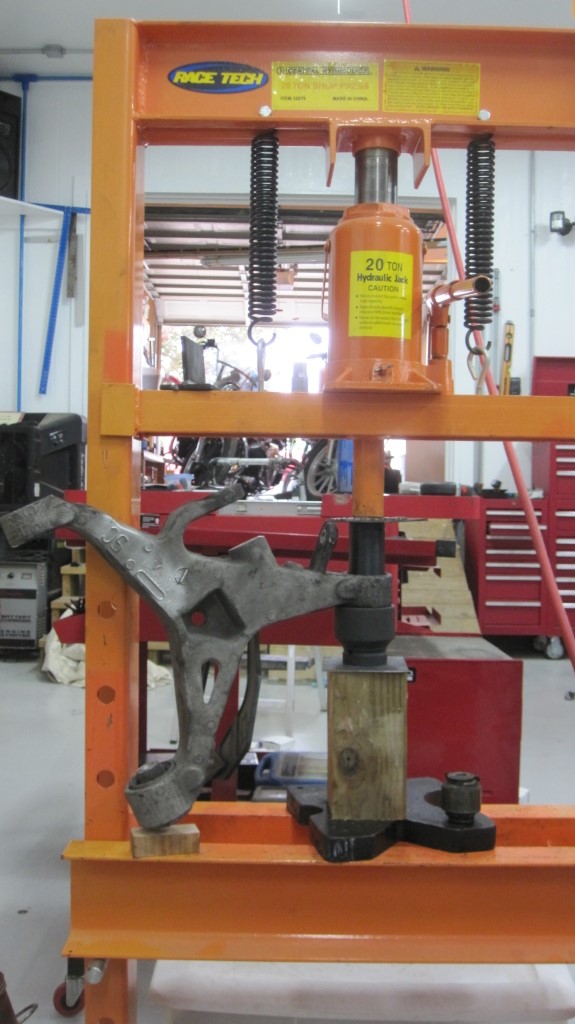
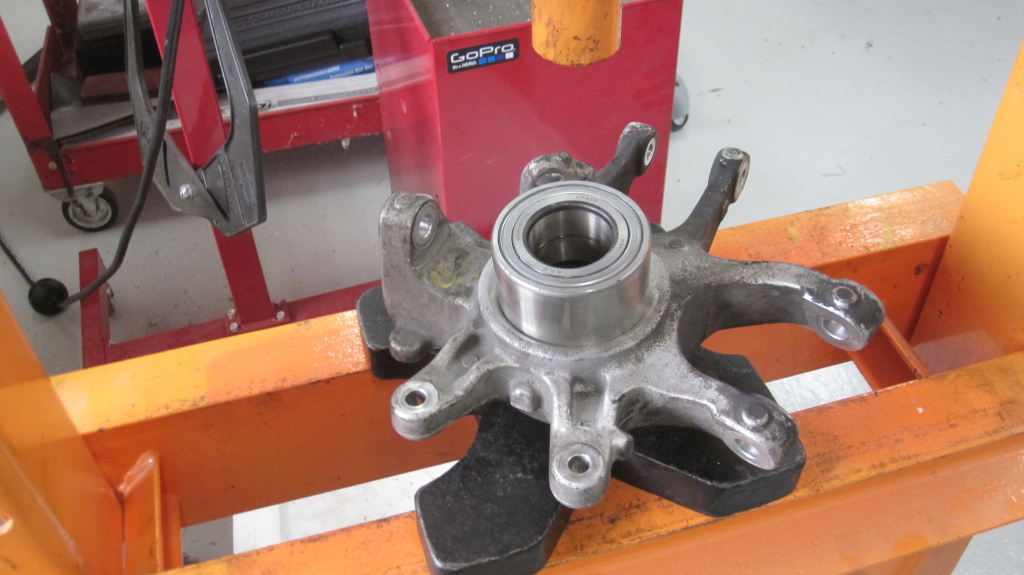
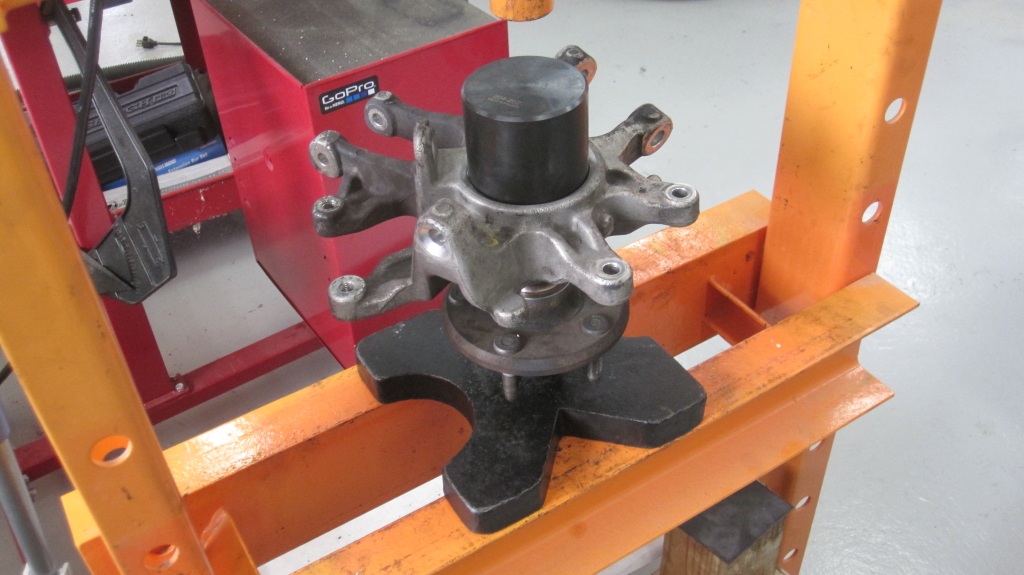
This is what I am dealing with: Removing the race from the shaft. Need a large enough bearing separator plus something to support the race/bearing separator while I use the press to push the shaft down and free the race. The book does show a special tool which I could buy for over $300 but shoot, I am sure I can rig something up..... Still working it.
Last edited by Lagonia; Apr 13, 2014 at 01:42 PM.
Reason: Grammar
I have seen devices with two plates and two semicircular cutouts with two connecting bolts. The cutouts are tapered. One of those would act like a wedge when the bolt are tightened up.
Then again, if the race is to be discarded then cutting through most of it with a
die grinder would let a cold chisel do its job.
Hi plums,
What you're describing is called a "bearing separator," and I thought Lagonia mentioned that he had tried to use one but that it could not grab the race. See photo 8 in the album at the link below:
Lagonia, I had to use a die grinder or drum sander to make the sharp half-circle "jaws" of my bearing separator even thinner and sharper to pull the bearing cones off the diff carrier. I wonder if you could modify your bearing separator in a similar fashion? I got this separator at Harbor Freight also, for about $20 or $25.
Lagonia, I had to use a die grinder or drum sander to make the sharp half-circle "jaws" of my bearing separator even thinner and sharper to pull the bearing cones off the diff carrier. I wonder if you could modify your bearing separator in a similar fashion? I got this separator at Harbor Freight also, for about $20 or $25.
Don
I got three of those, actually. I did try to grind the jaws down but they slide right up. There just isn't much to catch on to. I'll just have to cut the race loose carefully like Plums suggested.
I got three of those, actually. I did try to grind the jaws down but they slide right up. There just isn't much to catch on to. I'll just have to cut the race loose carefully like Plums suggested.
Could you grind a notch or bevel around the largest diameter of the race to give your bearing separator a better grip?
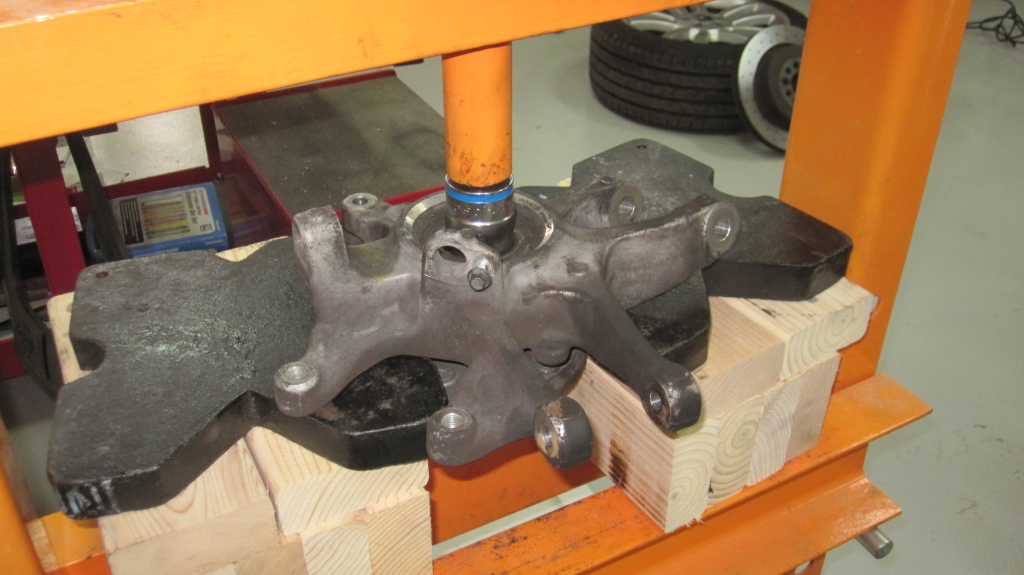
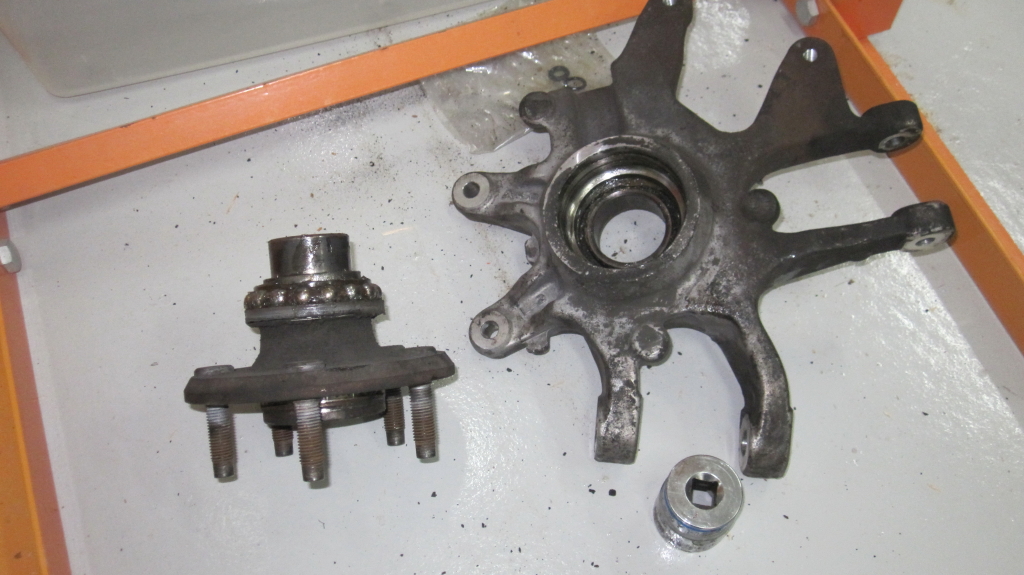
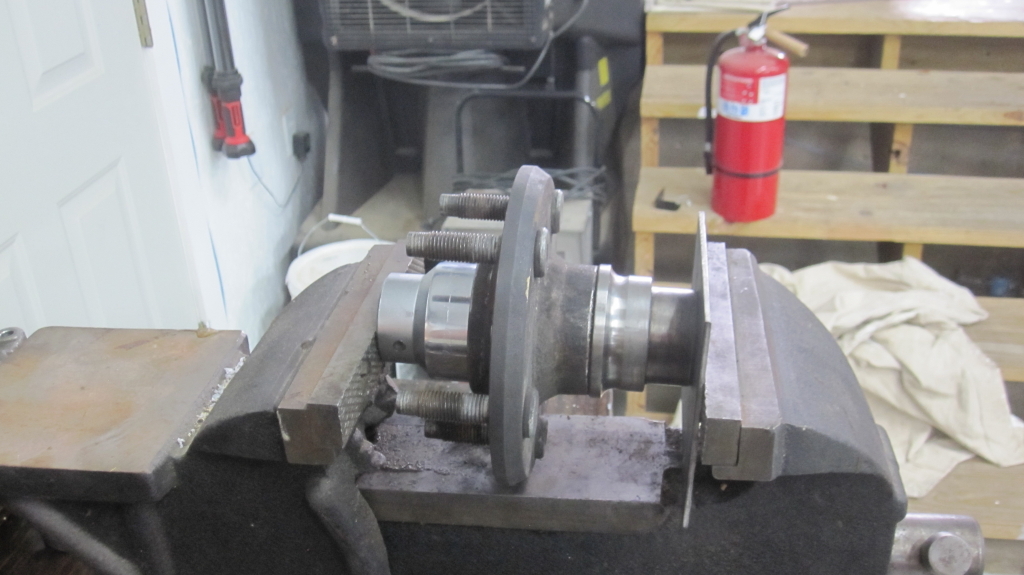
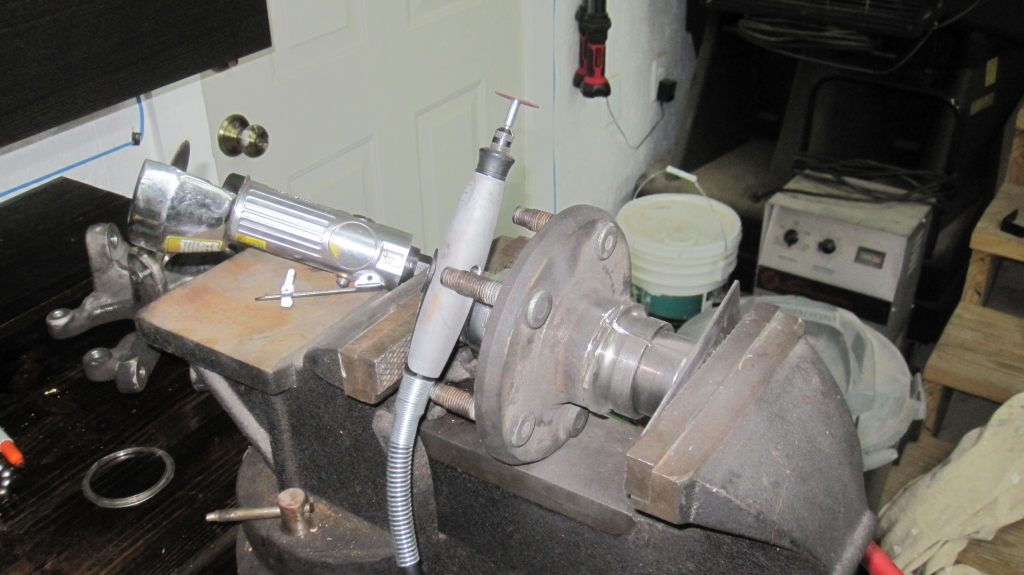
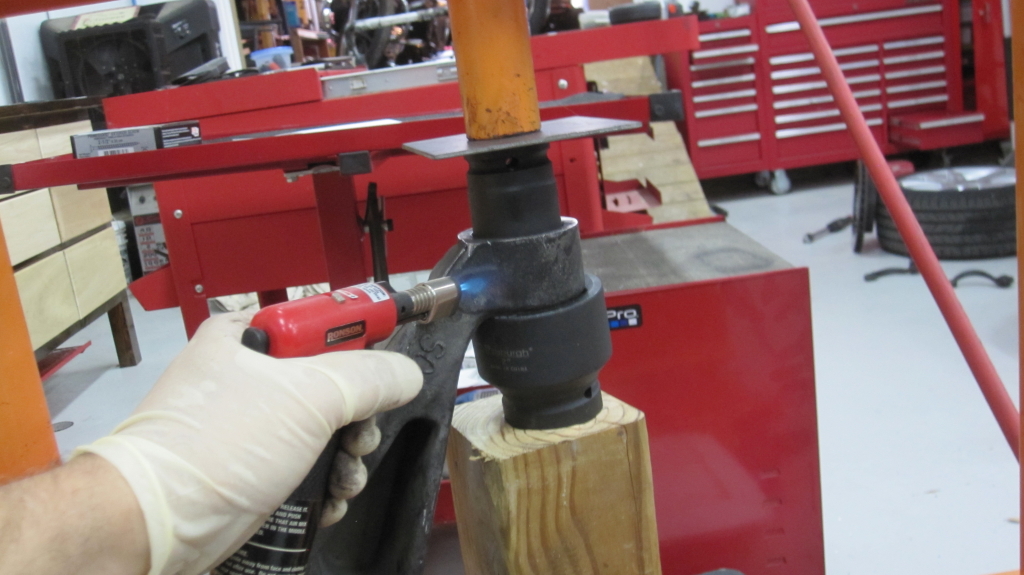
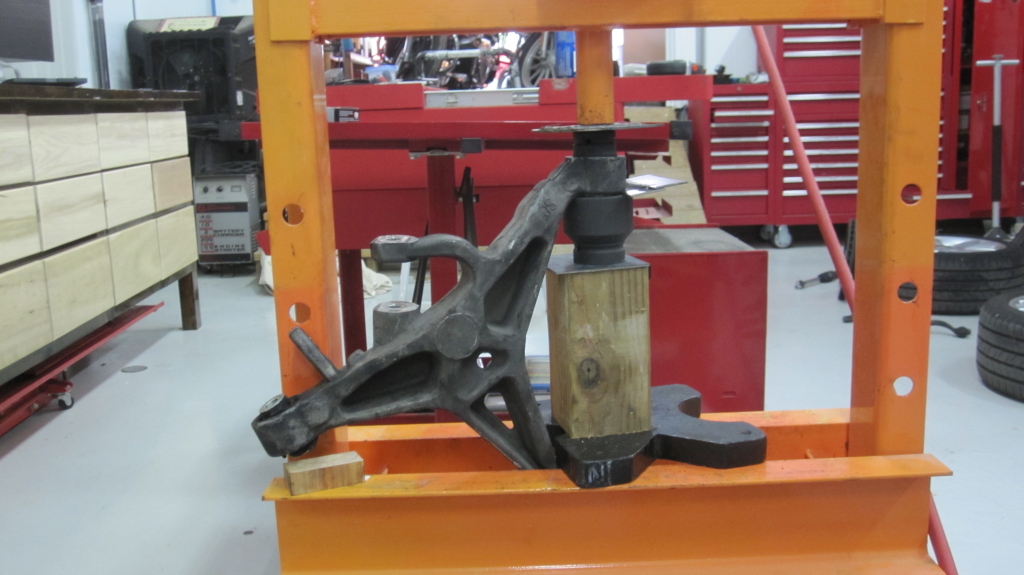
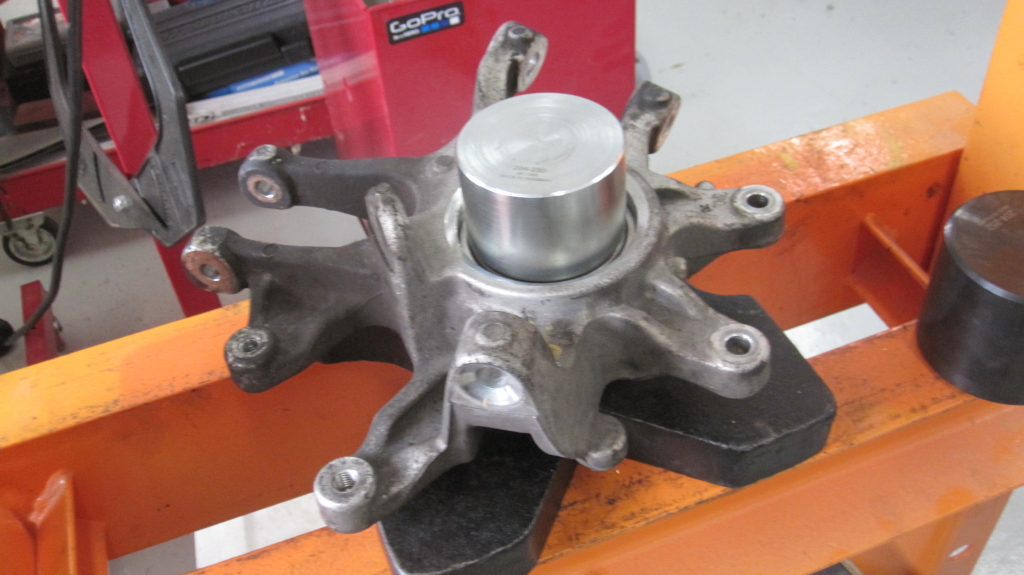
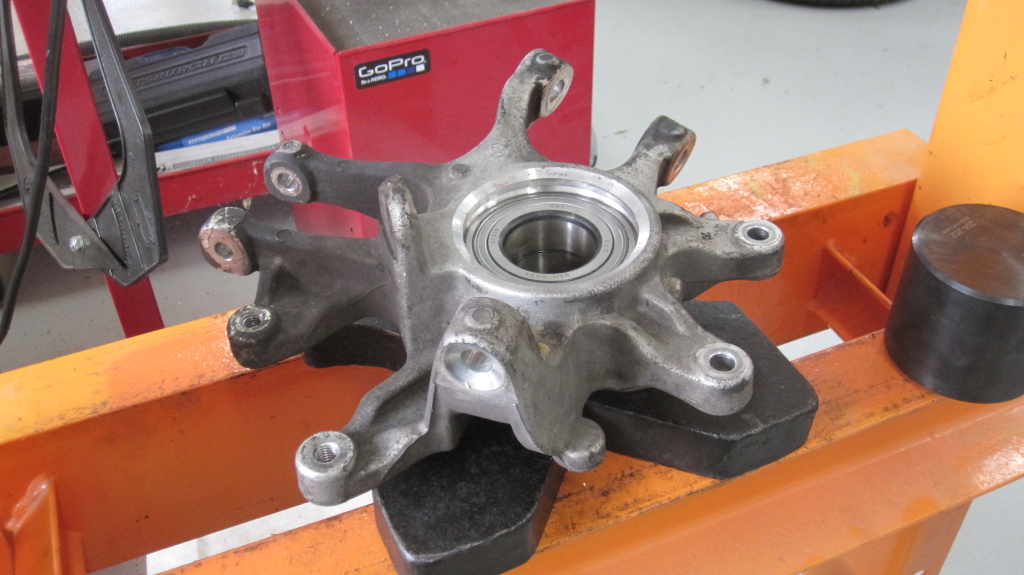
I do not think I removed the bearing the right way but, nevertheless, with some basic sockets, some wood and a cheap Harbor Freight press, I was able to remove most of the bearing out. I am still working on the inner race off of the hub shaft....
I do not think I removed the bearing the right way but, nevertheless, with some basic sockets, some wood and a cheap Harbor Freight press, I was able to remove most of the bearing out. I am still working on the inner race off of the hub shaft....
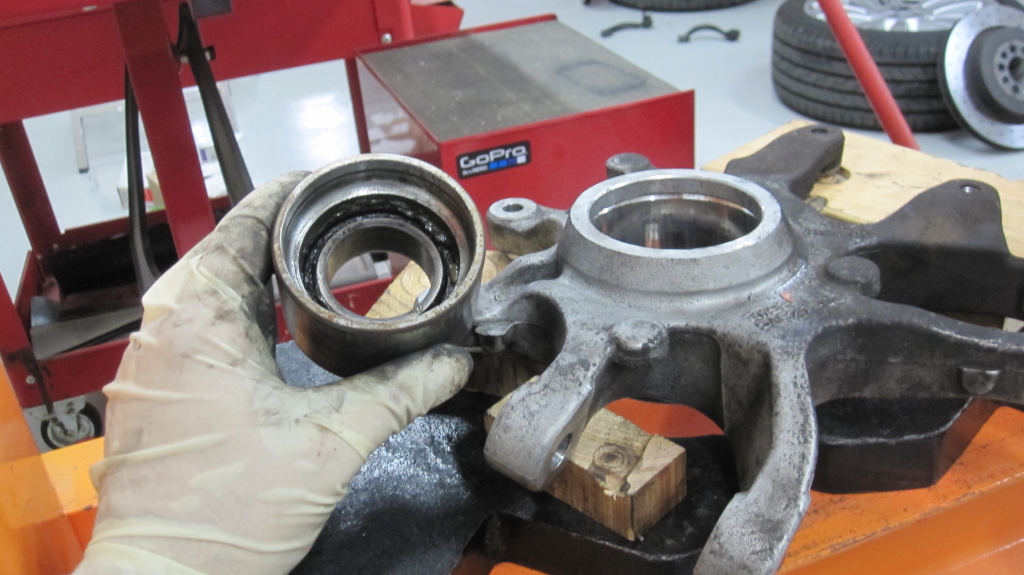
Looking good Lagonia! Sometimes the bearings come apart like that, so no big deal, as long as when you're installing the new bearings you apply pressure only on the inner races and not on the ball cages so the same thing doesn't happen to your new bearings.
Enjoying watching the process a whole lot more than you're enjoying doing all that work, but you're going to be really happy when it's done and the rest of us are very grateful for the photos!
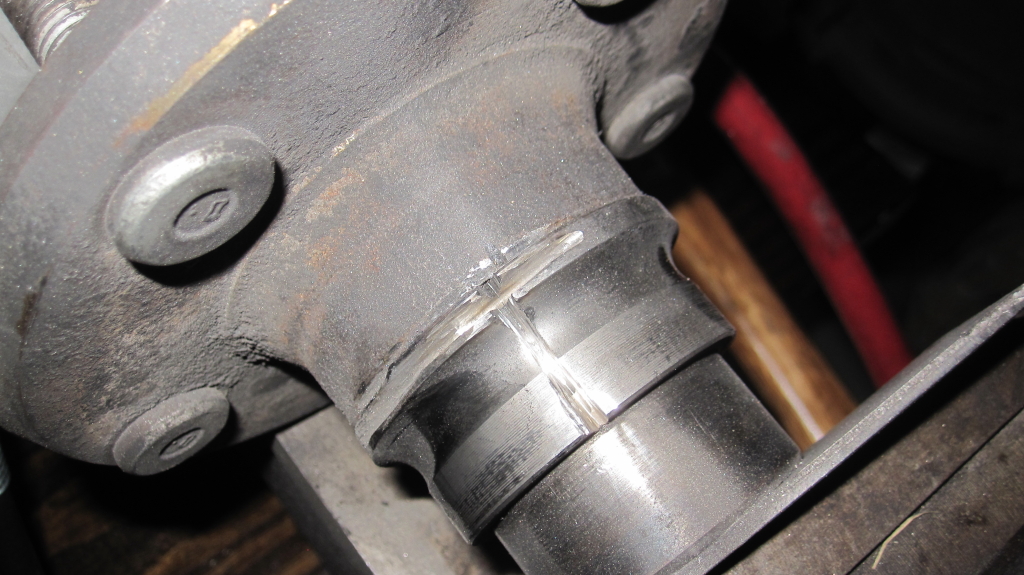
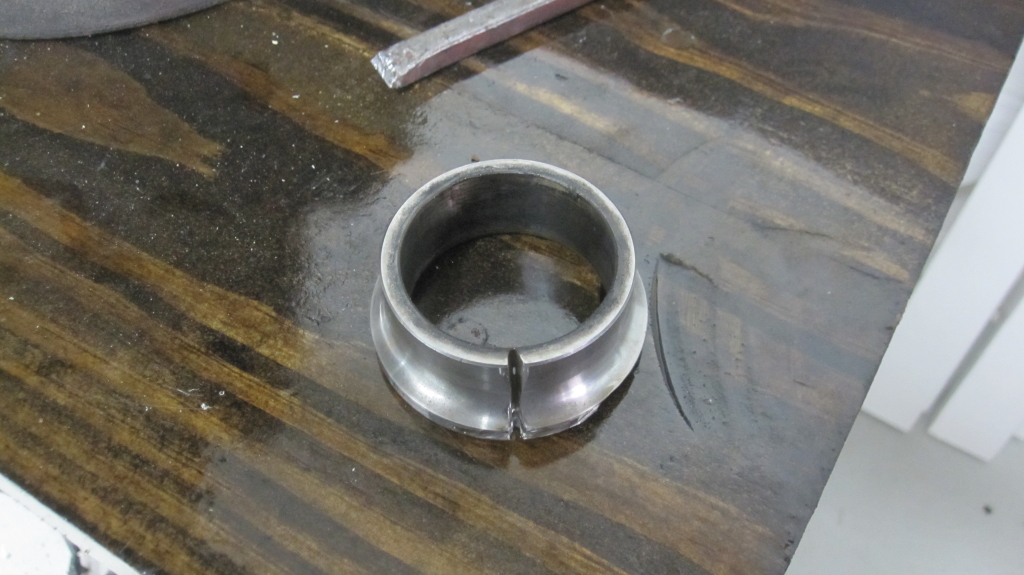
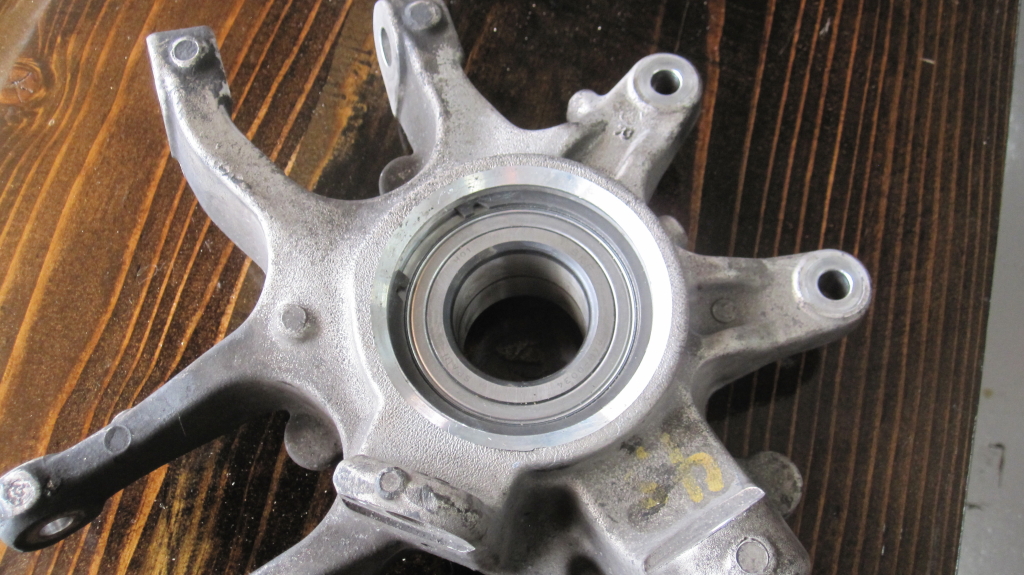
Cutting a notch was not working for me so I abandoned that in favor of *carefully* cutting a slit across the bearing race. I used an air powered cutter and once I was getting close, I switched to a dremel tool. It worked like a charm and took no time at all.
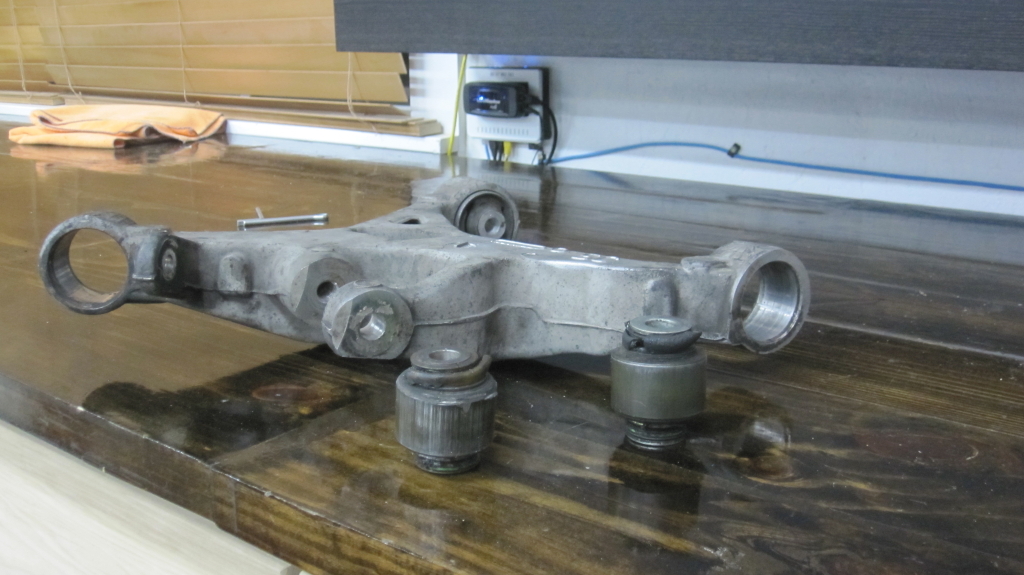
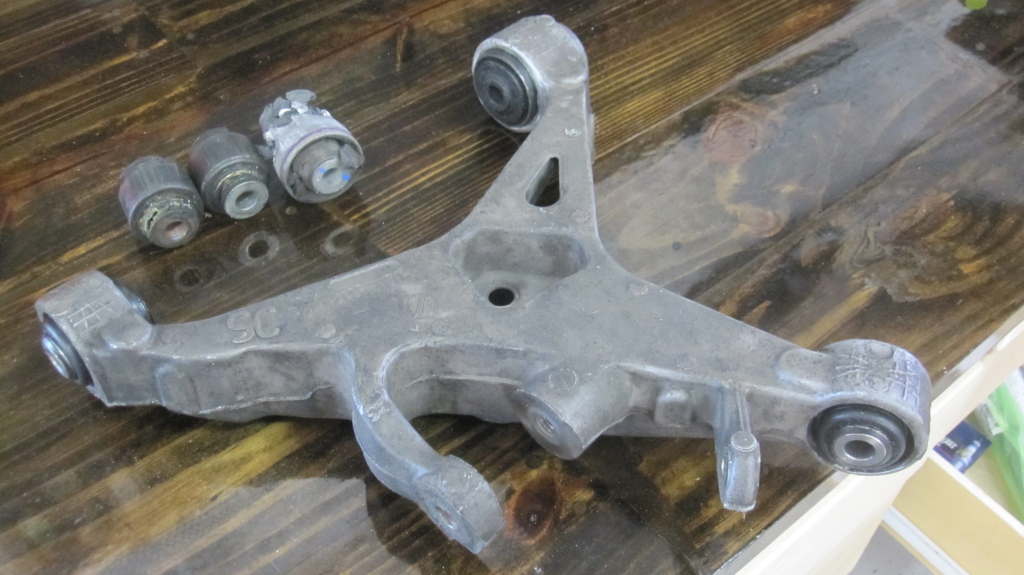
I did get replacements for the bushes on both the rear control arms. The ball joint type bushes I was able to get out. The 3rd one, which looks like an engine mount bush looks intimidating and do not think I have the right jigs to get them out. They look pretty good actually so I made the decision to keep those even though I have replacements
for them as well.
Well, finally the car is on the road again after weeks on the lift running better than ever.
Bearing installation seemed easy enough using the run of the mill fixtures you would find in a front wheel bearing removal kit from Harbor Freight, for example. To my surprise, after I put it together, the hub was loose as ***k from the wheel knuckle. WTF?
Well, there are two inner races in that huge bearing and those two races, I figured, did not end up next to each other as they should have....
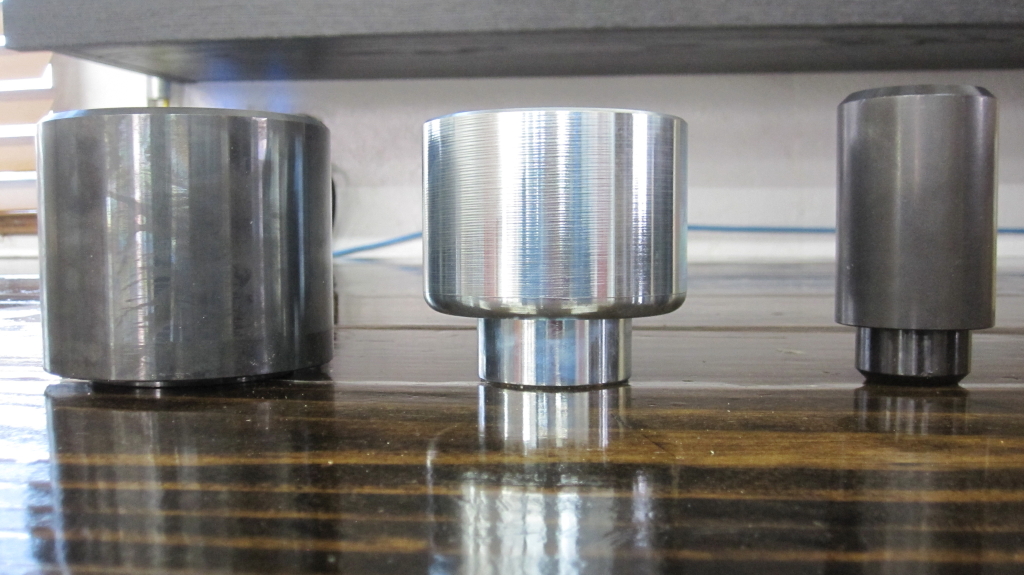
Solution? Get the tools the Jaguar manual recommends:
204-252: Bearing support
204-250: Rear hub bearing removal tool (installer too)
204-193: Front hub remover
The above tools are used for the installation of the bearing and hub as well.
The tools are shown here in order. They cost about $170 for all three from Bosch Auto Service solutions. I used them all for removing and installing the bearing on the second wheel knuckle/hub and I can tell you the whole process took about 10 minutes. Worth their weight in gold, ... well, almost.
Well, I did try. I removed two out of the three on one arm and that went fairly well (documented in this thread). The third one, the bigger of the three, was impossible to get out. It looked good so I had decided to keep it and not replace it. But when I tried to install the new bushings, I simply could not do it. Did not have the jigs/fixtures to put them back. They would not go straight, period, no matter what I tried.
So, I took them to my retired Jag mechanic who soiled on them for 4 hours and he got them done.
Rear suspension is absolute perfection now. I replaced both tie rod ends and both stabilizer links as well.
Congratulations on a job well done! On behalf of all X350 owners, THANK YOU for the excellent and comprehensive photos, the thorough commentary and the many helpful tips. We all owe you a debt of gratitude!
Hello,
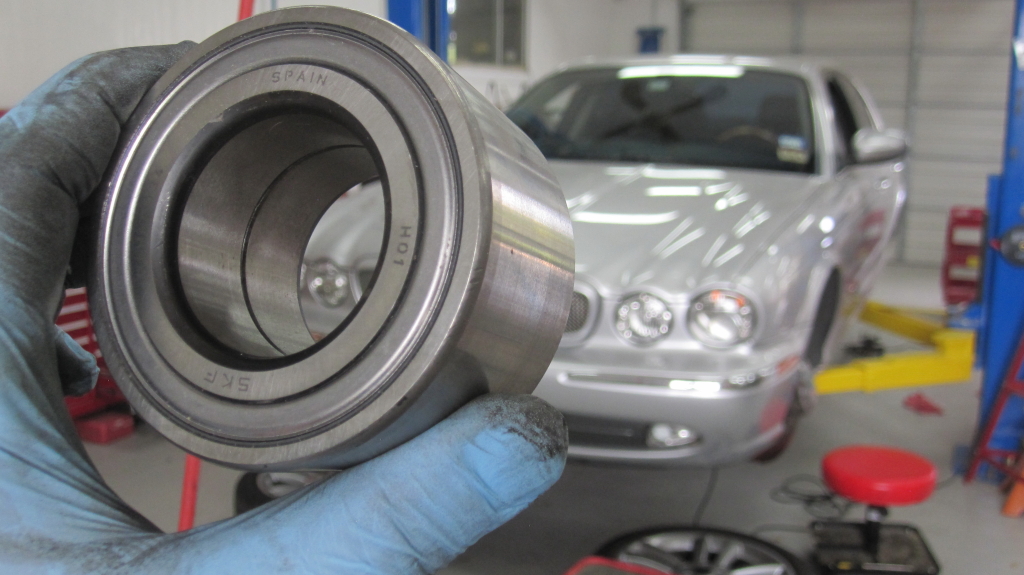
I just wanted to take a moment to thank Lagonia (and others) for all the wonderful pics and detail. I was able to replace the rear bearings on my 2004 XJR, and could not have done it without your information. I ended up replacing the lower control arms with Mevotech Supreme 2002 Lincoln LS units as the bushing removal proved impossible. The Jaguar special tools are no longer available, but I was able to source a bearing install set from Powerbuilt Tools that worked very well and was definitely necessary. Also invaluable was the temperature differential information on steel and aluminum both heating and freezing. The old bearings did not want to come out, and PB Blaster soaking and heating the hub in the toaster oven made it happen without breaking anything. Putting the new sealed bearing in the freezer overnight and then heating the hub again for install made that process much easier as well. So - thanks everyone! My 20 y/o, 140k mile car now has new bearings and should be much safer and reliable. I've attached a picture of the install as it's so pretty. I cleaned up the hub in my little blasting cabinet - you do not want to know what it looked like "before"...