
Advice on heater core removal and installation.

Thread Starter
|
Senior Member
Joined: Sep 2013
Posts: 703
Likes: 228
From: Dallas, Texas
I received my heater core this morning from Fleabay ($60) and checked it gave constant heat throughout by filling it with hot water. I am glad to say the core gave a good temp throughout its length and width. So I am now going to go ahead and change the heater core.
I have a couple of questions as follows:
1. I have read the JTIS removal and installation instructions and they are quite complex. They requie that you remove the complete blower unit, the centre console, and the glove compartment along with a plethora of items in the engine compartment. Do you have to follow all the steps as mentioned in JTIS?
2. I didn't notice it said anything about dumping all the radiator fluid prior to starting the work, is this a necessary step?
3. At what points am I going to give up hope and require help? What are the PITA bits to be on the look out for?
4. Has somebody already documented this process with either text, photo's or video?
I am also planning to take some photo's and document the process for future reference.
Senior Member
Joined: Dec 2012
Posts: 198
Likes: 39
From: Calgary,AB,Canada
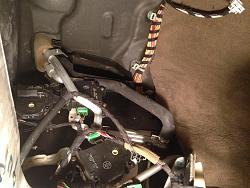
1. You only need to remove the glove box assembly to remove the blower motor and blower motor housing. The manual says to remove all that engine compartment stuff so you can remove the ECU which sits below the blower housing. To remove the ECU you will need a 5 point security torx, t30 I think. I followed the steps outlined and once you remove the clove box etc., the heater core slide out from the passenger side like a cassette. I ended up taking the car to my indy because I could not get my fat hands etc to install the clamps on the heater pipe properly. He asked me why I took the engine compartment apart, I said because that's how you take the ECU out. He claims he removes the blower housing without removing the ECU.
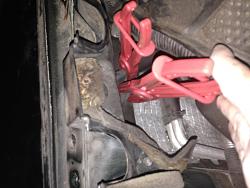
2. I pinched off the heater hoses at the firewall in the engine compartment and used a funnel and hose to drain the heater core as I removed the clamps and pulled the lower heater pipe out first.
3. The whole job was a PITA, if I had it to do over I'd gladly pay my indy the 4 hours he would have charged me. The clamps for the heater pipe to core are mickey mouse and use a phillips head screw. I ended up getting longer hex bolts so I could use a small socket and ratchet, still could not get them to seal properly which is why I towed it to my indy. Make sure you put the heater core in right way up, you'll see a restrictor in the outlet flange of the core. the lower pipe is the outlet. The blower housing bolts are difficult to reach and find, the housing itself was a pain to pull and and re-install, how my indy does it with the ECU there I could never guess, he must have trick having done many of them before. Removing all the engine bay stuff was no that difficult, just tedious. HTH Stu
Thread Starter
|
Senior Member
Joined: Sep 2013
Posts: 703
Likes: 228
From: Dallas, Texas
Well, I have got exactly to where you say about the 5 star speciality tool for the ECU disconnect. I wish I had seen this earlier. Its not a torx (they are 6 star shaped) The speciality tool is $70 or so online.
So now I am going to put the whole lot back together after cleaning it all up and go in from the glove compartment.
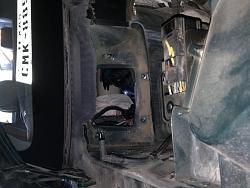
Lesson learnt.... Anyway, I will post the photo's of what I got down in the engine compartment. They may help someone who wants to carry out the process correctly. The 5 star tool is number 418-353 and can be ordered online.
So now I am going to put the whole lot back together after cleaning it all up and go in from the glove compartment.
Lesson learnt.... Anyway, I will post the photo's of what I got down in the engine compartment. They may help someone who wants to carry out the process correctly. The 5 star tool is number 418-353 and can be ordered online.
Thread Starter
|
Senior Member
Joined: Sep 2013
Posts: 703
Likes: 228
From: Dallas, Texas
Well, Your indy is correct. You can leave everything in the engine compartment intact. You could complete this job purely from the glove compartment area.
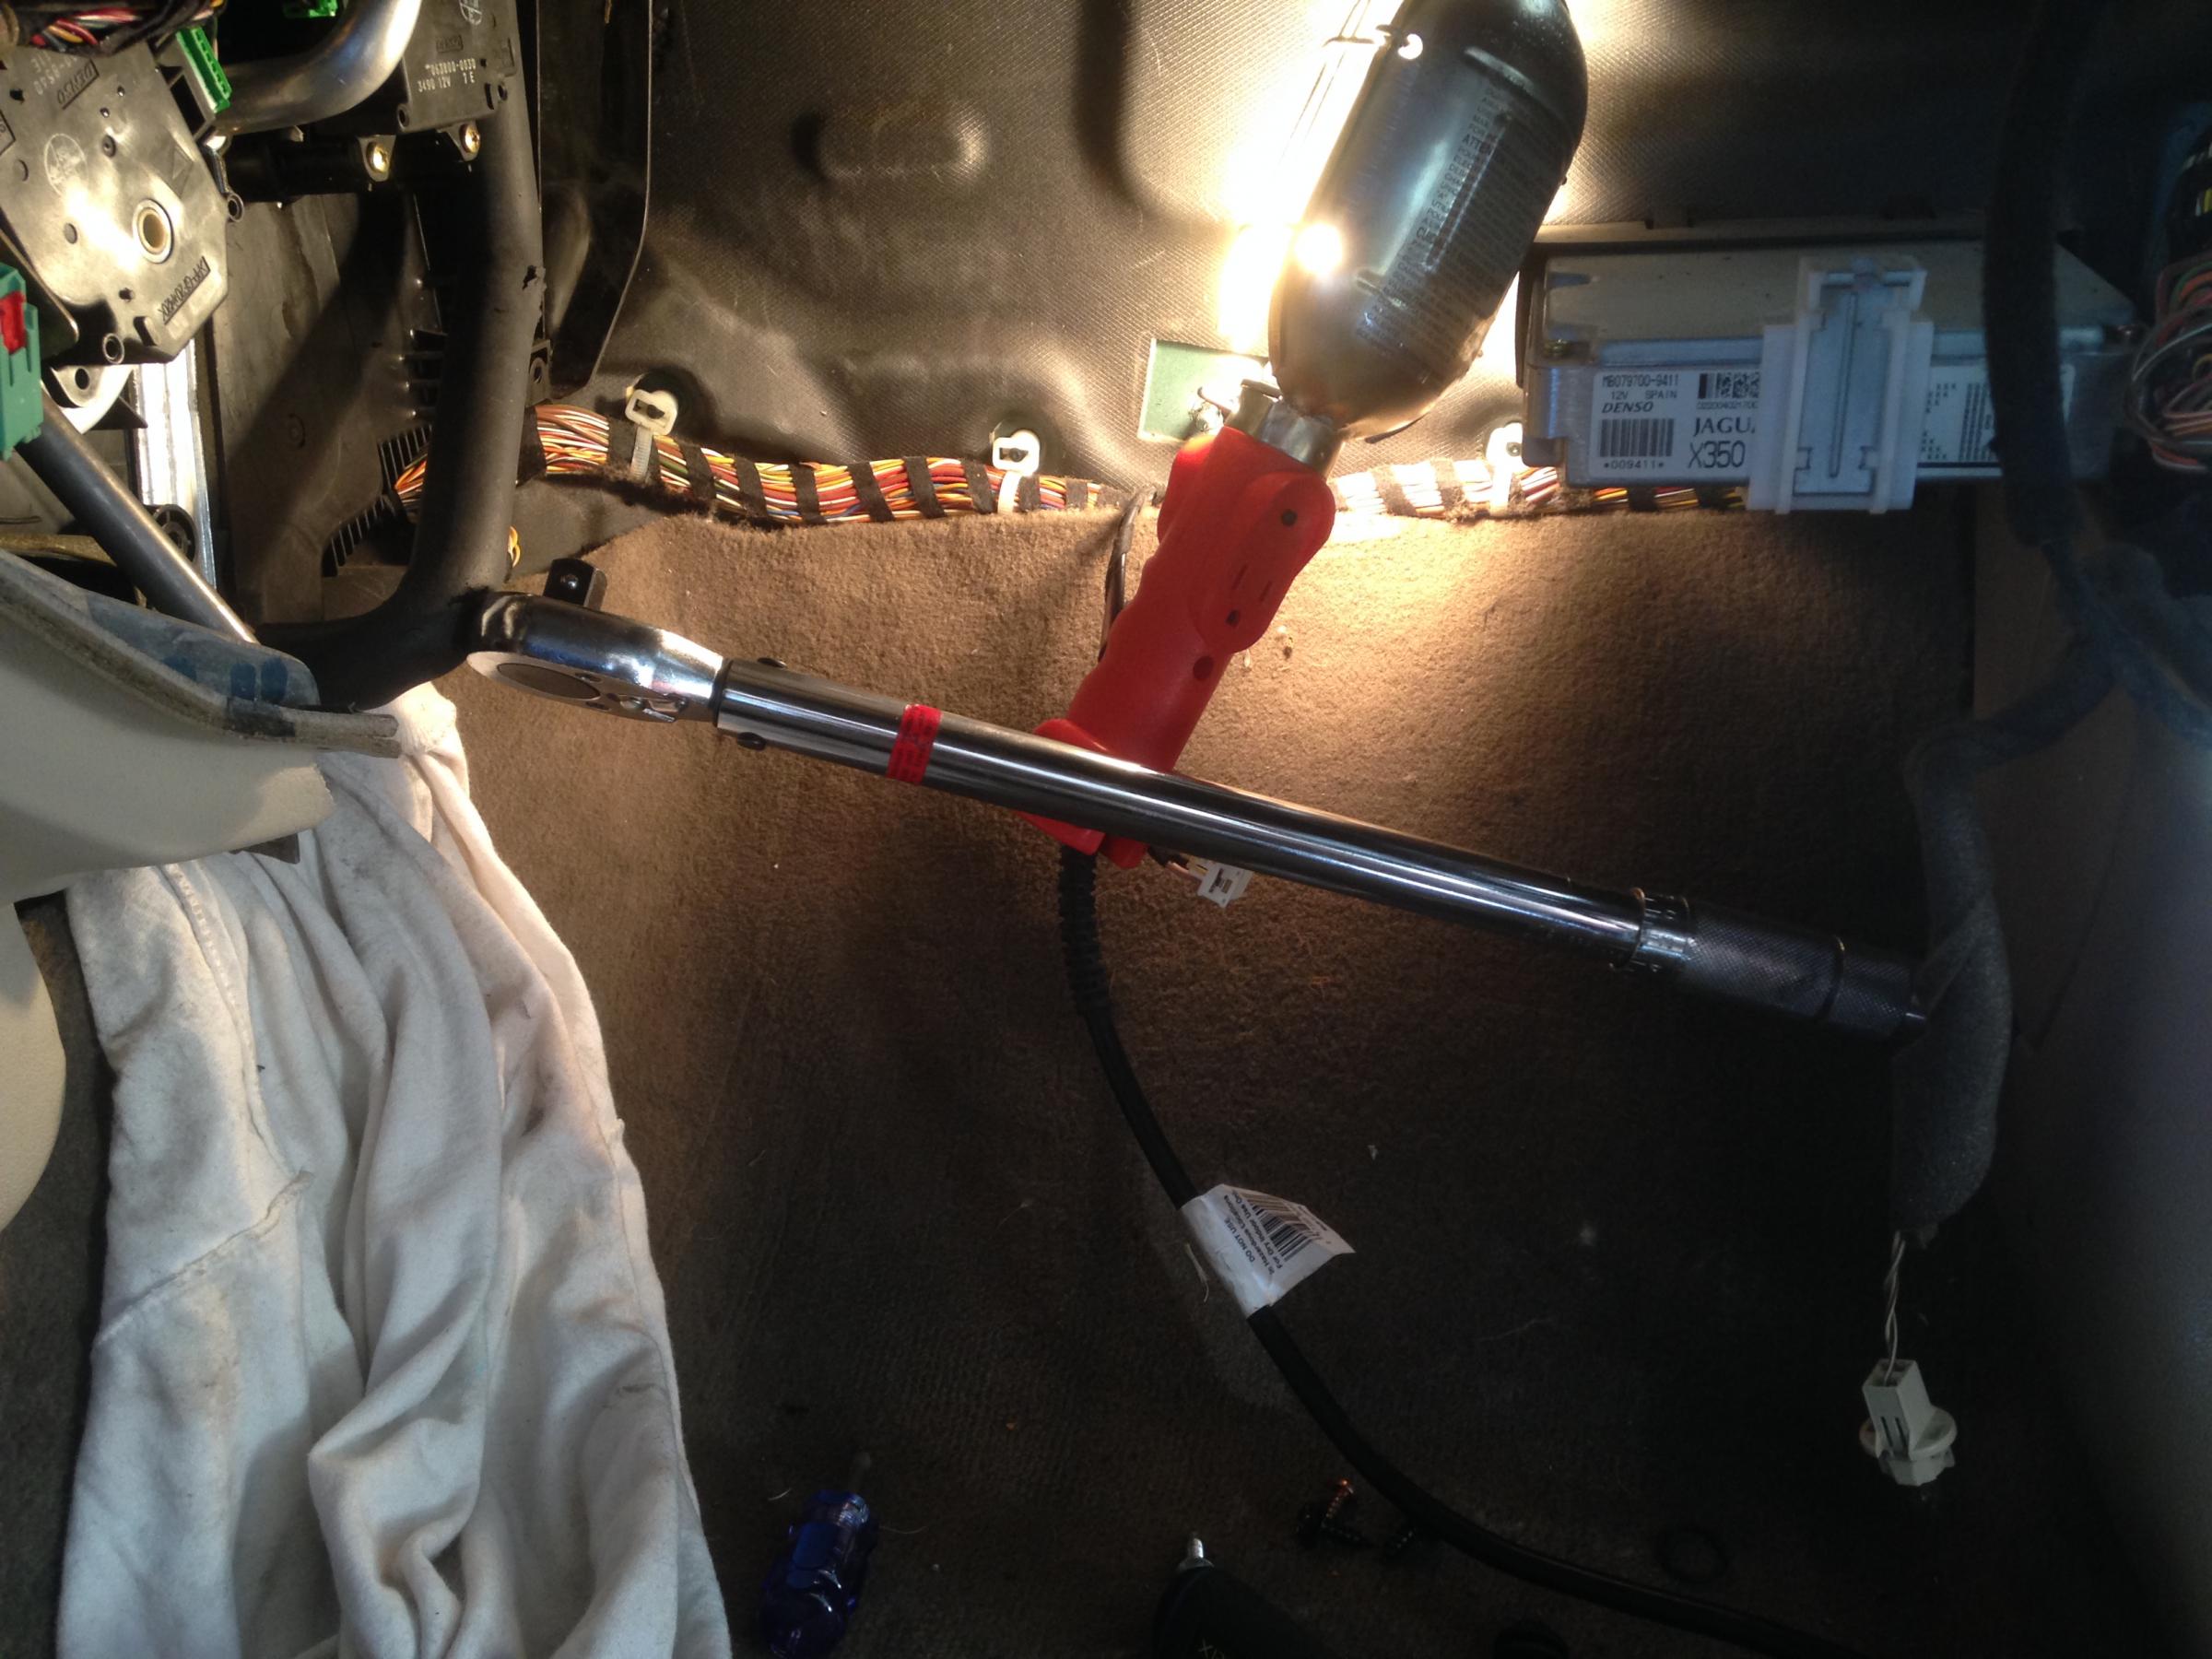
The ECU stays in situ while you pull the blower out. One of the bolts at the rear left is a real pain to get to but i found it wasn't tight and it spun off quite easily.
The heater core pipes are the biggest pain. I have been on th job 7 hours and and pulling my hair out trying to get the pipes into the new heater core. Absolute nightmare.
I will be putting all the engine components back together tonight. I will continue with the core and blower tomorrow. My knees are killing me, my back and shoulders ache too.
With beer in hand I am going to rebuild the engine compartment bits.
Senior Member
Joined: Dec 2012
Posts: 198
Likes: 39
From: Calgary,AB,Canada
FWIW, the torx plus, super torx or 5 point star or whatever they are called, I followed a Snap On guy to his next stop and got the bit from him for $7 or $8, it fits into a standard 1/4" 6 point bit holder.
Stu
Stu
Senior Member
Joined: Dec 2012
Posts: 198
Likes: 39
From: Calgary,AB,Canada
Just read post #4, I know the pain, try finding longer 4 or 4.5 mm, whatever they are, hex bolts, might make things a little easier although I still could not tighten them up properly while keeping the heater pipes in place, as I said I needed smaller hands or an extra pair of hands, its easy to damage the flange on the heater core if things are not lined up properly while you tighten the clamp. Those Phillip heads are useless. Good luck.
Stu
Stu
Last edited by psg; Nov 1, 2014 at 08:43 PM.

Joined: Apr 2010
Posts: 822
Likes: 95
From: Austin, TX USA
Trending Topics
Thread Starter
|
Senior Member
Joined: Sep 2013
Posts: 703
Likes: 228
From: Dallas, Texas
OK I got the whole thing back together and all running sweet. A couple of points to note are as follows:
1. Clamps across the heater pipes in the engine compartment near the bulk head will stop coolant flow when the heater core is detached (possibly).
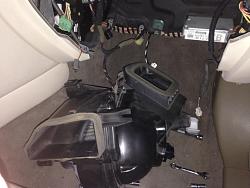
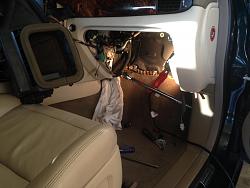
2. Taking everything out from the small confines of the glove compartment was extremely hard. The blower was particularly hard to get out and manoeuvre around. I could not find a way to disconnect it completely from the wiring harness. However it sat on the center console quite well out of the way
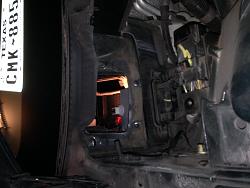
3. I removed the lower pipe from the heater core and let the coolant run out via a funnel into a container. There was probably half a litre or so. The heater core itself slides in and out very easily. The core was a second hand unit and it held 375ml of water prior to inserting it. On checking the old one, it held on 325ml of liquid and was definately heavier on one side, also 50ml water capacity difference.. When experimenting with flushing a lot of black grit, particles came out. There was no goo residue to be seen. I may cut it to see if it was glooped up.
4. Reconnecting the heater core pipes was PITA no 1. I could not hold and manoeuvre the sleeve and tighten all at the same time. So I slept on it and came up with this idea to hold the pipe in the core.

5. Once the bottom pipe was secured properly I then tried the same with the top pipe connector. But that didn't work out too well. I finally sprayed some WD40 on the sleeve so that it could be moved easily against the 2 end fittings and with patience and luck, I finally got it to a position where the collars were seated correctly and I could tighten it up. Another PITA to be sure.
6. The heater blower was the next obstacle to over come. It probably took over an hour or so to wiggle it in position. Most of the time is seemed like it was just going to slide right in and then the last 1 inch it would move no more. Very frustrating. Persevere and it will go in, remember you did get it out of the same hole. Be careful not to bang or move the Engine ECU which is right in the way.
7. I finally got it all back together and bled the coolant system and now have hot air on the drivers side. Whoot.....
8. Be prepared for hours on your back, side, cramped arms, bruised and battered legs and thighs. Frustration with the heater core pipes and the installation of the blower. Once those are done its all plain sailing.
Some more photo's here.

Happy hunting...
1. Clamps across the heater pipes in the engine compartment near the bulk head will stop coolant flow when the heater core is detached (possibly).
2. Taking everything out from the small confines of the glove compartment was extremely hard. The blower was particularly hard to get out and manoeuvre around. I could not find a way to disconnect it completely from the wiring harness. However it sat on the center console quite well out of the way
3. I removed the lower pipe from the heater core and let the coolant run out via a funnel into a container. There was probably half a litre or so. The heater core itself slides in and out very easily. The core was a second hand unit and it held 375ml of water prior to inserting it. On checking the old one, it held on 325ml of liquid and was definately heavier on one side, also 50ml water capacity difference.. When experimenting with flushing a lot of black grit, particles came out. There was no goo residue to be seen. I may cut it to see if it was glooped up.
4. Reconnecting the heater core pipes was PITA no 1. I could not hold and manoeuvre the sleeve and tighten all at the same time. So I slept on it and came up with this idea to hold the pipe in the core.
5. Once the bottom pipe was secured properly I then tried the same with the top pipe connector. But that didn't work out too well. I finally sprayed some WD40 on the sleeve so that it could be moved easily against the 2 end fittings and with patience and luck, I finally got it to a position where the collars were seated correctly and I could tighten it up. Another PITA to be sure.
6. The heater blower was the next obstacle to over come. It probably took over an hour or so to wiggle it in position. Most of the time is seemed like it was just going to slide right in and then the last 1 inch it would move no more. Very frustrating. Persevere and it will go in, remember you did get it out of the same hole. Be careful not to bang or move the Engine ECU which is right in the way.
7. I finally got it all back together and bled the coolant system and now have hot air on the drivers side. Whoot.....
8. Be prepared for hours on your back, side, cramped arms, bruised and battered legs and thighs. Frustration with the heater core pipes and the installation of the blower. Once those are done its all plain sailing.
Some more photo's here.


Happy hunting...
Senior Member

Joined: Apr 2018
Posts: 338
Likes: 105
From: Greater Manchester
This is an awful job to do! My XJR sprang a leak from the aux water pump so I took this as a chance to replace some suspicious looking hoses as well, actually most of the hoses but the valley hose. Some of the hoses are a real PITA to get at,you can see them but that's about it. Once all the hoses were done I decided to replace the heater matrix. DEAR GOD ALMIGHTY! what sociopath designed that mess? The clamps are a royal pain to get on but after a swearing session that would make a sailor blush they were both on and water tight. I cut open the old unit and found it well and truly blocked I could only see small pin ****** of light when I looked down the core. There also seemed to be flakes of what seemed to be rubber stuck in it. I will be back out tomorrow to try to hammer the blower box back in. Bleeding thing almost goes back but then stops dead AAARGH!

Thread
Thread Starter
Forum
Replies
Last Post
aholbro1
XJ XJ6 / XJR6 ( X300 )
18
Dec 29, 2024 06:46 PM
Currently Active Users Viewing This Thread: 1 (0 members and 1 guests)