When you click on links to various merchants on this site and make a purchase, this can result in this site earning a commission. Affiliate programs and affiliations include, but are not limited to, the eBay Partner Network.
There are some chemical precautions in the removal of the original paint coating and a chemical preparation before application of the powder coat that has a effect on the final powder coat outcome on the least for clear powder coat not off gassing yellowing during baking .
Last edited by Lady Penelope; Jun 4, 2018 at 06:59 PM.
There are some chemical precautions in the removal of the original paint coating and a chemical preparation before application of the powder coat that has a effect on the final powder coat outcome on the least for clear powder coat not off gassing yellowing during baking .
Yeah, we have a local powder coating shop here that has a lot of experience with magnesium. They have a special process.
The final cleaner is a Alkaline soap that seams counter to say aluminum oxidize . Keep in mind the porous nature of magnesium and the need to bake off / off gas any oil inclusion below the surface before powder coat application .
Last edited by Lady Penelope; Jun 4, 2018 at 09:05 PM.
The final cleaner is a Alkaline soap that seams counter to say aluminum oxidize . Keep in mind the porous nature of magnesium and the need to bake off / off gas any oil inclusion below the surface before powder coat application .
Yeah, the shop described a very similar process that he uses for magnesium, telling me that it takes an experienced shop to get it to work properly and off-gassing and contamination are a big challenge for the inexperienced.
I haven't used them yet, but they have very good reviews in my area:
I have powder coated a lot of magnesium parts over the years. There are many parts of Porsche, Volkswagen, and Audi that are made from mag, especially on the older cars. Magnesium is a problem metal because it contains so much contaminant in the lower quality alloys. Magnesium rims are a much higher quality alloy than engine parts and usually do not have as much, if any, of those problems. Those contaminants cause adhesion problems for paint and powder coat, and also cause outgassing bubbles in powder coat from those contaminants getting hot during the curing process. I overcome those problems by doing the proper prep work and using a special sealer powder base coat called 'outgas forgiving' (OGF). OGF powder is specially formulated to cure at a lower temperature, sealing the metal before it reaches temps high enough to start the outgassing process. Then the standard powder coat can be applied over the OGF. I have been powder coating since 1999 and have never had a problem using that process.
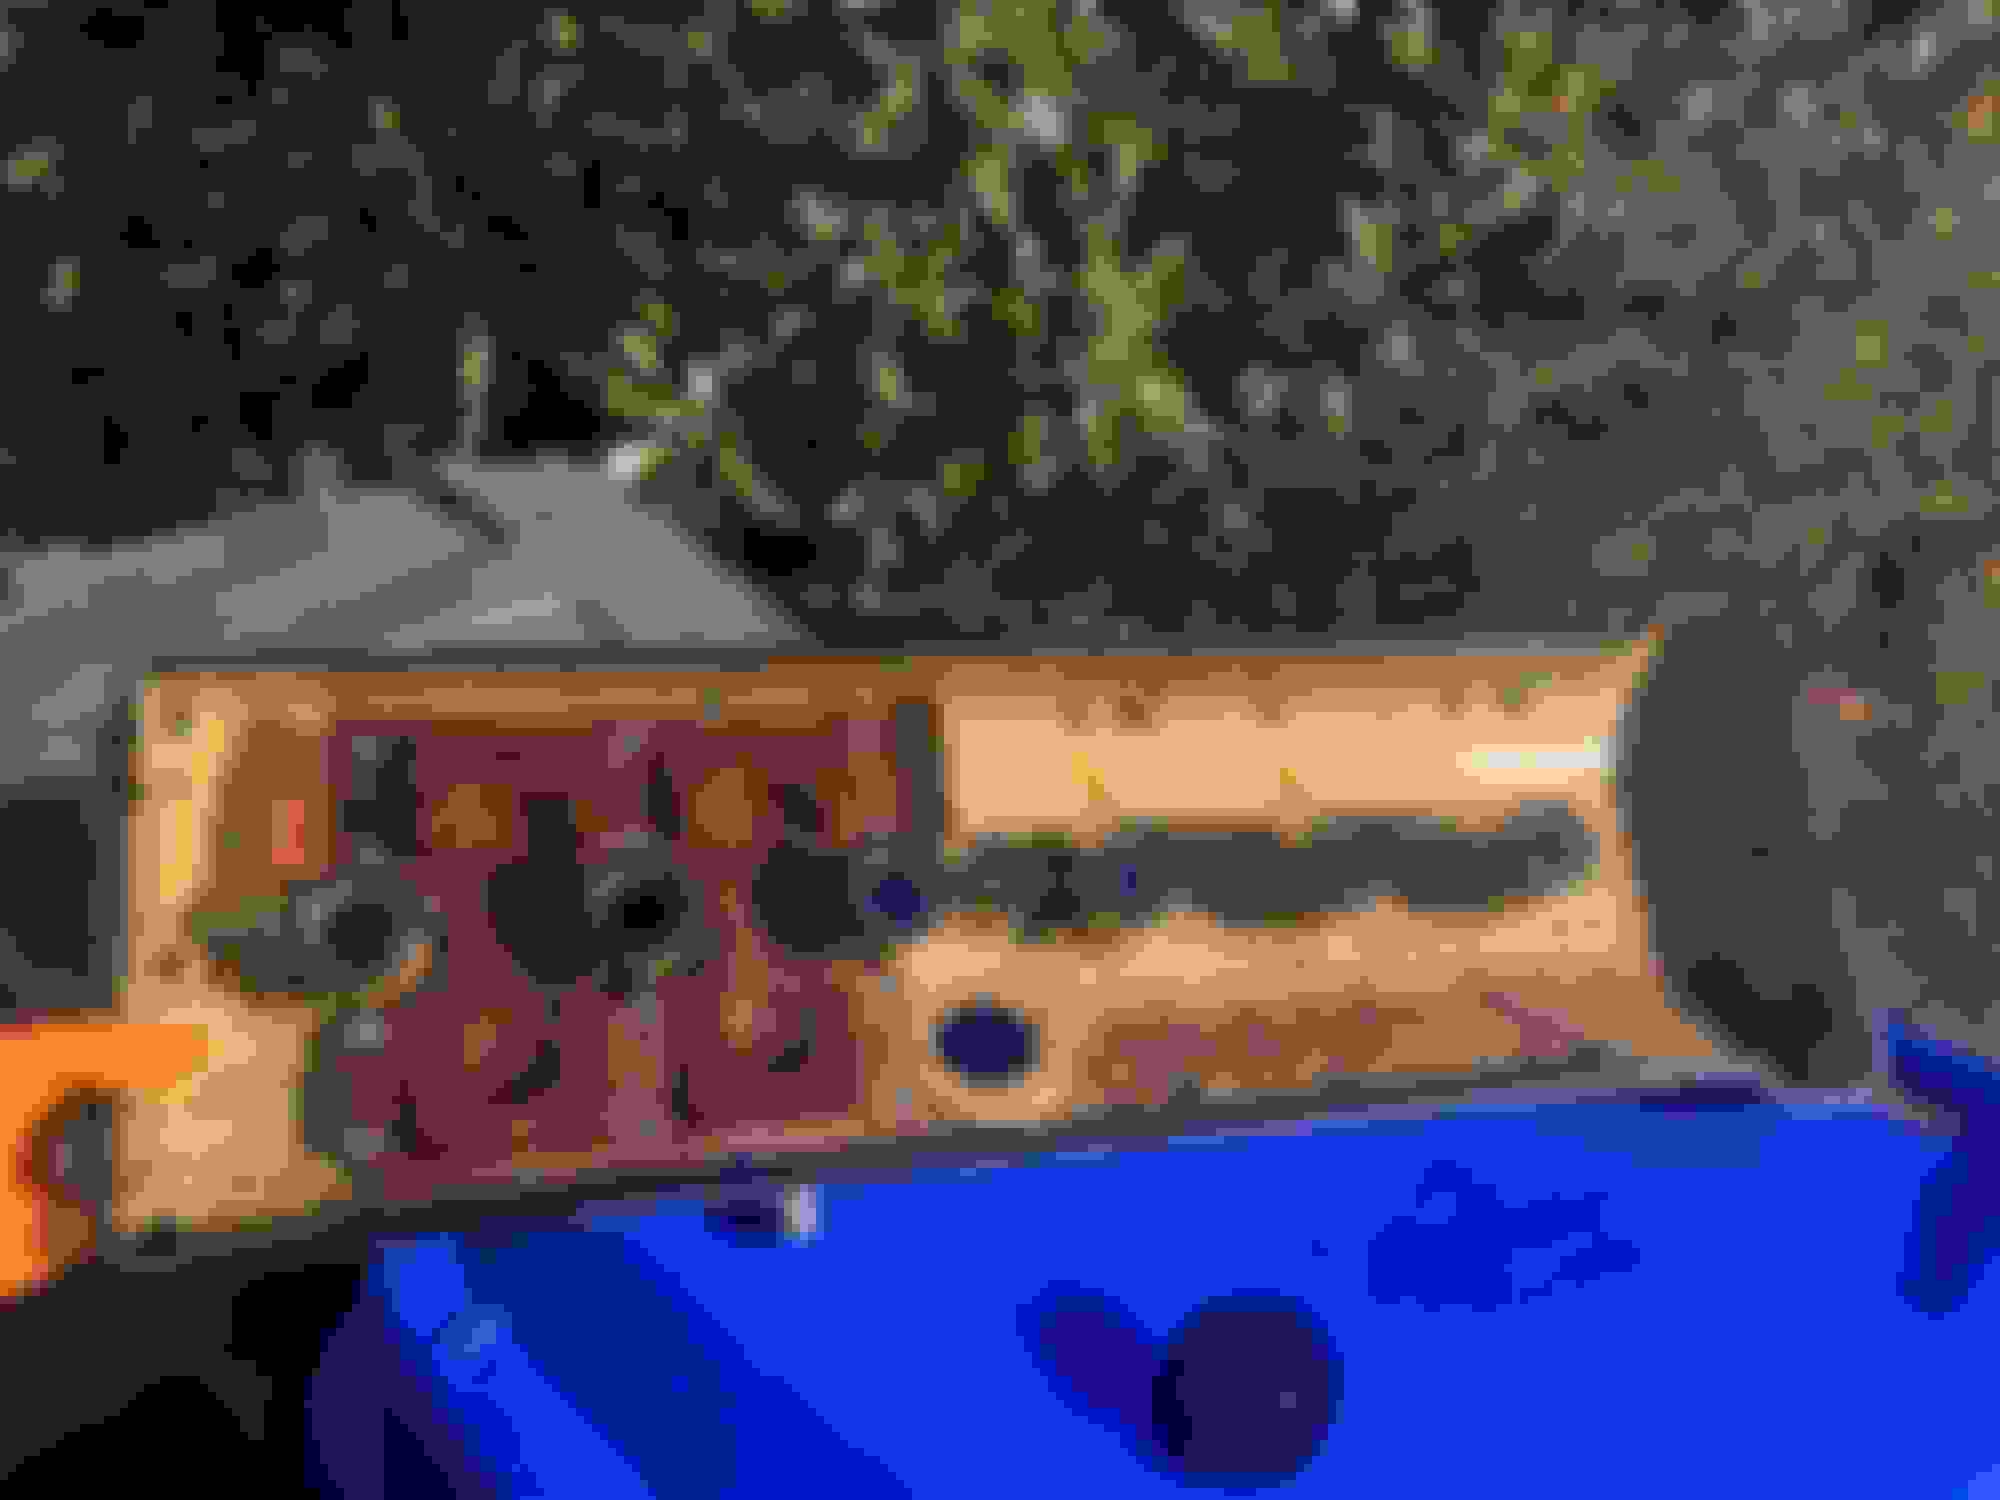
I bit the bullet, and bought a used camcover in the UK, and had it stripped and powdercoated by TPCS in the UK. This guy specializes in magnesium powdercoating.
Although I haven't received it yet, I have gotten some pics.
I opted to have the filter and cover removed since I have installed an oil catch can, rendering this stuff redundant and therefore useless. I opted to have the paint on the inside as well. I know some people are worried about paint flaking off, but I went full monty and got all of it coated.
I thought I'd share the initial photos and show you what it looks like. Will report later, when I receive it.
Here's an update.
The topside still looks good....the underside, not so much. If you're planning on powdercoating a magnesium camcover, don't do the inside. The powdercoated finish has begun to crack and will eventually flake off.
Some screws were loose, so replacing them with something you can run safety wire through will be required.
@aholbro1 curious as to an update / progress report on the one you did with POR-15?
i am looking to do that on my busted cover. https://www.jaguarforums.com/forum/x...-leaks-252889/
just wanted to see if it has held up for all these years or has required re-doing?
or has not really corroded more but still leaks.
Not really a fair comparison. Although I completed both about the same time roughly 5 1/2 years ago, the powder coat one has done about 75k miles while the POR-15 has done zero miles. However, it has run about 1/4 tank of fuel out. The fuel was getting old and the car was getting hard to start for moving in and out of the shop and around the estate, here, so I let it run about a year ago until I feared it was nearly empty, then added about a half gallon of fresh 93 with StaBil added.
Both still look nearly like they did at install, though here and there on the powder coat you can see a bubble or two under the paint. More concerning, several plug wells in that one are taking on oil. POR15 still dry as a bone. Next one I do will be in POR15, but as I said, that one simply hasn't seen the usage spectrum that the powder coat has. The car it is on needs significant work...which I hope to get to soon as the two x300's that have been serving daily duty on alternating weeks are getting tired.
good to hear it�s holding up to time.
shame it hasn�t had much use.
as you can see if you look at my thread i have had to do a bit of work on 2 of the spark plug seals.
beeded to file them down level, now i need to file down the grooves a bit so the seal sits in place, and i need to jbweld a couple small holes in plug well 2 and 5.
i am getting the silver por-15 as it contains the metal fillings. Hopefully i can get a result that holds up well.
my concern is mainly making sure the sparkplug wells are smooth, level and even so that they maintain a good seal over time as the rubber seals age. Rtv silicone is certainly going to be my friend.
one thought i had was some coating to insulate the sparkplug wells to reduce/avoid and arcing.
maybe a rubberised paint inside the wells?
The POR-15 (I suppose the one I used was the same silver) will fill holes and gaps. It will also insulate. I'm not sure how to square that with metal particle content, but I could not get a circuit anywhere when probing my POR15 cam cover with the multi meter leads.
I'm no paint expert...but it is the hardest paint I've ever encountered. Regard the instruction on the can to isolate the re-lidding with plastic wrap or you will definitely have to destroy the can to get it open a second time! Unfortunately, the plastic wrap will decay in the span over the can and ultimately fall into the paint. I ended up pouring my left-overs into a pint canning jar and vacuum-sealing it after several uses. This prolonged the shelf-life of the opened product considerably, but it ultimately hardened around the perimeter...to the extent that when I mistakenly knocked the jar off the shelf onto the concrete floor...instead of shattering and splattering the remaining liquified paint about the shop...the jar just cracked, all the various bits remained attached to the hardened paint, but released the vacuum retaining the top, and landed on it's side, allowing a bit to drizzle out onto the floor.
My experience indicates lining up all the potential uses you can imagine for application and doing them at the same time you do the cam cover...and buy the smallest quantity available. It takes very little to do 2-3 coats on the cam cover. I did a number of steel brackets for the '79 CJ that I had previously sand-blasted and had laying around, a skid-plate and reaf diff cover for the F150....can't remember what else...but should've lined up much more.
found por-15 also make a patch product designed to fill holes. So going to try that.
will def make sire to seal the tin with some wrap.
and yeah i am sure i will find 1001 things to use the left over paint on.
thlught it might insulate. Great to hear it does. Thats great news
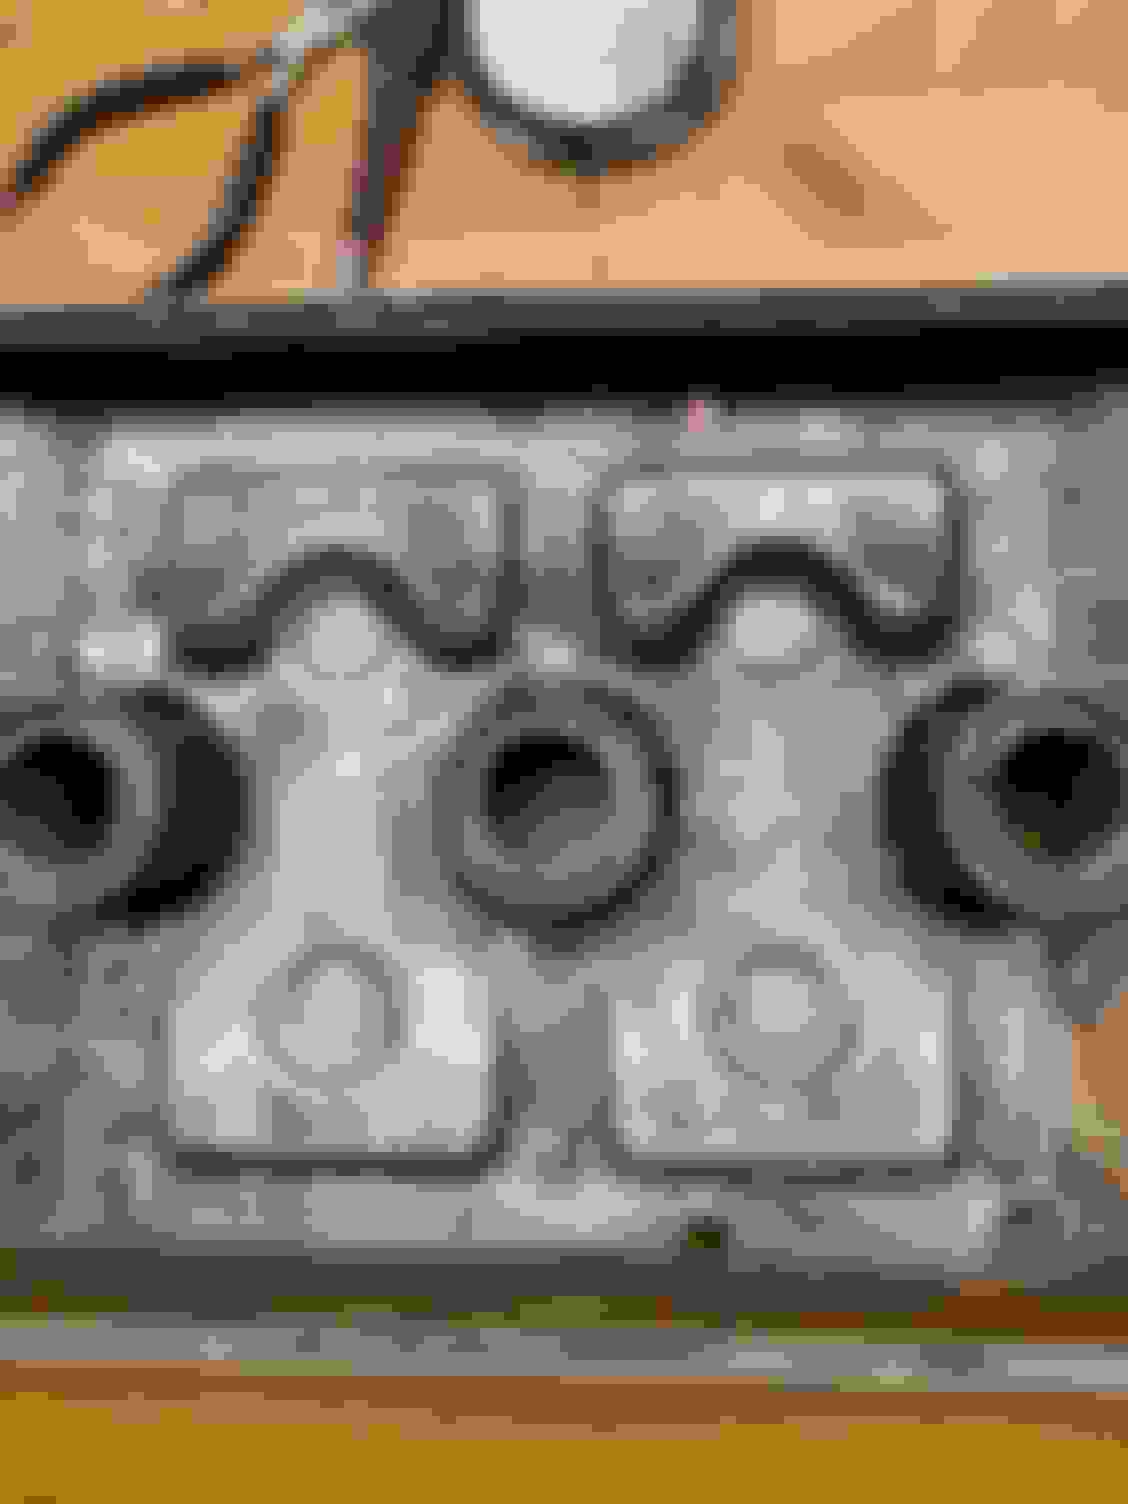
I changed my cam cover, spark plug and bolt gaskets around a year ago.
The spark plug gaskets were like solid brittle plastic and the bolt seals were al ripped up. Definitely a good idea to change them all if in any doubt. The lack of oil in the spark plug wells is a consistent reward.
One tip I would give is to use electrical tape to secure the Valve Cover Gasket to the Cover, so you can flip it over without it falling out. Just tape the gasket to the cover around the outside, then remove it when its in place. This helps with the D shapes on the back of the gasket.
doing much more than changing the gaskets.
need to restore the cam cover itself
lots of work to be done but the result will be awesome
Will be using gasket sealer when installing gaskets which will hold it nicely in place
Experiment is over. I went in today to replace the gasket and the paint on the inside is flaking off. I replaced it with the original one.
I drilled and tapped holes for some stainless steel screws with holes in the heads and essentially safety wired them.
Ill spend a weekend removing the powder coating from the inside and eventually putting that one back, only because it looks better.
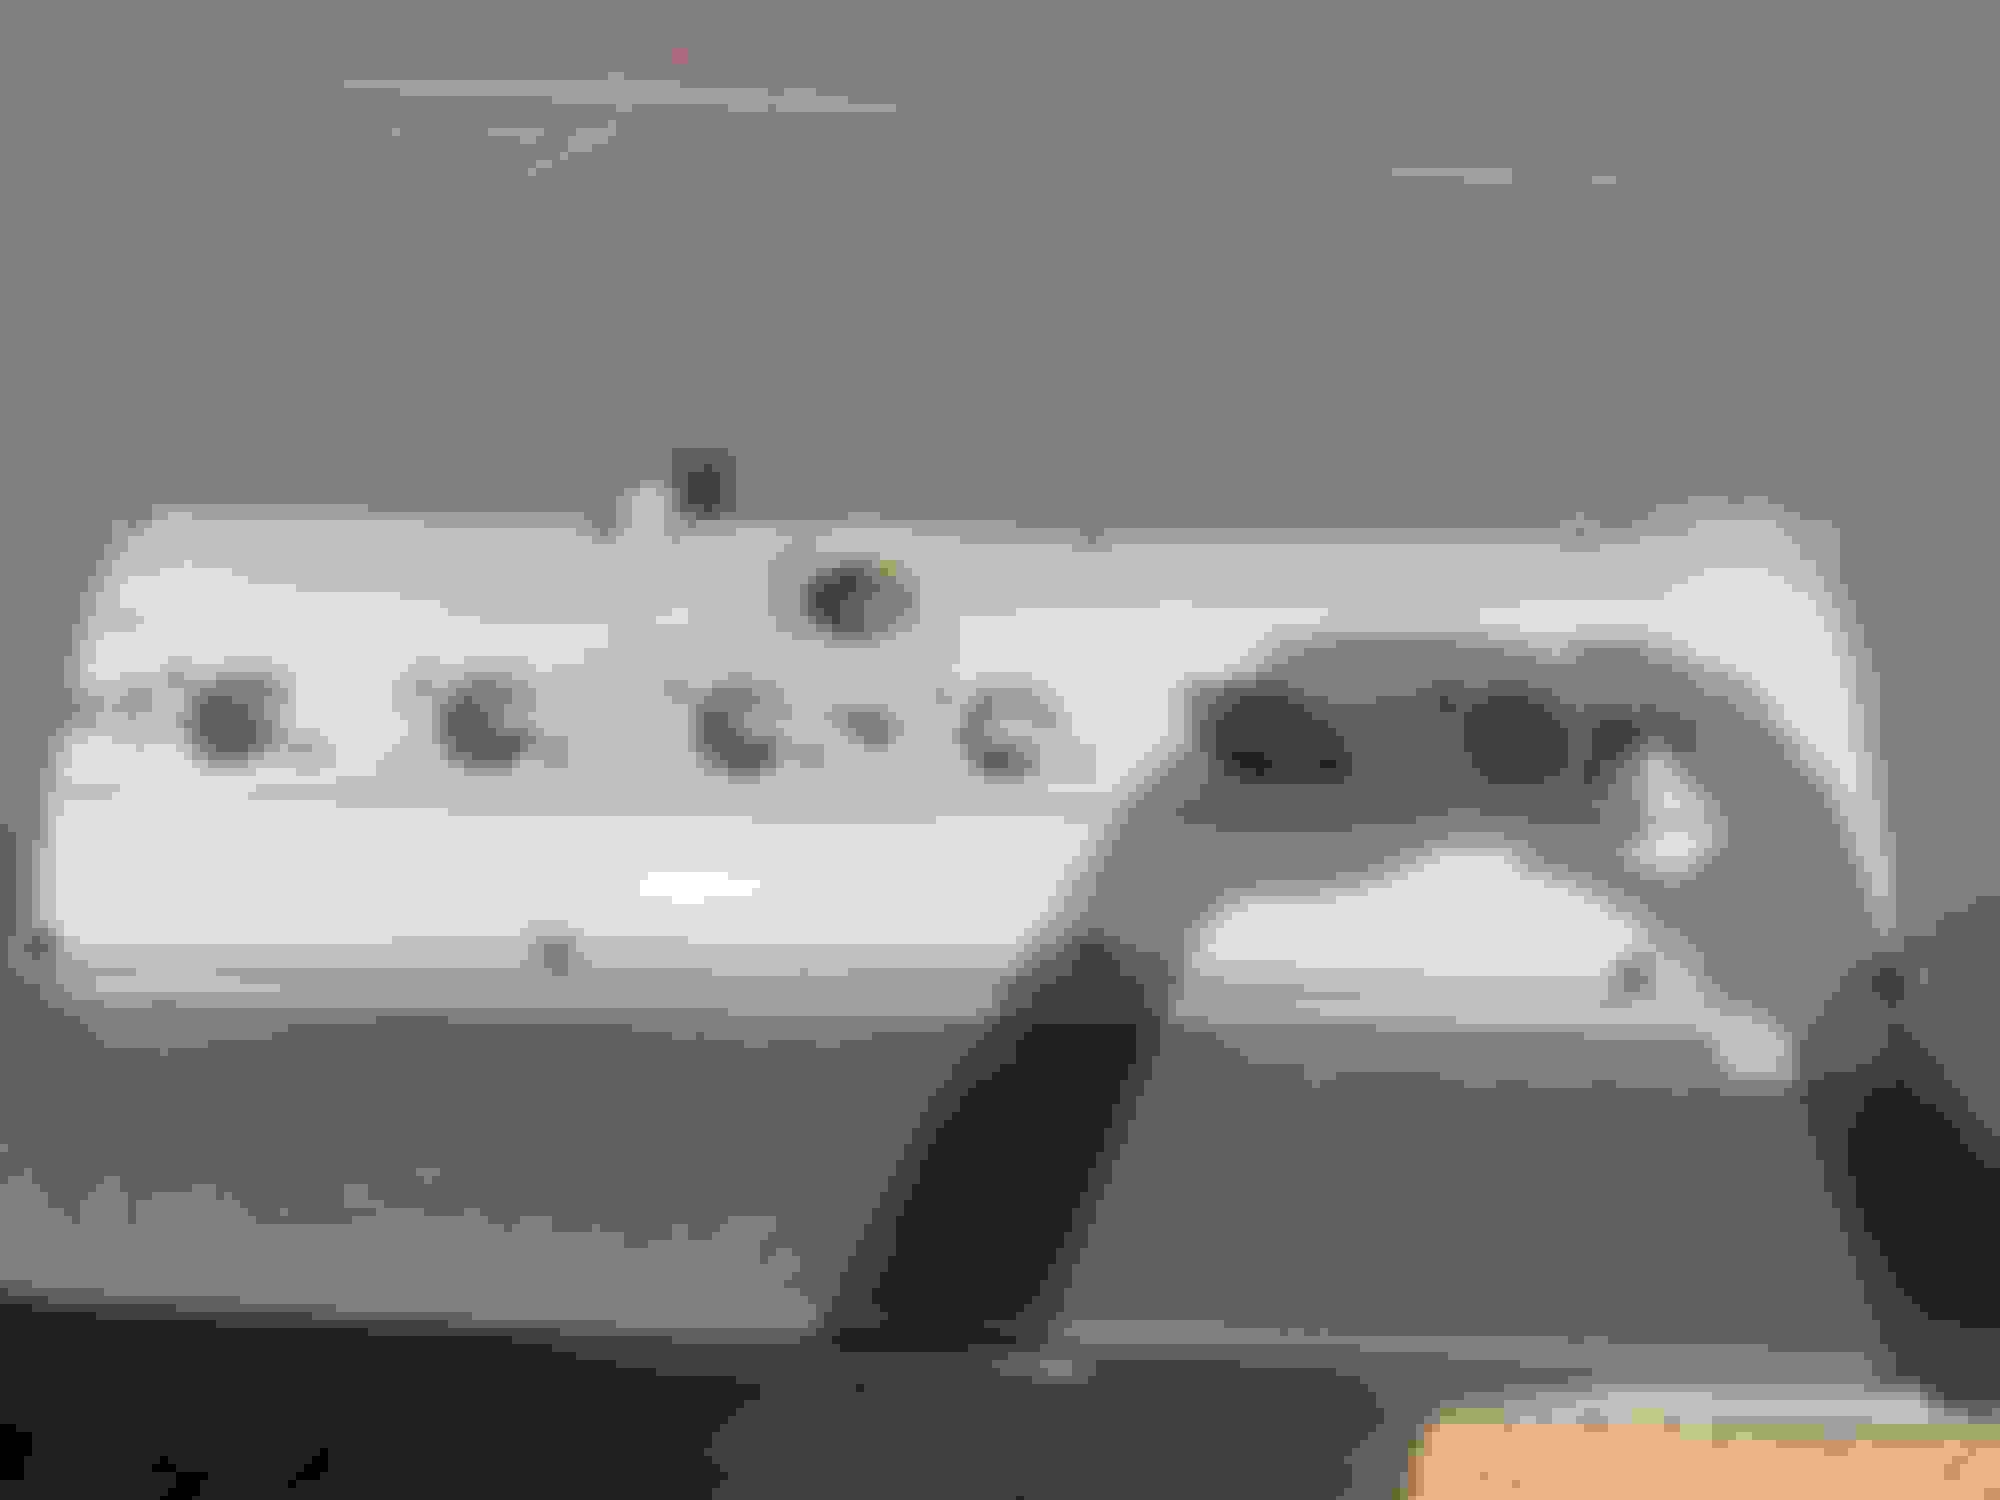
Heres a pic of the safety wire�.I did break a tap in one of the holes, that�s why there�s one hole without a screw and safety wire.
Originally Posted by Vee
Here's an update.
The topside still looks good....the underside, not so much. If you're planning on powdercoating a magnesium camcover, don't do the inside. The powdercoated finish has begun to crack and will eventually flake off.
Some screws were loose, so replacing them with something you can run safety wire through will be required.
That�s good to know. Doesn�t take long to put it on. The stainless screws and washers that I used for four years in the other cover still look good as new. I added the new screws with wire because I did find the screws coming loose, not enough to completely unscrew themselves, but you never know.
I used 22 gauge 316 stainless.
My camcover gaskets never seem to last too long anyways. OEM or aftermarket, I get leaks through that gasket. I considered using some gasket maker, but then the thought of scraping it out makes me go back to the gaskets�.
Originally Posted by Parker 7
Keep in mind the stainless steel wire is not 100 % corrosion free in the combustion gasses environment ( piston ring blowby )
So it should be inspected or replaced over a period of time
I�d officially cross powder coating off the list. Not only is it flaking off on the inside, now that I�ve cleaned off the camcover, you can clearly see degradation making it no better than paint.
POR15 might be the best solution for these camcovers after all?
I wonder if that would survive on the inside of these cam covers?