
Finally did my roof liner

Thread Starter
|
Senior Member
Joined: May 2010
Posts: 948
Likes: 317
From: Ireland
Well, having thought about it for long enough, I finally bit the bullet and sorted out my seriously sagging liner. Parts cost me €35, which consisted of a sheet of 1/4" foam, liner fabric and two tins of spray adhesive. The whole job took about 4 hours tops, what with all the bits to be removed and replaced, but it was well worth the effort. I took a load of pics, including the dis-assembly, but never got any of the minor struggle getting the liner out of the actual car. An extra pair of hands would have helped but it is do-able! I let the passenger seat fully forward, as low as it would go and left the drivers seat laid back down fully. (RHD) After releasing the liner, I swivelled it around inside the car, so the front part was facing back towards the rear passenger door, which was opened. Then I turned it on its side, with the curve facing towards the back of the car, so that the underside lined part was facing towards the rear of the front seats.
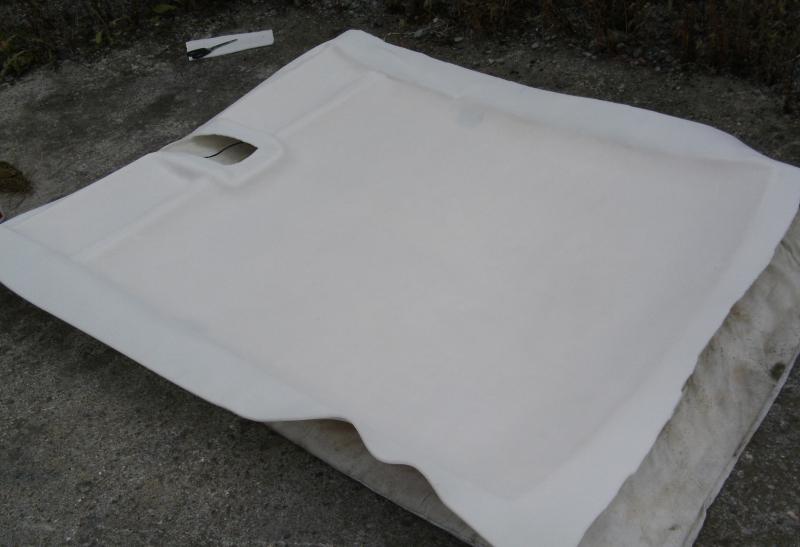
So now, its on its side, with the open front section that houses the interior/map lights etc, pointing slightly out the rear passenger door. Then I folded it over on itself!! Yes, gently rolling it into a curve of sorts, to avoid any suuden cracks. The open section helps as it is most pliable there. The liner is actually fairly flexible and quite forgiving. Just go fo it, it does come out with no real damage to speak of and certainly nothing that the new foam wont cover. Then it was just a case of peeling off the old fabric, rubbing off (with my fingertips!) the old dried out foam, brushing it all down clean and recovering. I will give a more detailed update, but for now, some before and after pics. The minor marks seen in the "after" pics, were just dents in the foam after the manhandling getting it back into the car and they were all gone the following morning when the foam got its "memory" back. Hope it encourages others to tackle the job. Be brave!!
In case its not obvious, pics 1,2 and 19 are before and 9, 13 and 16 are after.
Last edited by JimC64; Jul 28, 2012 at 08:30 PM. Reason: include pics in body of post
Thread Starter
|
Senior Member
Joined: May 2010
Posts: 948
Likes: 317
From: Ireland
Yes, exactly. It is a bit of a squeeze and would probably be made a lot easier by taling the front seats out and also the rear seat base/cushion. But all that extra work isn't really justified IMHO. It sounds scary and looks a bit scary too, but it works and any little creases you might cause are easily covered by using the 1/4" foam, as seen in one of the pics. Foam and fabric was fitted oversized and then trimmed when in place. An extra 1" was left on the fabric to fold back over the edges and then stuck down. It might be a thought to stick some of those sound deadening/anti vibration panels on the inside of the roof while the liner is out. What harm?

Senior Member
Joined: Feb 2014
Posts: 480
Likes: 43
From: Dallas, TX
SoGood
Great to see your headliner job and pics, It must have been a fine day in Kenmare yesterday.... Did you apply new foam backing too? Just curious as to where you got the materials? It's on my "To Do" soon. Glad to see your day went so well, so much better than mine. I was all set to swap out my front shocks when I discovered that the Front Damper Bush that lower shock fork attaches to was in really bad shape. I should have ordered new one's just in case...... Plus I could not get my shock to compress enough to remove it after getting all the bolts undone......... Any ideas?
Well keep up the good work.
BigBoss in Dallas TX
Trending Topics

Thread
Thread Starter
Forum
Replies
Last Post
Currently Active Users Viewing This Thread: 1 (0 members and 1 guests)