
Lower Radiator Hose Renewal


Decided it would be foolish not to renew the upper and lower rad hoses while I've got the radiator and hood off, and am awaiting other parts/maintenance before I can take to the roads again. So while I await delivery of the new hoses, I'll post some preliminary removal pics. I don't want to pull it out of place yet and possibly not route the hoses and wires that cross it in the proper way.
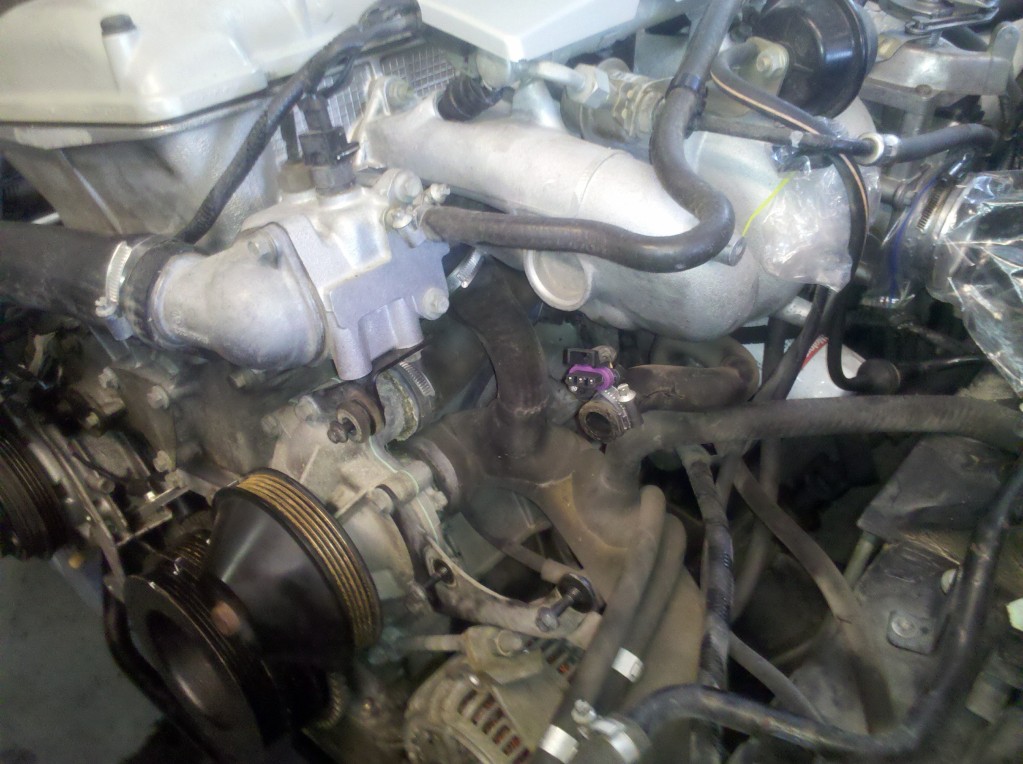
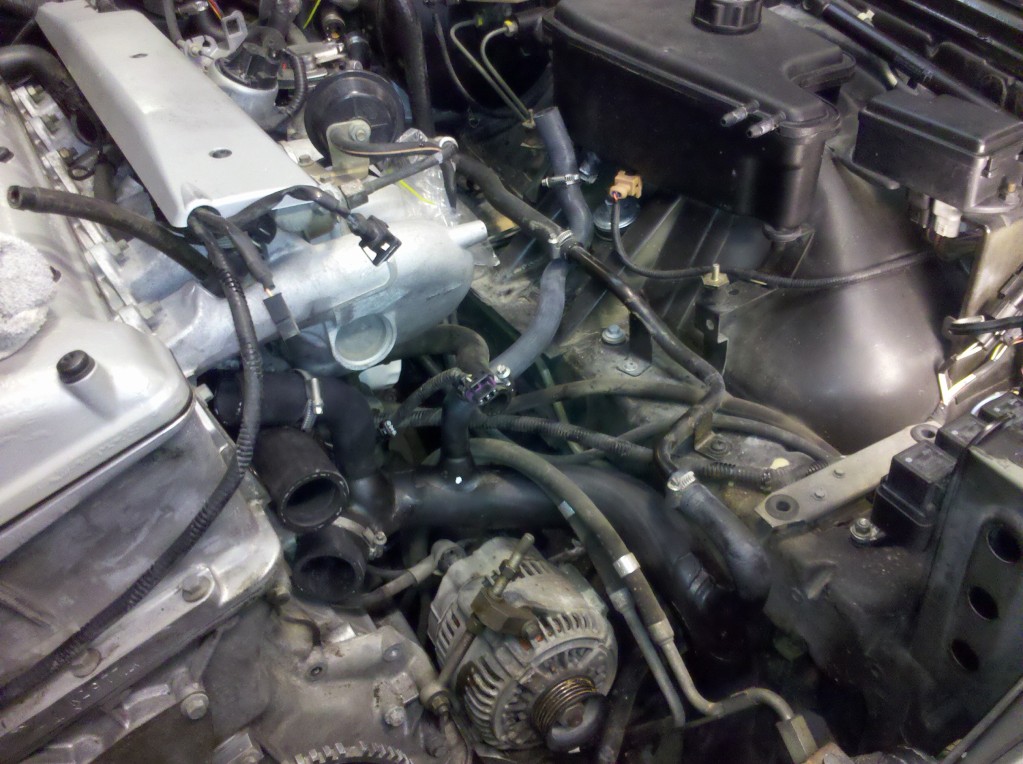
Overall view:
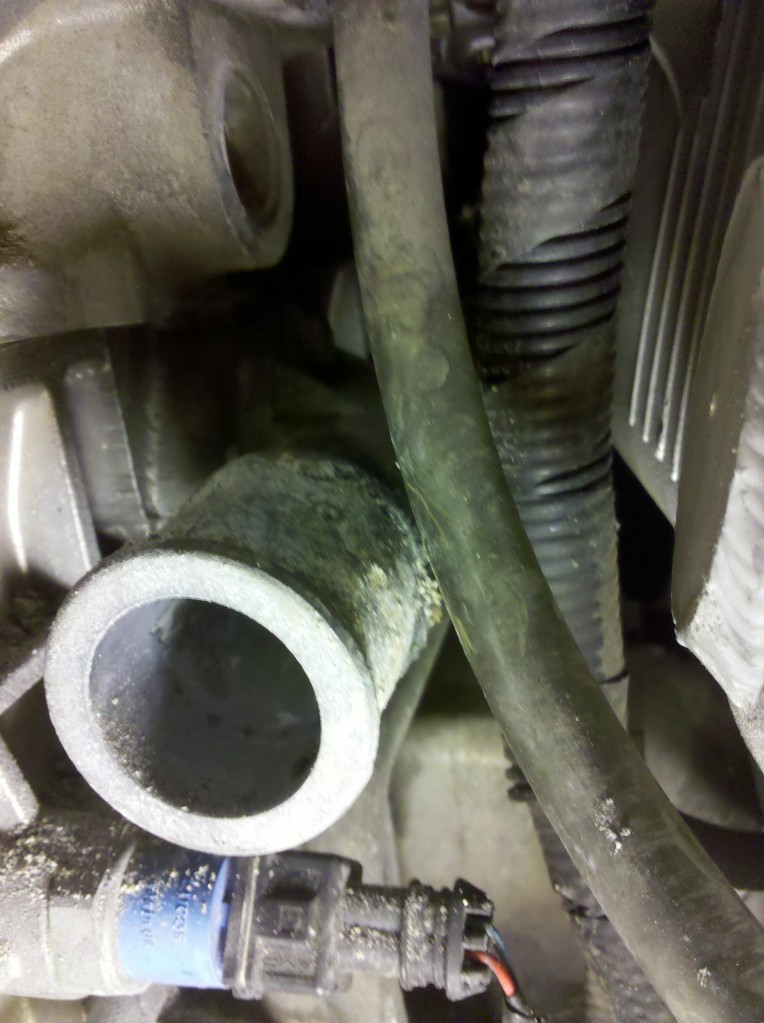
Lower hose to rad connection was already apart from previous radiator removal. Found some corrosion where this 5/8" takeout is connected to the steel tube that runs along the left frame rail:

Worked it with a wire-brush, steel wool, and sandpaper:

Finally, a coat of Rustoleum Gloss Black I had on the shelf:
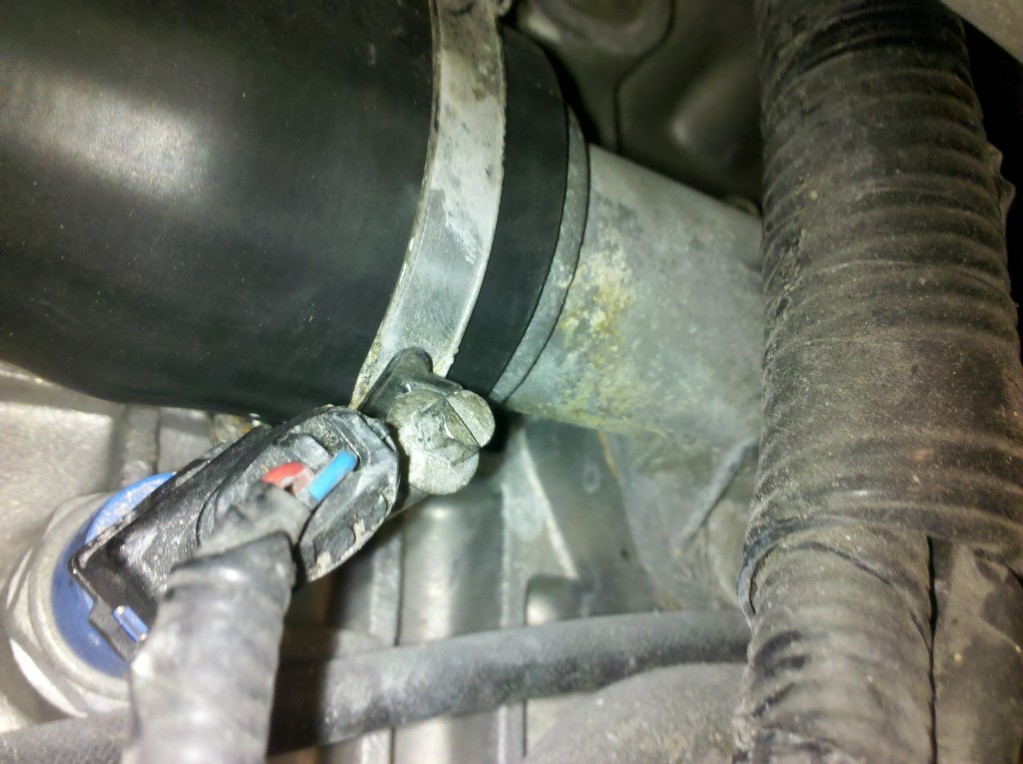
This takeout (The brownish hose on the bottom) connects to the bottom of the coolant overflow tank. As you can see, it is right against the frame rail, so in order to disconnect it, you would have to put a bending moment of sorts on the coolant bottle nipple. Not a risk I was willing to take.
Remove this 6mm nut and you can easily lift the tank to obtain a straight, axial pull on the hose. After the nut is removed, pull up on the front of the tank to disengage the front iso-mount pin, then forward to disengage the rear, horizontal iso-mount.


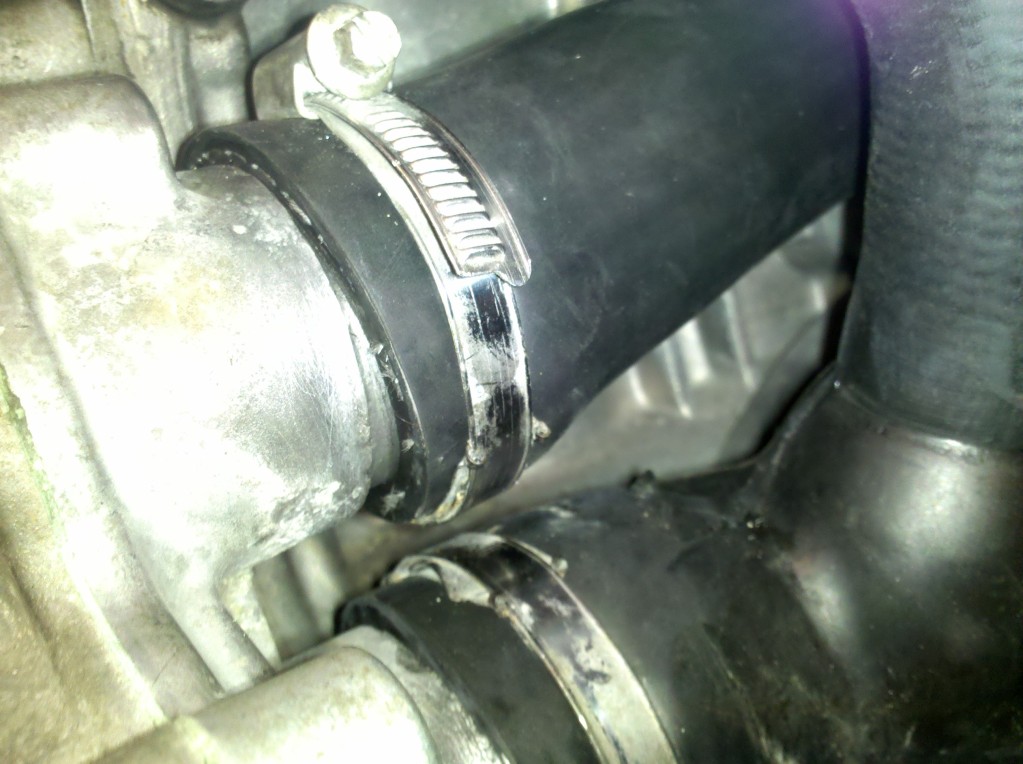
I found a lot of pipe-dope or something under this takeout that attaches to the elbow on the back of the T-Stat housing:


I decided the only sure way to clean it off and insure a good seal on the new hose was to remove the t-stat housing. So off with the wire connectors: (I left the small hose that goes to the overflow bottle on as it was already detached from the overflow previously. However, you must remove the same-size hose that is mounted to a nipple adjacent to that one that points to the rear - sorry, forgot to snap a pic, but you can see the nipple just aft of the clamp on the small hose)

This machine screw is on the bottom, fixing it to the air pump mounting bracket. (Air pump was previously removed to facilitate other maintenance)

Finally, remove the two long fixing screws to pull the housing (upper rad hose already detached from radiator during rad removal) The gasket suffered a very minor nick on removal.(See upper left corner) I'll smear a bit of RTV on the joint on reassembly:

I've also ordered this one, that goes from the back of the water pump to the intake manifold. Not really looking forward to changing it, but still will be easier now than later:

It is the top one in this view, at the back of the pump. Lower rad hose is the bottom one. Haven't broken those loose yet, may await the arrival of replacement parts.
Edit 9/4/13: I pulled it off tonight and as I suspected it wasn't fun. I found no flexibility in it whatsoever. Perhaps the original hose? It is very stiff and not pliable at all. First I removed the air-pump bracket to eliminate its ability to tear my forearms open as I worked on the hoses on the back of the water pump; next to go was the little bracket that supported the bottom of the thermostat housing asy. Finally, once I could get my hands on it and realized it wasn't bending much, decided the water pump was going to need to come off! Just as well, both ports needed a good cleaning as Tim notes below, and access wasn't the best with it still mounted.


Even after I wrestled the pump out of it, I still spent quite a while tugging and twisting on the hose to free it from the aft attachment. Now to figure how to clean THAT pipe up short of removing the intake manifold....


Wish it was as easy to get a wire brush in there as the slim camera/phone makes it look!
I brushed what I could reach, hit it as best I could with the pressure-washer one of the several times I've visited the engine bay with that since I started pulling pieces off in late July; then ultimately cut a narrow strip of 60 grit sandpaper and used it like dental floss on it. Got it fairly clean:


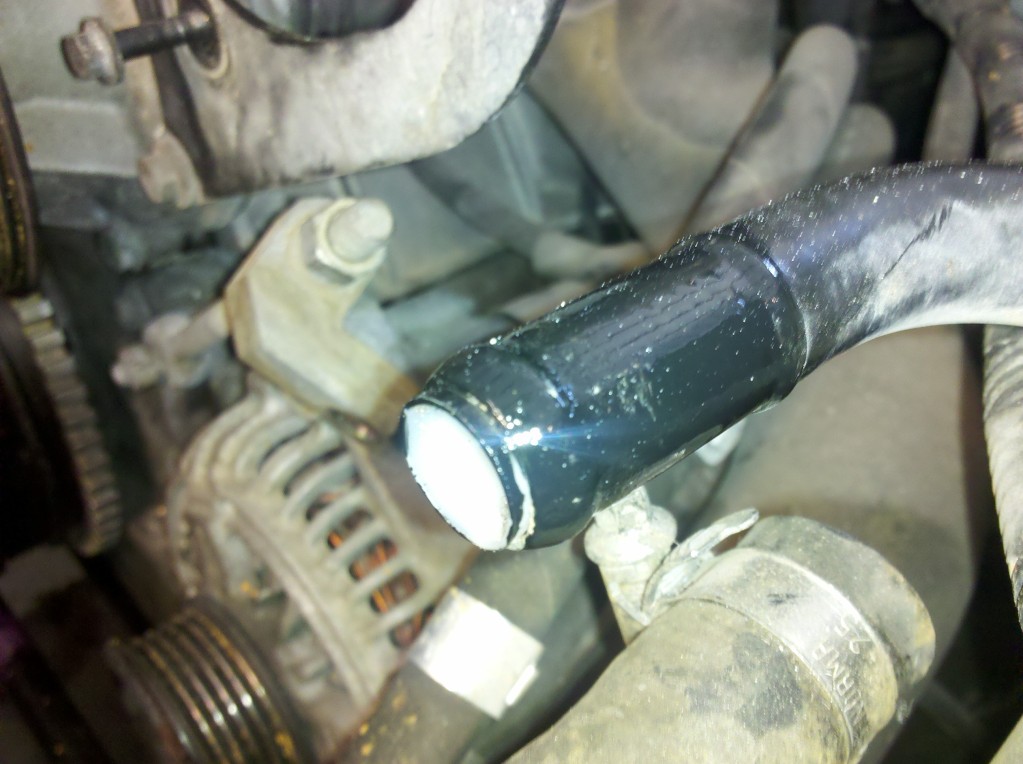
One of the toughest bits was on the bottom near the temp-sensor or whatever little electronic gizmo this is:

I attempted a dry-fit trial of the new bypass hose and rapidly concluded it would need be "trained" for an easier installation, so I soaped it up and pressed the 1-5/16" socket I bought to remove the crank-pulley into the aft end, and stuck the forward end on it's proper nipple on the water pump before retiring for the evening:

Normally, if I have access without great difficulty pulling such an apparatus apart, I take care to put the clamps back on in the same orientation and near-same location as before. However, in this case, I was not pleased with the aft clamp's proximity to the electrical sensor, so I turned it around. Requires a 6mm wobble-socket to actuate it (which I broke, later in the day!) so I'll make a mental note to have one of those on-hand in 15 yrs or so when I need to replace it again.


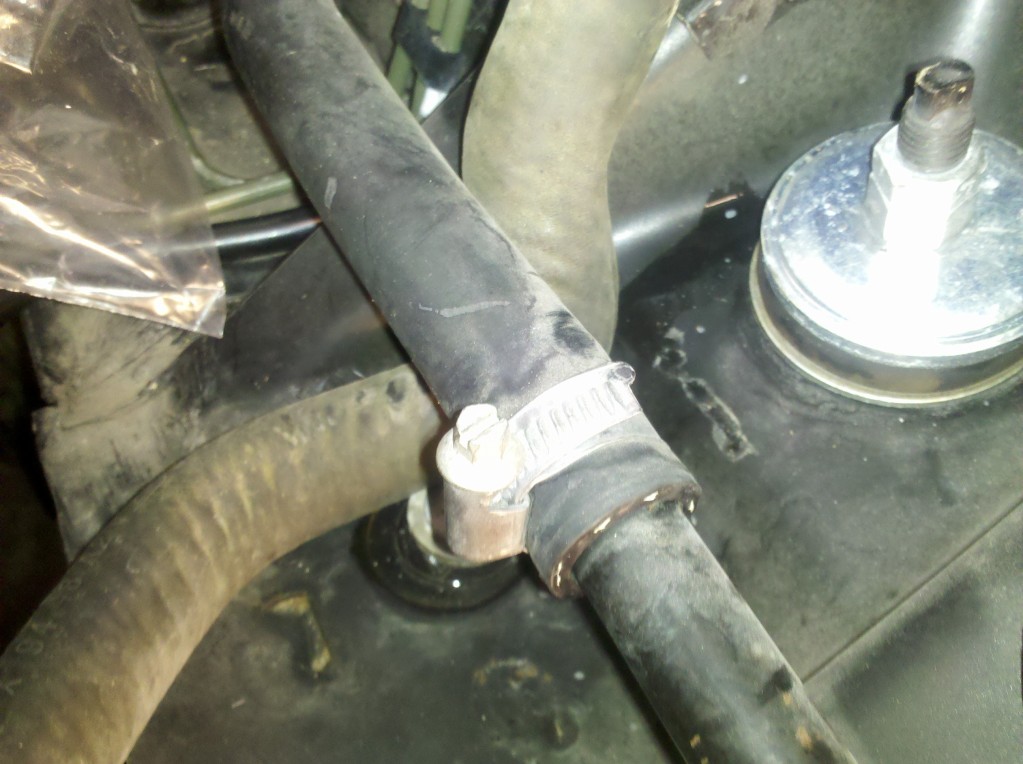
It was much worse with the worm-gear bit down here:
I wasn't terribly happy with the fitment of the bypass hose on its forward end, at the water-pump, but no amount of pulling, twisting, cussing and farting (yes! I remembered to loosen the aft clamp) would make it better, so I cinched the clamp down tight and hope it seals. I plan to run a distilled water sequence or two through it before I put in the coolant, so I'll have ample opportunity to find the leaks.

Looking back at the photo of the old one before I pulled it apart, I perceive it may've been the same way, though it is hard to tell with all the crud around it.
When I got the new lower rad hose out of the box, (Pay no attention to the photos immediately above showing it already clamped in place!) and inspected it...I realized there was still one I haven't yet disconnected on the old one:
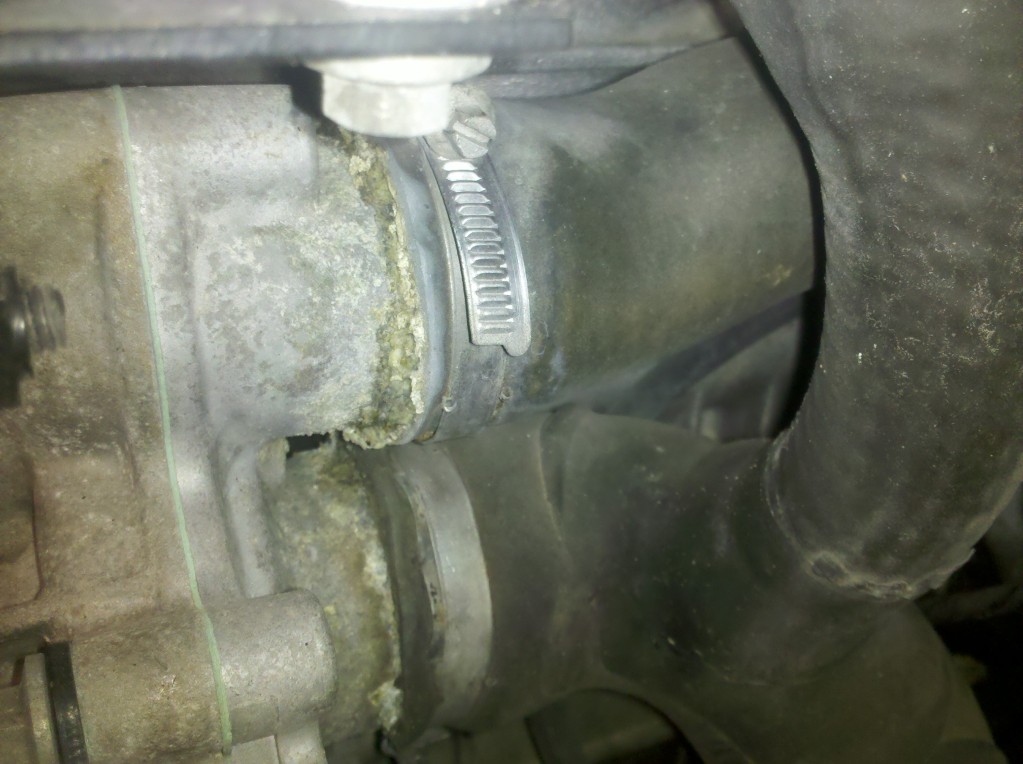
But it was easy to reach and not stuck to the nipple, so came off easily:

For me, the real key in this R&R is to not remove the old hose until I'm ready to place the new one. Helps with "does this wire go over or under?" type issues. So, when finally ready, I transferred the clamps and laid it in place:
Then a pretty simple matter to go along the hose and follow each takeout to its end and hook it up where it's supposed to go. This indicated a requirement to re-install the T-stat housing. FWIW, I smeared both faces of the joint with a bit of Permatex blue, and doctored the bolt-threads with a bit of anti-seize.
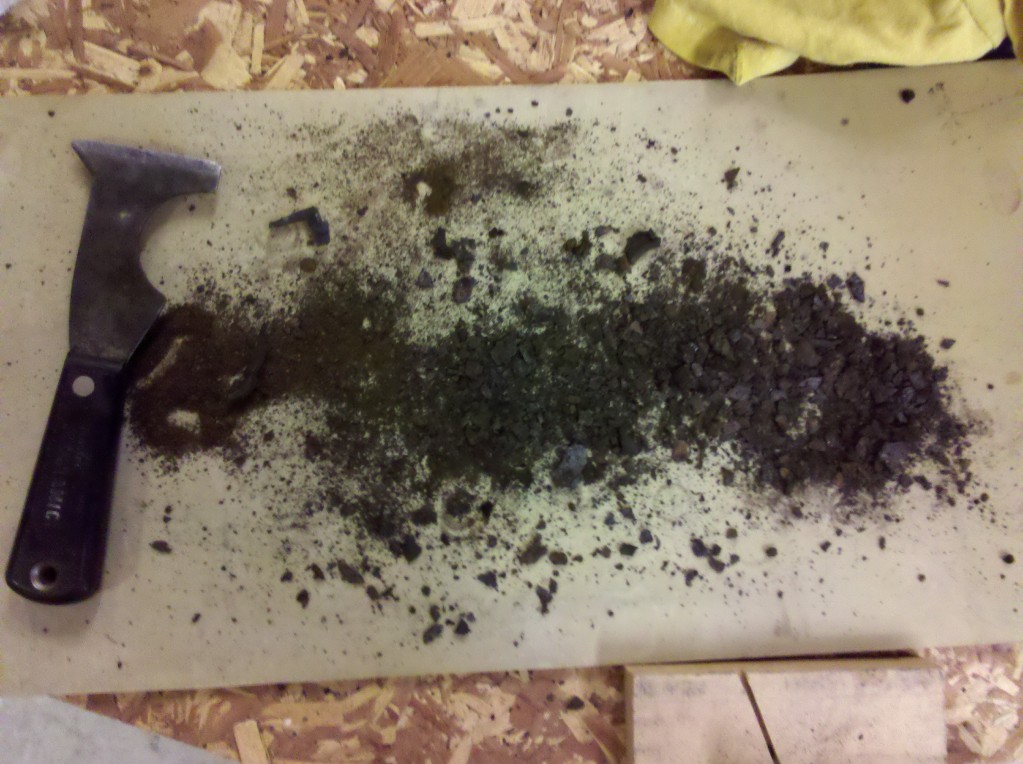
I put the air pump back on, even though I don't think it works, and I get the P0411 about twice per month. I attempted (unsuccessfully) to take it apart while I had it off and gave up after breaking one of what I perceived to be a fixing clip. However, while wrestling with it, all of this fell out of the outlet port:
Not much to changing the upper hose, particularly with the bonnet removed and having removed it last summer for a T-stat change. Then re-installed the radiator with new iso-mounts all around. Must take care when placing the uppper panel to make sure your upper condenser mounting pins are engaging the iso-mounts. Ready to make the connections to the radiator, now:
While it was down, I attacked other elements of the system:
https://www.jaguarforums.com/forum/x...92/#post808037
Overall view:

Lower hose to rad connection was already apart from previous radiator removal. Found some corrosion where this 5/8" takeout is connected to the steel tube that runs along the left frame rail:

Worked it with a wire-brush, steel wool, and sandpaper:

Finally, a coat of Rustoleum Gloss Black I had on the shelf:

This takeout (The brownish hose on the bottom) connects to the bottom of the coolant overflow tank. As you can see, it is right against the frame rail, so in order to disconnect it, you would have to put a bending moment of sorts on the coolant bottle nipple. Not a risk I was willing to take.

Remove this 6mm nut and you can easily lift the tank to obtain a straight, axial pull on the hose. After the nut is removed, pull up on the front of the tank to disengage the front iso-mount pin, then forward to disengage the rear, horizontal iso-mount.


I found a lot of pipe-dope or something under this takeout that attaches to the elbow on the back of the T-Stat housing:


I decided the only sure way to clean it off and insure a good seal on the new hose was to remove the t-stat housing. So off with the wire connectors: (I left the small hose that goes to the overflow bottle on as it was already detached from the overflow previously. However, you must remove the same-size hose that is mounted to a nipple adjacent to that one that points to the rear - sorry, forgot to snap a pic, but you can see the nipple just aft of the clamp on the small hose)

This machine screw is on the bottom, fixing it to the air pump mounting bracket. (Air pump was previously removed to facilitate other maintenance)

Finally, remove the two long fixing screws to pull the housing (upper rad hose already detached from radiator during rad removal) The gasket suffered a very minor nick on removal.(See upper left corner) I'll smear a bit of RTV on the joint on reassembly:

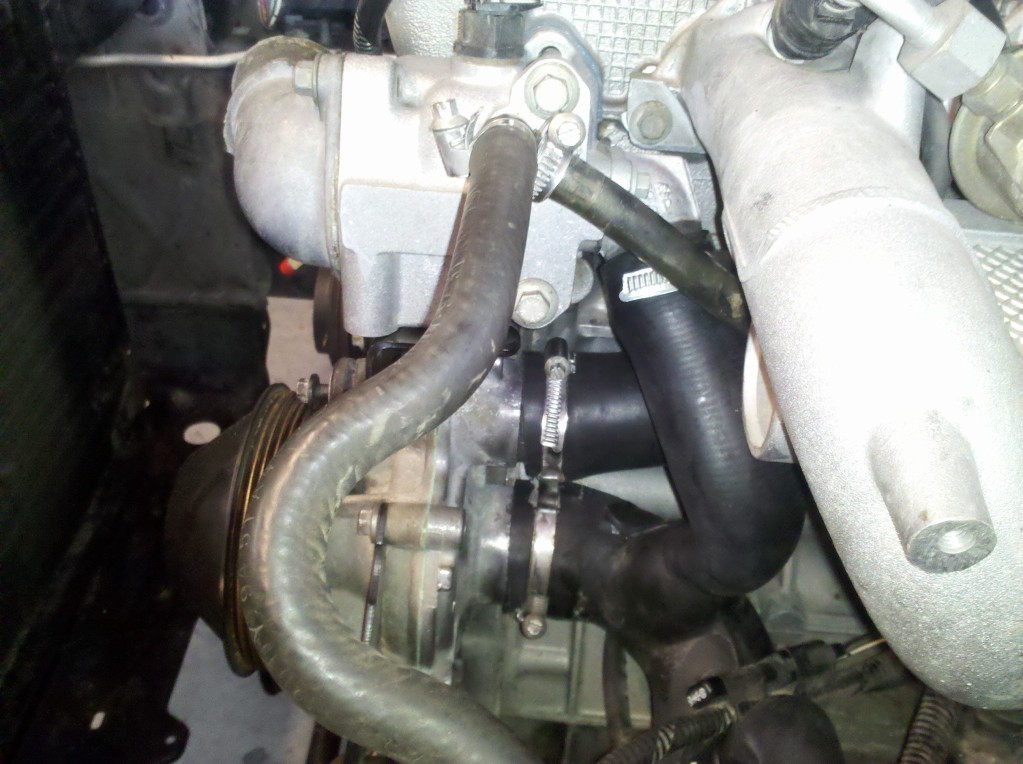
I've also ordered this one, that goes from the back of the water pump to the intake manifold. Not really looking forward to changing it, but still will be easier now than later:

It is the top one in this view, at the back of the pump. Lower rad hose is the bottom one. Haven't broken those loose yet, may await the arrival of replacement parts.

Edit 9/4/13: I pulled it off tonight and as I suspected it wasn't fun. I found no flexibility in it whatsoever. Perhaps the original hose? It is very stiff and not pliable at all. First I removed the air-pump bracket to eliminate its ability to tear my forearms open as I worked on the hoses on the back of the water pump; next to go was the little bracket that supported the bottom of the thermostat housing asy. Finally, once I could get my hands on it and realized it wasn't bending much, decided the water pump was going to need to come off! Just as well, both ports needed a good cleaning as Tim notes below, and access wasn't the best with it still mounted.


Even after I wrestled the pump out of it, I still spent quite a while tugging and twisting on the hose to free it from the aft attachment. Now to figure how to clean THAT pipe up short of removing the intake manifold....


Wish it was as easy to get a wire brush in there as the slim camera/phone makes it look!
I brushed what I could reach, hit it as best I could with the pressure-washer one of the several times I've visited the engine bay with that since I started pulling pieces off in late July; then ultimately cut a narrow strip of 60 grit sandpaper and used it like dental floss on it. Got it fairly clean:


One of the toughest bits was on the bottom near the temp-sensor or whatever little electronic gizmo this is:

I attempted a dry-fit trial of the new bypass hose and rapidly concluded it would need be "trained" for an easier installation, so I soaped it up and pressed the 1-5/16" socket I bought to remove the crank-pulley into the aft end, and stuck the forward end on it's proper nipple on the water pump before retiring for the evening:

Normally, if I have access without great difficulty pulling such an apparatus apart, I take care to put the clamps back on in the same orientation and near-same location as before. However, in this case, I was not pleased with the aft clamp's proximity to the electrical sensor, so I turned it around. Requires a 6mm wobble-socket to actuate it (which I broke, later in the day!) so I'll make a mental note to have one of those on-hand in 15 yrs or so when I need to replace it again.


It was much worse with the worm-gear bit down here:

I wasn't terribly happy with the fitment of the bypass hose on its forward end, at the water-pump, but no amount of pulling, twisting, cussing and farting (yes! I remembered to loosen the aft clamp) would make it better, so I cinched the clamp down tight and hope it seals. I plan to run a distilled water sequence or two through it before I put in the coolant, so I'll have ample opportunity to find the leaks.


Looking back at the photo of the old one before I pulled it apart, I perceive it may've been the same way, though it is hard to tell with all the crud around it.
When I got the new lower rad hose out of the box, (Pay no attention to the photos immediately above showing it already clamped in place!) and inspected it...I realized there was still one I haven't yet disconnected on the old one:

But it was easy to reach and not stuck to the nipple, so came off easily:

For me, the real key in this R&R is to not remove the old hose until I'm ready to place the new one. Helps with "does this wire go over or under?" type issues. So, when finally ready, I transferred the clamps and laid it in place:

Then a pretty simple matter to go along the hose and follow each takeout to its end and hook it up where it's supposed to go. This indicated a requirement to re-install the T-stat housing. FWIW, I smeared both faces of the joint with a bit of Permatex blue, and doctored the bolt-threads with a bit of anti-seize.

I put the air pump back on, even though I don't think it works, and I get the P0411 about twice per month. I attempted (unsuccessfully) to take it apart while I had it off and gave up after breaking one of what I perceived to be a fixing clip. However, while wrestling with it, all of this fell out of the outlet port:

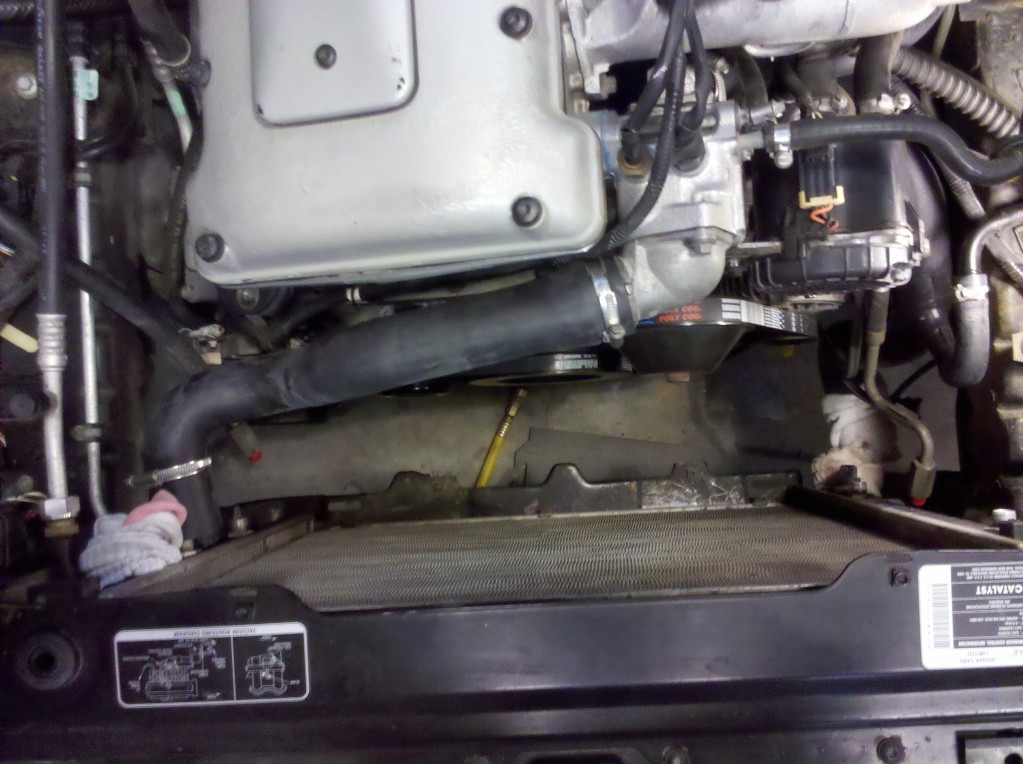
Not much to changing the upper hose, particularly with the bonnet removed and having removed it last summer for a T-stat change. Then re-installed the radiator with new iso-mounts all around. Must take care when placing the uppper panel to make sure your upper condenser mounting pins are engaging the iso-mounts. Ready to make the connections to the radiator, now:

While it was down, I attacked other elements of the system:
https://www.jaguarforums.com/forum/x...92/#post808037
Last edited by aholbro1; Sep 8, 2013 at 12:06 PM.
Senior Member
Joined: Apr 2012
Posts: 722
Likes: 92
From: Pittsburgh, PA
I've also ordered this one, that goes from the back of the water pump to the intake manifold. Not really looking forward to changing it, but still will be easier now than later:
It is the top one in this view, at the back of the pump. Lower rad hose is the bottom one. Haven't broken those loose yet, may await the arrival of replacement parts.
It is the top one in this view, at the back of the pump. Lower rad hose is the bottom one. Haven't broken those loose yet, may await the arrival of replacement parts.


Veteran Member


Joined: Dec 2012
Posts: 2,058
Likes: 1,076
From: Scottsdale, AZ, USA
Thanks for reminding us of the need to do this job, and just how nasty it is!! Lol. Good call to replace the bypass hose under the intake. There is another name for that hose you know... the B*ASTARD hose!!
You will be good to go for another 15 years when completed! Good luck.
You will be good to go for another 15 years when completed! Good luck.
Got it all sorted this afternoon and topped up with 3 gal distilled water (had flushed the coolant out with about 12 gal distilled at the end of July before I attempted to remove the damper.) Ran it up to temp. No leaks. Drained it, topped up with 2 gal distilled and ran again. Good heat from the heater now. Drained again and now most of the rust color is gone. Added 6.5L Zerex G-05 and then topped up with Distilled water. This part is complete.


Senior Member
Joined: May 2012
Posts: 307
Likes: 56
From: Los Angeles, Ca.
Trending Topics
Senior Member
Joined: Sep 2013
Posts: 126
Likes: 14
From: Chattanooga
Zerex G-05 Seem to be the coolant of choice? Just picked up a '97 XJR just turned 100k and not sure when it was last changed so going to flush and replace. Haven't found clear cut answer reading all the posts I can find as to which is acceptable. Have heard Zerex G-05 and Prestone 5/150 orange so far.

Veteran Member


Joined: Mar 2008
Posts: 25,541
Likes: 11,739
From: Pacific Northwest USA
Zerex G-05 Seem to be the coolant of choice? Just picked up a '97 XJR just turned 100k and not sure when it was last changed so going to flush and replace. Haven't found clear cut answer reading all the posts I can find as to which is acceptable. Have heard Zerex G-05 and Prestone 5/150 orange so far.
FWIW, I bought my XJR/6 at 30k miles and it had old fashioned green coolant, which I've continued using.
Cheers
DD
Veteran Member
Joined: Mar 2008
Posts: 25,541
Likes: 11,739
From: Pacific Northwest USA
Cheers
DD
Good luck. Other than the "bypass hose" it wasn't that bad. Having the hood off helped tremendously with access...but I'm not sure it offset the difficulty in realignment of same ...especially when you take it off wrongly!


Thread
Thread Starter
Forum
Replies
Last Post
Currently Active Users Viewing This Thread: 1 (0 members and 1 guests)