
Timing Cover Seal Renewal


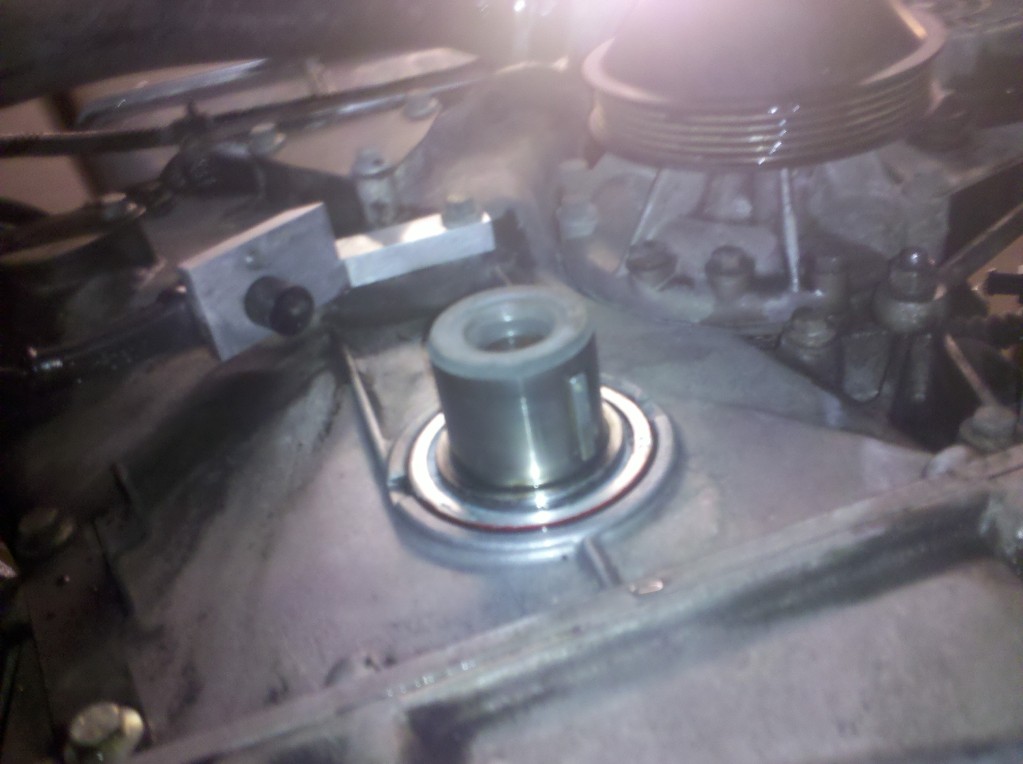
Found this mess behind the harmonic balancer once I (FINALLY!) got it off for shipment to the Damper Doctor for a rebuild:

I couldn’t divine a part number from JEPC, so searched online for a “Crankshaft seal, front” and got a few $60+ hits, some of which included the nomenclature, “rear.” So I called out to Motorcarman for “HELP!” He didn’t see the problem owing to the fact the EAC7954 “Timing Cover Seal” fits all 3.6/4.0L AJ-6/AJ-16 from 1988-1997 and is available all over the worldwideweb on the order of $30. Armed with this knowledge, I chose david@everydayxj.com in North Carolina for $25 +$5 shipping and it arrived via USPS in a couple of days.
With parts and tools in-hand, I naturally chickened-out Monday night - found some more loose edges on my new hoodliner to fiddle with, then decided it is so hot and dry here "I could easily have a dry floor tomorrow night after pressure-washing the timing cover tonight" and set about contracting an acute case of "Pressure-washer-starter's-elbow" and a blister on my bird-flipping finger(tallman) Despite those maladies, the beast finally cackled to life upon application of a bit of percussive maintenance to the carb-bowl. I cleared most of the mess in a few short minutes after having sprayed it multiple times at random over the past several weeks with Simple Green and sometimes brake cleaner, to no avail.
Also, as part of my procrastination in the days leading up to Wednesday night’s renewal, I spent a few evenings after work trying to cut a piece of 2” PVC square on both ends to make an installation tool. I failed on the table saw, and finally moved over to the radial arm saw, where, after some adjustments I had what you might call “near success.” Near enough to square for government work, but I never quite got the length exactly right before reaching my frustration limit and quitting. If TSC has a large enough washer, I’ll just buy one to make up the last mm or so, if not, I’ll cut a longer pipe.
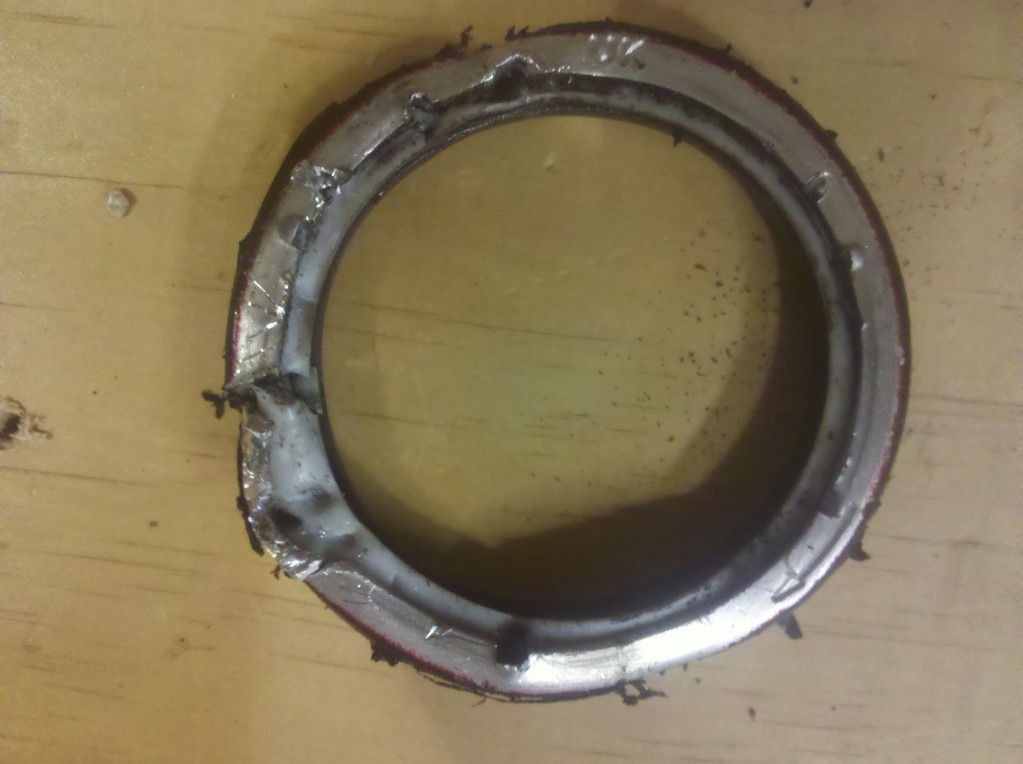
Ok, getting the old one out was something of a (bitter ex-wife) even though I'd purchased a tool specifically for the job:

Probably coulda/shoulda saved my $8 or so - Nothing really wrong with the tool - but in this particular application, not enough space between the crankshaft (spacer, really) and the seal housing to get behind the seal housing and bring it to bear. I could get behind the front lip, but only succeeded in mangling it. In the very end, I used a screwdriver & hammer in the two reliefs in the timing cover to work it out. Hit it once on top where I mangled it with the seal removal tool and dang-near pushed it back into the dark recesses. That's the one that actually broke it loose - but it scared me some! After that, I was able to work it forward. I can say with great confidence this task was facilitated greatly by the absence of the bonnet, which I had removed earlier for installation of a Gonzo-Hoodliner. Working from the top, even with the car elevated on ramps, was far preferable to lying prone underneath and working overhead. Not really sure I’d have the old one removed yet had I not had the hood off! It also made photodocumentation considerably easier. The a/c idler bracket mounting point made the relief shown at about 7-8 o’clock practically useless. You could drive the screwdriver in, but then it was up against the mounting bracket and there was no room to pry.


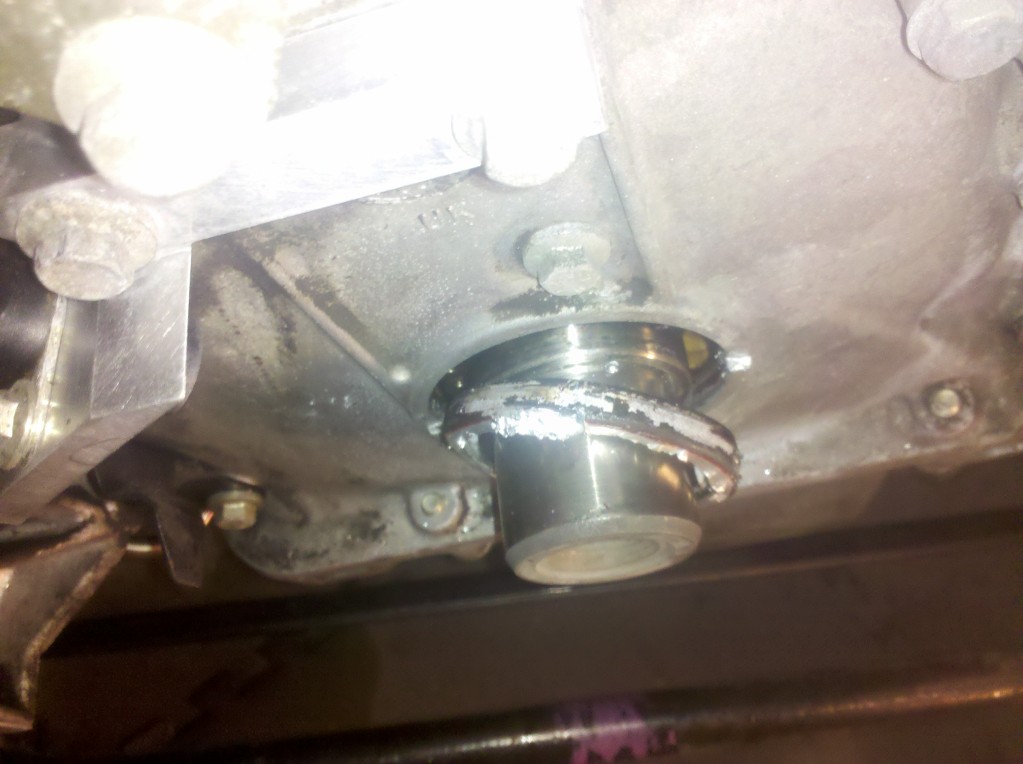


In case you wondered what it is looking like behind the seal:

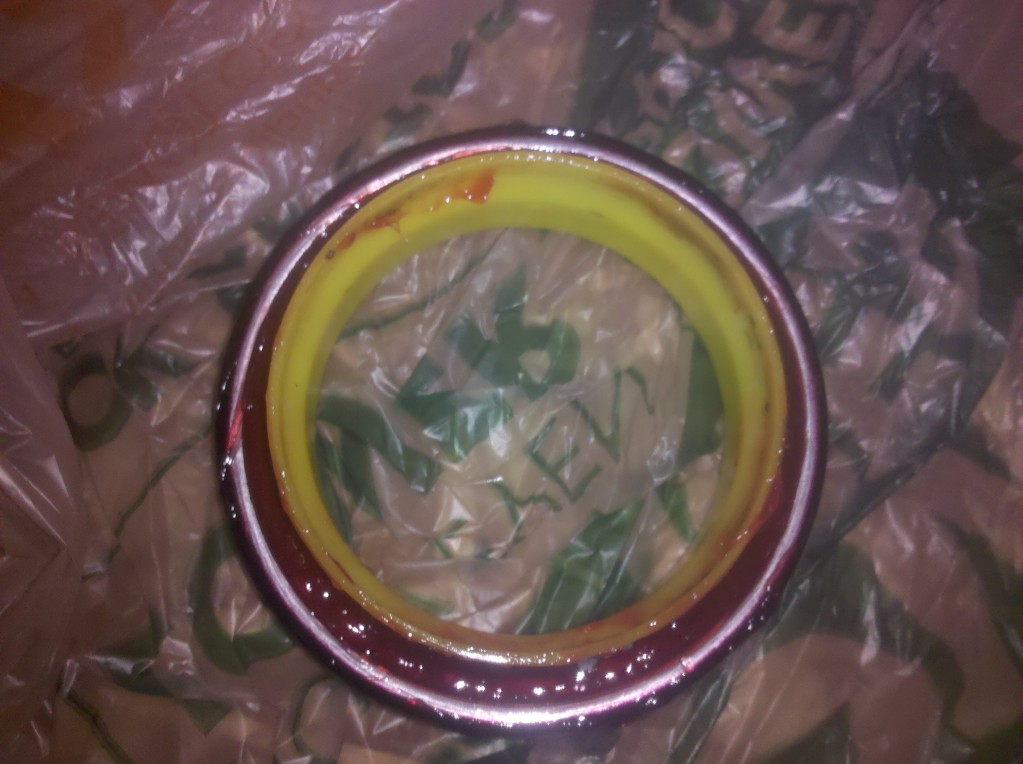
Before removing the shipping ring, I packed the back side of the seal with wheel bearing grease to prevent the little spring from popping out during installation. Then I placed it on the shaft and up to the timing cover by hand:


Installed my freshly-minted installation tool and the original damper-fixing bolt:
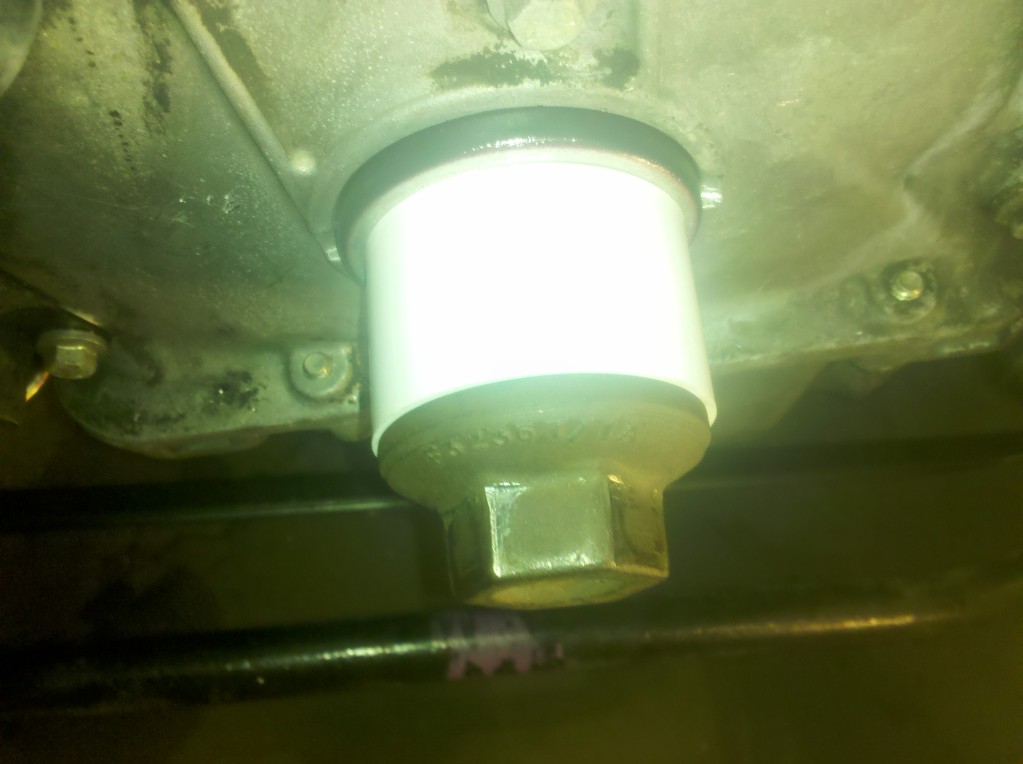

Very slowly and deliberately cinch it up with a ratchet:

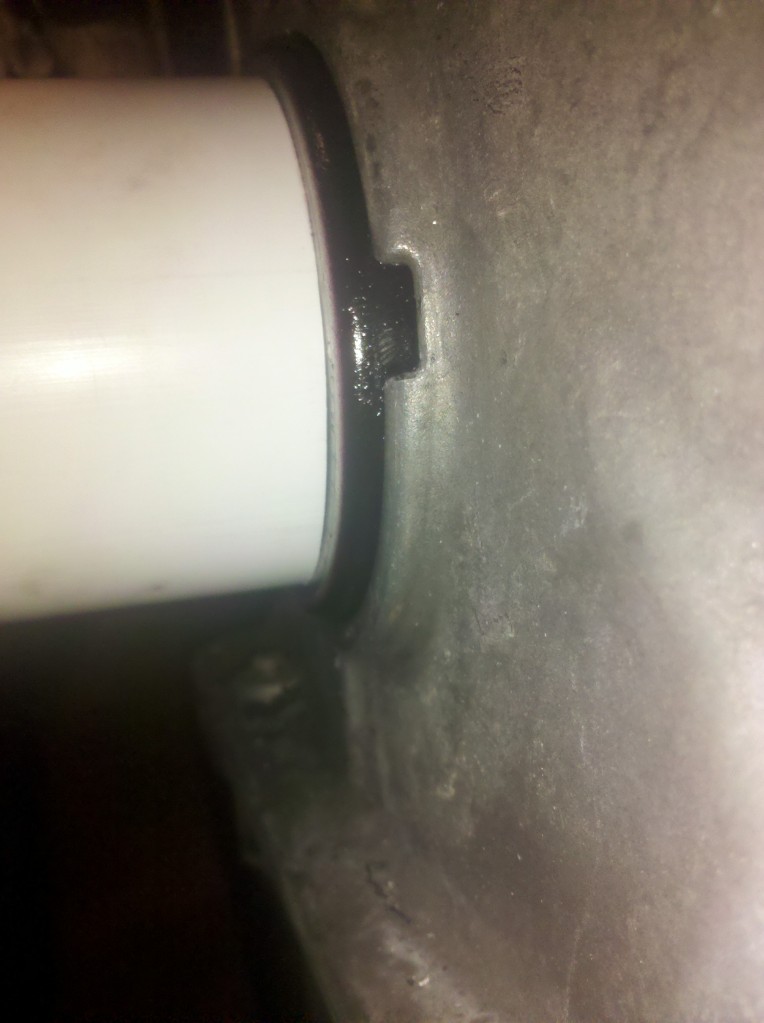

Not in quite far enough:

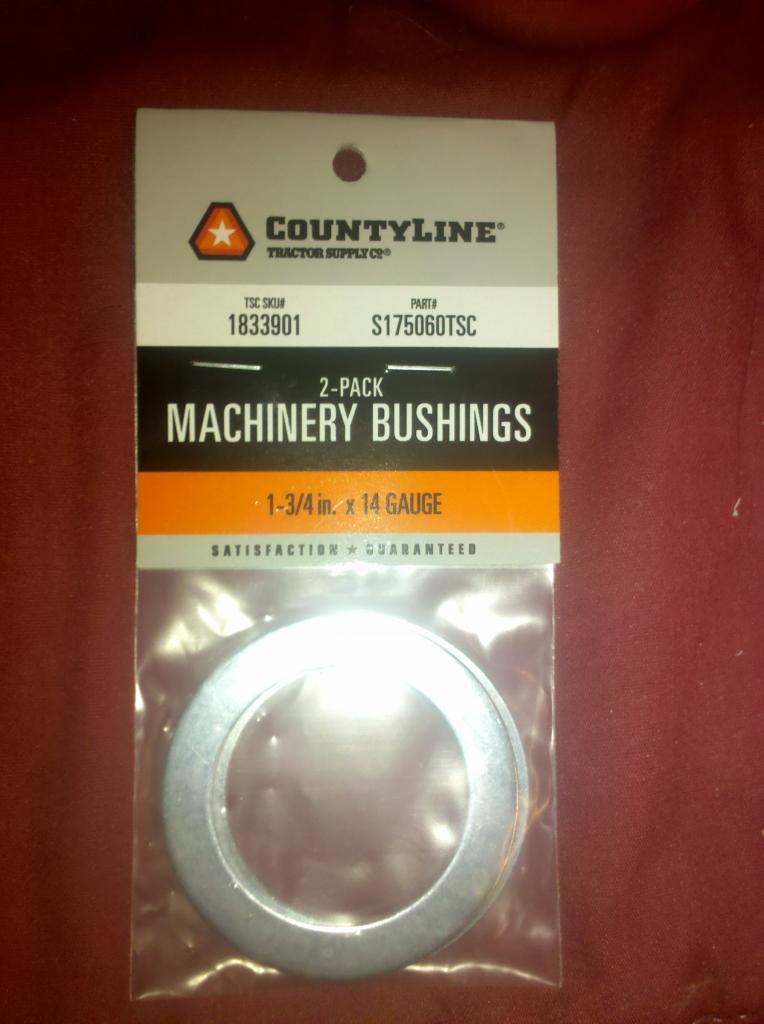
Found just-the-ticket at Tractor Supply this evening as far as spacers go:
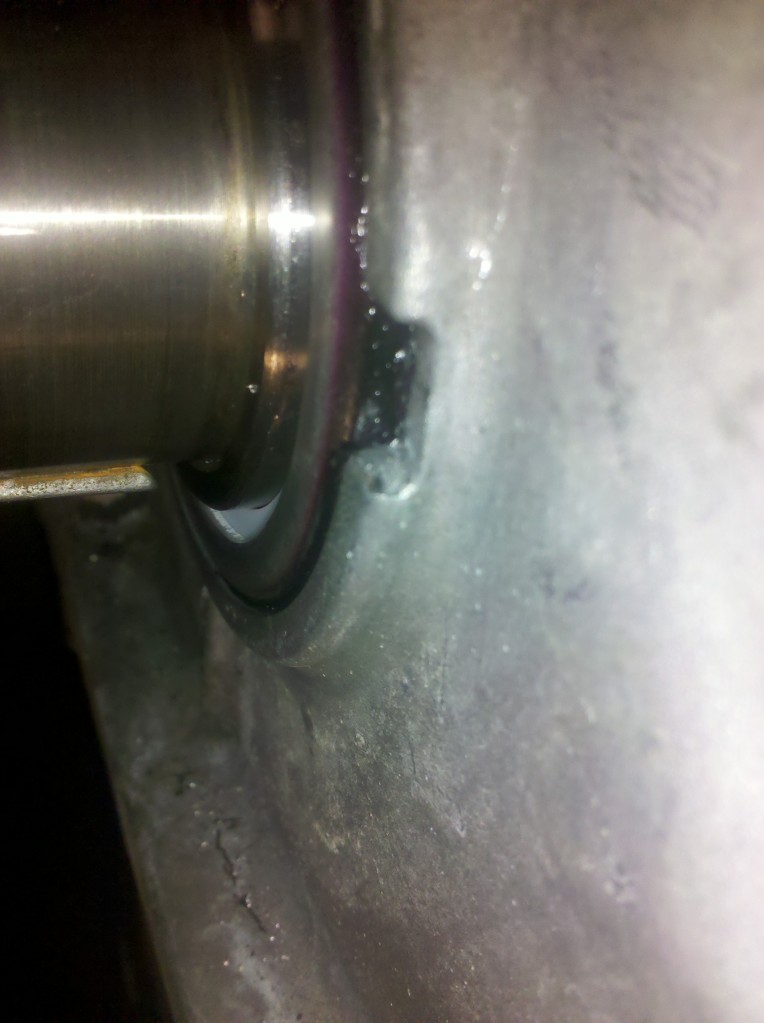
One wasn't quite enough, so i used both and just took care not to press it beyond flush with the front of the cover. I could've used one or both bushings to fail-safe that process as they were a greater diameter than the hole in the timing cover, but it would've required driving the woodruff key out of the crankshaft. It seems determined to stay in place and I'm happy to leave it alone. One less thing to fiddle with when re-installing the damper.


I couldn’t divine a part number from JEPC, so searched online for a “Crankshaft seal, front” and got a few $60+ hits, some of which included the nomenclature, “rear.” So I called out to Motorcarman for “HELP!” He didn’t see the problem owing to the fact the EAC7954 “Timing Cover Seal” fits all 3.6/4.0L AJ-6/AJ-16 from 1988-1997 and is available all over the worldwideweb on the order of $30. Armed with this knowledge, I chose david@everydayxj.com in North Carolina for $25 +$5 shipping and it arrived via USPS in a couple of days.
With parts and tools in-hand, I naturally chickened-out Monday night - found some more loose edges on my new hoodliner to fiddle with, then decided it is so hot and dry here "I could easily have a dry floor tomorrow night after pressure-washing the timing cover tonight" and set about contracting an acute case of "Pressure-washer-starter's-elbow" and a blister on my bird-flipping finger(tallman) Despite those maladies, the beast finally cackled to life upon application of a bit of percussive maintenance to the carb-bowl. I cleared most of the mess in a few short minutes after having sprayed it multiple times at random over the past several weeks with Simple Green and sometimes brake cleaner, to no avail.

Also, as part of my procrastination in the days leading up to Wednesday night’s renewal, I spent a few evenings after work trying to cut a piece of 2” PVC square on both ends to make an installation tool. I failed on the table saw, and finally moved over to the radial arm saw, where, after some adjustments I had what you might call “near success.” Near enough to square for government work, but I never quite got the length exactly right before reaching my frustration limit and quitting. If TSC has a large enough washer, I’ll just buy one to make up the last mm or so, if not, I’ll cut a longer pipe.
Ok, getting the old one out was something of a (bitter ex-wife) even though I'd purchased a tool specifically for the job:

Probably coulda/shoulda saved my $8 or so - Nothing really wrong with the tool - but in this particular application, not enough space between the crankshaft (spacer, really) and the seal housing to get behind the seal housing and bring it to bear. I could get behind the front lip, but only succeeded in mangling it. In the very end, I used a screwdriver & hammer in the two reliefs in the timing cover to work it out. Hit it once on top where I mangled it with the seal removal tool and dang-near pushed it back into the dark recesses. That's the one that actually broke it loose - but it scared me some! After that, I was able to work it forward. I can say with great confidence this task was facilitated greatly by the absence of the bonnet, which I had removed earlier for installation of a Gonzo-Hoodliner. Working from the top, even with the car elevated on ramps, was far preferable to lying prone underneath and working overhead. Not really sure I’d have the old one removed yet had I not had the hood off! It also made photodocumentation considerably easier. The a/c idler bracket mounting point made the relief shown at about 7-8 o’clock practically useless. You could drive the screwdriver in, but then it was up against the mounting bracket and there was no room to pry.


In case you wondered what it is looking like behind the seal:

Before removing the shipping ring, I packed the back side of the seal with wheel bearing grease to prevent the little spring from popping out during installation. Then I placed it on the shaft and up to the timing cover by hand:


Installed my freshly-minted installation tool and the original damper-fixing bolt:


Very slowly and deliberately cinch it up with a ratchet:


Not in quite far enough:

Found just-the-ticket at Tractor Supply this evening as far as spacers go:

One wasn't quite enough, so i used both and just took care not to press it beyond flush with the front of the cover. I could've used one or both bushings to fail-safe that process as they were a greater diameter than the hole in the timing cover, but it would've required driving the woodruff key out of the crankshaft. It seems determined to stay in place and I'm happy to leave it alone. One less thing to fiddle with when re-installing the damper.


Last edited by aholbro1; Oct 21, 2013 at 08:31 AM.

Senior Member
Joined: Feb 2013
Posts: 961
Likes: 353
From: Napier, NZ
aholbro, despite your (possibly) dubious nom-de-plume, to quote the Yardbirds, "Mister, you're a better man than I"
I would have probably bought two seals in case I wrecked one, the levered the old one out, then oiled to shaft and tapped the new one in with a length of wood, going around and around the seal gently.
And I would have probably needed the second seal..
I would have probably bought two seals in case I wrecked one, the levered the old one out, then oiled to shaft and tapped the new one in with a length of wood, going around and around the seal gently.
And I would have probably needed the second seal..

Senior Member


Joined: Oct 2012
Posts: 310
Likes: 45
From: sydney
Excellent work
Whats the best advice you have wrt to how far the new seal should be seated in the timing cover wall? Is it just placing the seal " centrally" on the timing case cover thickness or are you using those indents as guides?
excellent work again
best regards
Peter
Whats the best advice you have wrt to how far the new seal should be seated in the timing cover wall? Is it just placing the seal " centrally" on the timing case cover thickness or are you using those indents as guides?
excellent work again
best regards
Peter
Peter, I was just going for "about flush with the front of the case" like the old one was. I don't think it is all that critical as long as you get the back of the seal housing sufficiently past the indents, so you don't leave that open...but if you get too far in....one slight twist of the bolt or one more hit if you are driving it in..and "plink" it pops out the back and then you are screwed.....
And possibly a third...if you didn't pack it with grease! Motorcarman related the story of a chap at their dealership who went through three or four in rapid succession during an install...til Bob implored him to pack a bit o' wheel bearing grease in the back...so that's why I included that step...even though I wasn't tapping...I didn't want to risk it.
Thanks for the kind words; "handle" was acquired by convention at one of my workplaces, the trons had chosen first letter of first name and first 6 letters of last name as the network id for everyone...and when I saw mine...I knew it had possibilities....
Thanks for the kind words; "handle" was acquired by convention at one of my workplaces, the trons had chosen first letter of first name and first 6 letters of last name as the network id for everyone...and when I saw mine...I knew it had possibilities....

Thread
Thread Starter
Forum
Replies
Last Post
KarimPA
New Member Area - Intro a MUST
8
Sep 3, 2015 07:32 PM
Currently Active Users Viewing This Thread: 1 (0 members and 1 guests)