
2003 XJ8 Sport LS2 Swap


If you don't mind, once you figure out all the components and work required to fit the 13" rotors and XK8 to an X300, please consider cross posting that to the X300 forum.
If you are already going to figure it out for the your X300 XJR, the X300 community would really appreciate a clear "how to" with part numbers and instructions. It will also be good know if the solution does indeed clear the OEM X300 XJR wheels.
Good luck and thanks in advance! Very interesting and entertaining thread!
I already tried a spare X300 XJR 17" on the XJ8 with XK8 brakes - plenty of room. I have a set of 16" kiwis that I will test fit this weekend as well.

Not the greatest pic, hopefully you can see there is plenty of room in there:

Veteran Member
Joined: Mar 2014
Posts: 3,750
Likes: 688
From: Sanford, NC

I've started a thread in the X300 forum so that we can track your progress, specifically as it relates to the brake upgrade for the X300.
https://www.jaguarforums.com/forum/x...2/#post1579566
.
Thanks guys, I really wish I had more to report to keep the a pulse in the thread but haven't touched the car in months it seems. That's life...

Not at this time, here's the latest non-technical "who cares" life update on all things automotive and why nothing is getting done on the XJ8.
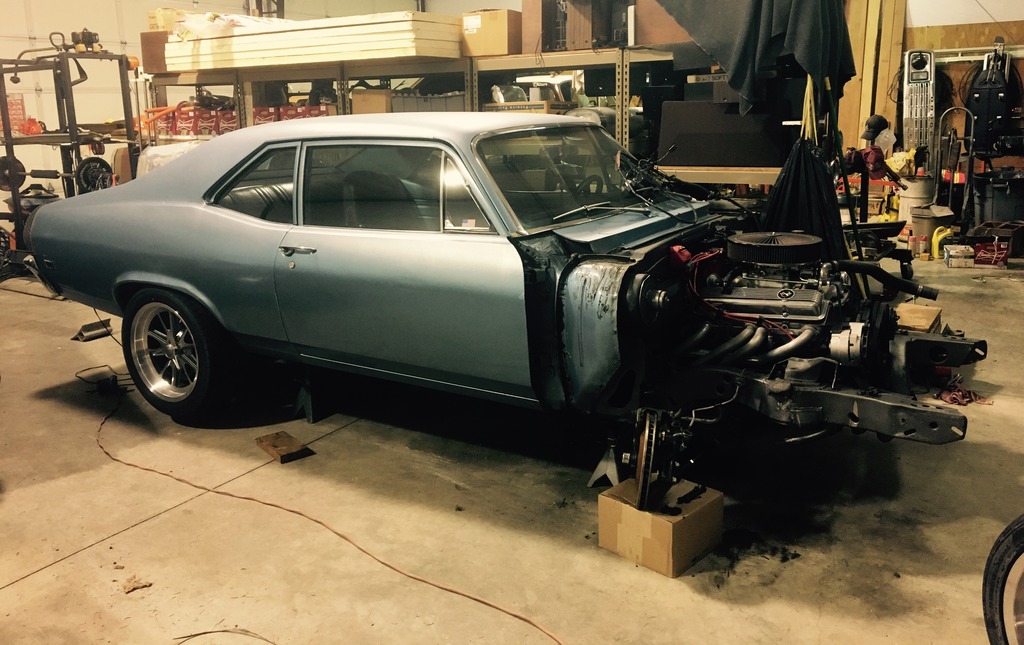
The primary culprit it the Nova; torn down for body repair and a "little" suspension upgrade while it's apart;
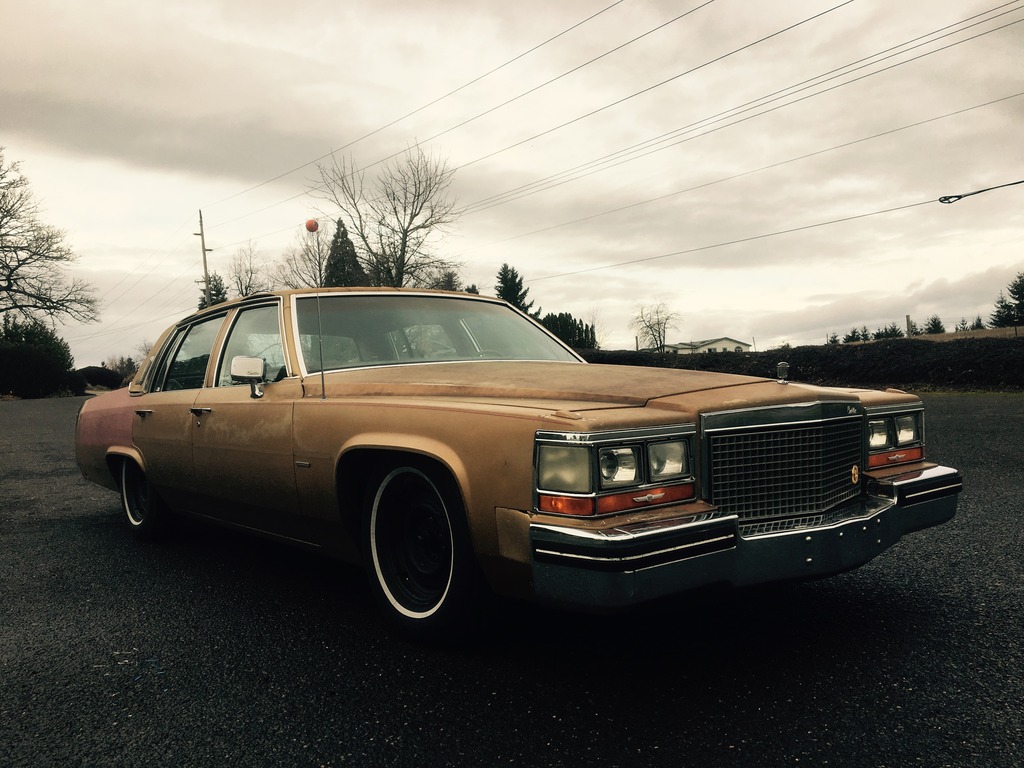
The anomaly that is the diesel Cadillac slowrider lives again, turns out the flexplate bolts all backed out causing all the grief, no mechanical damage whatsoever;
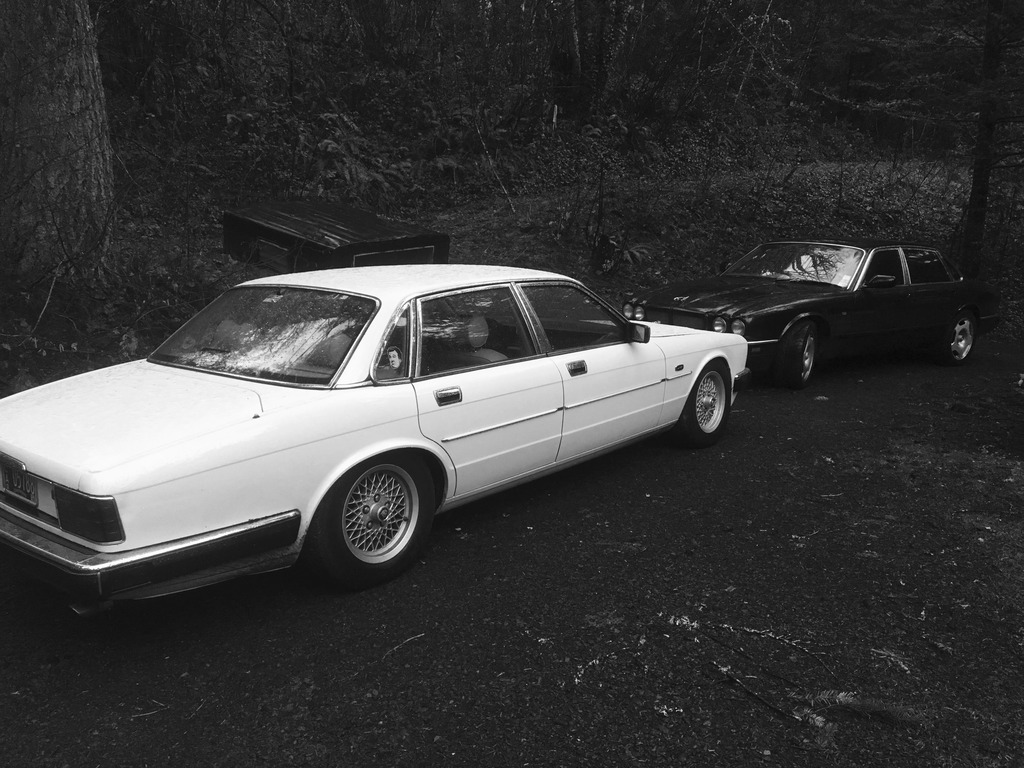
Still driving the XJR daily, and still undecided what to do with the beloved XJ6;
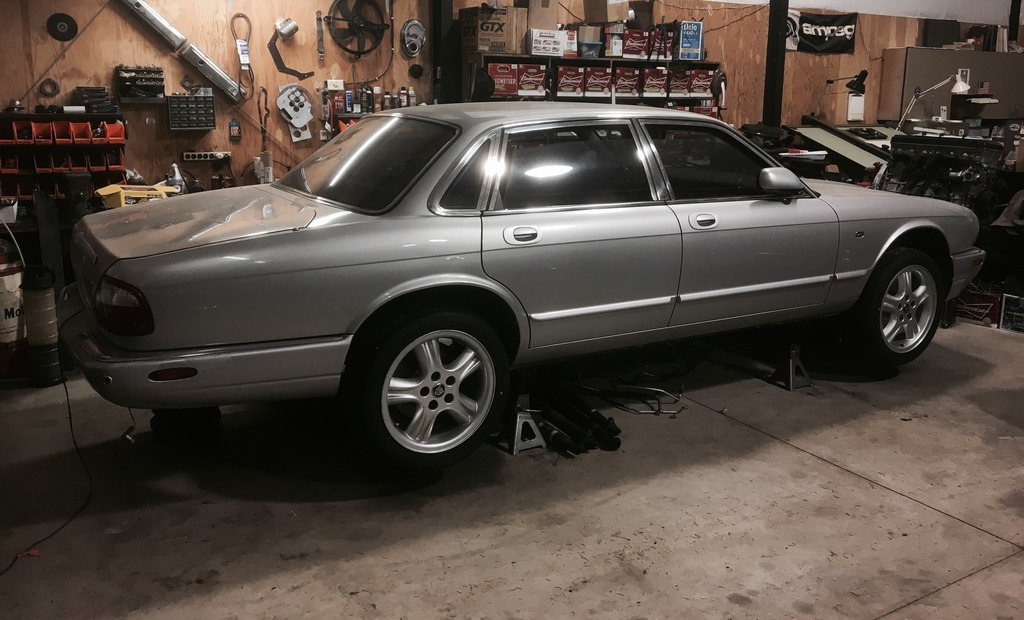
And finally, the XJ8 sitting as-is, with a huge to-do list;
There's hope though, it will happen. For those who read this far some very cool news is I quit my job at Cadillac and got hired on with Jaguar Land Rover!
The primary culprit it the Nova; torn down for body repair and a "little" suspension upgrade while it's apart;

The anomaly that is the diesel Cadillac slowrider lives again, turns out the flexplate bolts all backed out causing all the grief, no mechanical damage whatsoever;

Still driving the XJR daily, and still undecided what to do with the beloved XJ6;

And finally, the XJ8 sitting as-is, with a huge to-do list;

There's hope though, it will happen. For those who read this far some very cool news is I quit my job at Cadillac and got hired on with Jaguar Land Rover!


Former Sponsor
Joined: Jan 2012
Posts: 308
Likes: 364
From: California
Yes indeed, the earlier (XJ40 or X300) diffs can be swapped into an X308 subframe/suspension, but don't forget the XJ40 diff has the pinion flange offset to the right, not centralized like the X308 unit. And remember that the driveshaft coupling for these units is the rubber Jurid unit which is designed to work only when the driveshaft coming to the diff is perfectly in line with the pinion flange, not angled at all. The point is that while the early diff may fit into an X308 rear suspension assembly, the X308 driveline would not be compatible with it, at least not without major rework. When we do the LS conversions into these cars, the way the driveline is handled allows for this offset to be accommodated, and as a result, we can use the early diffs (with their more aggressive ratios, and limited slip in some cases) without any problem.
You can see the differences between the XJ40 and X308 diffs as installed in an X308 subframe on our website-the diff pics and commentary are at the bottom of the page:
www.jaguarspecialties.com/99-VDP-Conversion.asp
I hope that's helpful
Andrew
Jaguar Specialties
You can see the differences between the XJ40 and X308 diffs as installed in an X308 subframe on our website-the diff pics and commentary are at the bottom of the page:
www.jaguarspecialties.com/99-VDP-Conversion.asp
I hope that's helpful
Andrew
Jaguar Specialties
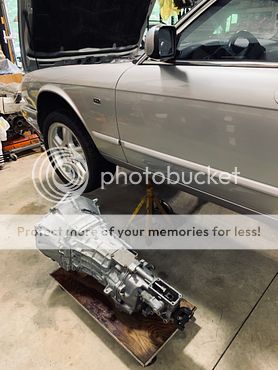
My fellow Jaguar masochists, welcome back. Let's blow the magnificent dust cloud off this thing and get back to business. Clearly there�s a gap in this project�s timeline, just a classic case of a busy guy, busy for extraordinary reasons. One lesson learned is to buy the engine and transmission together; it will likely be less expensive, save time, and give you a much better chance of making sure you have everything you need. At the time I didn�t know if I was going AT or MT, I just knew the ideal (suggested) engine for the swap and went for it to get going.
So here we are, getting back into the groove; I found the perfect T56 from a very low mile GTO that fell off a car hauler and got parted out (so the story goes). A couple reasons for this specific trans; it�s what the donor engine was paired to anyway, wide ratio gear set, triple synchros, and ideal shifter location. Anyway, got the trans, checked it out, cleaned it up, and got it in the car in very little time.

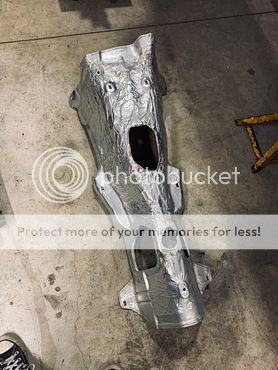
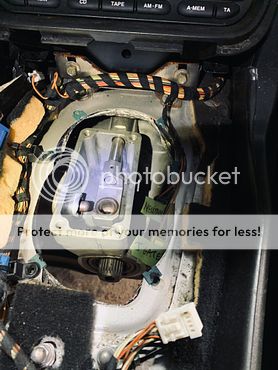
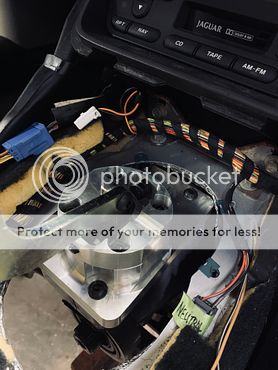
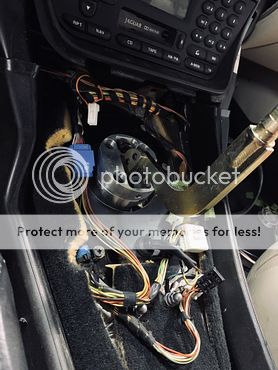
First step was to take a couple measurements to get an idea of where the shifter would land, the GTO shifter location appeared to be right on the money. I altered the heat shield to simply match the perimeter of the hole in the floor pan with the big hole cover removed,

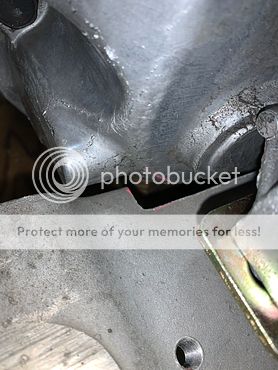
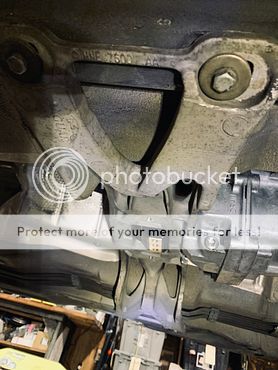
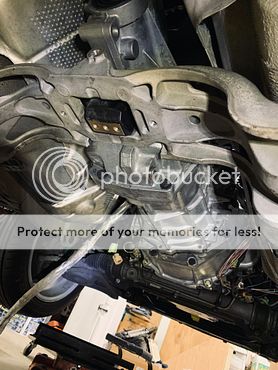
The stock crossmember worked out excellently with a little modification. The T56 needs to sit low to accommodate the shifter assembly, by notching the crossmember the mount was able to drop down though the crossmember rather than sit atop it. With it dropped down a plate across the bottom did the trick (just cut the AT plate in half from the kit). Clearance is pretty ample, only tight around the RLOS but it was just the heatshield which is very malleable.

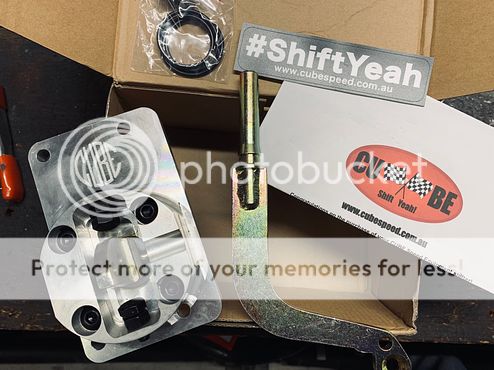
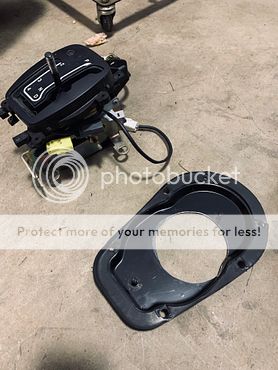
Shifter placement was right on the money. This can be achieved with the F-Body T56 also using GTO shifter cup and shift assembly. With the trans in I felt more comfortable making a shifter selection, didn�t go crazy high dollar nor did I go with a Chinese special off of eBay. I chose a Holden shifter from CUBE Speed in Australia, might need to beef up the centering springs but the action is pretty good and has a pretty robust mechanical feel.
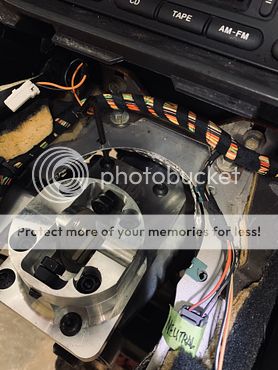

Console fitment is good, the armrest is natural and it doesn�t feel like you�re about to put your fist through the radio. The stick is set up for a stock press on shift knob, it will be trimmed down a bit and threaded for a good old fashioned ball. If this picture shows up huge I don't know why, the code is the same as the rest.

No modifications to the floor pan needed, though to install the shifter the crossmember needed to be lowered. This isn�t a big deal as it�s entirely serviceable from the top. Next to cover the hole, as luck would have it the original cover is symmetrical. The cover was originally recessed to mount the AT shifter low, so I just flipped it around to the �domed� position. Measured it, cut a hole, and transferred the gasket from one side to the other, it fit perfectly.
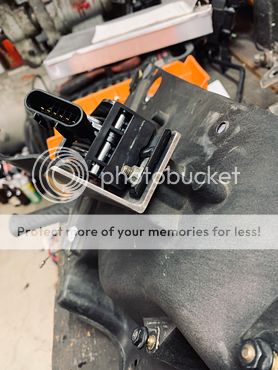
Tidied up the wiring, put a grommet in to pass through wiring to the reverse lockout solenoid (energized by Jag ignition, inhibit function controlled by GM PCM ground signal), and back up lamps (ground signal to JS module to enable back up lamps and module over CAN).
GM PCM wired to OBD port, Jag CAN leads wired to RS232 breakout (much more on that later).

Teaser:

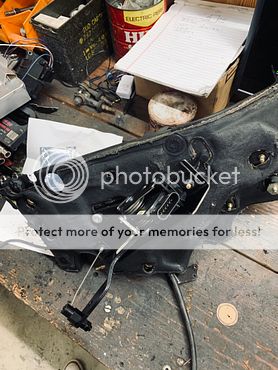
Between being dissatisfied with the GTO accelerator pedal setup I came up with and unintentionally damaging it up when it was disassembled, I decided to go with a C6 unit instead. Admittedly, I stopped by the JS page not long ago out of curiosity, and couldn�t help but notice the approach taken for their DBW conversion, albeit a derivative of Jag�s approach, it struck me as a better solution. Got a C6 pedal, measured total cable pull from the housing (1.5� inches), applied some geometry based on the degrees of the APP�s travel idle to WOT, and set off making an adjustable bracket.
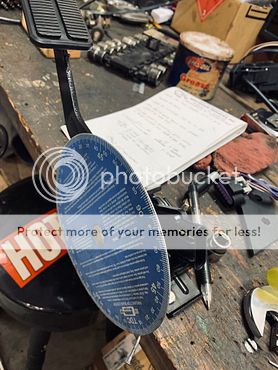
Running out of room, found a robust enough spot within the limits of the pedal housing (acc cable length).
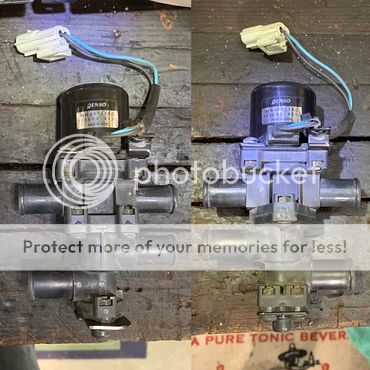
Relocating the heater valve made room for the APP, and actually cleaned up the heater hoses. Neat trick with the valve; since the solenoid/valve inside is a cylinder, the housing can be rotated 180 degrees to route the heater lines nicely without mounting the valve backwards, the factory wiring reaches it in this new location as well.
_600E8D67_3F3A_4753_A964_530FA484E94A_FullSizeRender.jpg?width=590&height=370&fit=bounds)
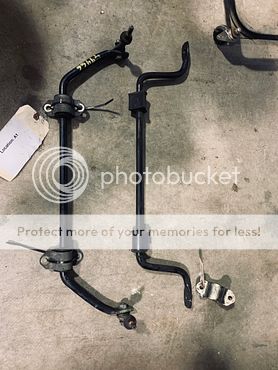
Another cheap XK based upgrade; rear sway bar upgrade from 15mm to 17mm using an XK bar, did this on my old XJR, probably does nothing you would notice but not a bad bolt on for $25-30 from eBay.
Old-ish engine pic, just realized I haven't taken one terribly up to date.

So here we are; need to load the suspension to get final dimensions for the driveshaft modifications, exhaust at some point of course, but more immediately I need to reschedule my tuner. We were set for a couple weeks ago but had family come in for a surprise visit and I haven�t rescheduled yet. Good news is the GM PCM is alive, reports sensor data, DBW works beautifully, everything's plumbed and filled, we�re finally seeing the light at the end of the tunnel. I really wanted to wait until the rubber was on the road as they say but have been too anxious. Considering this went from hibernation to nearing completion in just the last couple months makes me very happy. If you made it this far... thanks!

So here we are, getting back into the groove; I found the perfect T56 from a very low mile GTO that fell off a car hauler and got parted out (so the story goes). A couple reasons for this specific trans; it�s what the donor engine was paired to anyway, wide ratio gear set, triple synchros, and ideal shifter location. Anyway, got the trans, checked it out, cleaned it up, and got it in the car in very little time.
First step was to take a couple measurements to get an idea of where the shifter would land, the GTO shifter location appeared to be right on the money. I altered the heat shield to simply match the perimeter of the hole in the floor pan with the big hole cover removed,
The stock crossmember worked out excellently with a little modification. The T56 needs to sit low to accommodate the shifter assembly, by notching the crossmember the mount was able to drop down though the crossmember rather than sit atop it. With it dropped down a plate across the bottom did the trick (just cut the AT plate in half from the kit). Clearance is pretty ample, only tight around the RLOS but it was just the heatshield which is very malleable.
Shifter placement was right on the money. This can be achieved with the F-Body T56 also using GTO shifter cup and shift assembly. With the trans in I felt more comfortable making a shifter selection, didn�t go crazy high dollar nor did I go with a Chinese special off of eBay. I chose a Holden shifter from CUBE Speed in Australia, might need to beef up the centering springs but the action is pretty good and has a pretty robust mechanical feel.
Console fitment is good, the armrest is natural and it doesn�t feel like you�re about to put your fist through the radio. The stick is set up for a stock press on shift knob, it will be trimmed down a bit and threaded for a good old fashioned ball. If this picture shows up huge I don't know why, the code is the same as the rest.
No modifications to the floor pan needed, though to install the shifter the crossmember needed to be lowered. This isn�t a big deal as it�s entirely serviceable from the top. Next to cover the hole, as luck would have it the original cover is symmetrical. The cover was originally recessed to mount the AT shifter low, so I just flipped it around to the �domed� position. Measured it, cut a hole, and transferred the gasket from one side to the other, it fit perfectly.
Tidied up the wiring, put a grommet in to pass through wiring to the reverse lockout solenoid (energized by Jag ignition, inhibit function controlled by GM PCM ground signal), and back up lamps (ground signal to JS module to enable back up lamps and module over CAN).
GM PCM wired to OBD port, Jag CAN leads wired to RS232 breakout (much more on that later).
Teaser:
Between being dissatisfied with the GTO accelerator pedal setup I came up with and unintentionally damaging it up when it was disassembled, I decided to go with a C6 unit instead. Admittedly, I stopped by the JS page not long ago out of curiosity, and couldn�t help but notice the approach taken for their DBW conversion, albeit a derivative of Jag�s approach, it struck me as a better solution. Got a C6 pedal, measured total cable pull from the housing (1.5� inches), applied some geometry based on the degrees of the APP�s travel idle to WOT, and set off making an adjustable bracket.
Running out of room, found a robust enough spot within the limits of the pedal housing (acc cable length).
Relocating the heater valve made room for the APP, and actually cleaned up the heater hoses. Neat trick with the valve; since the solenoid/valve inside is a cylinder, the housing can be rotated 180 degrees to route the heater lines nicely without mounting the valve backwards, the factory wiring reaches it in this new location as well.
Another cheap XK based upgrade; rear sway bar upgrade from 15mm to 17mm using an XK bar, did this on my old XJR, probably does nothing you would notice but not a bad bolt on for $25-30 from eBay.
Old-ish engine pic, just realized I haven't taken one terribly up to date.
So here we are; need to load the suspension to get final dimensions for the driveshaft modifications, exhaust at some point of course, but more immediately I need to reschedule my tuner. We were set for a couple weeks ago but had family come in for a surprise visit and I haven�t rescheduled yet. Good news is the GM PCM is alive, reports sensor data, DBW works beautifully, everything's plumbed and filled, we�re finally seeing the light at the end of the tunnel. I really wanted to wait until the rubber was on the road as they say but have been too anxious. Considering this went from hibernation to nearing completion in just the last couple months makes me very happy. If you made it this far... thanks!
Senior Member
Joined: Jul 2015
Posts: 101
Likes: 27
From: Delaware, OH
Come on slacker, get that thing finished!  Seriously, I'm glad you're working on it again. Looking forward to more progress.
I started watching this thread before I started my XK8 LS1/4L60E swap, but mine is finished now. Looking forward to the T56 portion for sure.....
Seriously, I'm glad you're working on it again. Looking forward to more progress.I started watching this thread before I started my XK8 LS1/4L60E swap, but mine is finished now.


Thread
Thread Starter
Forum
Replies
Last Post
PinnacleWax
Detailing / Car care
0
Oct 24, 2014 05:10 PM
B.I.P.
S-Type / S type R Supercharged V8 ( X200 )
4
Sep 18, 2012 08:36 PM
Innovative Detailing
Detailing / Car care
14
Jan 24, 2012 12:13 AM
Currently Active Users Viewing This Thread: 1 (0 members and 1 guests)