Help bring my XJR R1 back to life? Pics
#21
Simply solder an extension of the same colour and shrink sleeve it. In some cases like the MAF it could do with a couple more inches from the loom anyway. The picture looks like the MAP sensor and they differed in the last year I think. Does it have the exact same connector?
You got a total bargain, a set of cam cover gaskets and a couple of hours with the soldering iron, and maybe an oil change should see this good. Your other car will be sold, once you've experienced living with an R!

The following users liked this post:
Z07Brandon (12-22-2018)
#22
#23
My dad and I got the car to stay running. Doesn't sound nice. I know 03s came with the updated chain and tensioners from the factory. I was under the impression metal tensioners don't go bad? That is of course, if that is what is causing that engine noise. Car 170k miles. Tomorrow, I'll remove both cam covers and have a look.
#24
Join Date: Jan 2012
Location: Newport Beach, California
Posts: 5,574
Received 2,579 Likes
on
1,784 Posts
#25
#26
#27

#28
#29
#30
#31
#32
https://youtu.be/NlnaSPAKxok
The plastic part of the tensioner, I can wiggle it with my finger. Is that bad? .
The plastic part of the tensioner, I can wiggle it with my finger. Is that bad? .
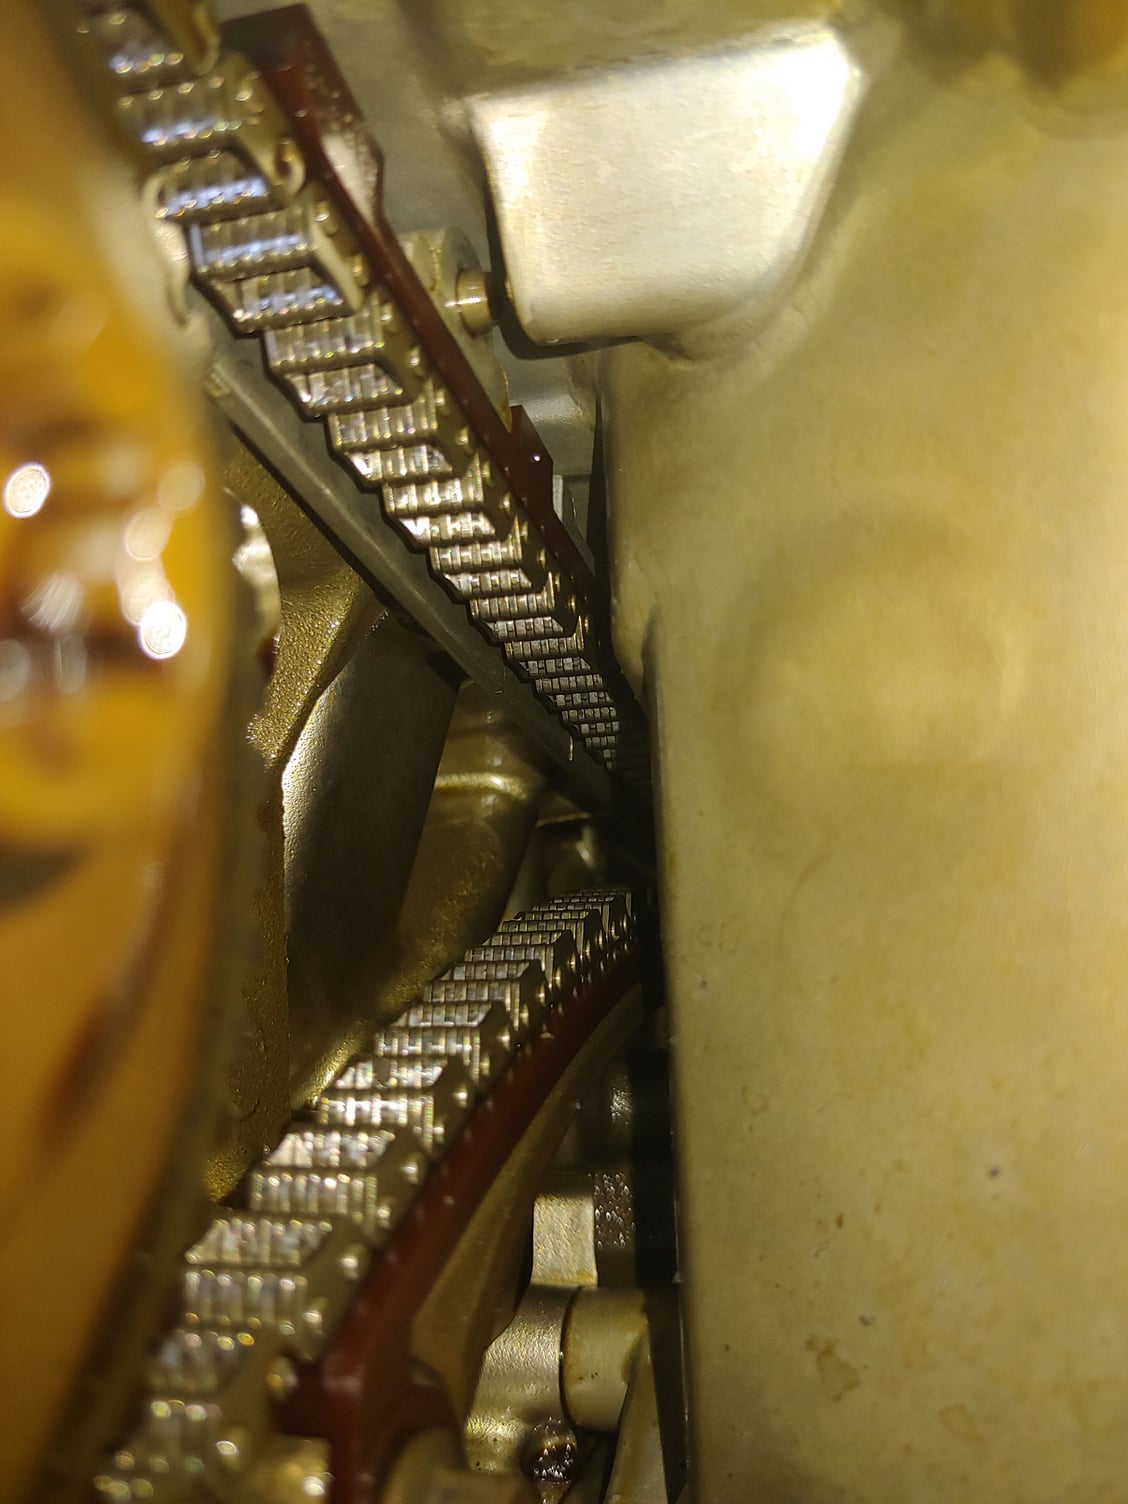
The chain tension on both primary and secondary tensioners is fine.
Great that you have the later design tensioners and Morse chain.
The cam lobes are "shiny" because that is the part of the cam that is in contact with the valves during opening/closing, the "dull" side is when the valves are closed and there is no contact. Perfectly normal.
.
The following users liked this post:
Z07Brandon (12-23-2018)
#33
Awesome, I learned something new today about the shiny vs non shiny cam lobes. Thank you sir. So, I assume the next step is to do a compression test? Since the timing parts are fine, it's safe to do the compression test?
If so, I have some questions about doing the compression test. How many cranks per cylinder? Will this not kill the battery? It is new, but I wonder about it draining it. Is there any fuses I need to disconnect before doing the compression test?
If so, I have some questions about doing the compression test. How many cranks per cylinder? Will this not kill the battery? It is new, but I wonder about it draining it. Is there any fuses I need to disconnect before doing the compression test?
#34
To do a compression test completely assemble the engine, (you do not want oil from the valve gear flying everywhere), and just remove the top inspection covers to remove all of the spark plugs, this will make turning the motor over extremely easy for the starter motor/battery as the only resistance will be the one cylinder you have the compression plug in.
Insert the compression rod with rubber plug on the end into the spark plug hole, and hold there firmly. Have someone sit in the car and turn the starter motor for about 5 or 6 seconds, this should give you an accurate, steady reading. They always say that consistency is the most important thing, that all cylinders return a similar pressure reading, but you should get readings of around 150psi on each cylinder.
.
#35
Join Date: Jan 2012
Location: Newport Beach, California
Posts: 5,574
Received 2,579 Likes
on
1,784 Posts
Did you not already attempt to start the engine? If the valves were going to hit the pistons, they would have already.
#36
Join Date: Jan 2012
Location: Newport Beach, California
Posts: 5,574
Received 2,579 Likes
on
1,784 Posts
Prior to attempting to test the compression, remove the fuel pump relay so fuel isn't being injected into each cylinder. Use a threaded compression tester and place shop rags or a towel over the spark plug holes if the spark plugs have been removed.
Connect a charger to the battery and spin the engine for three seconds for each cylinder.
Connect a charger to the battery and spin the engine for three seconds for each cylinder.
#37
Join Date: Jan 2012
Location: Newport Beach, California
Posts: 5,574
Received 2,579 Likes
on
1,784 Posts
It's difficult to tell from the photos, but it appears the cam timing is off on Bank 2.
If the spark plugs are removed, use a 24mm socket on the crankshaft pulley bolt to rotate the crankshaft manually in a clock direction when viewed from the front of the engine. Do not rotate the engine in an anti-clock direction or damage to the main and rod bearings is the result.
Rotate the engine until the flat areas near the front of both cams on each head are facing up. If they are not both facing up together, the exhaust cam is incorrectly timed.
The following users liked this post:
motorcarman (12-23-2018)
#38
#39
Join Date: Jan 2012
Location: Newport Beach, California
Posts: 5,574
Received 2,579 Likes
on
1,784 Posts
#40


