When you click on links to various merchants on this site and make a purchase, this can result in this site earning a commission. Affiliate programs and affiliations include, but are not limited to, the eBay Partner Network.
p.s. I did this on a 97 XK8 (X100) and posted to this forum by accident. Unless someone thinks I should delete it though, I think I may just leave the post up since I think the J Gates were pretty much lit the same�
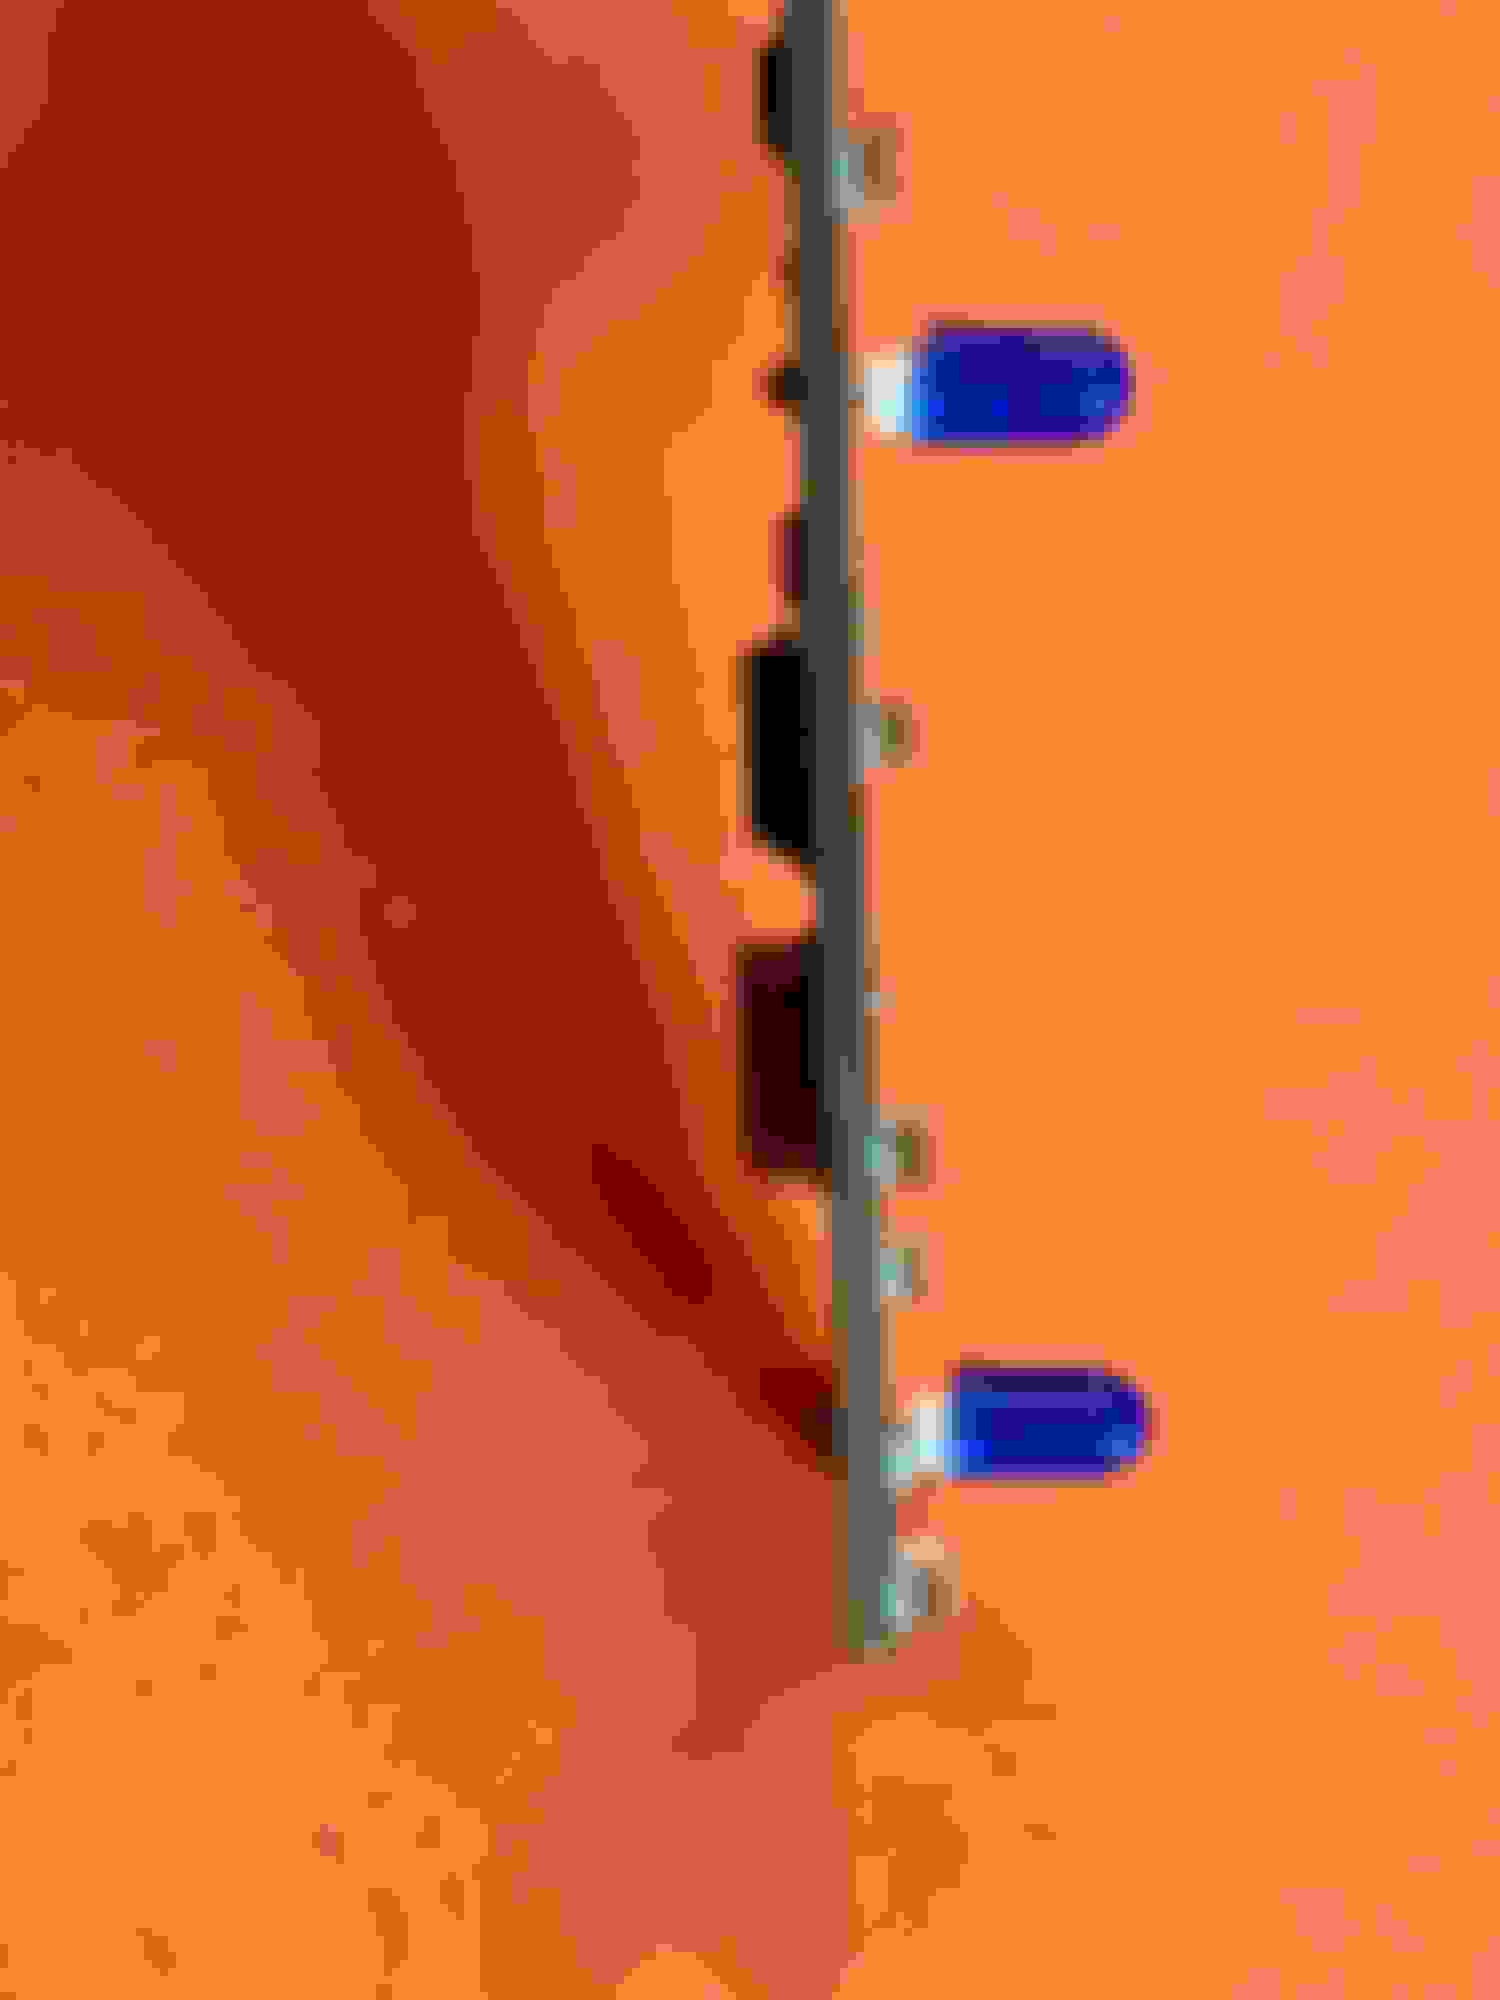
Not a perfect fit but they worked. They are thinner and slightly longer than the originals with the wire leads about 1 mm closer together than ideal. I had to carefully bend outward the wire leads and they could not sit flush on the wafer board. I also had to glue the blue bulb condoms on since the bulbs are thinner. Lights up good on the bench and looks nice. Here�s pics with more detail including dimensions of both the bulbs I used and the radio shack ones I could not locate.
This shows the dimensions of the often-suggested Radio Shack Bulb that I could not find.
Very good original write-up by Ian and subsequent follow-ups by others who have followed. May I suggest some very important revisions should be included in the FAQ . . .
.
Before disconnecting battery, drive both front seats fully to rear. If you come to remove the long entire centre console, as suggested in manual, you may damage either it or other interior trim trying to get it out . . . and reconnecting battery to do so when part way through the disassembly is rightly discouraged;
Under no circumstances would I do this work with the J-Gate selector in car, nor disassemble the illumination module other than on the workbench. Nor is it necessary to remove IC components if you remove the centre console first, as above. There are 2 vital steps to doing this and not revealed to date . . . (1) the two front, more difficult fixings of J-Gate to floor, fit into open slotted holes so, after removing 2 RHS plugs, gear selector cable (loosen one nut only!) and 2 rear fixings, just loosen front 2 floor fixings (do not remove) and slide back the entire J-Gate, then (2) the 3 electrical connectors on LHS and another on nose of solenoid can be undone. I find it far easier to slide the connected plug/socket either fwd or back off its mounting before unlatching . . . yes, I have big awkward fingers.
Ditto, ditto, ditto to the most critical of Ian's original warnings . . . DO NOT slide the engaged selector lever down P > R > N > D side of gate with illumination module removed! You WILL damage the little (and essential) wiper blade off the front of the N micro-switch!
Will be tackling this job soon. Be white stripe on the J-Gate is not illuminated and neither is my "S" on the Sport mode button.
Could one take the circuit board from another J-Gate, with two working bulbs, and just plug it into the existing J-Gate, or is the chip exclusive to the specific vehicle and will mess it up if a different chip is used?
Regarding the correct bulbs for the J-gate circuit board. Is 50mA a must or are 60mA safely to be used as well?
I did not give it much thought beforehand but the illuminated assembly gets extremely hot after some time. I did use the 60mA (after I installed LEDs two years ago which started flickering) and all looks fine but once you touch the assembly you can tell the quite extreme heat situation on the black plastic trim. I am somewhat concerned about this.
I used 60�s and that plastic gets hotter than I like. I haven�t had a problem yet but tearing it apart again to either rig up sort of heat shield or swap in shorter 50 bulbs is somewhere on my low priority to do list�